


Appleseed or Rimfire
Are you still pondering whether to get a 10/22? Or, have you already added a stainless Takedown to your gun safe and made several trips to the range? If you have also taken a class or done some serious practice, your round count is likely to be 300 to 500 rounds or more. You will have built some confidence in your rifle and yourself.
The next step is really a personal choice. Either of the two recommended options, Appleseed or Rimfire Challenge, will result in a major improvement in your skills and put you on the path to becoming a very good shooter or what we call a “capable defender”. (Capes are optional.)
Our advice: Go with your gut after reading the pros and cons of each. Whichever option you select to upgrade your skills, make a genuine commitment to one or the other. Stick with it.
Which one? Appleseed or Rimfire?
Let’s assume you are not an experienced rifle or pistol competitor and have had little or no formal instruction in four-position shooting (standing, kneeling, sitting, prone) and don’t have years of experience shooting varmints and pests. Which one should you pick?
Appleseed
Appleseed has several distinct pluses:
1. You can in theory earn the highly valued “Rifleman“ patch in a single weekend with an out of the box 10/22. (Spend some time on the Appleseed site to understand what they mean by a Rifleman patch and what it takes to earn one.)
2. There will be lots of other novice shooters on the firing line. Regardless of your skills, you will not be in the wrong session.
3. The instructors are well trained and thoroughly understand working with different ages, backgrounds, and physical challenges, like aging eyesight and bad knees.
4. You can bring a properly tricked out “Liberty Training Rifle” (basically a 10/22 with two modest upgrades) or a lever action with a tubular magazine or any rifle anywhere in between including an AR-15 or AK-47. The instructors will work patiently with you, regardless the type of rifle you bring.
(Special note: Depending on age or eyesight, you may be an immediate candidate for a variable power scope for Appleseed or a reflex sight for Rimfire. There is more on this later.)
On the other hand, Rimfire Challenge also has some advantages:
1. From its very inception, these “matches” were designed to be family friendly events to teach new shooters how to get started in competitive shooting. New shooters are the focus at our local club and are warmly welcomed. This has been the case at all the Rimfire matches I have attended.
2. The Match Director and any Range Officers will patiently and cheerfully walk you through coming to the firing line, direct you how to “Make Ready”, advise you on safety protocols, and help clear any malfunctions with your rifle. It is not called personal instruction, but for all practical purposes it works that way.
3. Counting from checking in, signing a waiver, attending a new shooters’ briefing, getting assigned to a relay, meeting some of the other shooters, to firing each Course of Fire, and then wrapping up, your total time commitment will be three to four hours for a Saturday morning match.
4. Everyone will be shooting a .22 rifle, a .22 pistol, or both, and for their first several matches, most shooters will be shooting a factory standard rifle straight out of the box.
They both sound good. So what’s the downside?
Here’s the Catch for Appleseed.
To get the most value from your weekend at Appleseed, you should plan in advance for a minimum of three or four range visits to practice shooting from the different positions and to confirm that your rifle is properly zeroed and functioning perfectly. This also includes some thoughtful testing to find out what brand of ammo your rifle “likes”.
NOTE: When shooters talk about “group size”, they are referring to the maximum distance between the two most distant holes for a single group of shots on your target. For this purpose, we recommend 5-shot groups and a simple ruler to measure from the outer edges of the two holes that are the farthest apart in each group. Technically, the measurements should be center-of-hole to center-of-hole, which requires subtracting the actual bullet diameter from this measurement, but for this purpose, great precision is not needed. You are only seeking to compare the relative consistency of different types of ammo. If all the group sizes for each different type of ammo are within ¼” of each other, that’s great. It means your barrel is not especially picky. But if the group size for Ammo A is 2” or less and Ammo B averages 4”, you know your rifle prefers Ammo A.
Your particular rifle’s ammo preference is hugely important. Any given combination of rifle and ammo with exactly the same shooter can produce a group size from 1” to more than 3” or even bigger with ammo as the only variable.
The Appleseed weekend events are shot on 25 meter ranges using scaled targets to simulate an enemy rifleman’s torso at 100 yards (with the shooter in the standing position), 200 yards (sitting or kneeling), 300 yards (prone), and 400 yards (also prone). And, the 400 yard score counts double. You have to keep all 10 of your 400 yard shots on a target that measures less than 1 ½” x 1 ½”.
If your rifle/ammo combo on its best day shoots 3” groups, no matter how well you listen to the Appleseed instructors, you will have some misses that could have been avoided just by testing different brands of ammo. (After two days of instruction and practice, you will be amazed at how much smaller your groups have become.)
Prior to your first Appleseed event, work-outs on your living room floor should include going through all the steps outlined in Fred’s Guide to Becoming Riflemen for each of the four shooting positions. Try to find your Natural Point of Aim (NPOA) with whatever sights you have decided to use. Like the time at the range, these practice sessions will be more productive if you can do some of them with a buddy or a family member. The entire booklet is available as a free download.
Whether you earn your Rifleman patch on the first or second weekend course, you will have learned a lot about yourself, your rifle, and how to use it safely and well. Everything will add up to being a better and more confident shooter, capable of imparting that knowledge to your family. You will not learn anything about hunting skills, but your ability to take game at a variety of distances will have increased greatly. You will also know that a .22 rifle is a very potent defensive weapon. A hit with a 10/22 is far more lethal than a miss with an AR-15.
What’s So Hard About Rimfire Challenge?
There is no “how to” weekend for newbies. There is no well written guide building on years of military training. There are no designated instructors. You will probably be thoroughly confused and overwhelmed at your first match. You will most likely feel conspicuous and out of place. You will not look cool, even with your dark-tinted Oakleys. (P.S. It will be a lot easier on your ego if you take a buddy or family member with you.)
Targets range in size from 8”, 10”, and 12” round steel plates to 12” x 12” and 18” x 24” steel rectangles at distances ranging from 7 to 30 yards. The targets for each Course of Fire are arranged in different patterns, using different sizes of targets, all set at different distances. Each of the 5, 6, or 7 targets need to be hit only once. Each shooter shoots five stages (the same set of targets) in a row on each course of fire, and the worst time is tossed out of your total. Then, the next shooter comes up to the firing line. When all the shooters in a given relay have fired, that whole group moves to the next Course of Fire. (You will need at least five of the Ruger 10-round magazines. We do not recommend using the 25-round mag.)
Compared to Appleseed, this is easy. Right? There is a huge target– 18” x 24”– compared to maybe 2” x 2”, and there are shorter distances except for the 30 yard targets. Not exactly. All shots are standing and start from a loaded rifle in the ready position. The range officer, with the timer, and the score keeper have to hear the impact of your bullet on the steel target for it to count. All the shots in a given stage are electronically timed to 1/100th of a second. You are on the clock, moving your sights from one target to the next as fast as you can swing the barrel, acquire a fresh sight picture, squeeze the trigger, and move on. This is real stress (though all self-imposed)! You will hear only cheers of support from everyone in your relay.
As you can see, Rimfire Challenge is completely different from Appleseed. Whereas Appleseed contemplates multiple targets, the goal is to engage them accurately in a measured rhythm from as far away as possible and take out each target before they can pose a threat to you. Rimfire Challenge sets 5 to 7 immediate threats in each Course of Fire that you have to hit anywhere on the steel target in the shortest possible elapsed time.
Both of these learning experiences are tremendously relevant, and the skills learned will carry over from using a .22 rifle to an AR-15 to a sniper rifle to a hunting rifle. Each event requires different types of practice. For Rimfire, assuming your rifle range allows, we recommend setting up four paper plates or regular 8 ½ x 11 printed targets on your target backer at any distance from 15 yards at the near end to 30 yards at max. For each string that you shoot, practice moving your barrel to a different plate after each shot. Alternate by trying for the smallest 10 shot group on a single plate taking as much time as you need at the beginning and then picking up the pace on each subsequent string.
After doing a range session with 100 to 200 rounds, pack it up. But, do an honest self-critique and take notes to review before your next range visit. Better yet, do the range session with a buddy or family member. Take turns shooting and spotting. Provide feedback and constructive criticism after each shooting session, and then change roles. After three or four range visits, you will be ready to enter your first match.
The Big Choice
Which skill set is likely to be more important to you in a TEOTWAKI situation?
1. Rapid target acquisition under stress on multiple torso and head-sized targets at distances from 7 to 30 yards? or
2. The ability to reach out and tag a torso target at 200 or 300 yards with plenty of time to take the shot?
We think both are important.
Rifle Upgrades
Special Requirements For Your .22 Rifle
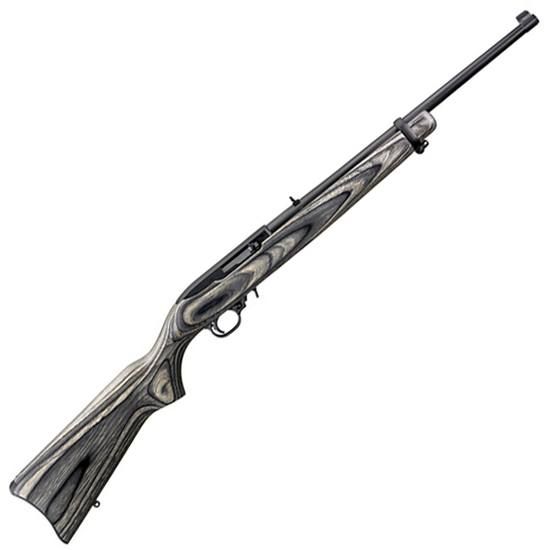
Both Appleseed and Rimfire require rifles that are reasonably accurate, highly reliable, allow easy magazine changes, and have good sights. Out of the box factory 10/22 rifles will do the job, and lots of folks show up at Appleseed or Rimfire and do very well with a standard rifle.
So, why change anything at all?
Appleseed Recommended Upgrades
For Appleseed, two changes are highly recommended on their site, and there are four more that we put in the “must do” category plus two really helpful magazine upgrades.
The two Appleseed recommendations are:
- A GI-style canvas sling available from the Appleseed store for around $14.50. This item is critical for learning how to use sling support to achieve maximum stability in the various positions. Depending on which 10/22 model or after-market stock, this may also require installing sling swivel studs on the stock. (Note: Whether or not you attend Appleseed, a sling is a basic item for every prepper rifle. You need to be able to carry the rifle on your shoulder when you need two hands.)
- The Tech-Sight or a similar rear peep sight ($69 for the TSR200 available at the Appleseed store or for $74 with free shipping through Amazon Prime*) mounted on the receiver for a quantum improvement over the factory folding leaf sight mounted on the barrel. Two more options are available from Skinner Sights.
If you already know your eyes will need some help and especially if you wear bifocals, give serious consideration to a scope at the very beginning of your upgrades and skip the expense of the peep sight. We recommend a 2-7X variable scope or possibly 3-9X with an adjustable objective to allow proper parallax focus at rimfire ranges. Prices for a good quality Bushnell scope will range from $89 to $139, depending on the model and vendor.
A sling plus some form of enhanced sight picture turn your factory 10/22 Carbine or Takedown into a “Liberty Training Rifle”, and you are set to go to your first weekend. If you can handle a portable electric drill to position a hole for a screw to hang a picture frame, you can do the swivel stud installation yourself in less than five minutes by following this online exceptional rimfire tutorial.
The most time consuming part of the project will be assembling all of the parts and the tools. If you have a factory synthetic stock and forearm, you will need the Uncle Mike’s 1 ¼” swivel set with one wood screw and one machine screw. If you have a carbine with a wood stock or the Magpul X22 synthetic stock for a Takedown, you will need the set with two wood screws . Both sets include the 1¼” quick-detach sling swivels that attach to the Appleseed sling as well as the studs that attach to the stock.
The Additional “Must Do” Upgrades
Our recommended upgrades apply whether or not Appleseed is in your plans. All four of the following upgrades improve the reliability of any 10/22 or make it easier to perform standard tasks, whether hunting, plinking, or competing.
- Tandem-Kross Automatic Bolt Release ($9.99) or the Kidd version ($10.95). Although they have slightly different geometries, the function is the same: allow the bolt to be released by a simple pull to the rear rather than requiring finger tip access to the bottom of the trigger guard to release a small metal tab allowing the bolt to close while simultaneously holding the bolt all the way back with the other hand. This upgrade results in less disruption to the shooter’s position when closing the bolt after a magazine change and eliminates fumbling for the hold open release– a genuine design flaw in the 10/22. Try closing the bolt or locking it open manually on a factory 10/22 while wearing gloves, and you will know what I mean.
- Tactical Solutions Extended Magazine Release ($34.99). Changing magazines while on the time clock is a required part of Stages 2 and 3 for Appleseed. The stubby factory release frequently fails to completely retract the magazine latch plunger, requiring the shooter to help fish out the standard 10-round magazine. This takes time and will definitely result in losing your cheek weld and your concentration. The TacSol mag release is very positive, much easier to reach with your trigger hand, and has more leverage on the magazine latch. Tactical Innovations offers a less expensive version ($21.99) with bling colors that match the anodizing on the scope base and matching rings. Very cool.
- Tandem-Kross Extractor and Spring ($9.99). Unlike the factory part, which is a stamped steel component, the T-K extractor is precisely machined from hardened tool steel and has a more precise geometry. The result is very reliable extraction even when there are problems with the case heads or the cases are a little sticky in your chamber.
- Kidd Firing Pin and Spring ($23.95). Tony Kidd was previously the Head of Research and Development for the Army Marksmanship Unit, and the precise size, shape, and material of his firing pin is the end result of many years of experimentation funded by our tax dollars. Using the Kidd firing pin, we routinely see more consistent ignition with all different types of ammo. Given the problems with all too frequent dud rounds and weaker quality control in today’s .22LR ammo, this upgrade significantly reduces the possible need to take the time to rack the bolt to dump a faulty round and chamber another. Oh, and Tony says you can dry fire without any worries.
Installing all four upgrades will take less than an hour, including the disassembly, cleaning, installation of the upgrades, and reassembly of your 10/22. The third and fourth articles in this series will cover the recommended tools, videos to watch, and some tips from our shop experience so that you can do the upgrades yourself.
Finally, one of the most useful things you can do is upgrade the BX-1 factory 10-round magazine. We strongly recommend using either:
(a) the Tandem-Kross Magazine Bumper ($19.99 for a 2-pack), which extends the bottom of the magazine below the trigger guard housing, allowing a magazine to be grasped more easily to pull it out of the magazine well, or better yet:
(b) the T-K Double-Kross Dual Magazine Body ($9.99 each), which replaces the external plastic housings from two standard 10-round magazines with a single, clear housing for the two sets of internal components. This turns a single housing into dual, reversible magazines; just drop it out, flip it over, and re-insert. Plus, this extended magazine is easy to grasp if the magazine ever needs an assist.
The four upgrades described above add up to $79 and are enough to make the Ruger 10/22 into an even better choice for your survival battery.
There are some additional upgrades to consider over time, including the charging handle (bolt handle), guide rod and spring, bolt buffer, and eventually a trigger job. You can upgrade the barrel, the entire bolt, the receiver, or the bolt and receiver combination. Improvements in accuracy are certainly possible but expensive for modest gains. Instead, enjoy your newly developed skills by spending more time in the field or at the range instead of spending more money.
Scopes, Red Dots, and Reflex Sights
In our experience, the optimum sights for Appleseed are some form of scope capable of adjusting parallax focus down to 25 yards or with a preset parallax of 50 yards. The best choices are variable power scopes of either 2-7X or 3-9X. This type of scope will also be excellent for any hunting with your .22 rifle. The next article will cover our recommendations for a scope base, scope rings, and some very inexpensive variable power scopes.
If you really like Rimfire Challenge and decide to continue to build your skills, you will likely add a red dot or reflex sight to your 10/22. I have one rifle that has had the same Ultra Dot for over 20 years. That combo has taken a lot of prairie dogs, gophers, and coyotes with only periodic changes of the small battery. If you still have good eyesight, you can postpone the purchase of a red dot or reflex, but you will see that most of the top shooters use one or the other. It is all about obtaining a sight picture and focus as quickly as possible.
Taking Stock
After many years of using a carbine with a beat-up factory stock, I upgraded to a stainless Takedown installed in a Hogue overmolded thumbhole stock that fits me very well. I should have done this years ago. There are many, many choices for a new stock, and you can make the decision any time. And, if your rifle fits you better, it may improve your accuracy.
Most likely you will need to purchase your new stock on-line, since very few gun stores have a selection. Just make sure the vendor (for example, Midway USA or Brownell’s) has excellent return policies, since any replacement stock needs to fit your particular 10/22 model and your unique body type. Finding the right stock is a lot like finding a good dance partner. Looks are not as important as how you work together.
Time For Action
All four of our “must do” parts add up to $78.92 or $65.92, depending on which magazine release you select. The sling and swivel set will add another $22.49. The new peep sights or a variable power scope will add $75 to $150 more plus scope base and rings.
Is it worth spending the money? Absolutely, especially if you become your own gunsmith. Whether you make the personal commitment to Appleseed or Rimfire, you will be thankful you spent the time developing your shooting skills and installing the parts yourself.
If you ever need to use your trusty rifle and your new skills, the value of everything you have done will be repaid many times over.
The final two article in this series are a do-it-yourself guide, complete with a resource list and tool list. Learn to be your own gunsmith with all the resources offered by the Internet.
EXCELLENT ARTICLE well thought out and researched. I am not a gun ehtnusiast, but I found a wealth of info = this gets my vote for first place
Thanks! I was hoping to make the information useful for the person who is not yet a gun enthusiast but might become one or even the person who is aware that guns are just a tool. You don’t have to like them, but it helps if you know how to use them.
I appreciate the thought that went into this article. The ubiquitous 10-22 deserves a place in everyone’s safe in my opinion, mine have served me well. I have done the Appleseed upgrades, and also firing pin and extractor upgrades as well, and they made it a more useful and dependable tool. Nicely done, behind-the-counter!
Sounds like you are ahead of the curve! You have already done the important upgrades for function and long-term reliability. About half of our customers walk out the door with a new gun complete with all the upgrades. The others come back over the next several years either to have us install them or buy the components so that they can do the work themselves.
Very nice article. I have shot a number of Appleseeds (no patch yet!) and learn something every time I go.
Just a brief addition about a scope – the author mentions parallax. I will recommend looking at a mid-range air rifle scope. I use a fixed 4 power that I can turn parallax down as close as 3 meters and also allows me to adjust the focus. I also concur on the addition of the extended mag release and also charging handle. I only make the following suggestion because I have experience with them, and that is the trigger services of Brimstone Gunsmithing. Their basic service on the standard trigger makes for an even better shooting rifle and is easy on the wallet.
Once you understand the process of the shot taught in Appleseed, you can become a hit-making machine. It is a very rewarding feeling to get into the shot cadence and see the hits you make.But as always, have fun.
Many of the more expensive air rifle scopes you suggest have parallax adjustment but some are pre-adjusted at a range of 10 meters or sometimes 20 to 25 yards. This works well for Appleseed but may not be a good answer if that same rifle/scope combo is used for small game hunting at 50 or 75 yards.
For the average big game hunter using a fixed power scope mounted with the proper eye relief and shooting at a range of 75 to 200 yards, parallax is not a big deal. Most hunting scopes have parallax pre-set at the factory for either 150 yards or maybe 100 yards. For the long range varmint hunter or sniper using a high magnification variable power scope, parallax can be the difference between a hit and a complete miss. And, it is also an important factor for precision shooting in the 25 to 50 yard range with a .22LR.
Why is this such a big deal – Especially for an Appleseed event?
First, let’s understand the difference between focus and parallax adjustment. Focus is the adjustment on the eyepiece at the ocular end of the scope, usually accomplished by rotating a ring at the end of the eyepiece. The correct focus brings the reticle in the scope into a crisp image for the individual user’s eyes at a given eye relief distance measured from the end of the scope to the shooter’s protective eye wear. The best way to achieve this focus is aiming against the sky or horizon so that the only image you can concentrate on is the reticle – not some object or background down range. One of the reasons why the exact same cheek weld is so important is that your cheek weld also controls the distance from your eye to the eyepiece. If that varies significantly when you are shooting in a prone position vs. off-hand from a standing position both focus and parallax will not be the same.
The easiest way for me to define parallax when I teach a class is that focus is something you can see, but parallax is something you must experience. When the ocular lens is out of focus, the reticle is blurry whether your eye is 2″ away or 4″ and whether you are perfectly lined up with the scope or looking slightly up or down relative to the center plane of the scope. Very easy to see when the reticle edges come into crisp focus.
Assuming the scope is mounted with the correct eye relief and that the scope is in focus for your eyes at the place where you normally rest your cheek, you probably cannot tell whether or not parallax is also in adjustment – as long as you hold your head still. To experience parallax, you must move your head several inches to each side as well as up and down while keeping the rifle completely stable and still looking through the scope. If the cross-hairs on the target appear to move even slightly as you move your head and eyes, then you have parallax that needs to be corrected. The definition of parallax is that the position of the object being viewed appears different when viewed from different positions.
If you have carefully zeroed your scope from a stable, seated position on a bench at the range so that the bullet impacts exactly where the cross-hairs intersect and you don’t change either your position or the magnification of the scope and you always bring your cheek to the exact same place on the stock and your eyes are in exactly the same plane as when you zeroed the scope – NO PROBLEM. Change any one of those variables, and your zero may move 1″ to 2″ or more even at 25 yards.
Now you understand why eliminating parallax is critical for the varmint hunters shooting prairie dogs at 600 yards or the thousand yard marksman.
There are three important things to remember about a properly zeroed scope on any .22 LR being used whether for small game hunting or an Appleseed Project weekend.
1. Because of its small size and the shape of the stock, getting the same cheek weld on a factory standard 10/22 is very, very important – especially if you have a tendency to hold your head in a slightly different (more comfortable?) position in standing vs. sitting vs. prone. Switching from the factory stock to an adult sized Magpul Hunter or a Hogue Overmolded stock can actually improve your accuracy because it increases your consistency.
2. Although the Appleseed Qualifying Target is normally shot at a 25 meter distance, the target torsos are scaled to replicate distances out to 400 yards. The smaller targets for the simulated distances translate into a very small margin of error. Even if everything else is perfect (breath control, posture, heart rate, and trigger control), uncorrected parallax will give you the impression that you are holding the cross hairs in the right place but in reality, your rife is actually aimed an inch to the right or left – unless you make absolutely certain to keep your head in the same position as when the rifle was zeroed.
3. An air rifle scope with parallax pre-set to 10 meters should be just fine for a well-placed shot on small game out to 25 or maybe 30 yards. At 75 yards, even if all the other variables are carefully controlled, parallax may be enough for either a miss or badly placed hit.
The best solution is a scope with an adjustable objective that goes down to a minimum of 25 yards (or maybe 10 meters – the air rifle distance) or a high-end scope with side parallax adjustment. Even then, practice all the different positions maintaining a consistent check weld using a scope mounted to the correct eye relief.
My apologies for a looong answer. Back when my eyesight was much better, I used to shoot prairie dogs at really long ranges. Bad parallax and not keeping a perfect cheek weld results in a miss every time.
Thanks for the additional information. I checked my air rifle scope and parallax can be adjusted out to infinity, with markers at 50,75,and 100 yrds. FWIW, the scope is a UTG fixed 4-power, was about ~80, so it’s not bank breaker. It was what I had at the time and have never changed it out.
And +1 about the cheek weld – reproducing the hold is everything! 🙂