


A small amount of land, in some cases as little as half an acre if managed correctly, could supply a bountiful vegetable garden even without the luxuries of fossil fuel-driven technology or animal power. The key to the survival of an individual or a family who is either under-prepared or through the course of events is somehow unable to use any fossil fuel-driven technology or animal power is being able to quickly produce edible crops on the ground that they have using nothing but hand tools. The methods necessary to do this are inexpensive to implement, physically rewarding, and beneficial to the long-term health of your garden. Implementing them on a small-scale now will be immediately beneficial to your health via increased nutritional quality and physical activity. You will also gain the confidence of knowing that if gardening should ever be forced upon you as a full-time job, you would be able to put food on the table for the people who are relying upon you for protection and guidance.
I will detail my own experience, gathered over the course of the last four years, which was inspired by the book, Gardening When It Counts by Steve Solomon. It is a brilliantly presented, scientific, yet accessible step-by-step guide to maximizing the production and minimizing the chemical input (to zero, in his case) of your garden. This guide will be a description of how to do it on a small scale. Deciding how to implement it is really up to you and depends on a lot of factors, all of which will vary from one person to the next.
The double dug garden is not a new concept, but it is rarely practiced. Most people use rototillers. Generally speaking, that works given that the power is on and the modern, relatively intense gardening practices can be kept up. (I have more on this later.) Double dug means that all the digging is done with a shovel by hand. Double means you do it twice, until you can bury the entire head of your pointed shovel in loose soil. Does it sound like a lot of work? It is, but after I describe the technique in detail, I will tell you a little more about why it is worth the effort.
Location
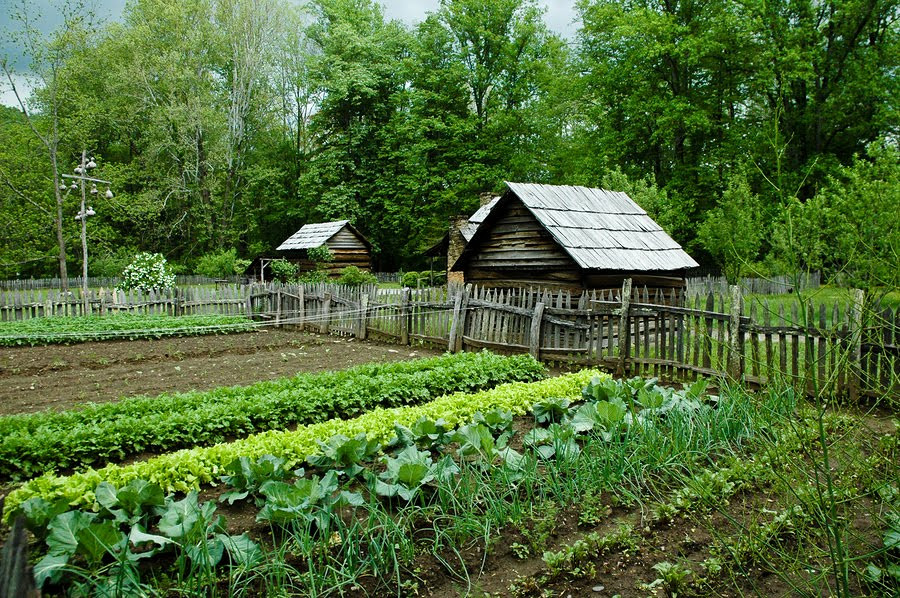
To begin, a location must be chosen. If you already have a garden established, you can either use a part of that one or expand it nearby with this technique. For those using this as their first garden, the top priority when choosing a location should be sunlight. Be realistic, and make sure to account for spring growth and summer foliage when looking at nearby tree shadows. Enough sunlight is relative. Read up on what you are growing, considering how often you get a day of full sun, and choose a place where you can generally expect to get at least six full hours of direct exposure to the sun. In the northern hemisphere, orienting towards the south or southeast exposure is the best. I like having the morning sun hit my garden, because I can water it early in the day and the roots get warmed up relatively soon. Drying off the dew early in more humid climates will also benefit the health of your crops when it comes to mold. An easily overlooked but very important aspect of site selection is proximity to the house. The closer you are to your tools and your plants, the better care you will give them and the more and better food you will get in the end.
Tools
Speaking of tools, here are the bare essentials:
- Shovels– pointed and transfer/scoop style.
- Sturdy hoe
- Stone rake
- Hose with a switchable shower-style nozzle
- Hat with 360 degree brim
- Metal file
That’s pretty much it. There are things that would make life easier, but if that’s all you have you can garden.
Sharpening Tools
So, to get started, the single biggest effort and time saving advice I can give you is to grab that file and sharpen the hoe and pointed shovel. Most of the hand tools you buy, in fact any of the ones I have seen for sale even if they are of fine quality, are not sharp. The difference between having a 1/8” piece of flat steel of a sharpened bevel at the end of your implement many seem trivial, but when it comes to slicing through hard ground full of rocks or simply flicking your wrist to kill a weed with the corner of the hoe, the effort pays off immediately and requires little initial input and even less upkeep. Sharpening these tools is pretty simple. Secure them with one hand and a sturdy object like a workbench, and file a bevel onto the leading edge of your pointed shovel up to about five or six inches out from the point. Do the same to the working edge of the hoe. The first filing takes a few minutes, since you have to grind through the thickness of the metal to bevel it, but once the edge is ground maintaining it after a day’s work takes literally seconds.
Killing the Sod
Now that the site is chosen and you have a sharp shovel, it’s time to kill the sod, which is a mat formed by the grass and its intertwining root system. Ideally, the ground breaking takes place in fall, but with proper timing you should be able to follow this advice and still at least grow some summer and fall crops, even if you have to start this project after the ground thaws in the spring. Killing the sod is pretty simple. Using the pointed shovel, start at the “top” edge of your garden. You will be advancing to the rear as you dig, so keep in mind that going downhill, if grade is even slightly a factor, is much easier. Using your foot, drive the shovel through the sod. There is no need to go for big chunks of dirt. The only goal at this step is to turn shovel-sized chunks of sod over roots up so that the grass dies. Lay the first row of sod on the ground in front of you, laying subsequent rows onto the bare ground that is now where the first row of sod was growing. Repeat for the entire length of your growing area and after all the sod is turned over, you can walk away for a week to ten days to let it die.
Check Out Soil and Gather Amendments
During this time, check out your soil and gather your amendments. For me, amendments fall into two categories: nutritional and water/root management. Nutritional amendments, like fertilizers, compost, and wood ash, feed the plants throughout the growing season. Amendments, like peat moss, vermiculite, and sand, are used to alter the quality of your soil regarding how roots can grow in it and how water is held and drained. Since everyone’s needs are different, I will describe the amendments that went into my garden. I had a lot of rocks to deal with and a slight tendency towards clay but nothing that wouldn’t drain. I decided to add approximately an inch of peat moss across the entire garden to give some improvement in water retention and also to help break up some of the clay. I could have used more, but since my nutritional amendment, composted alpaca manure, would also help with soil tilth I decided an inch would suffice.
Compost
Compost is a touchy subject and opens up huge debates that I’m not going to weigh in on. The stuff I use is made from the composted manure of my parents’ alpacas. When their pens get shoveled out, the “beans”, straw, and whatever urine is mixed in gets piled in rows about four feet at the base and maybe three feet tall. I turn them and let them sit for a few weeks; then, I turn them again until it reduces down to a dark brown, highly potent, all-natural fertilizer that has never failed to grow large and bountiful versions of whatever plant I nurture with it. There are plenty of other ways to make compost, and depending on the quality of the stuff you end up with you may or may not need other methods of fertilization. For my garden, the compost I make is the bulk of the nutritional input. I also dig in some fall foliage to the garden bed, and both wood ash and plant waste are tossed onto the manure pile throughout the year.
After the week has passed, spread half of your amendments onto the overturned sod, which should be mostly dead anyway. You are about to finish it off for good on the first of two rounds of real digging. Start in the same position as when you were removing sod. Drive the shovel through the amendments, dying sod, and as much soil as you can bite off with a good kick. Rock the shovel a little to free any small stones and scoop the load forward, away from you, just like you did with the sod. Unless they come up easily, disregard any large stones you clang the shovel off if they are more than a couple inches down. They will be dealt with in the next round. Once you finish a row, you should have a small trench dug with a pile of dirt in front of it. Go back about six inches, or half a shovel head length, and dig the next row, using the materials you turn over to fill in the trench you just dug. Take your time to chop up any big chunks of sod that are left and cover anything green that happens to have survived. Do this for the entire garden. It’s tough work but not the worst, and when you are finished with this round you will already have a result on par with rototilling. An adult man in decent shape should be able to dig a 10×5 area in about an hour, maybe 90 minutes. In subsequent years, the input is significantly reduced, so don’t fear that this admittedly difficult part of the process will have to be repeated annually. After digging, cover with the second half of your amendments, and get ready for the final dig.