


Lack of sanitation has killed more people than wars, so while bullets may be useful, outhouses may be more important! Can you dig a hole and construct a simple structure over it? For more than a decade, we have lived with an outhouse and no indoor bathroom.
In many coastal communities, an outhouse is built over a pier. Peering through the toilet, one sees the incoming or outgoing tide. I don’t want to think too much about that. Throughout India, where we spent 9 months, commercial outhouses and bathrooms in modest hotels have tile floors with a sloping center, flanked by two textured pads for shoes or sandals. One straddles the sloping section and afterward slops water from an adjacent bucket. Bring your own toilet paper.
This week, with the substantial help of a carpenter friend visiting from Wisconsin (thanks, Jim!), we built a new outhouse, near our guest cabin/ham shack/man cave, to supplement the one built in 2009 by our main cabin.
CONSTRUCTION
THE PIT:
The pit is dug first, of course, either by hand or with a backhoe. How do you select the location? First, know the depth of your land’s water table! If you live in a swamp, an outhouse with a bucket may be feasible, but not a hole in the ground. Second, choose a spot that will not drain down to a water source. Third, it is advisable to consider the direction of the prevailing wind. If you dig a shallow hole and the outhouse does not fit well over it, you will have downwind odor. Fourth, the digging will be easier in an area that is not riddled with thick roots, so keep your distance from big trees.
For our older outhouse, the pit dug by a strong teenager is so big and deep (about 5 ft deep x 4 x 4 ft) that it has lasted 13 years for the two of us and various guests and workers. One adaptation that may have aided its durability is that we started to burn the toilet paper rather than depositing it in the pit, and the night urine that I collect in an indoor commode (a 5 gallon bucket with a toilet seat on top) I dilute and toss in the side yard, rather than pour into the outhouse.
A little less enthusiastic about hand digging, my husband dug the pit for the new outhouse by the guest cabin with a tow behind backhoe. It is shallower – about 3 feet. I hope that will be adequate. Certainly, it will be used far less often.
THE BUILDINGS:
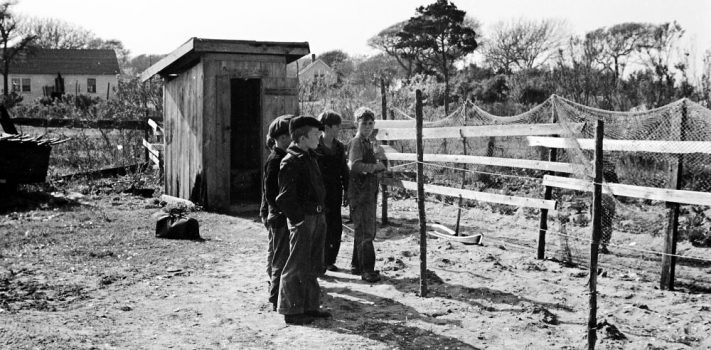
 Of the residential structures I have visited, most are made of plywood, 4 ft deep x 4 ft wide x 8 feet tall. These dimensions make it easy to slap together a structure with 4 – 8×4 plywood sheets and a 5th sheet as a roof. If you live in a dry part of the country, a flattish roof leaves room for 2 – 2 foot overhangs, front and back. Stabilizing the corners is important, of course. Many are built with 2×4 studs, but 4×4 posts are stronger. Each of three walls is strengthened in the middle with a vertical 2×4 stud. Four 2x4s form the frame for a narrow door. Usually the doors of outhouses open outward, rather than inward. However, we have visited several private outhouses with NO front wall, much less a door. Maybe the reason is less plywood and 2x4s, or full ventilation and a clear view of any approaching bears. As for me… I am a fan of doors.
 The plywood floor is supported by 2x4s or stronger 4x4s. Because the terrain may not be flat and may suffer from ice heave or soggy, wet soil, it is a good idea to rest the base posts on cement footers with metal “prongs” that can be adjusted for a level floor. However, it is also important to skirt the building or shove soil into berms around the periphery so critters big and small do not take up residence underneath. This is especially true for rarely used outhouses, such as at someone’s hunting or boating cabin. We have heard several stories of bears that denned under an outhouse, only to come out of hibernation when someone opened the door and sat down. Yikes!
Our first outhouse is 13 years old, is not built on cement footers or treated 4x4s, so proximity to damp ground has degraded the floor and lower inches of vertical plywood, which is getting weak. On the other hand, because it was not elevated at all, nothing but bugs can get underneath it. So pick and choose your construction priorities.
For construction, we utilized store-bought wood. But when prices jumped during the Covid lockdowns, my husband learned to make 4x4s, 2x4s, and to cut 1 and 2 inch planks from the birch and spruce in our local forest. This is a time-consuming but valuable skill, given the woody resources that surround us. The planks he cuts with a portable log mill made by Grandberg). The posts and studs are cut with a generic circular saw (like the DeWalt brand).
The toilet seat can be as simple as a wooden bench with a hole and a sliding panel over it, or a purchased toilet seat screwed over the hole in the bench. A circle of plastic sheeting can be stapled just beneath and around the toilet hole. It drapes several feet down. This is so that no urine spatters on the underlying wood, which would leave a lingering scent.
In a snowy climate like ours, an outhouse benefits from an angled roof to shed snow weight. A common construction has a front 8 feet high and a back 6 feet high, resulting in a slope of about 27 degrees. The 2 x 4 ft sheet cut off the back (of a 4×4 building) is easily deployed as high shelving for light storage, like toilet paper, hand sanitizer, and a lantern. The two triangles cut off the side walls can be used elsewhere. (Waste not, want not). We top the plywood roof with tarpaper and then metal roofing, which sheds snow better than raw wood. Painting or staining the exterior will preserve the wood, of course. I paint the interior, too, but this is uncommon, in my experience.
ACCUMULATION:
Homes with flush toilets move excrement and urine into a septic tank, which is vaccuumed out now and then, or into a municipal gray water system. Since an outhouse is a simple pit, the excrement builds up with no outlet, and the urine leeches into the soil. In cold climates, the excrement forms a frozen stalactite from the bottom, rising toward the toilet hole. When it gets close, we hack off the top two or three feet with an ice spade.
After several years, depending on usage and pit depth, the hole will fill up and it is time to dig another one. Many families anticipate this and construct a light 4×4 structure with bottom supports that function as skids that can be lifted from the footers by a tractor and dragged to a new location. Those who fill in the old hole can grow a refulgent garden on top the next year. Alternatively, an old outhouse can be repurposed as a storage shed when a new one is built.
ADAPTATIONS:
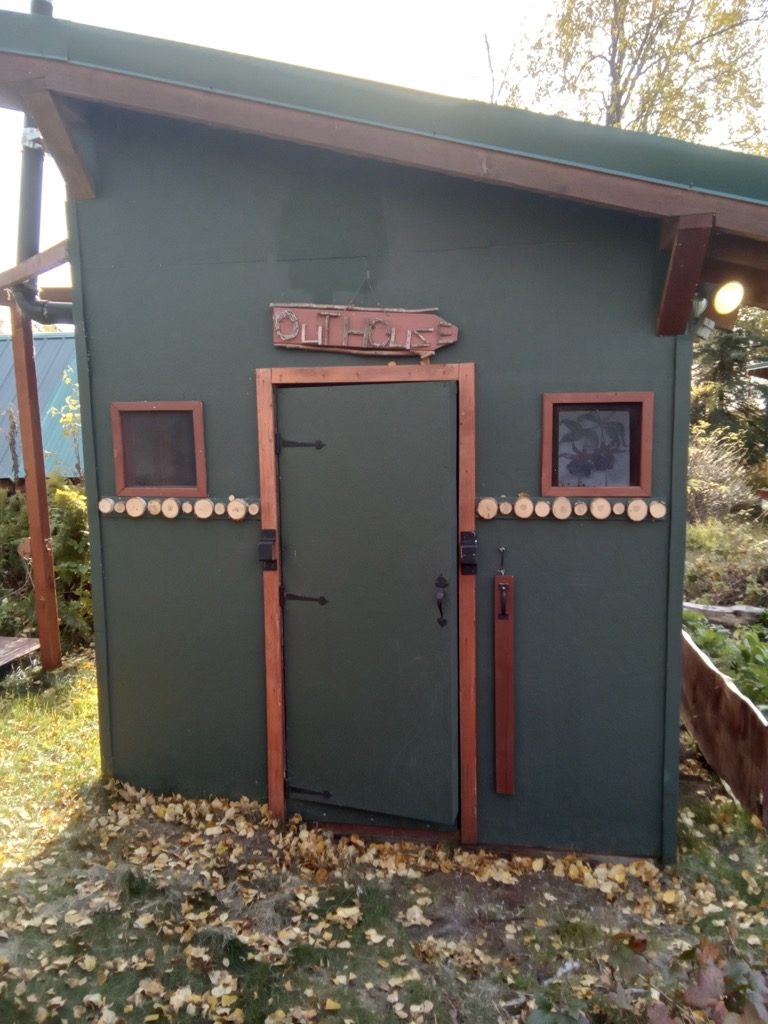
Both of our outhouses are bigger than 4×4 for several reasons. For one, I find the 4x4s to be rather claustrophobic and I am scared of Daddy Long Legs so I want more elbow room. For another, putting a roof on any structure requires effort, so why not make it wider for storage, too! Therefore, both of our outhouses are 8 x 4 feet. The first has 8 and 12 foot walls and a steeper roof. The second has 8 and 10 foot walls, with a shallower roof.
In each one, we built shelves above the door and opposite the toilet. In the second outhouse, we off set the door, closer to the toilet, to leave extra room to the left to store 7 large totes and suitcases with out-of-season supplies (no food). For example, in winter, one tote stores everything bug related, like bug zappers, coils, mosquito nets and head nets. Another contains summer shoes and boots. A suitcase holds summer clothes. In summer, we trade out these items for boot cleats, ice fishing gear, and winter hats, gloves, balaclavas, long underwear, etc. In a climate with strongly differentiated seasons, it is important to know where to find important supplies (like mosquito nets or warm mittens) many months after you put them away! Vertical shelves built to hold labelled containers are a high priority for me.
Another adaptation is that, after 10 years, we cut a second toilet seat in the bench of our older outhouse over a deep and unfilled section of pit. It looks like a “two holer” now! After 5 years, we also added a 4 inch PVC pipe that ascends from the pit, and up through the interior and outside, with a whirligig on top to help some of the methane fumes escape. I recommend this for frequently used outhouses.
Another change was made to the door. Because the older outhouse was not elevated in any way, it was often challenging to keep the door clear of accumulating snow and ice. What to do? We cut through the bottom 4 inches of the door and screwed that lower panel to the door frame. Now we are used to stepping over that threshold to enter and exit. Those extra inches, plus shovelling out three inches of the dirt in front of the building has made it much easier to maintain quick ingress and egress after dry snows.
A final suggestion to readers in cold climates is polystyrene. A wooden or plastic toilet seat in winter is COLD! So, we bought 2 inch thick polystyrene “planks” in which we cut holes that mirror the size of the toilet seat. We set them over the open toilet holes whenever the temperature is below 40 (for us, about 6 months per year). The air holes in this material form a “temperature neutral” toilet seat that is more comfortable than a hard, cold surface.
VENTILATION:
Since these buildings have no heat source, they are not insulated and are, therefore, naturally drafty, but ventilation is still welcome. The older outhouse has high, screened soffits under the eaves on two sides and two small, screened windows on the front wall. For the new outhouse, my husband has not yet cut any windows or soffits. Surely he will want some for illumination and air flow. (How long, do you reckon?) We have a roll of screening somewhere, and furring strips.
FLIES and RODENTS:
One problem that really bothered me the first few years was the emergence from the pit of massive numbers of flies in July. It was really gross. I really did not want to go in there. We solved this in two ways. When we had free ranging chickens, I let them in there every morning before I entered. They ran in with great enthusiasm for a buffet of dead (and live) flies on the floor and bench. The peck-peck-peck sound reminded me of the game, “Whack a Mole.” When they had cleaned the floor, I entered with a broom or rag and swept any other live and dead flies off the shelves and windows. The hens really helped keep the fly population down and they heartily enjoyed the daily ration of protein.
I prefer to live an organic life with few chemical products, but when I did not have free-ranging chickens, I bought a product recommended by an Alaskan friend. He called it “bug cheese” because the rectangular, white, perforated casing, about the size of a Hershey bar, contains something the color of cheddar cheese. In reality, it is called Hot Shot (a no pest strip.) This is an insect deterrent product that should not be hung in rooms where you spend a lot of time, but is appropriate for infrequent and aerated venues like attics, garages, and outhouses. The label says that is effective for four months, so it is perfect for our Alaskan summer season. It is so effective that I do not find ANY live or dead flies in the outhouse. I bought a whole case. (If you have planned supplies for a bug out place without considering insects… do so now).
In some parts of the country, mice and squirrels chew up the toilet paper, so it is common to store it in a coffee can with a plastic lid. This has never been an issue for us, here in Alaska. So I hang one TP roll on a wrought iron hook and stack extra rolls next to that.
DÉCOR:
Many outhouses are plain affairs. Others I have visited are decorated with magazine pages of cars with nubile young women draped over them.
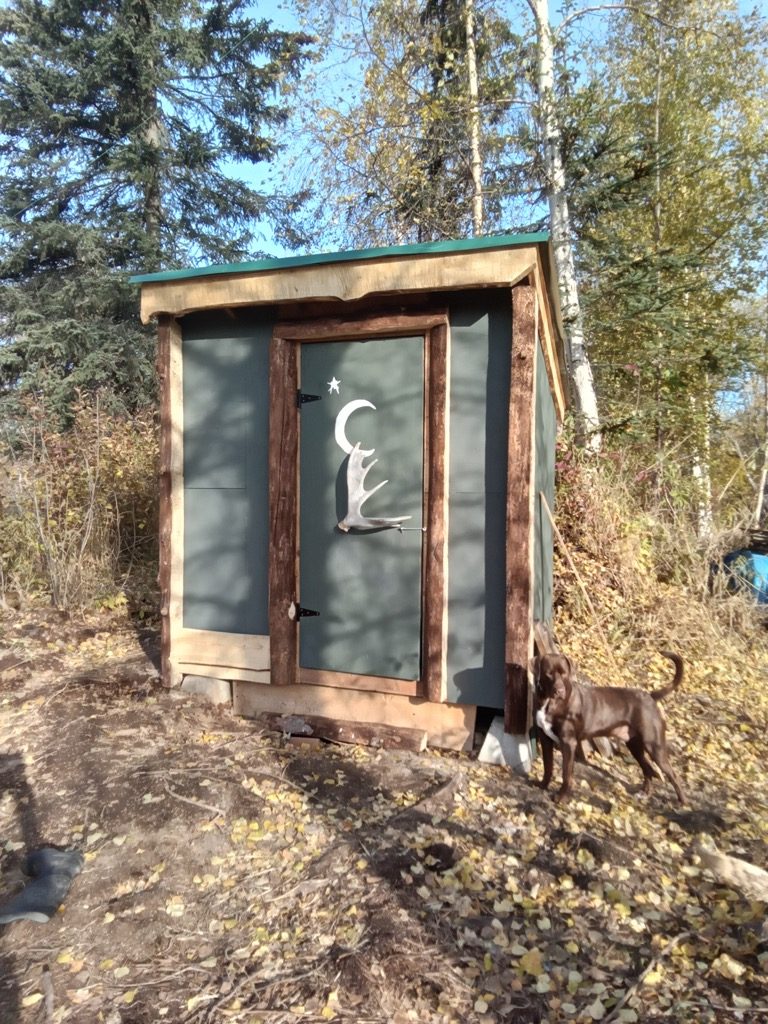
Some creative publisher has published a set of little books titled, “Outhouses of Alaska” with cute, creative, and practical structures made and decorated with materials on hand. One is made out of an inverted boat. Others are decorated with moose paddles or caribou antlers or hanging baskets of flowers. I wanted mine to look cute, too. I painted both buildings inside and out, to preserve the plywood. The interior paint is high gloss, for extra light reflection. I have enjoyed adding stencils of Alaska trees and animals, and even two stained glass windows created by a friend of mine for me. Our Wisconsin friends framed the door with quarter cut log posts which give it a substantial sort of look, and painted a moon on the door (thanks, Yana!). For a handle, we used a moose paddle that we found many years ago in the bog.
MY EXPERIENCE:
I will admit, that after my first two months living with an outhouse, I flew to Anchorage, visited the museum, and found the flush toilets of the ladies room a marvel of technology. But, over time, I have visited some pretty disgusting restrooms in gas stations, too. So, I have gotten used to the variety of bathrooms. It does not seem strange anymore, to go from my home in bush Alaska with an outhouse to houses, restaurants, and airports with modern bathrooms… in various states of cleanliness.
APPLICATION:
Hunters, fishermen, campers, soldiers, and hikers are all used to urinating and defecating in nature, and then cleaning up after themselves. But I understand that for urban people, the idea of an outhouse can be uncomfortable. I hope that www.survivalblog.com readers are past that. Let’s face it: flush technology is only 4 generations old and depends on expensive municipal infrastructure or commercial septic companies.
On the other hand, I, like many of you, have read lots of post-apocalyptic novels that never seem to address this important hygiene topic, or gloss over it. Surely, digging trenches in the right place and adding planks to stand on or structural shelters are among the first things that any group needs to do.
Want to practice this skill? Pick a spot to dig a deep and wide hole. Measure how much time it takes to dig 3x3x3 hole (arbitrary dimensions) with no power. What are the roots like? Are there rocks or a high water table? If it is sandy, the walls will cave in. Then what? After this exercise, you may decide to pack more shovels in your bug out supplies, to share the labor. And while you are at it, you may discover that a flat-bladed sharp shovel with a step on which to place one foot for added strength is more useful for cutting through roots than a more familiar curved shovel. If you don’t try, you won’t know what you need.
Best wishes for happy hygiene.
—
Editor’s End Note: Mrs. Alaska has an informative and entertaining Alaska bush country blog at: https://alaskauu1.blogspot.com/