


(Continued from Part 2.)
Cooking
Use a stove as long as you have electric power, natural gas, or propane. If you can find an old fashion wood-burning cookstove, great. This allows you to be able to cook when fuel or grid electrical power is gone. With a lot of gas stoves, the surface burners will work without electric power, but you will need to light them with a match or some other spark source. The oven will not work in modern models without electric power.
A camping stove, gas, propane, or charcoal grill can be used. However, you will need fuel supplies. And, of course, proper ventilation is a concern.
If you have a large propane tank then you can install a “wet leg” with this you can fill the smaller 15-20 pound propane tanks. This doesn’t go very fast, especially in the winter. In the summer, cool the small tank and it will fill a lot quicker.
There are also some cooking options with Sterno, in the short term. You can also cook in a fireplace. Even more basic is a and outdoor campfire. But leep it small as you don’t want to attract attention. Practice cooking with a Dutch oven with charcoal or hot wood coals. Anything you can bake in an oven you can do in a Dutch oven. Nothing beats cast iron. But you do need to practice, practice! Tongs to move charcoal or hot coals around, and leather gloves and a lid lifter are very helpful. Cast iron does get hot, and stays hot. Dutch oven cookbooks are very helpful here. Again, practice! The base size is a 12 inch diameter, 6 quart. However, I would get the deeper 8-quart size, as you’ll find that it is easier to bake bread in it without burning the top of the bread. The range of available sizes includes 8 inch, 10 inch, 12 inch, 14 inch, 16 inch, and even a 20 inch. The size you want will depend on your needs. (Cast iron is heavy.)
Flaxseed oil (edible) is the best for seasoning cast iron. (See: Cooks Illustrated.) First, clean and dry and then warm the cast iron to 200 degrees to open the pores in the cast iron. Carefully rub the oil over the surface, then in 350-450 degree preheated the oven, put the cast iron upside down in the oven over some foil to catch the oil drippings and bake it for an hour. Let it slowly cool for two hours or more in the oven to further season it. They say to repeat this five times. Avoid soap and water for cleaning at first to give it more time to get a good surface, scrape and dry it. Over time, oils from cooking will produce a stick-free surface and you can then use some soap and water. Don’t store with the lid on tight, but put a folded paper towel between the lid and the pot to allow water to escape, and decrease the possibility of rust. A lot of new dutch ovens are sold pre-seasoned.
Sources of cast iron include camping stores, Ace Hardware, Cabela’s, and Agri Supply.
Lodge cast iron cookware is the best, and made in the USA and they also have a number of dutch oven cookbooks.
Cast iron deep fry pans with fry pan lids – Cabela’s or Lodge are dual usage as dutch oven and frying pan. Agrisupply.com has old fashion cast iron cooking ware and cast iron pots up to the 90 gallon size, imported.
A Tripod stand to hold the pot or dutch oven over the campfire is very helpful, as is a grate, one source is Cabela’s. You can make your own tripod with three metal T-posts and a short chain or wire. T-posts laid side by side will make a grate with rocks or logs holding them over a fire.
If you need really really large Stainless Steel Large pots for large groups, one source is Northern Brewers, good for brewing too. You can get them with or without holes (10-30 gal size) some of these are really heavy duty.
Can openers. Have more than one. I am distressed as to how poorly some can openers are made. In extremis, you can open a can by grinding the rim off on a rock or sidewalk. Slow, but it works. It is wise to have multiple nonelectric quality can openers, plus several WW-2 design P-38 or the newer P-51 basic military-style can opener as a backup. Many multi-tools have a can opener in them.
Fire-Starting
For fire-starting, you should have at least 3 different ways to start a fire!
a. Matches unfortunately they have been dumbed down and are less effective than the old ones, thanks to the EPA, they do work, however. Get the strike anywhere type rather than the safety type. They must be kept dry. You can waterproof them by dipping the head in melted wax, to light them you need to first peel off the wax. Matches, lots and lots of them. After Hurricane Sandy they were going for $10.00 a box, and no candles were to be found within 50 miles. (Hint-hint.)
b. Bic lighters, have a lot of them
c. Cero Ferro rod. The best are military-grade, there are some that you can use with one hand, as you may only have one usable hand due to injuries.
d. Refillable lighters—Bernzomatic lighter re-filler is helpful to do this.
e. Charcoal does store forever if kept dry.
f. Yes, you can use a flint and steel with char cloth, or a bow and stick, but it does take practice.
g. Firestarters, fat wood, cotton balls, or makeup pads with wax or petroleum jelly
Light and fire are your friends at night. But cover your windows with heavy light-proof curtains. If your house is the only one with a light, then you may have unwelcome guests.
Candles: Your church may throw away the short stubs candles. Goodwill is also a good a source.
Having wax and wicks to make your own, along with candle molds.
Tea candles are cheap and will last about 3-4 hours. The bottoms of these get hot, so only burn them on a safe surface. Of course have a means to light them.
Solar pathway lights can be charged outdoors or on a windowsill and then used indoors. They can be recharged hundreds of times. However, over time the batterers will give out.
Oil lamps: You will need lamp oil or kerosene, or number 1 diesel fuel (smoky) in a pinch.
Kerosene lanterns: These only have at best 8-10 candle power with a ½-inch wide wick. They will burn between 1/2-ounce to 1-ounce of fuel per hour. One source is Lehman’s. Other things that you can use are charcoal lighter fluid, mineral spirits, or jet fuel. You could also use #1 diesel fuel in a pinch, but it produces a lot of smoke.
Headlamps. These keep your hands free to do things. They need batteries, so you should have a large stock of batteries (AA or AAA) that you use in your headlamps.
Generator for AC electricity: You get what you pay for. Higher-grade Honda and Yamaha have the better bearings, and the inverter types produce cleaner electricity. Kubota diesel generators are heavy duty and last a very long time, but costly. If you can, get a 4- pole, which runs at 1,800 RPM. These are more fuel-efficient and last longer than the more typical 3,600 RPM gas generators. Generators do go through oil, so have extra oil on hand along with lots of diesel or stabilized gas.
A solar flare or man-made EMP: If an EMP completely took out the electrical grid for a year in the USA, then we would have an 80-90% die-off in the big cities. Everything there and a lot out in the country depend on electricity, food transport, water, fuel transportation, et cetera. Your best chance of survival is to be away from large cities.
You only need to run your generator for 1-2 hours 2 or 3 times per day to keep the food in your freezer frozen or in the refrigerator cool. However, you will eventually run out of fuel. So try canning to save as much food that was in the freezer before it spoils. Generators make noise, which may attract unwelcome attention.
Food preservation: In times past, the pioneers worked all summer to get enough food put away to get through the winter. Knowing how to preserve food so it doesn’t spoil is very important. The old ways of food preservation are salting, drying, smoking, pickling, lactofermation, and a root cellar.
Canning
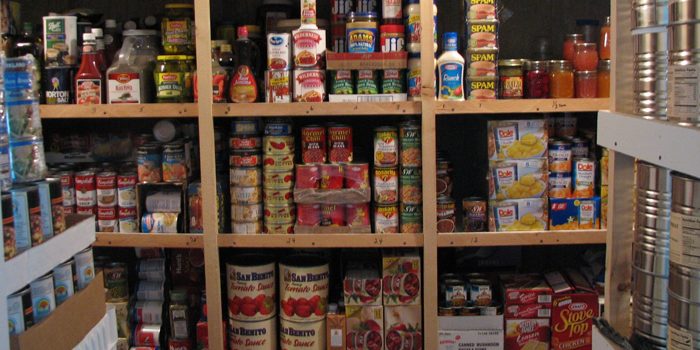
You need at least 365 to 730 quart jars of food for one year, if you are just eating out of canned food supplies for 1-2 people. (This is more than just canned veggies or fruit, as they don’t have a lot of calories.)
Buy lots and lots of spare canning lids, and an ample supply of jars. You can find reusable lids, examples are Harvest Guard and Tattler go to their websites. There are other types too. I have no experience with Chinese lids. However, by the grapevine I’ve heard their quality is poor and so I would avoid them. You can reuse the lids if you are very careful, in removing them from the jars.
get a pressure canner. The All American is one of the best, get one that will hold at least 7 quart jars or a larger canner. They are made in Wisconsin.
For canning directions, get a copy of Ball’s Blue Book of Canning, or Putting Food By, – Hertzberg, Vaughan, Greene. There are other canning books by many authors.
Use canning salt, as iodized salt may make some food taste bitter. You can get by with non iodized sea salt.
For dehydrating, one good brand is Excalibur. However other models work too. You can use a car interior (windows up) on a hot summer day, to dry food on a window screen (greenhouse effect).
Books
Salting/smoking: Great Sausage Recipes and Meat Curing – Rytek Kutas
Root cellars: Root Cellaring—Mike and Nancy Bubel
Food production
The thing to remember that for your family to be able to stay alive, long term, is to be as self-sustaining as possible. You will need to be able to produce the food you use, as you will eventually run out of stored supplies over time. One should also be prepared to help out others in need, if possible.
For a vegetable garden—you need seeds. Get heirloom (aka open-pollinated) seed varieties. This will take lots of practice, tools, how-to books, and some insecticides, but those are best avoided if possible. Don’t expect to have great production without some practice. Plan on 1.2 acres per person if this is your only food source. A great seed-saving book is Seed to Seed – Suzanne Ashworth.
This is where the old timers or grandparents who have the knowledge and know-how from the past to show you how to stay alive, they are very valuable sources for advice. Best to talk to them now while they are still around.
Depending on your available land area, consider:
- Chickens
- Rabbits
- Cattle/pigs/sheep/goats
- Fruit trees, best planted 5 years ago.
- Nut trees, best planted 10-15 years ago
- Fishing: You need equipment, skills, and a lake or river within walking distance. This is a good source of protein.
- Trapping is a quiet way to get food.
- Hunting: All game will more than likely be hunted-out within one year, seasonal duck and geese will be there only at certain times of the year. A pellet gun is quieter than a rifle and good for small game.
Shelter
Sheltering in place or at an out-of-the-way acreage or cabin. The best choice is a location on a side road to a side road. This is for safety, staying out of sight and out of trouble. You don’t want to become refugee, as this puts you at greater risk of things that are out of your control.
It would be wise to pre-stock a cabin with supplies before you need to go there. These supplies should be in rodent-proof containers. This is not only food, but also clothing, tools, a means to cook, and fuel. You will be limited in time and what you are able to transport in an emergency. Have several ways of getting there. Practice the routes and note what potential difficulties you may encounter in getting there.
Have a means to get to your home or to a bug-out place: A car or truck in good repair, always keeping the gas tank greater than ½ full. Keep extra gas on hand in 5-gallon cans, if you have a distance to cover. Long-term, gas storage needs a stabilizer.
An RV can be very helpful here as an alternative. However, they have very limited storage space.
(To be concluded tomorrow, in Part 4.)