


(Continued from Part 1. This concludes the article.)
BUILDING THE BOX
Again, if money isn’t a big concern, I’d recommend using a full sheet of plywood and corrugated polycarbonate greenhouse panels. This will not only give you a larger water heater, but be lighter and easier to move as well.
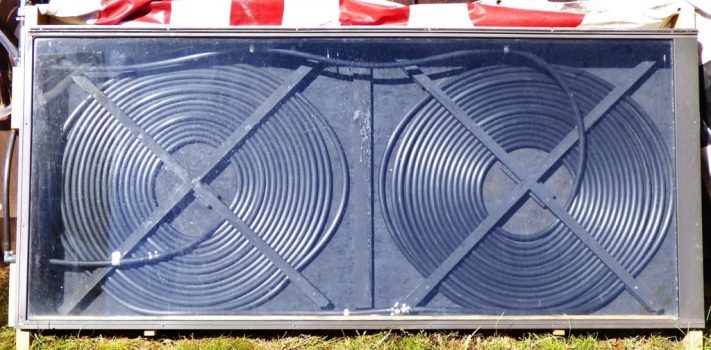
I constructed a double-coiled version using a free recycled, double-paned sliding patio door which, on sunny days, supplies more hot water than I can use. The construction method will be the same regardless of which size you choose to make.
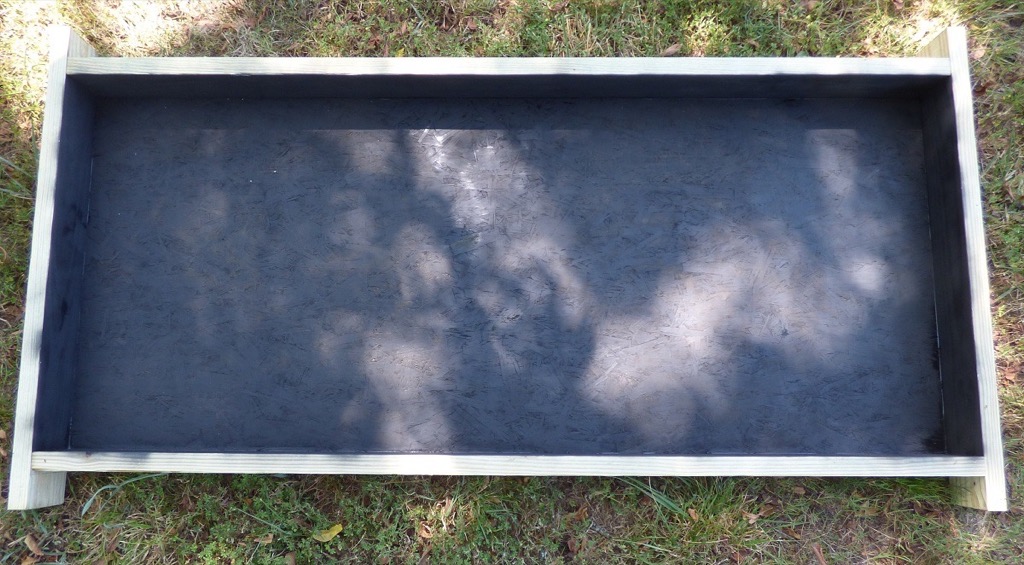
For the full-sheet-of-plywood version, use two treated 2 x 4 x 8’s (one for each sidebar of the frame) and one 2 x 4 x 10’ for the ends, cut in half to make two 2 x 4 x 5’. This will make the end pieces extra-long to act as legs which keep the SWH off the ground as seen in photo below. (The light spots in the photo are sunshine coming through the trees, not a lousy paint job.)
When building the box, make sure the outside dimensions of the box are the same size as your sheet of plywood. A quick sketch on paper ahead of time will help prevent making an expensive mistake.
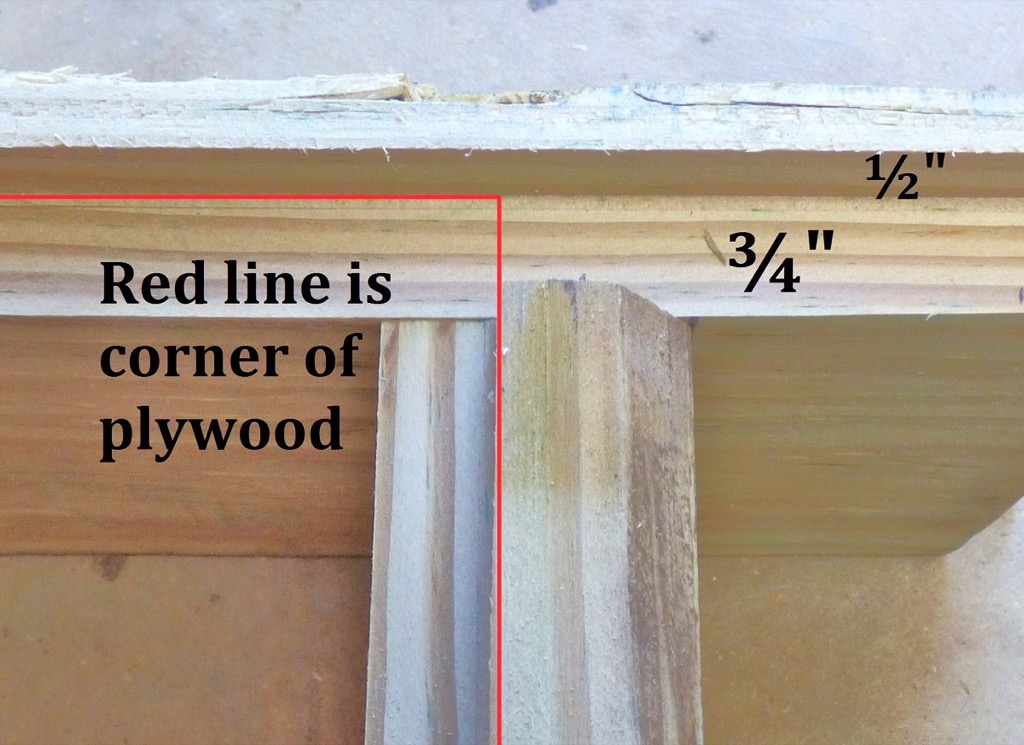
Once the frame is assembled with deck screws, a piece of plywood or chipboard is used for the bottom panel. Since plywood and chipboard both have a tendency for the laminates to separate when exposed to the elements, I prefer to countersink the plywood into the frame before painting, but this can also be accomplished by sandwiching the plywood edge between a 1½”-wide furring strip and the box frame.
Once the box is completed, paint the entire inside black.
SUGGESTIONS FOR WINDING THE COILS
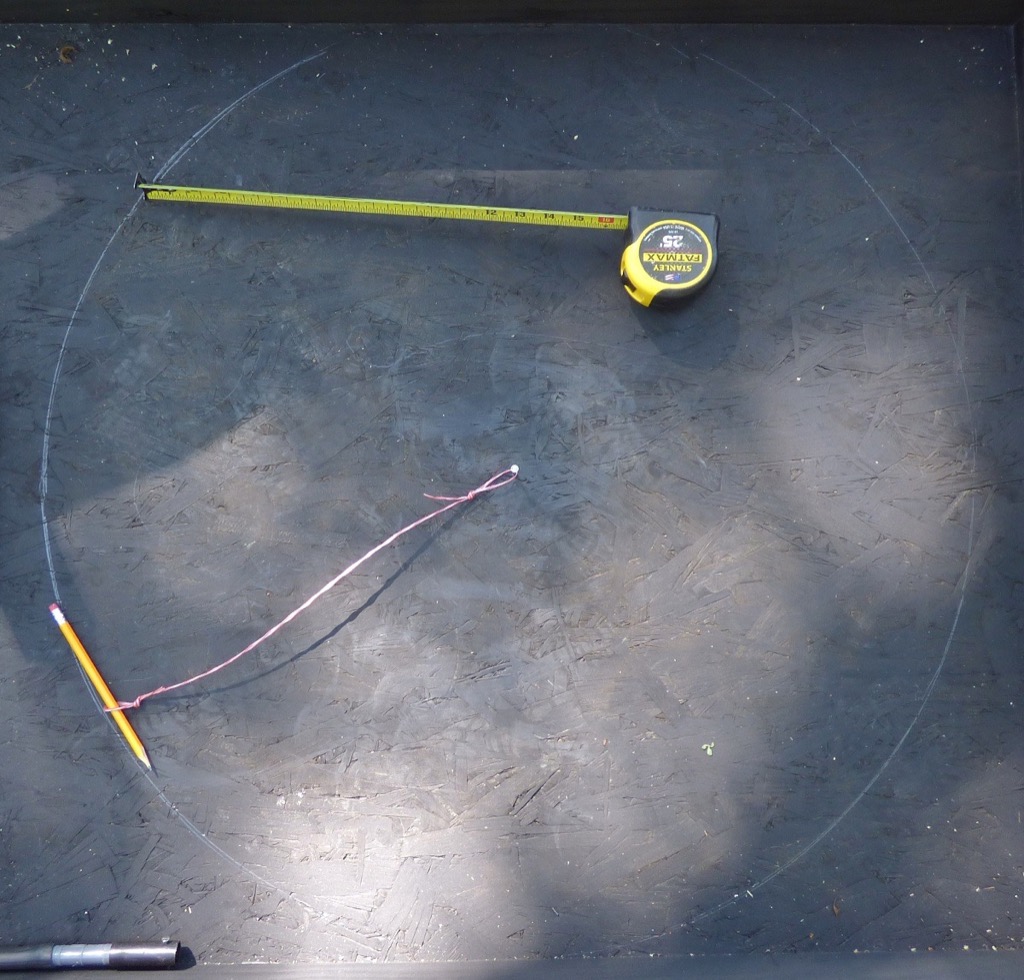
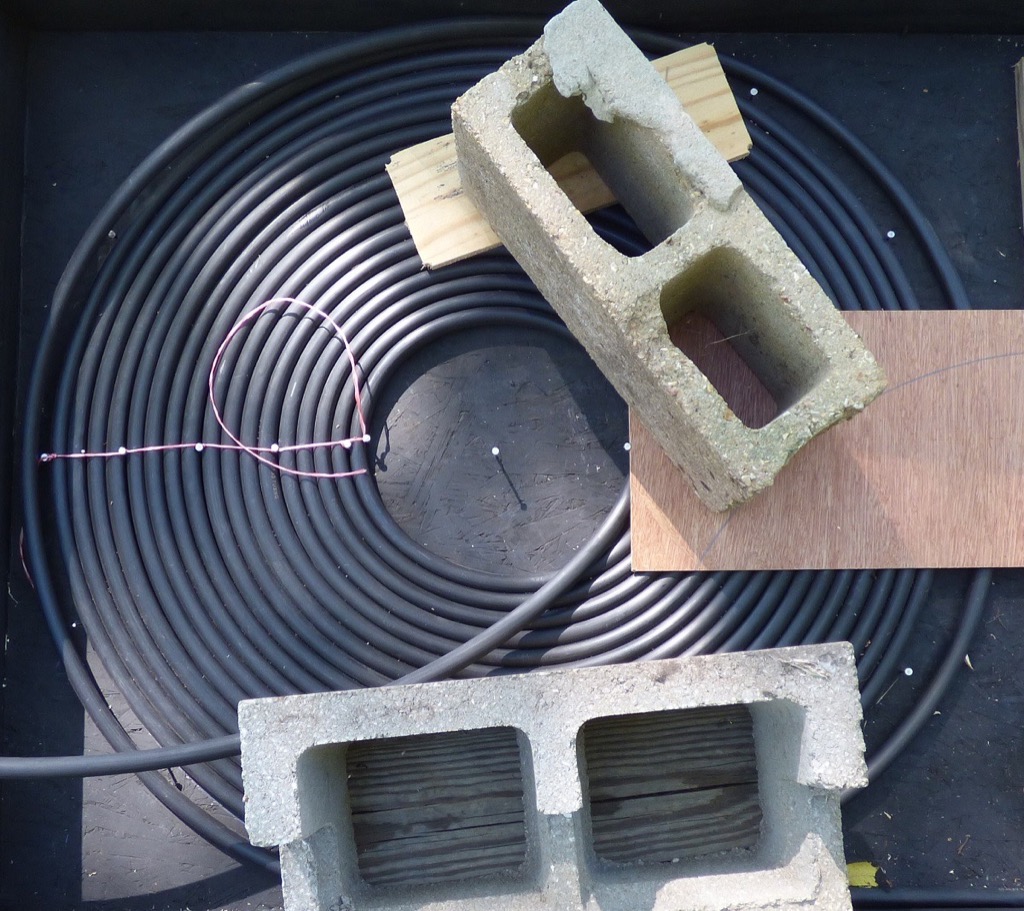
Winding the coils is the trickiest part of the project. First, draw a circle on the plywood as shown in Photo 6 by using a tape measure to find where the center of each coil will be, hammering in a small nail, then using a string to draw the outermost circle of the coil with a pencil or piece of chalk. Keep the circle ¾” away from the edges of the box to leave room for the first coil. Along the drawn circle, drive a small nail (8d work best) at each hour position: 12 o’clock, 1 o’clock, 2 o’clock, etc. These will help hold the tubing in the correct circular shape as you begin the coiling process and ensure that the innermost smallest coil will be round.
Rather than using a single long piece of tubing to make both coils, it’s easier to make them individually, then connect them with a barbed coupler. Be sure the tubing ends coming off the center of each coil are long enough to exit the box when both coils are complete. In the photo below, a short piece of tubing is nailed to the side of the box and attached to the coupler to temporarily hold the tubing firmly in place while the first coil is being formed.
The easiest way to deal with the Rain Bird tubing is to stretch it out into a long line before starting the coiling process.
Begin winding the first coil starting from the outermost circle and working inwards. The outermost coil in Photo 8 will be tightened up while connecting to the second coil. Also, notice the row of nails at the 9 o’clock position. These are added as the coil increases in size and string is tied between the nail heads to hold everything in place. The T70 tries to uncoil during the entire process so coiling is easier with one or two pairs of helping hands. If working alone, cinder blocks resting on small boards will help hold things together. As seen in the photo, I coiled this from the 3 o’clock position, kneeling on the small red piece of plywood to keep that section of the coil in place as I wound towards the center.
Once you get to the center the smallest circle should be no smaller than 10” in diameter to prevent kinks which restrict the water flow. Be sure to leave a long enough piece of tubing coming off the centermost coil to reach the outside of the box for plumbing attachments.
Once you’ve completed the coil, weigh it down with blocks so it stays together as you add a wooden “X” on top of the coil as a permanent hold down. The “X” is constructed and attached in such a way that all four arms are in complete contact with the upper surface of the coil. The wider the boards, the more sun they’ll block so narrow is good. I used 1¼” wide x ¾” thick boards, each notched at the center crisscross to form a flat X. Since the Rain Bird tubing is ¾” outside diameter, you’ll need some shorter pieces of board to hold the center and the ends of the X that high, as seen in Photo 9, and should be painted ahead of time. For better visualization in the photo, these were not painted until afterward.
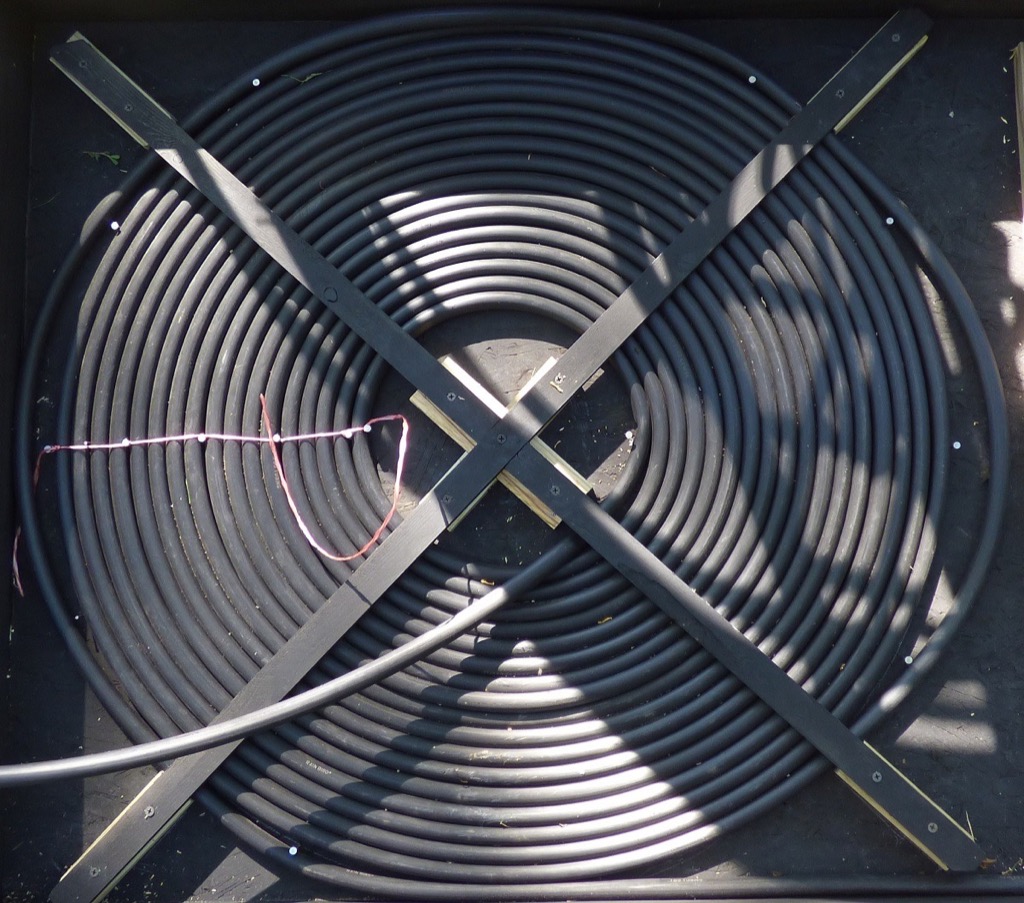
When adding the small support boards, four inside the coil and four on the outside, it helps to have them pre-cut, pre-drilled, and with 4d nails inserted as shown in the photo below. The nails poke through the plywood and are later bent over and pounded flat to provided extra holding power.

Make the second coil the same way, again remembering to leave an extra length at the end of the coil to reach beyond the edge of the box where the plumbing connectors will attach.
When making the frame, pre-measure the polycarbonate panels to fit the box as closely and tightly as possible. Don’t apply silicone to the frame or panels so the coils can be accessed more easily if ever necessary. The polycarbonate sheets have a corrugated piece of foam to seal the tops and bottoms, sold separately. Do not attach the glazing material until after the system test.
At the top of the box, drill a small hole for snugly inserting the point of a thermometer to monitor the temperature inside the box, then add a stout handle in the center of the top bar to make the SWH easier to move. Both are seen in the photo below:

Before attaching the glazing material, the plumbing should be finished and a leak test performed.
ATTACHING THE PLUMBING
To finish, plumbing fittings are added to the outside of the box frame so the SWH can be attached quickly and easily to the pump and/or main plumbing system, or removed for storage. Rain Bird makes connectors for this tubing but since they are more expensive and have to be specially ordered in my area, I used gray PVC barbed connectors available at any hardware store or home center. As mentioned previously, these fittings won’t work with Rain Bird T65 tubing so be sure to buy the T70.
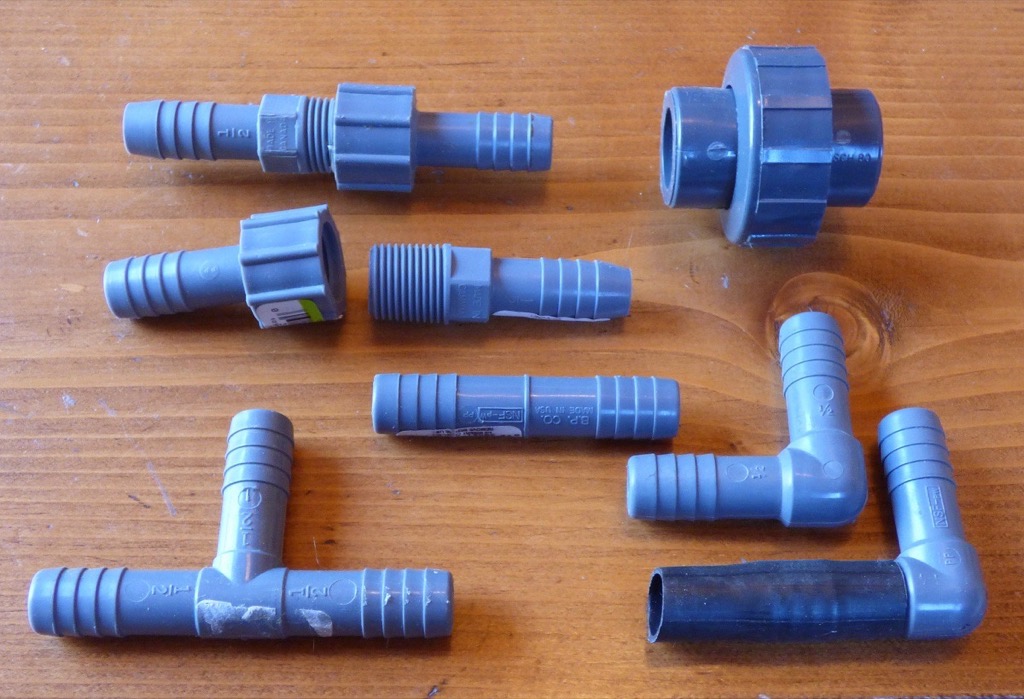
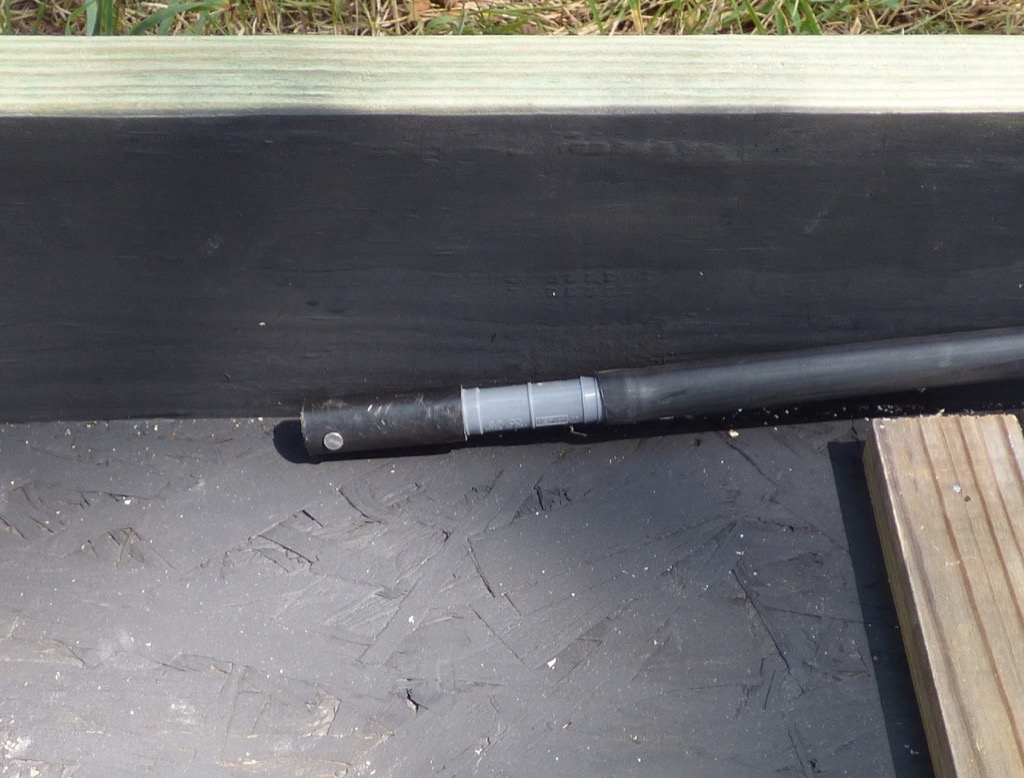
Decide which side of the frame the external plumbing should attach to based on your system design. Next, drill two ~¾” holes in the frame so the Rain Bird tubing can exit to the outside, then attach a female-threaded barbed adapter and an elbow as seen below. Keep in mind that the tubing kinks very easily so be gentle with it, make wide sweeping curves as you’re routing it towards the edges, and use plumbing or conduit clamps to firmly secure the tubing at strategic locations inside the box.
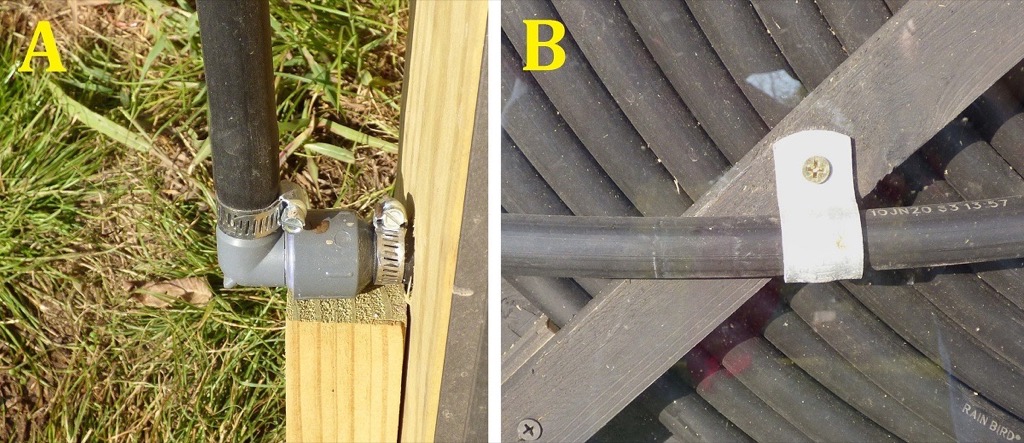
After attaching the barbed elbow at both exit points from the box, use more tubing above those to get to the top of the box as shown in the close-up of the uppermost section. Supports made from scrap lumber will help to reinforce the plumbing lines on the outside of the box. The exterior box plumbing will end with two barbed adapters for attaching flexible tubing.

Integrating a SWH With Existiung Plumbing
My SWH is attached to my regular plumbing system and circulates water from the electric water heater through the SWH and back again. The small circulation pump is inside the well house with two PVC ½” unions terminating just before the window. One half of each union is permanently attached to the well-house plumbing, and the other half attached to the SWH. To disconnect the SWH, the two gasketed unions are easily unscrewed by hand.
The flexible tubing should be rated for high temperatures. PEX, normally used in home plumbing systems, isn’t flexible enough so I used clear tubing which I had laying around. This can burst under certain circumstances so perhaps something like black automotive tubing would be better. Whatever you decide on, take a barbed adapter with you to the store to be sure you get the tightest fit possible.
I should mention here that when the SWH is not being used, the box must be shaded from direct sunlight. Mine has accidentally reached 170°F and while I’m curious to know how high it can go, I don’t want to find out the hard way if that can cause any damage. This is another reason to have a thermometer in the top of the box. To entirely block out sunlight, I use a thick plasticized “Sale” banner but anything opaque from carpet to plywood will work.
Most small solar pumps have threaded male connectors on each side. Connect a ½” barbed adapter to each side, then connect the ½” Rain Bird tubing to your system. This will give you more flexibility (in both senses of the word) than using CPVC to connect to your system. Be sure your plumber’s paste or Teflon tape is specially rated for CPVC so it can withstand the higher temperatures it will be subjected to.
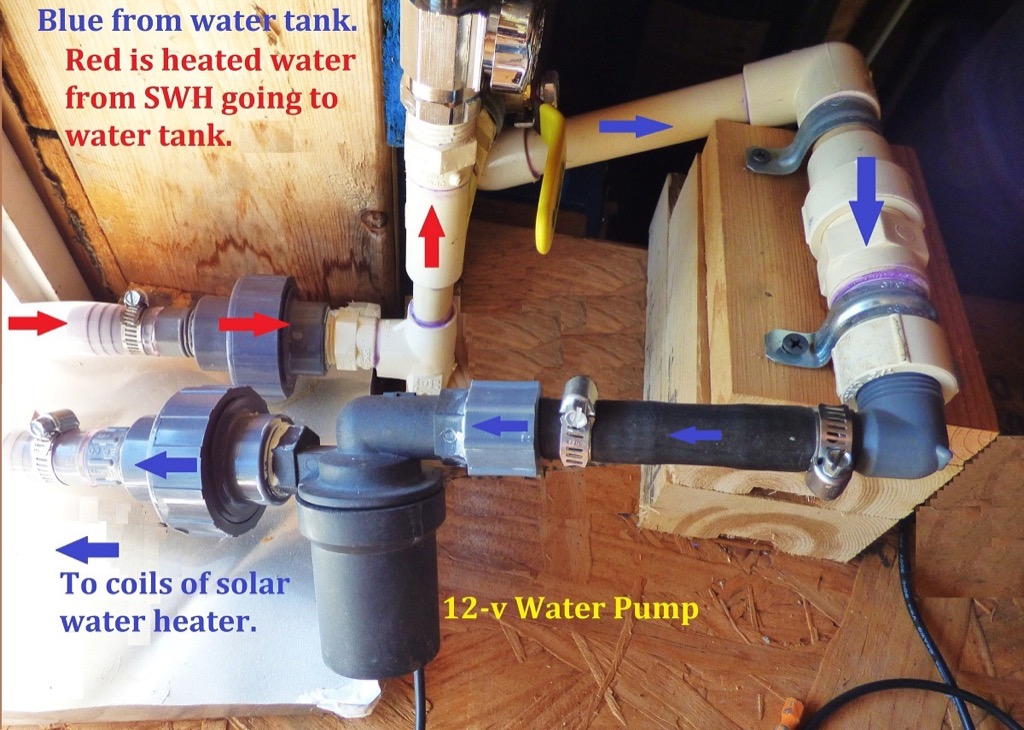
During pump installation, pay attention to the directional arrow on top of the pump to be sure it’s pushing water into the SWH, not pumping it out, making it easier to prime the line. Photo 15 shows how my SWH is connected to the main plumbing system.
Once everything is complete, connect the pump and take it on a test drive.
HOOKING UP AND TESTING YOUR SOLAR WATER HEATER
Whatever you’ve chosen as your hot-water storage tank, it should have shutoff valves somewhere along both the inlet and outlet lines of the pump, both of which should be in the closed position when the SWH is not in use. Bleed valves are also recommended for priming the system, removing air in the lines, and “burping” the lines to get rid of water pressure after the SWH is shut off.
Begin the test by opening the two in-line valves and priming the lines at least to where the pump is, then turn on the pump to begin circulating water through the SWH. Until you get in-line thermometers attached to your plumbing, use a cup and thermometer to check the water temperature as it exits the loop
During the test, look for leaks in the coils, water lines, and connectors. In order to minimize connector leaks, use the smallest-diameter hose clamps that will get the job done. Clamps that are too large distort as they are tightened and usually won’t form a watertight seal.
Once the test run has worked to your satisfaction and there are no leaks, put the glazing in place and start heating up some water!
ONE LAST NOTE
Keep in mind that your solar water heater is either heating water up or cooling it down. During insufficient sunshine it’s cooling the hot water coming from your storage tank in the same way antifreeze in your car’s engine cools down as it cycles through the radiator. For that reason, once you have attained the desired temperature in your water tank or the sun’s energy is no longer sufficient, turn off the pump, close the valves, and cover your SWH.
CONCLUSION
A solar water heater as described here is not difficult or expensive to build and requires no special tools. If you check the yellow Energy Guide sticker on the front of your water heater, you’ll see it’s one of the biggest energy hogs in your home. By using a solar water heater, not only can you save money today but you’ll also be that much more prepared for TEOTWAWKI and SHTF will stand for Solar Heater Totally Fabulous!
Have fun putting one of these together and if you’ve never worked with CPVC pipe or irrigation tubing before, maybe it’s time to add one more easy skill to your resume.