


Shooting requires constant, realistic practice to hone and maintain your skills with a weapon. This is especially true when preparing for the possibility of human beings attacking you or your family. Many people shoot for target practice or hunting, but they do not train for hostile encounters. Training with firearms for prepping must be intentional and planned, not merely a recreational activity. In this article I will show how to train for hostile encounters, including drills you can do with or without ammunition.
Given the enormous breadth of this subject, I will be limiting the scope of this article to range shooting drills with semiautomatic rifles. This will be divided into four sections: pre-fire, basic, intermediate, advanced, and expert shooting drills. It will begin with very common and simple – yet essential – exercises, and progress into more advanced drills meant to train your brain, eyes, and weapon to work together in order to successfully engage multiple targets under realistic and complex situations.
This article would be amiss if I did not discuss weapons safety. I implore the reader to always be careful around firearms, and to communicate and enforce the rules of weapons safety with each and every person he or she brings to the range. These five are especially important:
1. Always treat all weapons as if they are loaded.
2. Never point a weapon at anything you do not intend to destroy.
3. Keep your finger off the trigger until you are ready to fire.
4. Keep the weapon on “safe” until you intend to fire.
5. Always be aware of what is in front of, to the side of, and behind your target
Firearms are designed to kill, and there is not any margin for error when lives are
involved. Ensure that a range master is assigned and present, that each person understands the rules, and do not allow anyone to progress in training faster than he or she is ready. A range is not the place to have an ego.
After each person understands weapons safety, you can move on to the fundamentals of marksmanship. For anyone to become proficient and effective as a shooter, he or she must become an expert of these basic fundamentals:
1. Firing position
2. Sight picture
3. Breathing
4. Trigger squeeze
The three main firing positions are prone, kneeling, and standing. There are some differences while moving or firing behind a barrier, but they are very small. I will discuss each firing position in detail later in the article.
Sight picture is often misunderstood, yet it is essential to achieving a consistent shot group. In order to gain a proper sight picture, you will need to understand how to see, and what to look at, while shooting. ‘How to see’ refers to the shooter looking at the same part of the optic, from the same angle, every time. This is best achieved by placing your cheek on the same part of the buttstock every time. Some people place their nose on a certain part of the charging handle; others like to place the upper part of their cheekbones on a certain ridge on the stock; no matter which way you choose to position yourself with the weapon, just make sure it is consistent. Then you will consistently be looking at the optic from the same angle, achieving a good sight picture.
The aforementioned point of ‘what to look at’ refers to the shooter looking at the target, rather than the sight or scope. Too often, people look at the crosshairs or red dot, losing focus on the point they are aiming at. Shooters should instead focus on the target. Focus on the point you are aiming at, then meet the crosshairs or red dot to that point. You will be able to consistently aim at smaller points on the target, causing tighter shot groups. This is especially important when engaging multiple targets, as this allows you to transition between them with more speed and accuracy.
Breathing while shooting should be deep and natural. The more relaxed your body is when shooting, the more accurate you will be. This means you should never hold your breath while shooting. The human body is most relaxed and steady at the natural pause at the top and bottom of the breath – this is where you take your shot. If your shot group is vertical, then you need to work on your breathing.
The opposite is true for trigger squeeze – if your shot group is horizontal, then you need to work on your trigger squeeze. The middle third of your trigger finger should be on the trigger, not the first third. Your finger should be relaxed, yet firm on the trigger of your weapon. The most important part of proper trigger squeeze is not anticipating the weapon’s recoil. This can result in a tense shooter, causing the shot group to be spread apart. The trigger squeeze should be smooth and continuous as the shooter takes the slack out of the trigger and pulls his or her finger back; the shot should be almost surprising. With practice, this will become second nature, and your shot group will be tighter and more consistent.
Pre-shooting Drills
Each of these fundamentals must be rehearsed before firing live rounds. There are multiple drills that can achieve this; three of my favorite are dry firing, quarter drills, and laser drills. Each drill should be executed in multiple firing positions, and it can be remarkably effective.
Shooters should slowly execute dry firing should drills. Deliberately getting in the correct firing position, controlling breathing, gaining a proper sight picture, and executing a smooth and controlled trigger squeeze should take some time. Dry firing allows a shooter to practice all four fundamentals of marksmanship. Having a partner spot you, or even record you as you practice, will help you fine tune your marksmanship skills and become more accurate. Once you finish dry firing, then move on to quarter drills.
Quarter drills are very similar to dry firing. The only difference is that you place a quarter on the tip of the barrel as you dry fire. If the quarter does not fall off when you pull the trigger, then you have executed a good quarter drill. This focuses on breathing and trigger squeeze, as even the slightest shallow breath or trigger jerk could knock the quarter off the barrel. Finally, move on to laser drills.
You can do laser drills in a variety of ways. Military personnel have access to electronic shooting trainers, complete with special rifles and simulations. If you do not have access to these, you can buy a special SIRT bolt that goes into your rifle and emits a visible laser when you pull the trigger. This focuses on body position and sight picture, forcing the shooter to really focus on steady and consistent fundamental practice.
Additionally, I recommend practicing reloading and malfunction drills before you go to the range. In violent encounters, you do not want to be fumbling to reload a new magazine or to clear a malfunction in your rifle. Practice before you are ever in that situation. Dry fire and simulate having to drop your magazine, get a new one from your belt, ankle, or wherever you store your additional ammunition, and reload it. Ride the bolt forward and prepare to engage your next opponent. Similar to this is malfunction drills; dry fire and simulate having a malfunction. Slap the magazine, pull the charging handle, observe the round leave your weapon, release the charging handle, tap the forward assist, and prepare to engage your next opponent. You can integrate both of these drills into your range practice, causing you to become a much more competent and adaptable shooter.
Basic Shooting Drills
After reviewing the safety rules, the first thing you should do on the range is zero your weapon. This will adjust the sights where your bullets will impact at a specified distance. I prefer to zero my rifles at 25 yards, which allows for easy conversions for close quarters and mid-distance targets. If you have iron sights (always a good idea as a backup optic), I recommend zeroing these first. Afterward, zeroing your red or green dot sight will be super easy and quick.
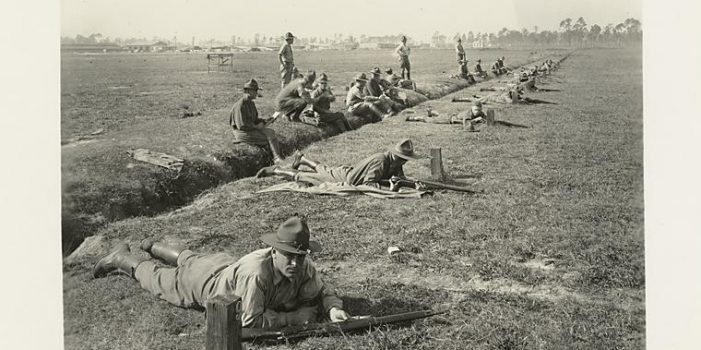
JWR Adds: Also, always wear eye and ear protection, unlike the soldiers pictured at the top of this article! I chose that photo out of historical interest — not as an example of how you should shoot, in the 21st Century.
Get in the prone supported position. Lay down on your stomach and spread your feet and knees out in a stable and comfortable position. Your feet should be facing out, allowing for a more stable position that can absorb the weapon’s recoil. Bring the rifle butt to your shoulder and place your cheek on the stock. You should be able to lay your rifle on a sandbag and obtain a clear sight picture without straining your neck or eyes. This position is great for zeroing your rifle, as well as firing at targets from a protected position.
You should have placed a zeroing target (readily available at ranges, gun stores, and on the internet) 25 yards away. Aim at the middle of the target, slow your heart rate, and smoothly pull the trigger at the bottom of your breath. After five shots place your weapon on safe, clear your weapon, and move down to see your target. Your shot grouping should be within an inch of each other. If not, go back and keep practicing until you can get a consistent shot group. Then you can adjust your sights in line with the manufacturer’s instructions and the directions on the zeroing target. Pretty soon you will have accurate and consistent shot placement right on the center of the target.
Now you have both zeroed your weapon and practiced marksmanship in the prone supported position. The next step in progression is the kneeling supported position. Get on one knee, with your firing knee on the ground. Pull the rifle back into your shoulder as you place the rifle on a table. Obtain a clear sight picture and smoothly pull the trigger. This is the kneeling supported position.
The standing supported position starts with your stance. Either square up to your target, with your feet slightly wider than shoulder width, or slightly stagger your feet. Bring the rifle up to your shoulder and place the rifle on a table. Obtain a clear sight picture, breathe, and shoot.
Remember that in each of these static supported positions, the sandbag or table is to your advantage. Lean into it, causing the rifle to more fully seat itself into your shoulder. This will help you absorb the recoil and maintain a better body position. Each of these supported positions allows for you to obtain a clear sight picture without exerting much energy. In addition to being a great drill for beginners and refresher for experienced shooters, this is very applicable to barrier drills, which I will explain further in the article.
(To be concluded tomorrow, in Part 2,)