


Night Vision, Thermal Vision, Wireless Video, EMP Protection
I decided now is the time to put this together because the consistent theme in every prepper blog and financial publication today is that TIME.IS.RUNNING.OUT. Even non-preppers know something is up because it is starting to pop up now and then in random conversations. Many average people are finally realizing that something is different this time. However, they mostly still want to complain and do nothing, but at least it’s a start. In the meantime, the more motivated among us are making ready for the pending disruptions we know are coming. This remains an excellent strategy to provide for loved ones and do what we can to help put the pieces back together. Having a plan and working it is critical, and priorities should be reviewed frequently. Yet, even up to the end, we will all have loose ends and things we wish we could have gotten done, realized, learned, or bought sooner. That is why Survivalblog is such a valuable resource; it’s a sort of knowledge base multiplier, if you will. I am very thankful to JWR and company for the invaluable tips and skills I have received here. To do my part, I have compiled this affordable force multiplier rundown to help us all stay sharp. The big takeaway here is that the price points and features for important preps, like night vision, thermal vision, and similar tech, have finally become affordable for the masses. I own and use most of the items discussed here, and I have no financial stake in any of them. If I own it, it’s because I bought it.
Force Multiplier Defined
Let’s start with a good paraphrase of the DOD definition of a force multiplier: an item or capability that a combat force can use to significantly increase its combat potential and increase the likelihood of a successful mission. That’s a little general perhaps, but by that definition anything that can extend your reach for information, communication, planning, and force projection would be considered a force multiplier. What follows are the pertinent details on four affordable and very functional solutions that are available today. Best of all, you can add them to your kit at a cost far less than you expected. The cost of these items makes it relatively easy to overlook their limitations yet still benefit from what they do offer. If you find you want the full-price full-featured version later, you will then be making a more informed decision and can start saving your money now. This progressive approach makes sense when operating on a budget. It is the rationale that gives credence to my choice to carry a $100 Hi-Point 9mm pistol until I could afford the Glock 17 I wanted. Having the inexpensive but functional Hi-Point still allowed me to project plenty of force until help arrived in the form of the Glock.
Night Vision
I asked myself if I should invest in Budget Night Vision from $50-Kids toy or something more? I will be the first to admit I have dreamed about having decent night vision since Prep Day One. My inner grown-up kept saying that I had to wait until the other important stuff was done. When I finally bought a Gen 1 scope that could double as a rifle sight, I tried it out and instantly sent it back to recover my $350. Then I stumbled across a little CMOS monocular IR camera setup for kids that really can see in complete darkness for a paltry sum. Read on before you blow this idea off completely. I bought the Jakks Pacific Spynet Night Vision goggles on Woot.com for $25 about two years ago. I figured I’d give it a try, and what I got amazed me.
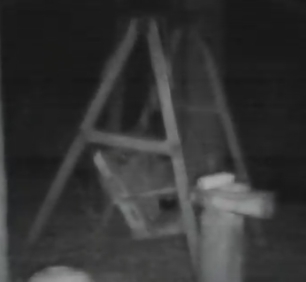
It’s sure no PVS14-Gen3, but it’s not $3000 either. The link here to Amazon shows it as discontinued but available from third party Amazon retailers. I included the Amazon listing because it has hundreds of reviews worth looking at.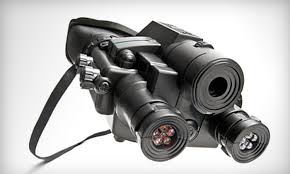 You can also purchase this model on eBay for about $50 in new and/or good used condition. What looks like a set of binocular lenses are really two IR illuminators. The center aperture is a single-lens CMOS chip that outputs to a 320×240 res color display that’s about 2 x 1.5 in. It displays on a tiny screen set out at viewable distance inside the viewfinder. You ask, “Does it work?” Linked below is a video recording that suffers some loss of clarity from the secondary recording with a handheld video camera. It still shows good detail, and this is what you see. Below is an actual frame from the USB stick and is more like what you will see through the viewfinder. This was a dark night with the single IR illuminator from about 15 feet away.
There’s no depth perception, but it is quite usable. To operate the Spynet unit, turn it on, and the camera and display screen power up in about two seconds. The first of the IR diode sets also comes on. The red LEDs are not bright enough to be easily visible to the naked eye, but you now own the amazing ability to see in a pitch black room clearly to about 25 feet. I was able to read a paperback book in a pitch black room (yep, the bathroom) with it. Turn on the switchable 2nd Illuminator and you can see on a very dark night out to about 75 feet with good discernment. Those LEDs are slightly visible to the naked eye but really make a difference. The unit does not magnify light, but on a starlit night with the IR covered I still got a decent image. Also, if you can believe it, you can record what you see on a USB stick for later playback. The record function has a dedicated on/off switch. So pony up your fifty bucks, and invite your friends over to your basement for some Pitch Black Airsoft fun, and record it for bragging rights. Want to use it hands-free? There is a second version called the Eyeclops that works exactly the same, but it has straps for head mounting, freeing up both hands. It ranges from $70-$100, and there are plenty listed on eBay. Both units use four AA batteries and provide hours of use from one set. My Sanyo eneloops worked great in mine.
A few final things to remember: To someone else with night vision, you stand out like a road flare. So, if you under assault, it might be time to pass it to your brother-in-law for a sitrep. Also, these are priced like a kid’s toy because that’s what they are. They are surprisingly rugged and of reasonable quality, but they are not waterproof and are definitely consumer level rather than commercial. That said, I’ve used mine weekly with no issues.
Thermal Vision for Your Android Device and iPhone/iPad
Do you want thermal vision but hate the $1500+ price tag? How would you like to have it for a price of less than $300? I knew it had to happen eventually, and it finally did. Functional, color, thermal vision is now available to the masses for under $300. In fact, there are actually two companies with credible solutions competing for our hearts, minds, cell phone ports, and credit card numbers. These two products stand alone in a new market segment called Personal Thermal Vision with a very attractive price/performance class. Both are small and easy to use with the smart phone you supply. Both require a free app download. Both are relatively inexpensive, and they both work.
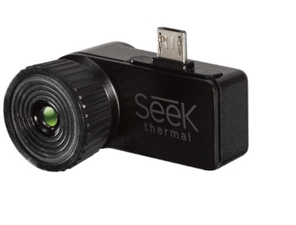
SEEK Thermal makes a very small plug-in camera available as either the standard version or extended range version called the XR with 2x magnification. Both connect through the charge port to an Android or iPhone 5/5s. Shown here is my standard Android version.
I shot this image at my desktop with me holding the SEEK Android attached to my 1st gen MotoX in one hand and my Olympus camera in the other. 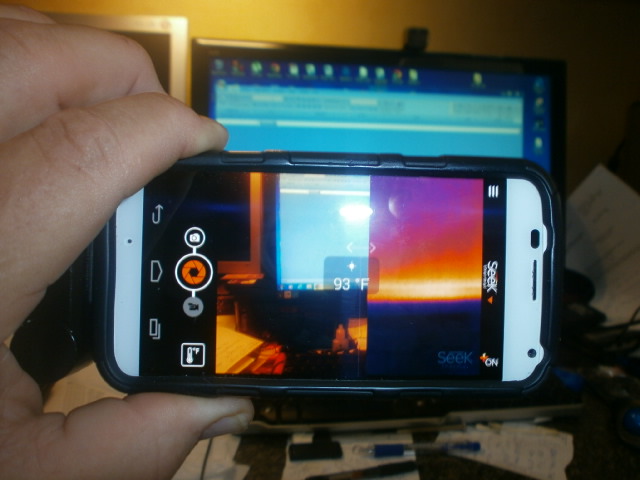 You can see the hot spots on the monitor and the split video/thermal that I swiped to about 50% each.
SEEK Thermal’s competitor is FLIR Systems, a company with a long history of thermal imaging innovation that has recently entered the personal thermal market. Their unit is larger, adding a full-coverage back with a built-in thermal lens.
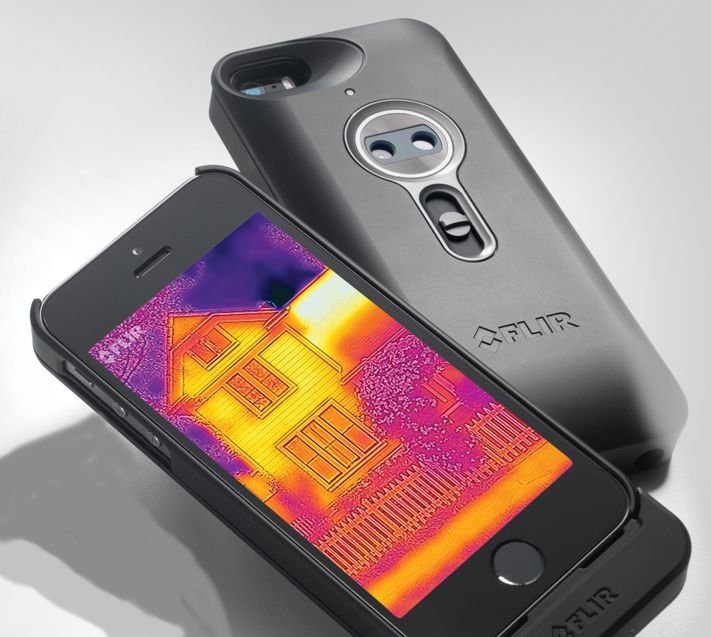
They only offer an iPhone 5/5s or higher version at this time. There is an Android version promised sometime in late 2015. In addition, they also offer a stand-alone unit about the same size as a FLIR-equipped iPhone. It is dubbed the C2, and at $699 it is one order of magnitude above the budget devices listed here. Unfortunately not having an iPhone 5 means no FLIR One comparison from me, but there are a number of comparison reviews with photos out there, like this one from Wired magazine.
Here is a quick rundown of my experience and some links for more detail, so you can make your own choice. First, here is the quick side-by-side comparison of the specs from the manufacturer’s websites.
|
Feature |
FLIR One |
SEEK Thermal |
|
iPhone |
iOS 8+ |
iOS 8+ |
|
$199 |
$299 |
|
|
Android |
Soon 4.3+ |
v4.3+ |
|
$NA |
$249 |
|
|
Resolution |
80 x 60 |
206 x 156 |
|
Image |
Thermal |
Thermal |
|
Upgrades |
None |
|
|
Temp range |
-0 to 100C |
-40 to 300C |
|
Battery reqd |
Yes |
No |
|
Calibration |
Manual |
Auto |
Image note: The FLIR One enhances its low-res thermal image using an overlay of grayed-out video for a pretty useful image. The SEEK version displays either thermal or video but does not overlay like the FLIR One. Both units allow you to finger swipe to split the screen 0-100% between the video image and the thermal image. SEEK also offers a wide array of color schemes to display the thermal images that are helpful, depending on what you are looking at.
To say it is “way cool” doesn’t even begin to describe how much fun and how practical this is. I’ve used it to see the rabbits in the desert at night from about 50 yards and I found the hot spot where my car’s cooling system was restricted and the hot breaker in my panel box from a loose connection (yikes!). Best of all, I can find my kids within seconds while playing hide and seek in the back yard at dusk. It’s not called a force multiplier for nothing. Bwah-ha-ha!