


Rabbits
On the evening of the first night of being in the instructional phase of our USMC Mountain Survival Course, we were handed a pet shop rabbit. The Marine Corps had bought a batch of larger farm raised rabbits, only to find out they carried the nasty Tularemia (rabbit fever). They discovered the disease after looking at the first rabbit’s liver, which was spotted white/yellow and/or swollen. They weren’t willing to accept the risk of disease transmission. So, they searched all the nearby pet shops and bought up all the pet bunnies they could find. Those bunnies were small and cute instead of large and fluffy and full of meat. Mine was black and white. I had always wanted a pet rabbit. Just the same, I didn’t bother naming him since he looked tasty.
Butchering a Rabbit
Using one as an example, the instructors showed how to kill, skin, and butcher them. A large portion of the class had never hunted anything except humans. Therefore, eating what they killed was new to them.
The instructors taught us the “broomstick” method for killing the rabbits. First, we pet the rabbit to calm it. Then, we put our boot on its head and snapped the spine with a clean jerk. This looked easy when they showed us and seemed easy in theory. I tried it. Mine just got really scared and angry. I couldn’t get it to hold still enough to put my boot back over its head to try again, so I used my Tanto. There was a lot of neck breaking failure going on around me. It seems brutal. But it is much more humane than how animals die in the wilderness– eaten alive.
Earing Rabbit
We ate everything, including the eye balls. (They are squishy on the outside and crunchy on the inside.) I don’t recommend eating something that will make you vomit. Don’t waste your food like that. It’s probably 25 calories anyways. You will lose more calories and fluid throwing up than you would have gained. I boiled my rabbit and made kind of a broth. It wasn’t too bad, but I regretted not putting salt in my Survival Kit.
Using the Hide
We were shown how to brain tan the skins, as another course requirement was to use the hide to make something during the course. I made a sheath cover for my Recon Tanto. It smelled and attracted flies. So I was glad I didn’t make a loin cloth.
Day Two and Three
The second day was spent with more bow and drill time. We had a few nature hikes wherewe looked for edible plants and animal sign. Did I mention we had more bow and drill time? We had lots of it. People were getting hungry. A lot of plants were eaten, along with a few bugs and no animals. I got an egg from my chicken and boiled it for brunch. The guys with roosters weren’t too happy.
Killing and Eating Our Chickens
On the third day, we killed and ate the chickens. Again, this was first demonstrated by an instructor. If you haven’t seen 26 military men trying to kill chickens with the “snapping the neck” method, hilarity ensued as angry feathered birds flew in many directions as they slipped out of hands. Mine did. Once I chased it down and caught it, I used my knife again. After plucking and gutting the carcass, I cut the meat off and boiled it, eating half and saving the rest. After seeing the Polish Commando pluck then roast his chicken whole in its skin over the fire and eat it, I regretted not doing the same. I wasted some valuable calories there.
Goat and Chicken Meat
On the fourth day, they turned two goats out for us to eat. We chased them down, killed them, ate them, and wore their skins. Only we didn’t wear the skins; there wasn’t enough to go around. Again, hilarity. At this point a lot of spears, bolos, atlatls, and clubs had been fashioned– all sorts of things. And men were flying through the air. In the end, it was cornering and tackling the goats, and slitting throats that did the work. We ate well that night with a handful of roasted meat for each of us. The rest we strung over the fire on our snare wire and slow cooked over the night into a sort of smoked jerky. Being our last night before the second phase, I ate the rest of my chicken as well.
Moving On
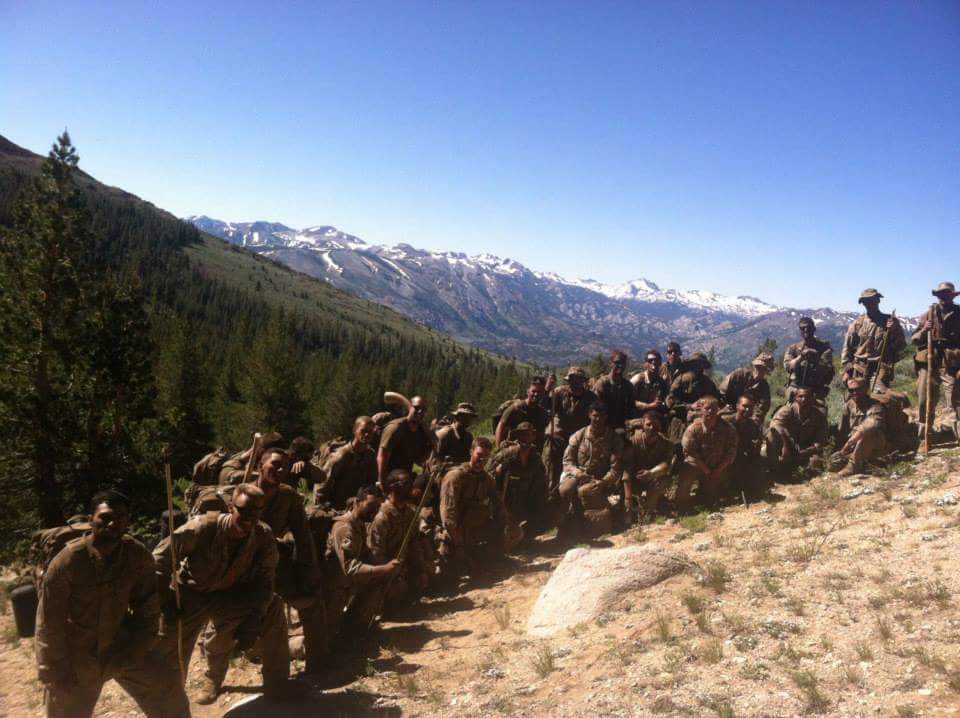
The morning of the fifth, we tore down our shelters. We split the goat jerky evenly (a handful each), loaded up, and went for a hump. We moved several clicks further into the woods, following the stream up the mountain. When we reached a large grass clearing with an ammo can on a log in the center, we stopped. The ammo can was for proof of life. Every morning we were required to put out the fires and go down to the clearing, avoiding all other contact, and sign our initials on the log sheet inside the ammo can to prove we had survived the night. If there is no signature, the instructors come looking for you and the bear that probably ate you.
Second Phase – Individual Survival
Isolation
Each instructor took a group into the woods and dropped us off one by one at our isolation sites that were scattered through the valley. For the indeterminable future, we were on our own. I would say we were far enough that no one could hear you scream. Yet, I did faintly hear someone screaming obscenities once. Still, we were pretty far apart.
Immediate Goals
We had been taught that there are certain goals to attain during the first 24 hours. You need shelter, fire, and a signal for rescue. During the following 24 hours, you are to find food and water and improve your situation. After the first 48 hours, you either keep improving while waiting rescue or make the decision to move. If no one is looking for you, you have to move. If they are looking for you, get that bonfire pyre ready to light and keep an eye out. (It is important to think smoke not flame. Flame isn’t very visible during daylight. Use fresh pine branches with lots of quick to light dry kindling and such below it. Toss in a burning stick from your campfire onto the kindling and send a smoke signal.) If you move, remember that water leads to civilization.
My Shelter
I set about making my shelter; a basic lean-to in a cluster of large rocks and trees to block the wind. I lashed a stout branch across two trees that were conveniently spaced and then placed cut branches from the top of that to the ground. This gave it just enough angle and height that I could sit under cover and fit laying down. I draped my space blanket over the vertical supports and piled cut leafed branches and dirt over the top of that. This was just tall enough that I could hunch over in front of the fire in a sitting position and be under cover. The space blanket helped reflect heat back on my body. On the ground, I piled fallen pine needles several inches deep and folded the tarp in half on top of my “bed” to sleep inside of.
In front of the bed, about 18 inches away, was my fire that I started with my knife and magnesium sparked onto Vaseline-coated cotton balls. Past the fire, I built a rock wall two feet high to reflect the heat back into my lean-to and shelter it from the wind.
Signaling
For signaling, I took my signal mirror and hung it from a nearby tree in a windy opening on the side of the hill so it would spin and reflect the sun. Then, I created numerous arrows on the ground, made from logs and sticks in a circle around my area pointing towards my campsite. I tried to get as many of these in the open as possible for any airplanes searching the area. It also was clear in any easy avenues of approach for searchers. Near my fire, with plenty of open space around it, I built a smoke signal that could be lit within moments of seeing or hearing rescuers.
At the campsite, I took my ILBE Waterproof bag and turned it inside out so the orange side was out. Then, I filled it full of water to keep next to the fire in case of an emergency. This was for two purposes– both for signaling to find my campsite, as it stood out well, and required by the course to prevent a possible wildfire.
Food on Day Two
The second day in isolation, I gathered some edible onions around my shelter and boiled a broth with a piece of goat jerky for lunch. I used the entire wild onions– stems and bulb. It still tasted bland.
Heat
The area we were in was extremely dry. All of the fallen trees and branches were bleached white from the sun and burned quickly. The amount I had to stockpile to make it through the night took several hours a days. At night, the temperature would drop to the high 30’s (Farenheit), and as the fire died down you would wake cold and have to add wood onto it. Unless you wanted to get in and out of your shelter, you had to keep the wood within reach. I put mine stacked on the outside of my shelter near my head. When I woke up to the fire going down, I could slide a little out and reach for more.
If you are thinking this is a fire hazard, it is. One of the snipers woke up to his shelter on fire. As he jumped out of it, it collapsed on him and fractured his hand. He still finished the rest of the course with a bandaged hand and in a considerable amount of pain.
Further Reading:
SurvivalBlog Writing Contest
This has been part two of a five part entry for Round 71 of the SurvivalBlog non-fiction writing contest. The nearly $11,000 worth of prizes for this round include:
First Prize:
- A $3000 gift certificate towards a Sol-Ark Solar Generator from Veteran owned Portable Solar LLC. The only EMP Hardened Solar Generator System available to the public.
- A Gunsite Academy Three Day Course Certificate. This can be used for any one, two, or three day course (a $1,195 value),
- A course certificate from onPoint Tactical for the prize winner’s choice of three-day civilian courses, excluding those restricted for military or government teams. Three day onPoint courses normally cost $795,
- DRD Tactical is providing a 5.56 NATO QD Billet upper. These have hammer forged, chrome-lined barrels and a hard case, to go with your own AR lower. It will allow any standard AR-type rifle to have a quick change barrel. This can be assembled in less than one minute without the use of any tools. It also provides a compact carry capability in a hard case or in 3-day pack (an $1,100 value),
- An infrared sensor/imaging camouflage shelter from Snakebite Tactical in Eureka, Montana (A $350+ value),
- Two cases of Mountain House freeze-dried assorted entrees in #10 cans, courtesy of Ready Made Resources (a $350 value),
- A $250 gift certificate good for any product from Sunflower Ammo,
- Two cases of Meals, Ready to Eat (MREs), courtesy of CampingSurvival.com (a $180 value).
Second Prize:
- A Model 175 Series Solar Generator provided by Quantum Harvest LLC (a $439 value),
- A Glock form factor SIRT laser training pistol and a SIRT AR-15/M4 Laser Training Bolt, courtesy of Next Level Training, which have a combined retail value of $589,
- A gift certificate for any two or three-day class from Max Velocity Tactical (a $600 value),
- A transferable certificate for a two-day Ultimate Bug Out Course from Florida Firearms Training (a $400 value),
- A Trekker IV™ Four-Person Emergency Kit from Emergency Essentials (a $250 value),
- A $200 gift certificate good towards any books published by PrepperPress.com,
- A pre-selected assortment of military surplus gear from CJL Enterprize (a $300 value),
- RepackBox is providing a $300 gift certificate to their site, and
- American Gunsmithing Institute (AGI) is providing a $300 certificate good towards any of their DVD training courses.
Third Prize:
- A Royal Berkey water filter, courtesy of Directive 21 (a $275 value),
- A custom made Sage Grouse model utility/field knife from custom knife-maker Jon Kelly Designs, of Eureka, Montana,
- A large handmade clothes drying rack, a washboard, and a Homesteading for Beginners DVD, all courtesy of The Homestead Store, with a combined value of $206,
- Expanded sets of both washable feminine pads and liners, donated by Naturally Cozy (a $185 retail value),
- Two Super Survival Pack seed collections, a $150 value, courtesy of Seed for Security, LLC,
- Mayflower Trading is donating a $200 gift certificate for homesteading appliances,
- Montie Gear is donating a Y-Shot Slingshot and a $125 Montie gear Gift certificate.,
- Two 1,000-foot spools of full mil-spec U.S.-made 750 paracord (in-stock colors only) from www.TOUGHGRID.com (a $240 value), and
Round 71 ends on July 31st, so get busy writing and e-mail us your entry. Remember that there is a 1,500-word minimum, and that articles on practical “how to” skills for survival have an advantage in the judging.
I’m enjoying reading this. I work at a hospital where many of the guys that get evacced wind up at.
Pneumonia, exposure, Rhabdo and high altitude sickness are frequent problems. It’s surprising how fast an outdoor exercise can tear down healthy, fit young soldiers! Any prepper that thinks they are going to have an easy time in the woods had better think again.
Thank you!
To all preppers I certainly recommend GETTING OUTSIDE. Put your skills to the test. Things are always easier in thought than action.
Next time use the Siberian log fire, small or large Siberian log fires all work the same way, once setup they will burn for 8 to 10 hours, also very effient at reflecting heat back to the user.
I had never heard of this before. Looking at videos it seems like it would work, but I would be cautious of the fire burning along the log away from me. The entire area I was in was a massive fire hazard.
But another tool for the toolbox. Thanks for the tip! Always good to learn new techniques to staying alive and WARM.
E.T.
Thanks!, two points, the fire doesnt burn away from you because you end up waking during the night, remember no one sleeps for 8 hours straight in the wilds do they ? noises wake you etc , animals move around , birds chirp etc, your brain is quickly alert,so you would check your fire, correct ? plus fire prep the area ! I have used this fire in Australia snow,rain all seasons for years, its been used in the taiga for centuries, nothing worse than freezing at night is there ? by the way,for instant shelter I use a Russian Plash Palatka, beats the brush/ debris shelter in dozens of ways, look it up.
Enjoyed your article.
Siberian log fire
https://www.youtube.com/watch?v=vdcyIr3skbM
Awesome article. Made me laugh. Leaned much. Thank you.
Thank you very much! I’m glad you learned and got some laughs!
This has been an interesting read. I like the humor he has added to his story.
Thank you Tracy!
I have an odd sense of humor for sure…
A Dakota fire pit will save enormously on firewood. A modified one using a 3-4 ft long trench. Large flat stones over the middle, sealed with mud makes a good “stove”. I have used one in pouring down rain under a tarp. Use the exit end to dry the wood and cycle through. A flat stone there to cook on too. Not as visible as a traditional fire which may be a plus in a combat environment.
My biggest concern at the time was warmth, but that is certainly something to keep in mind. This looks like something an E-Tool would be perfectly suited to dig out.
Adding a few small animal snares would reduce food hunting time quite a bit. Why was there not training on them and adding them to your kits? several small ones weigh very little and cost very little?
We were trained on them and we had brass snare wire included in our kits. Later we found the mountains cross-crossed with lots of old Comm Wire that could also be used. We had some success in this, which I chronicle in later articles.
Absolutely worth having.
A ‘Force multiplier’ of sorts in your ability to acquire game.
1) Did the course cover any techniques for excape and evasion? Trying to survive in cold weather but being unable to build heating fires because they will be seen by the enemy seems like a difficult job to me– especially with today’s FLIR night vision.
2) Also, does the aluminum in the space blanket make it a major radar beacon? Which would be good for attracting rescuers in peacetime but bad for attracting the enemy if evading.
3) But conversely, does the space blanket shield your body heat from FLIR providing it isn’t touching your body surface? Would plastic work as well for a shield?
4) Some of us older guys have what Mel Tappan called a “cleverly contrived modular food storage unit” around our waists and might survive starvation longer than lean and fit young men. At least, that is what I tell my wife over the second helping of pie.
5) I was impressed by what I saw on the Internet re the courses in Nordic skiing that the Marines have at Bridgeport and the Army has at Ft Wainwright in Alaska. Old School technique (christy, telemark turn) but far more practical for backcountry travel than what we civilians do at Alpine ski resorts and with skinny Nordic skis suitable only for groomed Nordic courses.
1. While the Instructors were graduates of SERES schools and some very brief mentions about their course (everyone I’ve met tends to be pretty tight lipped on it), we never went in depth on that. The only techniques that came to mind is stuffing our clothing with as much ‘insulation’ type material as possible and trying to get out of the elements. I remember reading books about kids holing up inside haystacks during blizzards, but I don’t know if that’s just fiction or possible. Later parts of this article will discuss what happened when the temperatures went sub-freezing.
2 and 3. From what I gather the Mylar Blanket will defeat FLIR. But I don’t know enough about this to give an educated opinion. It will certainly attract attention though!
4. Those of us who put on extra weight leading up to the course were certainly glad we did. The fat stores helped, but we were still very mobile and agile. If you can’t touch your toes…well… in the wild the fattened calves get eaten first! (And at home…hmmm)
5. They did offer a Winter Survival Course in January after mine. I’m not sure how it went, but I suppose it was pretty miserable. I know the winter before I arrived a training battalion had a guy INTENTIONALLY give himself frost bite on his fingers (stuck them in his canteen with water for long periods of time) to get out of the field. That was just regular training. A couple of the Snipers had taken the Mountain Skiing Course in Bridgeport and had some stories to tell!
Time to schedule a fire-making competition among our group. It’s raining again. Ever watch the first two seasons of Alone? It’s five degrees warmer and wetter in our Puget Sound area. Very hard to find anything that isn’t either growiing green full of moisture or dead wood soaked full of water. In our case the teepee shape fire burns better than laying pieces in a square, but sometimes we build a layer of wood like a scaffold over the fire to get it to dry.
I really appreciate the author mentioning a heat reflector. Laying up rocks is good but you can even make a wooden wall- or better yet a two-angled wooden wall- to reflect the heat. Stacking sodden wood next to the fire to both act as a reflector and dry out can be beneficial. I love the dry wood the author mentions. In our wet area, smoke abounds! Thanks for this article…it’s a great series!
I’ll have to look that show up!
All areas certainly have different challenges. For example I recall reading about wagon trains on the prairies burning ‘buffalo chips’ for cooking fires. (I bet THAT gave off an interesting smell – it’s dried buffalo dung)
Thank you for taking the time to read it!
The chips are just dried grass when dry enough to burn so not much smell. Far less than a diesel fueled feces fire during a shift of ‘stir the pot’. Still, the chips are easy to gather and burn well. Tibetans live that way currently on yak chips.
This grandma had a good snicker over the mental image of you fellas trying to get a boot on the head of a lively rabbit or chicken! Try laying a stick (the size of a broomstick) over the neck of a small animal to pin it to the ground. Then set your feet on the stick to either side of the neck. A firm jerk on the legs will snap the neck and easily pull off a chicken’s whole head. You only need to use a knife or hatchet for furred animals. Toss the body aways off to flop, and it will bleed out well. This method requires the least skill for children to learn or for old folks to use who are not too nimble on our feet.
This method was shown and used by a SERE instructor from Warner Springs at a private class I took. Humane and quiet. Nothing worse than a class of screaming rabbits (another class).
Thank you Elspeth for the tip. I’d much rather use the method that is most likely to be quick and humane!
Great article. I met a couple of NCOs from Bridgeport and they knew their stuff. What was your primary method of water purification? I’m also adding salt to my kit. It goes with me on any hike outside my local AO.
Primary method was Iodine Tablets included in the Military Survival Kit. As those ran out we all turned to boiling our water.
After the course I found out that Iodine Tablets are questionable when it comes to killing off microorganisms in water. I’m unaware of anyone contracting any water related issues after the course. But it is certainly something to keep in mind.
Best option would be a small portable water filter as compact as funds will allow.
The salt is an excellent idea. I discussed this in a comment on Part 1. For both flavor AND fluid retention. Water was passing through us during our movements and we were certainly feeling the effects of low hydration.
Thanks for the reply and thanks for sharing. There’s new tablets out there that are bleach based and I have first hand experience with them. No flavor issues and they claim to be good for cryptosporidium as well. Looking forward to more.