


We never have enough storage, do we? Be it a lack of dry coverage for equipment and gardening tools or pantries that are packed so full that first in first out rotation becomes a full contact sport. I enjoy working with my hands and trying to solve problems. In this two-part article, I hope to share some insights, ideas and projects that have helped us with storage for food, preserving supplies, and household items along our self-reliance journey.
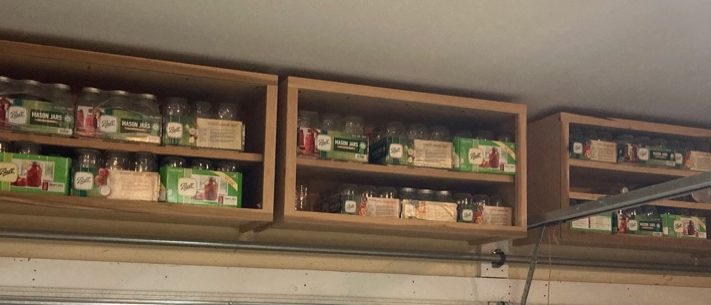
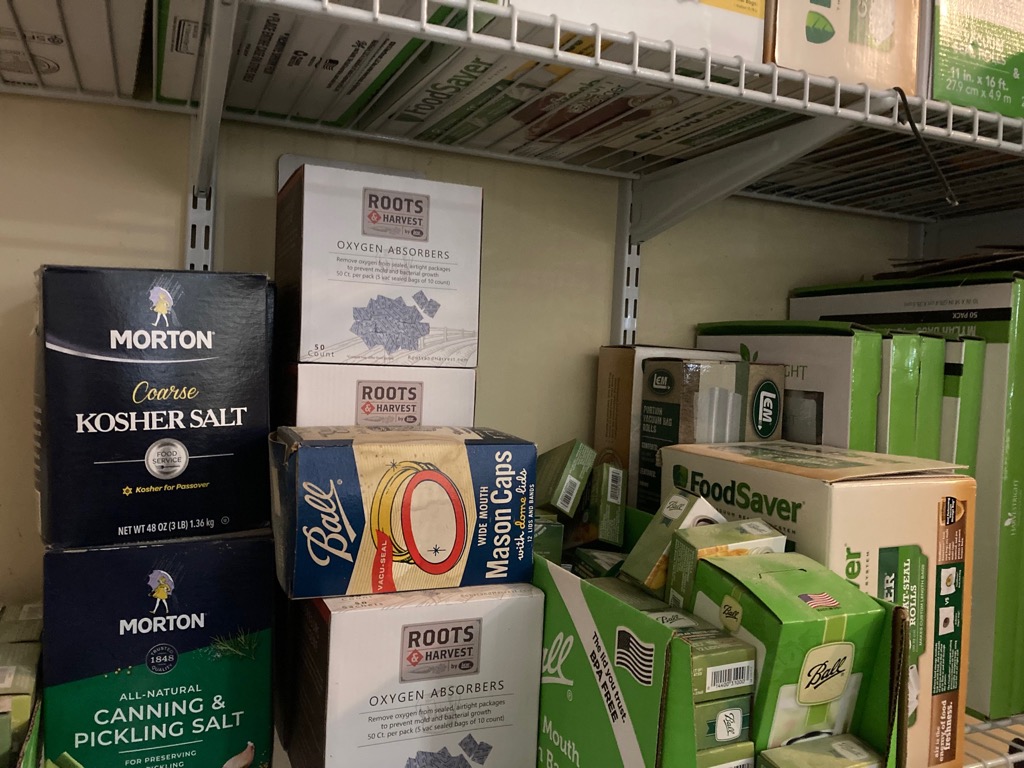
When we purchased our home, the property included a 24-foot by 30-foot dirt floor metal building, a derelict house, and the most pitiful chicken coop you can imagine. The previous owners had invested the money to put a new roof on the old house to keep it from rotting down and told us they had intentions of making it livable again. At our time of purchase, the windows were broken, someone had stripped the wiring and plumbing out and birds had nested throughout it for years. They never made it past the roofing. Our hopes of using it for dry storage have been limited to overflow for mason jars and a couple of rooms that I’ve used to store salvaged trim and lumber. As for the metal building, keeping opossums and mice out given its dirt floor is impossible. It functions wonderfully as a tool shed and I’m grateful to have it, but with no hope of temperature or humidity control it can’t be used for delicate or perishable storage.
My first project before we even moved in was adding plywood to the garage trusses for storage of lightweight, seldom-needed items that could withstand the swings in temperature attics undergo. We used half-inch plywood that had to be ripped into 2 ft x 8-foot pieces in order to fit through the scuttle access. I staggered my end joints on different trusses then fastened the plywood using 2-inch combi-head deck screws. These are good fasteners, but they are far less forgiving than the T20 and T25 torx head deck screws that are now prevalent. We store spare egg cartons, a few Christmas decorations, and very little else in the attic. It works fine for bulky and light items but after putting away the decorations this year my wife informed me that there would be a “she shed” in the near future and I needed to learn to say NO when offered empty egg cartons. It will be easier to build her she shed than to turn down free egg cartons.
Adding More Shelves
Our second storage project was outfitting the garage with shelves and cabinets. I have tried multiple iterations of built-in shelving for garages as well as different types of wire shelving. The permanent spacing of these options and space loss due to the bulky 2×4 construction resulted in functional but unsatisfactory results. Prior to trying the track and bracket system my opinion of wire shelving was rather low. The diagonal wall braces that compose the span support system for traditional wire shelving installations always seem to be in the way of items placed on lower shelves. Also, when overloaded in closets or laundry rooms there was a tendency for the shelf to rotate out and down leading to full collapses. It is true that a substantial contributing factor of these failures was poor workmanship such as too few anchor clips or using hollow wall anchors instead of ensuring the anchor clips were secured to a stud. Nonetheless, prior to trying the system described below, I found limited utility in wire shelving.
 After our last move we took a chance on a three-component wire shelving system. It utilizes wall-mounted rails with evenly spaced double slots that support adjustable locking shelf brackets which in turn carry spans of traditional wire shelving. This product was a game changer for the storage of boxes and totes. Fully outfitting a wall with the system described can be expensive. Fortunately, the modularity lends itself to an incremental build-out because once your tracks have been purchased and installed adding additional brackets and shelving can be accomplished piecemeal. Further, adding capacity or changing the layout are tool-less enterprises. Both Closet Maid and Rubber Maid provide wire shelf systems of this type and there may be vendors that I am unaware of. Track lengths range from one foot to six feet and the brackets are available for shelving of 12, 14 and 16 inches in depth.
We standardized our highest row spacing to accommodate the clear plastic totes with flip-top lids so essentially sixteen inches between shelves and sixteen-inch shelf depth. Keep in mind that you can position the railing far enough below the ceiling such that mounting brackets in the uppermost slots gain a shelf without using track length i.e. it isn’t necessary to run the support track all the way to the ceiling. We used four-foot track and for the lowest shelf backed off to twelve-inch depth shelving so we were less likely to walk into the exposed corner as we entered the garage. Our tracks are mounted using three-inch-long deck screws and placed on alternating studs.
Since the drywall was finished and painted, the studs were located using a strong small magnet swiped along the surface until it connected to an underlying drywall screw. From that point we could use a level to find the plumb line of the current stud and by measuring over 16, 32, 48… inches it was quick to find a screw in the subsequent studs. Over time, we have used this shelving system to install a full perimeter shelf, located just above door height, around our laundry room and closets. Doing so lets us make use of every linear foot of storage we can.
 For all its touted versatility, wire shelving does not function well when the items to be stored are small or don’t have wide flat bottoms. For instance, our kitchen pantry was outfitted with it and trying to store spices, bottled condiments, or packets is a challenge. We currently have shelf liner atop the wire to improve functionality, but items still regularly fall over or fall off. Therefore, we shifted to open cabinets for storing smaller and odd-shaped items in the garage.
Making your own garage cabinets is a great opportunity to develop your woodworking skills because making a mistake doesn’t matter much. If your cabinets are different sizes, it doesn’t matter. Find a deal on random plywood or scraps at a yard sale, and use those to build garage cabinets because nothing has to match.
Look for Cull Packs
Speaking of deals, every Lowes store I have been to on a regular basis will eventually have a palletized stack of materials sitting outside the contractor sales door. These bundles are referred to as cull packs and no two are ever the same. Most of the items are warped from internal stress, are returns faded from exposure or are discontinued items from the inventory. The price for materials on the pallet trends toward 50% off but I have learned that you can make a reasonable offer and frequently buy the bundle for even less. The hook is that you have to take the garbage lumber along with the diamonds in the rough. Some of my experiences include a stack that held enough crowned (think: bent like a rainbow) 2x12s that I was able to frame a 10 ft by 12 ft roof-shed on 16-inch centers for $75. I used a chalk line and circular saw to turn the crowned 2x12s into 2x8s, bought two straight 4x4s (the cull pack already had two ten footers) and inexpensive metal to cover the roof. All in less than $200 and I had a dry place for the riding mower, wheelbarrows, and such.
Another cull pack buy was discontinued vinyl storm windows for $5 each. I have used three in a pair of chicken coops already with several large units remaining that will likely end up in a shed. In fact, while I was at Lowes last week the contractor sales manager tried to get me to take a pallet of yellow pine 2×10 and 2×12 pieces home. They were all around four feet long so I couldn’t think of a use beyond splitting for kindling but two days later someone had bought them and I suspect paid half or less of the $40 price that it was offered to me.
Two years ago, I bought a cull pack that had one sheet of half-inch AC grade (one good face but not stain grade), one sheet of 5/8 CDX (lowest grade typically used for concrete forms) and four sheets of ¾ inch AC for $10 each. With the prices at the time this would have been nearly $300 but because some of the veneer on the good face was damaged and the CDX looked like a curved Pringles potato chip the store knew the chances of anyone taking them home was minimal. You could cut around bad spots or choose projects that are not dependent on appearance to save 80%, couldn’t you? Deals such as this make excellent garage cabinet stock.
(To be concluded tomorrow, in Part 2.)