SurvivalBlog presents another edition of The Survivalist’s Odds ‘n Sods— a collection of news bits and pieces that are relevant to the modern survivalist and prepper from “HJL”. Hawaii emulates the U.K. with their descriptions of a “large” cache of weapons
Hospital of Horrors
I tend to think of South Africa as a relatively advanced country, but this article sent in by reader S.M. makes a person realize just how bad things are there. Apparently, in the KwaZulu-Natal province of South Africa, the conditions are so bad that the local hospital has a serious problem with feral cats. Up to 150 cats have made the general ward their home, often climbing into bed with the patients and stealing their food. The hospital does not have the funds to forcibly remove the cats, nor is anyone willing to donate the costs associated with capturing and putting the feral cats down (feral cats evidently can’t be re-homed)
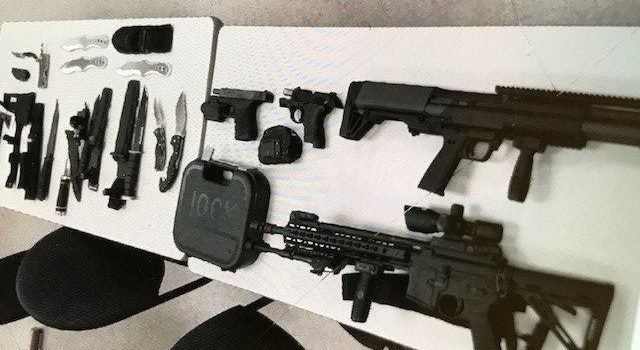
“Large” Cache of Weapons Found in Waikiki
If it weren’t so annoying, I might actually class this one as mildly humorous. As it is, I have come to expect this sort of reporting from the UK, but I am still surprised to see it in the U.S. The “large” cache of weapons turns out to be an AR-15 with 15 standard-capacity magazines, a shotgun, two handguns and less than 1000 rounds of ammunition. All in all, a good start on a single person’s load-out for a defensive mission. A bit on the anemic side if anything. All the weapons were legal to own. One more reason to use good OPSEC no matter what you have. If the report is to be believed, he brought the scrutiny on himself by bragging about things he shouldn’t have. Thanks to DSV for the link.