(Continued from Part 1. This concludes the article.)
PUTTING IT ALL TOGETHER
You now should have your holster and all the necessary pieces cut out. At this point there are a bunch of steps that need to be completed before final assembly. I’ll try to keep these all in the right order, or at least the order that I use, which has worked for me so far. Most of these steps require that the leather be damp/wet. Again, watching a few videos on the internet will help with understanding this process. Suffice it to say that for the following steps I use a small sponge, and a bowl of water to keep the leather damp for working it.
- Groove the edges of the leather where your stitches will go using a stitching groover. I actually used the groover on all the edges, not just where the stitches would go, because I thought that the groove would look nice on the finished holster.
- Use the spacer tool to mark where the holes need to be drilled/punched for your stitching. (or mark them out with a ruler and a pen). You only need to do the front half of the holster at this time.
- Drill or punch the holes for your stitches. Only do half the holster – the front. You will never get the holes to line up perfectly, so once the holster is glued you can use the holes as guides and punch the holes all the way through.
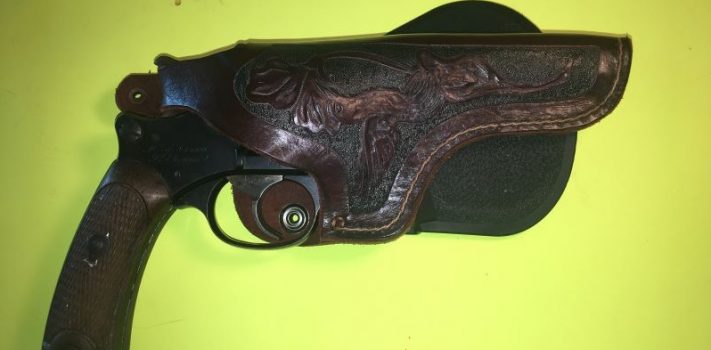
- You will now have a good idea of the space and shape of the area that you have available for tooling, carving, or decoration. It always looks a lot bigger on the pattern, but once you take into account your allowance for stitches, it shrinks up considerably.
- Draw, or transfer your design onto the holster. I wish that I had some secret for this, but I don’t. You could probably use tracing paper. I tend to work freehand, and draw the design lightly on the holster with a black ball point pen. If you are using stamps, like a basket weave pattern, you will want to draw some light lines with a pencil for reference to keep everything straight and level.
- Making sure that you keep the leather properly dampened you will be able to do your carving, or stamping into the leather.
- Important note: You can just leave the leather plain and it will work fine, and look good. If it is left plain it will also let you “wet form” the holster to your pistol later on. This is a process where the wet leather is molded/shaped to your gun with a stylus/burnishing tool. I’m sure you have seen numerous holsters done this way. If you choose to do this, it will be done after the holster is stitched. Manufacturers have plastic guns that they use for this, to produce multiple holsters exactly the same. You will have to use your expensive, antique for this process. Make sure your gun is well oiled, or it may rust due to the damp leather!
Continue reading“Packing Antique Iron – Part 2, by The Lone Canadian”