(Continued from Part 1. This concludes the article.)
Start Cooking!
Stage III. Build the deck (Two Days)
Since adding a deck to your outdoor kitchen is optional I offer no plan or directives for you to follow. Again there are expert builders – even average builders – who are capable of producing a fine deck for these purposes. Likewise big box stores and most book dealers are a source of good plans for your deck. Here a few things for you to consider:
* Craigslist and other on-line postings are likely to turn up trex and other similar used materials that will last a long time.
* Consider building your deck floor in 2’ wide removable panels that will allow you access to spaces where you may want to install plumbing, hide your nickels etc.
* Keep in mind floor height in relationship to height of culvert cooker surface. This relationship may be a calculation you want to make in the early stages of laying out the base for the cooker, elevation of ground prep, etc.
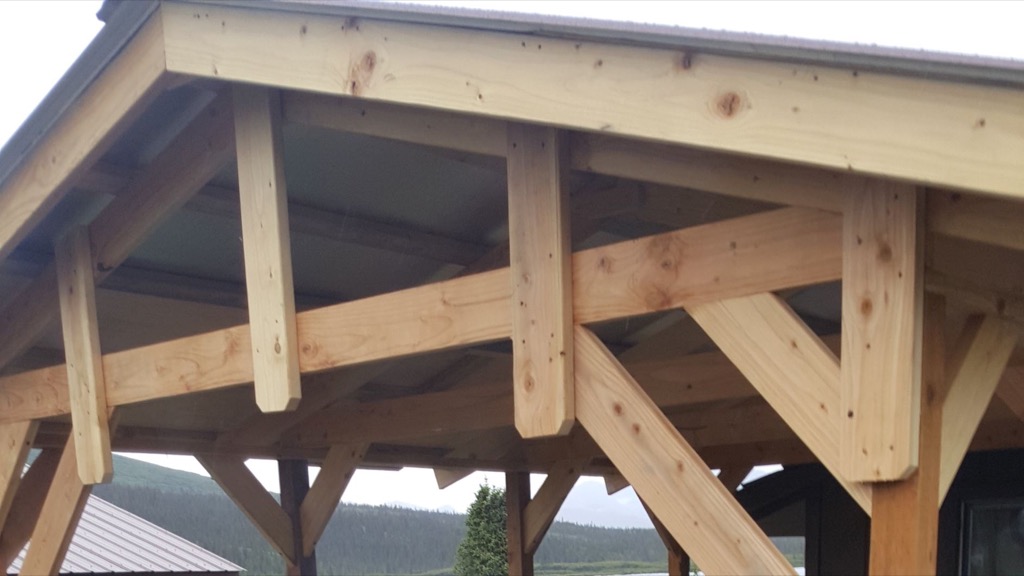
Stage IV. Build the Pavilion Roof (Three Days)
 Although you can always come back and build this later I encourage you to work it into the original construction plan. Having the roof in inclement weather will greatly increase the value of the outdoor kitchen; I would say by as much as 40%. Not only will it allow you to dodge raindrops, consider the importance of getting out of the sun, maybe more than you may think. Here are more specifics to consider:
* 7’ is a good height for the top of your 4”x4” timber-framed walls. Allows for plenty of airflow to dissipate smoke from the cooker.
* A 16” overhang of the eves is good for rain and sun protection. Two feet is better.
* Leave a 16” or 18” wide by 30” – 36” long opening at the midpoint of the roof ridgeline, to allow the escape of smoke from the fire. Shield this opening from the rain with a cupola roof that is supported by 4 sturdy posts, and which overhangs all sides of the vent hole by 6”. A steady wind or breeze will blow the smoke out the high ends of the pavilion, and no wind at all will let smoke escape through the cupola.
* I highly recommend metal roofing.
If you can afford it your entire roof project will be enhanced by an underlayment of ¼” or ½” plywood.
* If you are going without plywood underlayment, then consider lining the underneath of the roof with rolled ½” foil back bubble insulation to buffer the sound during heavy rain.
* Wind bracing. Give serious consideration to your roof’s vulnerability to the wind. A roof, without enclosed walls and a well-rooted foundation, can be picked up, in a moment, and be completely turned over and destroyed. An important part of the structural stability must come from extensive angle bracing between horizontal and vertical frame members.
* Sink vertical posts into the ground and/or incorporate cable anchors to each vertical post to resist strong winds. Because of mountainous terrain our cabin compound is vulnerable to regular winter winds of 40 to 60 mph during any winter. Depending on your location my recommendation – OVERKILL!Continue reading“Constructing My Culvert Cooker – Part 2, by J.P.”