


(Continued from Part 1. This concludes the article.)
The Second Big Problem
Everything was going great until the July test. As usual, the test went well. I put the generator in the shop and when I stood it up on end… the engine fell out! Since this is a family blog, my comment roughly translated to something along the lines of, “Wow, that’s not good.” My second thought was, “This is going to be pretty funny in a week.” Fortunately, it proved to be so.
I learned several things about generators in general that I’d never thought about and the whole event turned out to be a good learning experience as far as my preps go.
Determining Why the Engine Fell Out
The next morning, reattaching the engine seemed like it was going to be a fairly simple job. Those are the worst kind: they always turn out to be more complicated and time-consuming than imagined.
The first task was to determine how the engine could just plain fall out of a generator. You’d think the manufacturer would bolt the thing in to last forever.

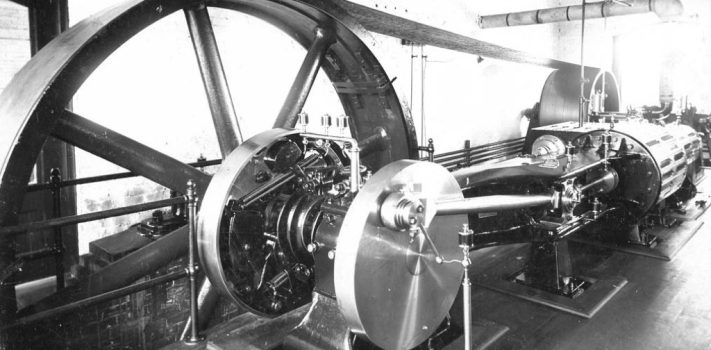
When I refer to the engine, in reality it’s the engine plus the alternator. As in a car, the alternator is turned by the engine and produces the electricity. In a portable generator the two are connected together in a single unit and together they’re very heavy. The whole thing is held to the frame of a portable generator by four rubber fittings called isolators (Photo 3, letters A & B). These act as small shock absorbers to isolate the metal engine from the metal generator frame, thus reducing vibration which the running engine produces a lot of. Without them, the generator would be hopping all over the floor when in use.
The particular isolators on my generator are made from a thick piece of rubber, roughly a 1½” cube, with a metal plate attached to each end with some sort of a super epoxy. One plate bolts to the engine, the other to the frame, and the piece of rubber between them absorbs the vibrations.
I soon determined why the engine had fallen out. When sitting on the floor in the normal run position, the engine rests on the isolators. When stored in the upright position, the 100+ lb engine and alternator hang from the isolators producing a heavy, twisting pull. It’s no wonder they eventually came apart after 10+ years. While looking at the ends of the rubber where each had been attached to the plates, I could see where parts of it were dusty, meaning that cracks had opened up long ago and were collecting dust before it finally reached the critical moment when the engine fell off. It would pay for generator owners to check to see if these cracks are visible on their isolators.
The first thing to begin the repair was to remove the isolator pieces and pull the heavy engine and alternator back into place. That involved removing the gas tank, the muffler, and carefully removing the electric panel from the frame to avoid damaging the large bundle of wires leading to all the various plugs, switches, and lights. A come-along pulled the engine back into place.
Once the engine was in place four new isolators could be attached between the engine and the frame.
Repairing the Isolators
The isolators had to be replaced with new ones. I consulted the manufacturer’s website and found the model was no longer in production and no isolators were available. I found some on Amazon but when they arrived wouldn’t quite fit. I tweaked them to fit only to discover they couldn’t bear the weight of a 5,000-watt generator. In hindsight, be sure the generator wattage is mentioned before ordering isolators. The ones I bought were only good up 4,000 watt generators. The higher the wattage, the heavier the engine.
The only option left was to try to repair the originals. I was fairly confident that no adhesive available to me would work to glue the plates back to the rubber. I ended up rebuilding the original isolators by drilling a hole through the rubber block and the two metal plates, then holding the three together with a bolt through the center (Photo 1, inset). This was unlikely to reduce vibrations as much as the originals but would probably work well enough. Everything looked good.
While removing the gas tank I discovered the 6” fuel line connecting it to the carburetor had broken when the engine fell out. Not only was it rock hard and brittle, it was now too short to reuse. It definitely had to be replaced. Here was a 75¢ item without which the generator couldn’t operate. What would it be like on Day One of TEOTWAWKI discovering that?! I had nothing on hand that would come even close to substituting for the small-diameter tubing. When I bought new fuel line I bought three feet ($5) to have a lot as backup. Even if the S never hits the F, the hose gets brittle over time and needs to be occasionally replaced anyway.
I attached the repaired isolators, put everything else back together, then installed the new fuel line. I pulled slowly on the pull cord to prime the carburetor. The third time I gave it a good yank and she started right up and ran for the 30-minute test period. Even with the jury-rigged isolators, the generator ran smoothly without any detectable abnormal vibrations. I was back in business.
Take-Home Lessons
After my 10-day prep-testing adventure and the carburetor repair I thought my generator was ready to go for a long time with just normal maintenance required. As it turned out, I couldn’t have been more mistaken. The generator functioned well for a short test each month, then went belly up when the engine fell out. Had the carburetor issue happened in a permanent grid-down world, my generator would have been rendered completely useless. I didn’t have an extra needle valve and no way to get a replacement. Had the engine fallen out after the SHTF, I possibly could have jury rigged a gas line but right at this moment, I can’t see how. The isolators were repairable but only because I had the right tools on hand: a drill press and the right pair of nuts, washers, and bolts.
The carburetor problem was due to my own negligence and completely avoidable. I’ve had my generator for umpteen years and put 300 hours on it just while building my house and shop. In all that time I failed to do some of the necessary maintenance. While I do change the oil and filters in all my small engines once a year each spring, I neglected some equally important things like checking the gas lines and cleaning the carburetor.
As I’ve thought about how I should prioritize my gasoline beginning the day after the SHTF, the most immediate concern would be to run the generator to buy time with the refrigerators and freezers long enough to get the contents preserved ASAP via canning, drying, freeze drying, etc. The generator wouldn’t have to run constantly, just enough times per day to keep the freezer contents frozen. The amount of food and calories stored in the freezer makes preserving freezer foods one of the highest first priorities in a grid-down new life. The second, more important long-term use would be to run the 240v well pump to fill my 500-gallon water storage tank every time it empties. In the meantime, since gasoline will be in short supply after the SHTF, I’m working on switching over to a water pump that runs on 120v or 12v.
Hopefully I’ve learned my lessons and will be prepared to generate electricity if The Crash ever arrives.
Recommendations for Generator Owners
1. Generators must be tested monthly. If the lawn mower doesn’t work after Day One, hallelujah. If the generator doesn’t work, refrigerator and freezer contents will have to be dealt with in a very short amount of time, hours. Trying to accomplish it among all the confusion and mayhem (speaking from experience from my 10-day preps test) will be a challenge and no doubt some food will end up wasted. We all know generators should be tested monthly, now do it! If that week-long ice storm hits, life would be much better with a working generator.
2. Store generators in the flat position, not standing on end. When in the normal-use position, the engine rests on the isolators. Don’t store it on end leaving the heavy engine and alternator to hang from the isolators. Since most portable generators have handles which fold down, storing on end doesn’t save much space anyway so store it in the normal-use position.
3. Do a complete annual maintenance. Aside from changing the oil and cleaning the spark plug and air filter, look at the fuel lines and other rubber hoses. Replace them as soon as they start to harden, don’t wait until they’re inflexible. Be sure to check the isolators for cracks. Use carburetor cleaner to de-gum any carburetor buildup. If this is too troublesome, do it at least every few years. Clean grime and dust off the entire generator. If the pull cord is even slightly frayed, buy a new one to keep on hand until the original finally breaks. I haven’t tried it yet but military-grade parachute cord would probably work as well.
4. Have as many backup parts on hand as possible. At the very least, $20 will buy multiple backups of rubber fuel-line hose, needle valves and seats, gaskets and spark plug.
5. Have a hard copy of a small-engine repair book on hand. It works for generators, rototillers, and lawnmowers as well as other four-cycle engines and chain saws. The instructions and photo illustrations are easy to follow. On my homestead, assuming my solar-powered well pump is installed by then, the chainsaw will be the most important small engine once the freezer contents are preserved and the freezer turned off forever to conserve generator gasoline.
6. Take photos before generator and carburetor disassembly to use as a reference for reassembly. Color-code wires with sharpies and/or mark wires with tape to help reconnect the correct pairs together again.
7. Don’t be afraid to try your own maintenance and repairs, it’s easier than you think.
In closing, I consider my generator one of the most important preps for getting through the first days, weeks, and months if the grid goes down forever. We’ll all be lost without electricity as we get used to the new normal. Being able to continue with electricity via our own generators, even in a very limited capacity to conserve fuel, will reduce much of the stress during the transition to our new life. The adjustment will be difficult enough without adding more grief than necessary to the equation.
In the meantime, don’t be afraid to tackle these types of issues on your own and to learn how to repair small engines. It’s a great item to have on your TEOTWAWKI resume and will be an excellent barter skill.
Now please, go test your generator!