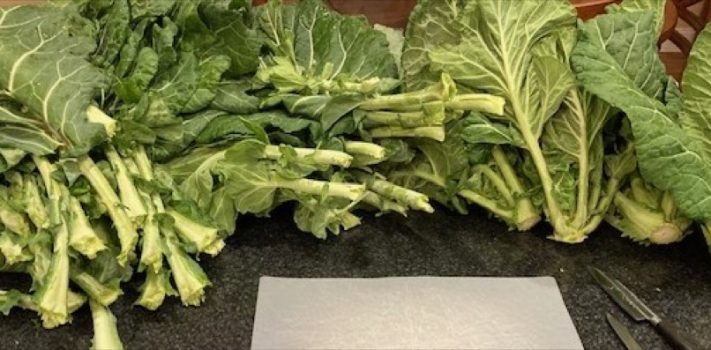
One of the aspects of living where we do I find most appealing is the long gardening season. It is possible to keep produce of one type or another growing in the garden year-round, (though this is not the same as saying we have harvestable vegetables for the full year). Kale is the most resilient thus far since a single fall planting can carry into the following June if there is not an early heat spell. Cabbage and broccoli are each suitable for both late winter and late summer plantings and typically yield well while requiring minimal effort.
When life and time permit, we start brassica plants from seed in mid-August. Our observation has been that even buying sets from a local greenhouse is risky because they will quickly sell out of their own in house sets and rely on vendor plants to finish meeting demand. The sets brought in from outside the area typically struggle due to weak stems, often appearing to be pinched just above ground level. We start seedlings in 180 cell trays and transplant into larger cups as soon as the sprouts are as thick as a toothpick. We bottom water until the plant is three or more inches tall and rely on the potting mix nutrients for the first few weeks after up-potting.
It is necessary for us to keep the greenhouse sides up as well as the gable vent open with fans on to minimize the temperature, thereby maintaining soil moisture. Once the plant stems are as thick as a coffee stir-stick we will begin to use a bulb waterer. If the new leaves remain green then we continue to rely on the starting mix for nutrients. If, however, they begin to yellow and it will be a while before we transplant into the garden, we will add a small amount of soluble fertilizer into the water. Ideally, transplanting to the garden is done when the plants are five to six inches tall, the stems are nearing the thickness of a number two pencil and we are in late September.
The hole for each plant is dug using a post hole digger so it is approximately five inches in both depth and diameter. Each plant gets about two tablespoons of triple seventeen fertilizer and two cups of compost. The fertilizer and compost get mixed by hand prior to transplanting the collard (or any other brassica) and the soil plug that was removed digging the hole is crumbled up to finish filling the hole and to make a micro-berm on the lower side of the plant. Watering in is accomplished with drip tape and the soil is kept slightly moist until it is obvious that the sets have taken root.
Around mid-season we will apply Miracle Grow or similar soluble fertilizer using the irrigation tape and then we await the second frost to begin harvesting our collards. Note to new growers, collards can get large. We initially used eighteen-inch spacing and realized that was not enough. The lower leaves can reach twenty or more inches in length if you include the stem, so we now use closer to thirty-inch spacing and will harvest the largest plants first to give more space within the rows throughout the season. Also know that the stalks will fold over on themselves as the collards grow, with the plants becoming so heavy that they will fall over. There is no need to worry as with time they will re-orient themselves and continue to grow.
For yield purposes, the Georgia variety is our default choice. Morris Heading collards have also done very well for us and I prefer the flavor of this variety. Unfortunately, it does not become as tender when cooked. The largest selection of varieties I know of is available from Southern Exposure Seed Exchange. Not too long ago they hosted a collard sampling at a farm conference we were attending. SESE presented a dozen or so collard types and it was surprising how much difference there was between the flavors.
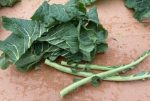
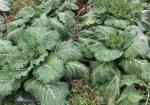 When the time comes to enjoy the harvest, I’ve found that much the same as cooking game initial preparation greatly influences the final product. I begin the process of “fixing a mess” by selecting the four largest plants in the garden. The photo at left shows four Georgia collards, the remnants of which are in my refrigerator now. Due to the aforementioned tendency of mature plants to fall over, I typically cut the stalk six or eight leaves above the ground to minimize the amount of soil stuck to the leaves. I take the selected plants to the tailgate of my truck when the weather out is suitable where I slice each side of the leaf away from the central stem
In my experience this is much easier to do outside and atop a clean piece of cardboard than it is on my kitchen counter with a cutting board. As the stems are removed, I stack the leaf halves into two- to three-inch-tall piles. When space begins to run out on the work surface, I begin cutting up the stacked leaves into roughly inch and a half pieces. After all of the plant is cut up, I wash out and sterilize both sides of the kitchen sink. Next, I fill each basin up with room temperature to warm water and add a bit of salt into the first basin. I will dump as many of the cut-up pieces into the salted water side as possible then use my hands to “swish” the collards around to begin cleaning. The salt is added to help remove any bugs I may have missed when cutting up the leaves. After letting the collards soak for several minutes, they get rinsed in the second basin a few handfuls at a time. When the water in the second basin begins to look the palest green, I change the water. This process is repeated until all of the leaves have had a salt soak and a fresh rinse.
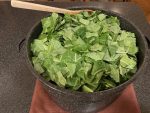 For conducting the initial boil down, I use a water bath canner. As shown in the photo at right, the four large plants have been reduced to a tightly packed canner full of pieces. I have stopped at this point many times and saved the cooking steps for a later day by covering the canner with plastic wrap and putting it in the refrigerator. When time comes for the initial cook-down, the canner is taken out to the front porch and placed on a small propane burner. I add a teaspoon of salt and fill the canner up to the second ring with fresh water. It is important to bring the greens to a boil slowly and with stirring to prevent scorching any of the collard pieces that may be pressed directly to the bottom of the canner. As the water approaches boiling the pieces will begin to wilt and it becomes much easier to stir the pot. As I stir using a solid wooden spoon, I push the un-wilted pieces lower and pull the already cooking pieces to the top ensuring that the bottom of the canner is well scraped.
After all of the greens are wilted, I set the temperature to maintain a medium simmer and put the lid on the cooker. I cook the collards for 30-45 minutes then turn off the heat and set the lid askew for half an hour to let the pot cool before I carry it back to the sink to drain. If you have the ability to cook down the collards or any dark green outside then I encourage you to do so. As they cook down a strong sulfur smell will be given off; it is these volatile compounds that are responsible for the objectionable flavor we are working to avoid. After giving the pot a cool-off period, I turn on the cold water at the sink and pour off as much of the boil water as I can without the greens falling out of the canner.
My last boil-down step is to place the canner in the sink and fill it with fresh cool water while stirring around the greens and pouring off the rinse water at least twice. Lastly, the pot is tipped into a large colander and the greens are drained. At this point the collards can be placed into freezer bags and stored in the freezer for later preparation, returned to the refrigerator for short-term storage or immediately prepared for eating.
While I have used collards as an ingredient in soups and casseroles my family’s preference is as a stand-alone side dish. Most of the family prefers a recipe with a slight hint of sweetness that contains ham and apple cider vinegar. My preference is on the savory side with a garlic and bacon pairing. For each recipe the cooked down collards are placed in a six-quart crock pot with one quart of chicken stock as the cooking liquid. Additionally, each recipe gets a large sliced onion and two tablespoons of bacon grease.
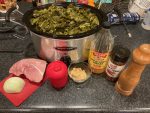 The apple cider vinegar (ACV) variation (see photo at right) will have around a half pound of cut-up spiral ham, ¼ cup of ACV, two tablespoons of brown sugar, red pepper flake, black pepper and salt to taste. The bacon and garlic version gets salt, pepper, ¼ teaspoon of cayenne pepper, 1.5 table spoons of minced garlic and half a pack of cooked and crumbled bacon. It is important to use cooked bacon because the fat rendered out of raw bacon would overwhelm the dish. The crock pot is left to cook on low for anywhere from 8 to 12 hours. I recommend stirring the dish several times and it is often necessary to adjust the saltiness or flavor profile near serving time.
Earlier I mentioned that we try to wait until the second frost before we begin cooking collards. Our old-time gardening neighbors told us that collards become sweeter after they have endured a hard frost. We didn’t have reliable cool weather prior to our family Thanksgiving this year so I served collards that hadn’t been chilled. They were good but not great. By the time I cooked the exact same recipe at Christmas we had experienced a week and a half of “good” frosts and the collards were noticeably tastier. Maybe we are crazy to think frost makes the greens better but…….. January 1st is almost here (and likely past by the time you read this) so I’m headed to the garden tomorrow to cut four more plants. There is already a ham in the pantry along with the field peas. It’s a New Year’s Day tradition around here to have pork, peas, and greens for dinner; I’m looking forward to the meal and pray we will all have a blessed and safe 2025.
I acknowledge that an article on what many may consider an oddball and possibly unappealing vegetable was a strange choice of topic so I would like to share my reasoning. If food security during a time of unrest concerns you as it does me then I see value in planting vegetables that can thrive and hide in plain sight. We offer farm tours multiple times each year, and virtually none of these visitors recognize collards. If planted throughout our meadow instead of in neat garden rows, the plants (especially while young) could easily be mistaken as aggressive weeds. Collards are extremely resilient and hardy. Many if not all varieties can be treated the same as leaf lettuce and kale in terms of harvesting a few outer leaves from multiple plants to prepare a meal versus cutting down the entire plant.
Amongst the brassicas, collards are one of the easiest to get to set seed. Essentially you just leave the plant alone once warm weather arrives and it will bolt, producing beautiful yellow flowers that eventually become tiny pods filled with hundreds of seeds. Collecting collard seeds for replanting may be the easiest vegetable for which to do so and in many soils, they will reseed themselves. Collards such as the Georgia variety can produce great yields for much of the year. They are climate hardy; it takes sustained freezing weather to kill them and they are productive in temperatures up to the mid-seventies.
According to WebMD, collards are a source of vitamins A, C, and K as well as providing fiber, calcium and potassium. As a meal, they are versatile and filling. And with the appropriate preparation and seasonings delicious. They are well suited for preserving, the cooked leaves store well frozen after the initial boiling or after the final seasoned preparation. I have read of others pressure canning greens although I have not yet done so. Lastly, they can be eaten raw if need be.
I find collard greens to be a fine example of the old saying about the relationship between good, fast, and easy in that it is possible to have any two conditions but not all three. I want good-tasting healthy food so that means I have to sacrifice the time required to follow an easy process of removing stems and large veins, conducting a pre-boil followed by slow cooking using a flavorful recipe. I hope my reflections on our winter staple have been of use. Thank you for your time and as always thank you to the SurvivalBlog editors for their work on our behalf.

