


I think everyone agrees that water is an absolute necessity, regardless of the situation at hand. Catching what nature provides can be as simple as a bucket or tarp or as complex as multi tank systems with complete purification systems. I am no expert, nor is this meant to be a technical article but a simple guide to get started harvesting rain. As always consult your local codes and permit requirements. The American Rainwater Catchment Systems Association (ARCSA) is a great place to start. The American Society of Plumbing Engineers (ASPE) is also a source of installation information as well. Your state may have a similar publication – a Manual on Rainwater Harvesting.
Getting started – How do you want to utilize the harvested water? Are you interested in watering plants, maintaining your garden and/or building a potable water system? All can be accomplished with the right resources and motivation.
First, determine if your roof is suitable for harvesting rain. A wood or shake shingle roof is no go. Normal asphalt roofs are not great due to weather- and age-related breakdown, but being the most common type of roof system, I would not rule it out. Metal or tile roofs are the best option.
If you do not already have gutters, you will need them with some systems to keep leaves and other debris out. Gutter ads are plentiful on television. For every 1,000 square feet of catchment area you have, one inch of rain could yield as much as 640 gallons of rainwater. There are many variables in this statement, such as roof material, pitch, velocity of rain, gutter efficiency, etc. Your mileage may vary (YMMV).
At this point, you have looked at your roof, have or had gutters installed and now it’s time to decide what size tank to purchase and where to locate the tank. You need a very solid foundation for your tank as full tanks are very heavy. Reinforced concrete is probably the best foundation, followed by a less expensive alternative with pea gravel contained by your choice of border for containment. Yes, it may settle some depending on your soil type however not everyone has the means or ability to pour concrete. Heavy-duty elevated welded stands are an attractive option but tend to be expensive. Whatever foundation you choose, just ensure there is nothing sharp under the tank that might puncture if, if it shifts or settles. In addition, the foundation needs to be at a minimum one foot wider than the tank. More is better, should you want to, add landscaping, artwork, or a side pad for additional tanks.
Next, how big of a tank do you need? Base your calculations on the catchment area you have available. For example, I harvest water from my house, shop, and barn. I have placed multiple tanks ranging from 100 gallons to 1,150 gallons throughout the property. In my part of the world, Texas, we pretty much stay in a drought condition with one or two decent rains, if we are lucky. You need to consider how important water is to you and how you will be using the water. Is it your only source of water. Do you have a city, co-op, or a well as your primary source of water? Purchase the biggest tank that is aligned with your catchment capacity and overall plan. Make sure you are going to be happy with the tank placement for your future needs. Ideally place it in a covered area to protect it from UV rays, however in my experience that is rarely an option. The best poly tanks have around a 20-year life span and the darker color tanks generally have less light transmission. Water and light equal algae. Metal tanks of various materials are also an option.
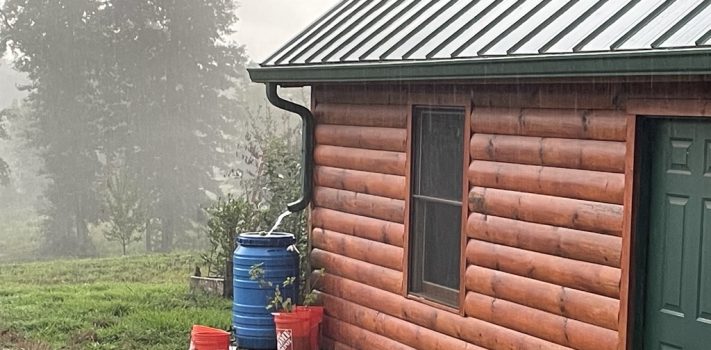
Most of my tanks do not have the option of covered gutters so I use leaf guard system, with a PVC catchment vessel with a slanted screen to allow debris to slide off instead of entering your tank. Whereas your tank should have a screen where the water enters the tank, I still use the PVC catchment vessel with a slanted screen to keep leaves and debris out of the tank. In addition, the PVC catchment vessel transitions to various sizes of PVC piping. I use a 3” pipe on my larger tanks. All openings must be screened to keep mosquitoes and vermin out. The newer thanks I have purchased do not have a screened overflow installed. If this is the case, you will need to install one. The larger poly tanks may have a 2” bulkhead at the top and I have been known to insert stainless steel wool in them. Of course, you will need to periodically inspect the condition and placement of the wool.
At this point you are transitioning to the 3” or smaller PVC pipe. The best installation practice is to use a first flush diverter. This is nothing more than a line going down to the ground. You have a tee with a line going to your tank at the top. This line fills up because it is sealed off at the bottom with a valve or plug. The “dirty” water sitting in the gutter goes into this dead leg and as it fills up to the tee then is diverted into your tank. It can then be drained by opening the valve or loosening the plug to drain it, or let it drip slightly and it’s ready to go for the next rain event. If you expect freezing temperatures, it’s best to leave it dripping, so as not to forget to drain it.
Your tank will have gutter guards in place with piping going into your tank with a first flush diverter, “dead leg” line with a valve or plug in place at the bottom. Now you probably have a ¾”, 1” or 2” bulkhead near the bottom of your tank. You will need a way to isolate the tank, usually a PVC nipple and valve. If you have a large catchment area, you will likely have more than one downspout coming off your gutter. The installer can recommend how many downspouts you need. If you are the installer, consult the internet. You may have to experiment with blanking one or more off, so you get maximum flow to your tank. You don’t want the gutter overflowing so watch it during the first or heavy rain.
Now that you have a tank full of water, what do you do next? You are only limited by your imagination. Oh yeah, how much head pressure your tank will supply? Questions to determine when developing plan:
- Are you looking to supply water using a simple hose forced by gravity or an irrigation system supported by a pump?
- Do you want your system on a timer?
- Do you want sight glass on a wireless system to monitor the level?
- Do you want a floating suction line installed instead of the outlet at the bottom of the tank?
And yes, the “oh heck, I wished I bought a larger tank” —don’t worry you can pipe the overflow that you screened to additional tanks.
I have not personally installed systems that use rainwater exclusively whereas the ones that I have visited have anywhere between a 7,000-gallon to 30,000-gallon capacity. These are large systems that are multi-functional and like most things require maintenance. Usually, large systems utilize underground tanks, and I will not attempt to go into this installation for this article.
Additionally, to the above, you can decide you want to make this water potable. You’ve come this far in taking all precautions and steps to keep your water as clean as possible. Whereas, I have not installed a potable water system, in my past life I worked with many larger RO and deionized water systems. This experience coupled with a little research I can provide a basic idea of how these systems work. A simple version – Requirements: A pressure pump, 2 stages of filtration, a UV light set-up and an in-line flow meter with isolation valves. The water cannot be turbid for a UV light setup to work.
Chlorine and Ozone are other options for potable water. You will need to stay on top of these systems. You are the responsible owner/operator. All water systems you install must be labeled and/or color coded as to “potable” or “non-potable”. Once again, consult your local codes and permit requirements. If you are considering tying any other systems into your rain catchment system a backflow preventer is a must. I stress that tying systems is a big deal to your local providers. They will likely require permitting (and all that come with permitting) inspections and most probably annual inspections to include water cleanliness tests.
Uses for installing rain catchment systems are endless. One such idea is to use tank water for a fire emergency suppression. I have personally used these systems to irrigate my garden, landscaping, equine water trough/barns, goat enclosures and dog kennels, just to name a few. Should you live in an area with abundant rainfall you might route a downspout or more to a small pond or for use in a rain garden. Wildlife benefit greatly from these small water projects. Custom-made accessories such as fish, frogs and mermaids, etc., can be fabricated to catch the water and route to water holding areas. Piping can be painted to match the tank color or whatever background material you have in mind.
Security- Now you have a full water tank or tanks. What if someone decided they need the water more than you do or worse than that they don’t want you to have it at all. Not all my tanks are hooked up to gutter downspouts. Some are holding tanks. I use a simple 120-volt AC transfer pump to move water from connected tanks to the holding tanks. In the past, I have been my own worst enemy by opening a valve and walking away to do some other tasks and coming back to an empty tank. My plan is to have enough stored water in secured places to ride out any short-term emergency. Even with an empty tank you can stick a flexible suction line from a pump, then through the lower valve port and pump out water. Simple hand pumps are economical however, the water will be considered non-potable and will be treated and/or filtered should you plan to consume it.
In conclusion, there are many more options and variations on what you can accomplish with stored water than I have touched on in this article. Your gardens and plants will love it and there is a long-term payback on installation costs. More importantly, it gives you options and that is what we should all be thinking about in this day and time!