
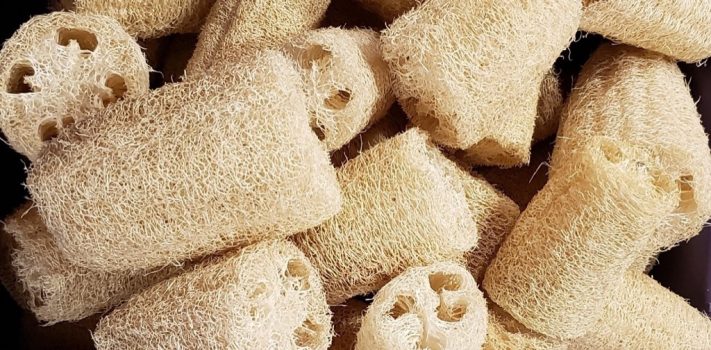


There are three types of people when it comes to luffah sponges: those who have no idea what they are, those who know what they are but think they’re for the kind of ladies who frequent health spas, and those who know they’re one of nature’s best all-around cleaning tools and natural scrub brushes.
I’ve personally progressed through all three stages, and hopefully this article can get you straight to stage three.
In a grid-down world, after all our sponges and scrub brushes have worn out, luffah sponges can take their place. They can also do the same before the SHTF and best of all they don’t come from the ocean, they’re a type of gourd that can be grown in our gardens.
Luffahs are easily home grown and don’t take up much space. They can be planted on improvised trellises in waste areas like fences, pergolas, and even small trees as I discovered by accident. A single plant can produce more luffahs than you can use in a year and once the seeds are planted and germinated, luffah vines can be completely ignored until the first frost when they’re harvested. They’re fun to watch progress as the vines grow to incredible lengths, and then so many gourds start coming on they make zucchini plants look like sparse producers.
Luffahs have many spelling variations so choose which one suits you best: luffas, luffahs, or loofas.
Luffah Uses
I had never grown luffahs before moving to my homestead. After growing them as a novelty item, I discovered they’re very durable and actually have a lot of practical uses.
As far as prepping goes, luffahs will be a welcome addition to our home production after the SHTF. Since they last forever, they’re far more durable than the sponges we use for cleaning and dishwashing. Even the high-quality sponges with a scratch pad on the back only last a month or so for dishwashing. Luffahs are so durable the compost pile can’t even digest them.
Since many preppers won’t think of storing enough sponges and scrubbers to last a TEOTWAWKI-time luffahs will also make a great barter item for those who grow them.
A Different Texture for Each Job
Luffahs have three different textures for different uses based on how wet they are.
Dry Luffah – Completely dry luffahs make great back scratchers and can be bought commercially for that purpose. They’re used as a scrub brush for things like getting dirt off garden vegetables before taking them into the house to be washed. I keep one by the outside doormats to remove mud and dirt from the sides of boots before going inside. As a cat scratcher, they have the advantage of scratching without picking up hairs which need to be cleaned out. I can tell the cat enjoys it as he does the “oh yeah baby” kneading thing with his paws. You can find 100%-natural luffah dog-chew toys online (not to be confused with the polyester ones) advertised as having the extra benefit of being canine dental floss. Breeders are still working on the hound halitosis luffah variety.
Damp Luffah – Slightly damp luffahs can be used for jobs where you want scrubbing power but not quite as coarse and scratchy as a dry luffah. It’s good for pre-washing dishes and countertops with stuck-on food before washing.
Wet Luffah – Wet luffahs are perfect for most cleaning jobs from bathing to dishwashing to scrubbing walls and shower stalls. When fully wet they’re soft yet gently abrasive without scratching. I recently used luffahs to clean algae off the north metal roof of the house. Almost anything you can imagine can be cleaned with luffahs.
Growing Luffahs
There’s not much to growing luffahs. Once you get past the germination hurdle, luffahs are one of the easiest crops to grow. To aid in germination a small notch can be made in the side of the seed with nail clippers to allow water to enter more easily and increase germination speed. You can also lay some out on a wet paper towel, then fold and put it into a plastic sandwich bag. After a week to ten days, select the ones which have germinated and plant those in the garden.
Luffahs like a longer growing season than most crops but in areas where they won’t get mature enough to produce viable seeds, the gourds can still produce a lot of sponges. Luffahs can be grown as either trailing or climbing vines. Grown on a pergola or cattle-panel arching trellis, the gourds will hang down and put on a great show.
Harvesting and Processing Luffahs
My four or five plants each year produce 50+ luffah gourds averaging 14-16” long. There are many varieties of luffahs producing gourds of varying lengths.
Harvesting – Since my luffahs never get to the dry-on-the-vine stage, in order to get them as mature as possible I wait until the first frost kills the vines before harvesting.
Luffah gourds have a fairly strong stem so use pruning shears to cut them from the vine. All 50 can be processed in a day when starting first thing in the morning. They can also be harvested and then processed within a few days as time allows.
Luffah Maturity Stages
On the vine, there are three stages of luffahs, all of which can be processed into sponges as long as they get to the appropriate size. Only the smallest ones won’t be developed enough to make sponges but can be eaten much like zucchinis, which are in the same family.
Dry Brown Stage – From what I’ve read, this is the preferred stage for processing the sponges. Mine have never gotten to that stage and not sure if they can in my area.
Green Mature Stage – This stage is recognized when the seeds inside are black. The outside is still green and one average-sized luffah gourd will produce enough seeds for your family and friends as well as the local seed exchange.
Green Immature Stage – These still produce sponges but the white seeds won’t germinate. Some years when I get the seeds planted a little late I don’t end up with any mature seeds so be sure to save plenty for the future in those years where you get viable seeds.
Processing Green Luffahs
Processing luffahs is one of those jobs best done with two people and some lively bluegrass music to keep the pace moving along.
Since I have no experience processing fully-mature dry luffahs, I’ll let the reader do an internet search for that information.
When I first started growing luffahs I found some processing instructions online. Those I found involved too much time and energy in my opinion so I decided there had to be a better way. With the method I use, 50 luffahs can be harvested, processed, and ready to use in a single day. In more humid areas, the line-drying time can take an extra day.
After harvesting, the following steps are followed.
Trimming the ends – You’ll learn by experience how much to trim off (Photo 1) but if either end is too small in diameter the seed and pulp removal will be more difficult. The holes need to be large enough to fit your fingers into.
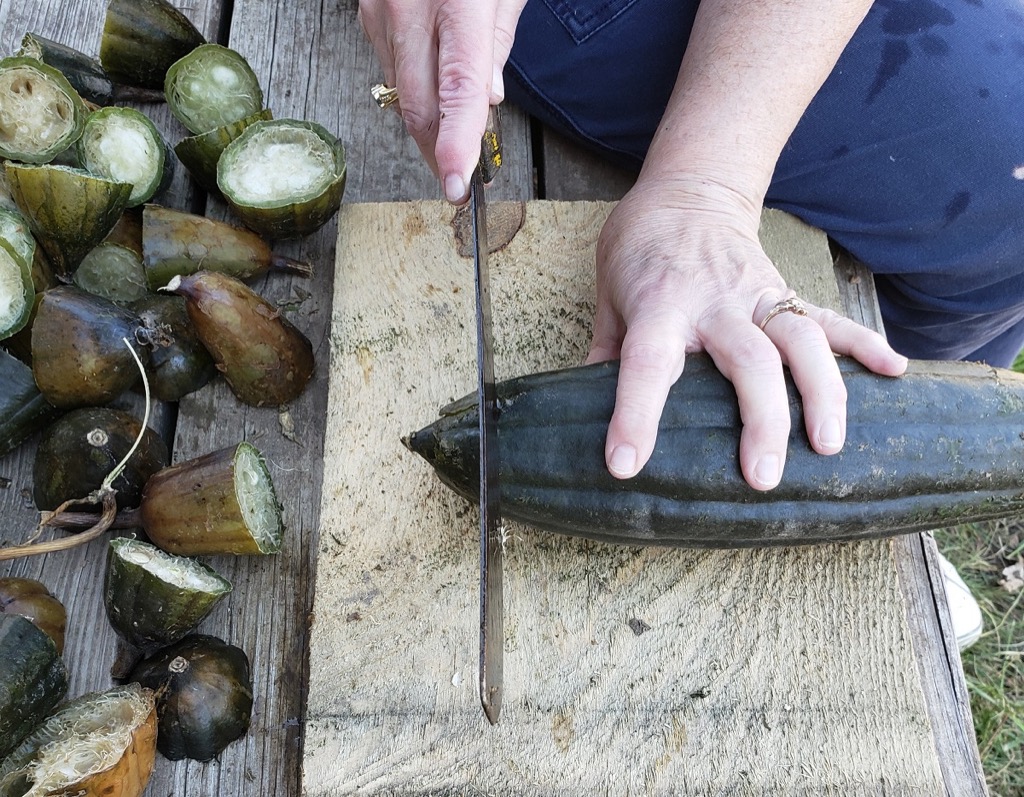
After the ends are trimmed you can either leave luffahs their full length or cut them in half. The ones I give to friends and neighbors I leave the full length, most of the rest are cut in half since I generally use that size. Removing the pulp is also easier in the half size.
After trimming and cutting, put them into a tub of water. A large tote works well. For just a few, the kitchen sink can be used.
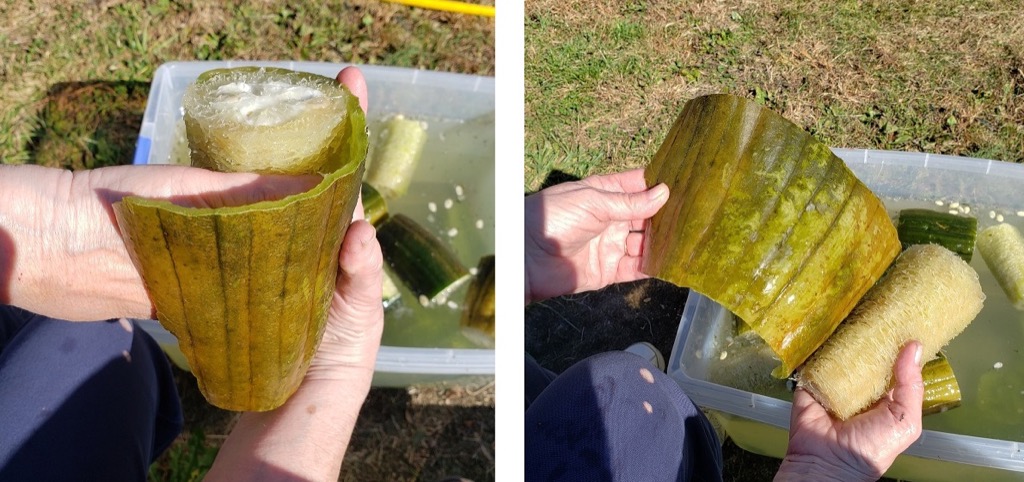
Removing the skin – The only laborious part of luffah processing is removing the skin. A few will be stubborn and have to be peeled like an orange. The majority will be easier, and with a small percentage the skin can be quickly removed in a single large piece.
Begin by peeling back a small portion from the tip until you can get your fingers underneath the skin. Then slide your fingers down along the rib so a strip of skin separates from the gourd. Keep moving your fingers up and down the length of the sponge to separate each section of skin between the ribs (Photo 2).
Removing the seeds and pulp – Luffahs have three, sometimes four, holes that run the length of the gourd. These contain the pulp and seeds and both are partially embedded into the sponge mesh itself. Similar to cucumbers, the pulp is mushy and surrounds the seeds.
Begin by gently squeezing the peeled loofah in the tub of water. Squeezing too hard will separate some of the mesh at the center of luffah from the rest of the mesh, weakening the finished sponge. You’ll quickly get a feel for it once you start. The squeezing process loosens the pulp and seeds enough so they can be removed with the fingers (Photo 3a.) The removal is easier on sponges which have been cut in half. Full length luffahs can be started with fingers and finished using a length of half-inch PVC, wooden dowel, etc. (Photo 3b.) The tip of the PVC/dowel should be slightly rounded on the corners to keep the sharp edges from cutting the mesh of the luffah.
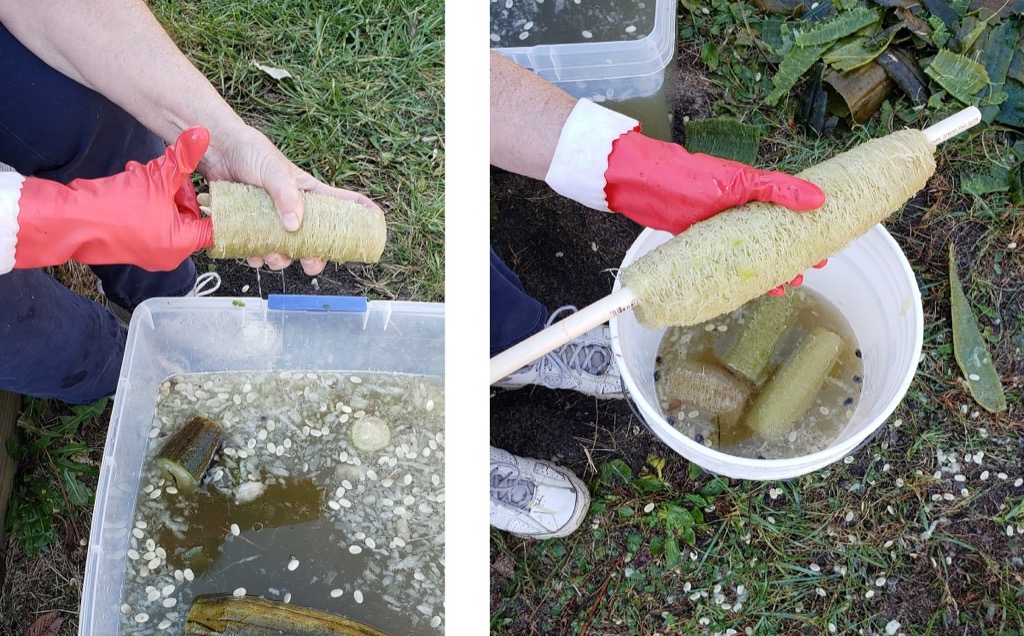
After the majority of the pulp is removed the last remaining pieces are cleaned out using a pressure nozzle ($5) on the end of a hose (Photo 4). An adjustable hose-end sprayer might work better.
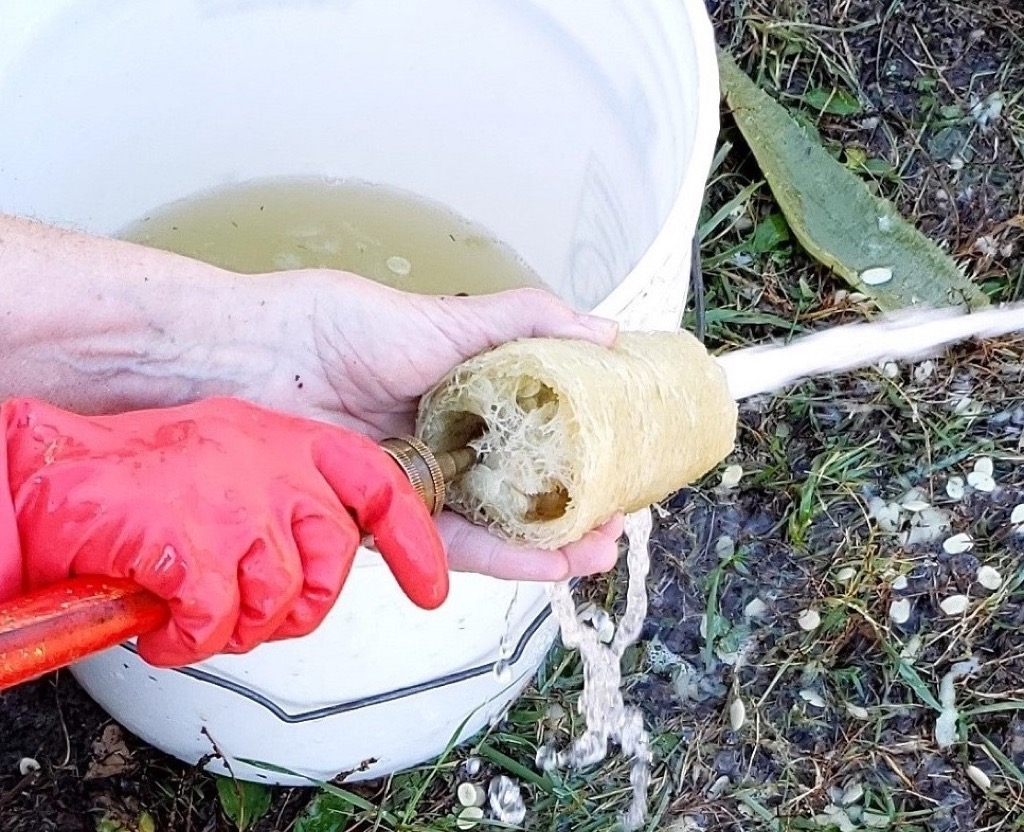
All the pulp can be blasted out but it’s impossible to get every seed. Many will come out in the washing stage and after the drying stage any remaining seeds can be shaken out.
Once fully cleaned, each sponge is placed on a flat surface to let the water begin draining while the rest of the loofahs are skinned and depulped.
Processing a lot of luffahs using these steps is most efficiently accomplished with two or more people using an assembly-line approach.
Drying the sponges – Drying has two stages: spinning the water out, then line hanging.
Like clothes in a washing machine, the more water you can spin out of the luffahs the more quickly they’ll dry. The following drying method is what allows the luffahs to be harvested and fully processed to the ready-to-use stage in a single day.
After removing all the luffah pulp and seeds, wash them in the washing machine (Photo 5), using the extra-water option and spin-dry on the highest speed. The spin cycle will remove most of the water and greatly speed up the drying time. I’ve tried washing them with and without detergent but it doesn’t seem to make any difference. Using the extra-water cycle helps to remove as many seeds as possible. Machine washing will also remove any green tint some of the sponges may still have from the skin.

Before starting, find the drain-filter plug on the front of your washing machine. Depending on how many luffahs you’re processing and how many of the seeds you were able to remove, you may get an error message on the washing machine keypad indicating the filter is clogged. But not to worry, the filter is easily cleaned. At the bottom front of the machine behind a small door will be a hand-tight threaded plug. Remove the plug, clean the seeds out, and put the plug back in. If doing multiple batches, clean the filter between each batch.
After removing the luffahs from the machine there will be seeds in the bottom of the drum. Clean most of these out before starting the next batch. No need to get them all since you’ll be adding more seeds from the next group. After the final batch remove all the seeds from both the drum and the filter. Next, with the washing machine empty, run a final wash cycle using the extra-water feature and high spin. Lastly, do a final drum and filter cleaning. If after doing the next batch of laundry you feel a tickle in your trousers you probably missed a seed or two but it’s no biggie.
Since I don’t have a clothes dryer I’ve been unable to test it for drying luffahs so you may want to test that out with a few luffahs first. I can’t imagine why it wouldn’t work. For line hanging, use an improvised “needle” made from wire, a chopstick, etc. to string the sponges onto a length of bailing twine or other cord. After 10-15 sponges, loop the twine over the line three or four times to keep that group of luffahs from sagging and dragging on the ground, then add more loofahs to the next section of twine. (Photo 6.)
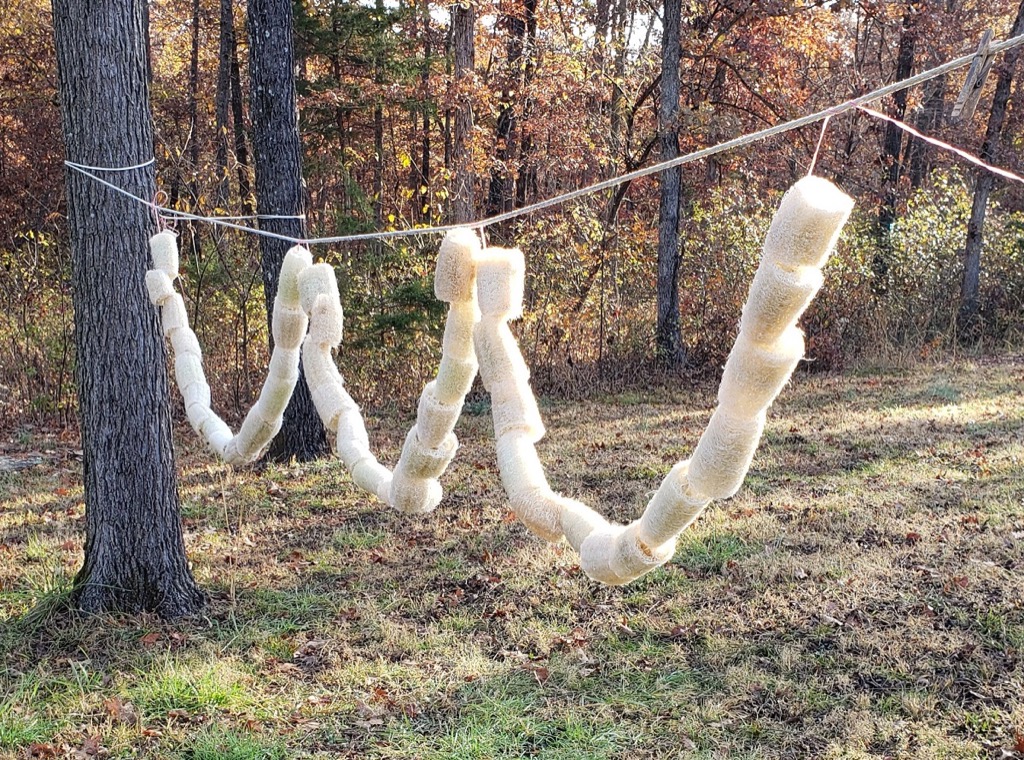
On a sunny day with some wind, the luffahs will be dry by evening or the next day at most. The bottom side dries the slowest so be sure to feel that before you take them off the line to prevent any mold from forming in storage. While not suitable for gift giving or selling, sponges with a few mold stains are perfectly usable for cleaning.
Once the luffahs are completely dry, any remaining seeds can be rattled loose.
Storage
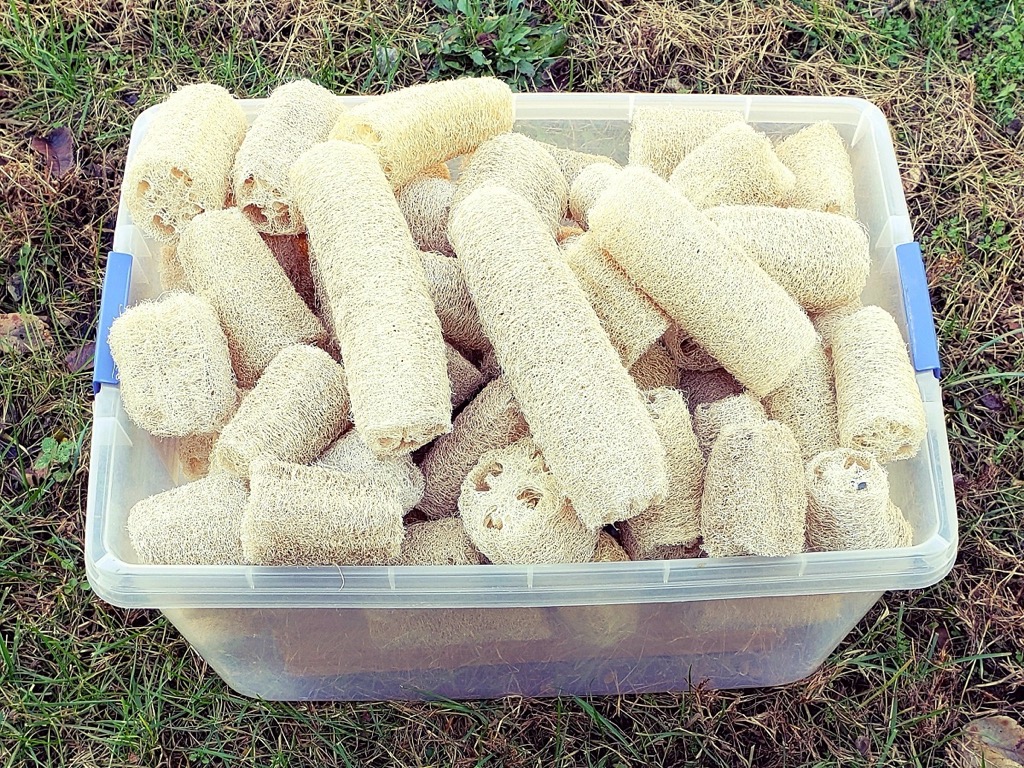
After taking the sponges off the line they can be stored any way that works for you. I keep mine in a large tote in a back room (Photo 7). I let family and friends know this year’s luffahs are ready to go and the requests start coming in. One family member likes me to send her enough to give to all her friends as gifts. They especially like the fact that they’re organically grown and processed without bleach or other chemicals.
Conclusion
If you’ve never grown luffahs they’re a fun novelty crop worth growing. Even if you never process the sponges, the smallest immature luffahs can be eaten like zucchini. For other gardeners, luffahs are worth your time to see how they perform as bath sponges, scrubbers for dishwashing, window and car washing, dog chews, etc. Some of your friends and family will certainly enjoy them as gifts.
Most importantly for preppers, luffah sponges will be an important cleaning commodity after the SHTF.