


Greenwood crafts are essential to the preparedness community. It allows us to create what we need on the move or on homesteads, the things we need to keep going. This is why I have written this article on the practice of bodgery, a sect of greenwood crafts.
Bodger. Though the word is synonymous in the United Kingdom with doing only half a job, it is also known in greenwood crafts circles as someone with great skills in the handling of unseasoned timbers (greenwood), with minimal tools and within the woodland masters of their craft bring forth fabrications of assumed unattainability. Quite simply, a bodger, named after their favourite tool, is someone who crafts using the greenest of timbers while working in a symbiotic relationship with the woodland in which they dabble. That might include the production of chairs and other furniture, gardening tools like dippers or digging sticks, shingles for roof tiles, draw horses as work vises, tables, turned goods using a pole lathe — like cups, bowls, chair legs, and candlestick holders or perhaps even wicker baskets weaved of the thinner twiglings. But that is not the discussion here. We’re talking about the fundamentals of bodgery, and how to start off before embarking on more intricate projects.
The primary distinction between bodgery and bushcraft is rather subtle. Personally, I consider them one in the same. See bodgery involves the study and practice of greenwood crafts, just like bushcraft is. Bushcraft however, is centred around meeting the basic needs of the woodsman, such as crafting tools and shelters to enhance your comfort during your short stay in the woodlands. However, it’s important to note that bushcraft should not be confused with the military’s application of fieldcraft, which focuses on the manipulation and manoeuvrability of the landscape for the easing of military exercises. Whereas bodgery focuses on the longterm production and use of greenwoods crafts, for trade or personal use. Both bushcraft and bodgery producing the ability to create your needs and desires using the materials available in abundance in the outdoors. It should be said that all of the skills discussed in this paper pertain to both the bushcraft and bodgery crowd, as they focus on long-term woodland management for maintaining the woodlands for the following years to come.
Now we have a brief understanding of what bodgery is, we should discuss the primary function. The bodger produces no more product than what the bodger can reproduce. Through a process of woodland management. This means to maintain a woodland to keep a constant supply of workable greenwoods, fire woods and construction timbers. Bring only what you can carry on your back in the woodland and take only what you need. Abundancy is the catalyst for complacency. It is not enough to allow a woodland to re-gain its own supply of usable greenwoods for your crafts projects. Mother nature is an all powerful master, but does not take your needs into consideration. This is why you must actively manage it through a practice of pruning, coppicing, and waste product management. That is your safest bet to ensure there is always enough greenwood to be used for the following years to come.
The Infinite Coppice
In ancient times, our ancestors were well aware of our connection with the woodlands that surrounded small settlements and were aware of the life that was brewed there. They knew to manage and care for them because they were assets abundant with function. Hence the act of coppicing.
Coppicing is the act of cutting trees to the stump in the late fall to allow room for more growth and workable woods. When we consider coppicing our woodlands for fresh green wood timbers to be used as firewood, or kindling or greenwood crafts, we must first consider species.
There are two main groups of trees, trees that lose their greenery in the winter, those are called deciduous. And trees that retain their leaves during the winter, and those are called coniferous trees. If you are uncertain if a tree is a coniferous tree or a deciduous tree, you have a few identifiable features without having to be an expert in tree identification. Namely, shape of the tree and how the greenery looks. In a coniferous tree, they resemble a cone shape and have thin, pointy, needle like or scaly looking greenery and still has its greenery in the winter, these trees likely have brown or green oval shaped droppings on the tree called cones. If it doesn’t have those features, you can assume it is not a coniferous tree.
The reason it is important to identify whether a tree is coniferous or a deciduous tree is because coniferous trees do not respond well to coppicing. Once they are cut, that is usually the end of the tree. Deciduous trees however are very responsive to coppicing, most deciduous trees will successfully respond to coppicing many, many times. For those who are more familiar with tree species, ash, oak, hazels, alders, willows, birches, elms, and beeches respond exceedingly well to coppicing amongst many other species. And usually produce many shoots.
When we plan to coppice we must be sure we treat the tree we are coppicing with respect. This means reducing its susceptibility to rot and stress. This means choosing the correct season and cutting technique. To coppice, first only harvest your tree or start a coppice tree during the late fall, when the tree is now dormant due to the colder temperatures slowing the flow of resources (oxygen, carbon dioxide, nutrients, minerals, sugars, etc. ) in the tree, to do it outside of the cold season will cause undue stress to the tree and will likely kill it. Secondly practicing proper cutting technique. Which means cutting the tree at a slight angle at the base and to maintain a very smooth surface, to prevent rain water from idling on top of the tree stump, as this will cause the tree to rot, and thus kill it.
Coppicing orchards are parcels of land dedicated to the production of greenwood timbers through the practice of coppicing. It takes about 3-4 years sometimes even 8 years for a tree to recover and produce workable greenwood after a successful coppice. This is what produces renewable resources for future greenwood projects. A good practice is to have at least 4 coppice orchards on your plot of land so that you can cycle through which orchard you should coppice each year.
How to coppice:
– Find a deciduous tree, possibly amongst other deciduous trees of the same or similar species intended for the production of a coppice orchard.
– Create a clean cut at the base of the trunk a couple inches off the ground and at a slight angle. Using a saw or a swift cut with an axe, making sure to clean afterwards.
– Leave the stump for 3 to 4 years to re-grow their timbers. Where after it will produce several tall ½ – 2 inch thick very straight sticks. Which can be cut to coppice again.
– Repeat on 3-4 plots on your land and rotate the trees that you coppice so you can have an infinitely growing coppice harvest for your crafts or firewood.
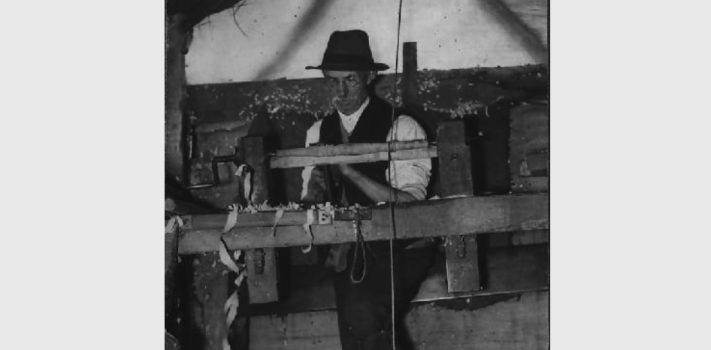
The bodgers bodger
The essential tools of a bodger that cannot be created in nature without excessive efforts are the axe, chisel, bushcraft knife, and hand saw. As well as other common tools, but for more advanced projects, such as pole lathes, shaving horses, draw knives, and throes. But when you want to hit something what are you supposed to use? A bodger. The very tool that practitioners of bodgery are named after. It is in essence a heavy-headed mallet that is constructed using a single log and carved into shape using the essential tools outlaid previously, intended to be used to hit your pegs, dowels, and tool heads to produce cuts.
How to make a bodger:
– Start with a freshly felled timber trunk, ensuring it has a diameter of at least 3 inches but no wider than 9 inches. Look for a relatively straight section with no knots within 1 to 3 feet in length. (Keep in mind that a wider diameter makes for a heavier head, and the log’s length determines the handle length if you’re making a hand bodger or a sledge-style bodger for driving in posts.)
– Divide the bodger into two main parts: the handle and the head. For the handle-to-head ratio, a general rule of thumb is 2:1. You can adjust the head’s size if it feels too heavy.
– Use a saw to cut into the timber, creating a division between the two main parts. Ensure the cut is only deep enough to leave a 2 to 3-inch thickness in the center for the handle.
– Employ a hand axe to remove excess wood from the handle using broad strokes, similar to splitting wood for a fire. Continue this process until you achieve a rough handle shape attached to the larger log for a head.
– Clean the handle by using a knife or axe to remove small amounts of wood, to produce a smooth handle. Also, remove any bark from the head to prevent rot over time. Finally, chamfer both the top and bottom of the head and the bottom of the handle using your knife.
– Congratulations, you’ve created a fully functional greenwood bodger. The tool’s handle will be robust and resilient because it’s shaped from a single piece of wood, creating a strong bond without the need for glue.
Propping up sticks
Venturing off into the woodland and propping sticks against a tree to create a den is synonymous with childhood. We were re-incarnating our innate desire to construct. We will be discussing the simplicity that went into housing the poor and middleclass during medieval Europe. This type of construction is called wottle and daub. It is the process of taking prepared coppice timbers and weaving them inside and out of stakes and layering timbers on top of each other to create a wall. Then a mixture called daub is covered onto the wottle to create a wind break and add insulating value. This material blend can be used to create walls around frames for expedient buildings in the woodland, such as workshops, animal housing or living quarters.
How to wottle:
– Firstly coppice a woodland for as much wood twigs as is required for your desired construct.
– With your feet or a long stick, drag to mark mark out your construction area on relatively loose soil.
– In the grooves you’ve just made, push twigs into the ground as tall as you wish your wall to be. Keeping in mind, if you want a 4 foot high wall, you will need to allow for at least 1 to 2 feet of length for pushing into the ground. Set them 1 foot apart along your groove line.
– Weave the twigs in and out of the twigs sticking out of the ground. Alternating starting on the inside or outside of your groove. And if a twig is not long enough then you can just take another twig and continue where the last one left off. If a twig is too long, simply cut off or wrap the twig around to continue weaving through the twigs.
– Every ½ foot in height it is important to tamp down your layers. This is where a bodger comes in handy. Gently tap the weaved twigs until the gap is smaller, then continue.
– This is the wall of your building, fence, hut, pen, or workshop. You can drape a tarp or waxed/oiled cloth over the top to finish if you wish. Use daub to create insulating value to the wall structure.
How to daub:
– Daub is a mixture of clay soil, water, straw. You can use pretty much anything, manure is also useful however it is not necessary. You mix to a 3:1:1 ratio. If you add too much water, or there is not enough available of any one material, as long as the daub is not too liquid and resembles a sticky mud pie, it will work. You can use your feet, a mixing stick or your hands to mix the daub.
– You must mix this in great quantities to coat your walls at least a total of 3 times for the best insulating value.
– The best idea is to create the daub on the side of the wall you want to coat in the mixture, so there is no need to transport it to your wall. However this is not always possible, you can prepare the daub on a cotton sheet for easy transportation or use buckets or wheeled barrows.
– Once a transport solution is found, the fun begins! Grasp a handful of mud pie, and lob it at the wottle walls. Once the first layer is done, use your hands or a some cloth slightly damp to smooth the surface over. Then repeat like previously mentioned at least 3 times. Then you are done.
Though this is only a short list of the practice of bodgery, and there are so many other practical skills bodgery provides. I find it important to share these vital skills, because even as woodsman or homesteaders, it is important not to rely so heavily on what the grid can provide. Your hands, and yours alone are capable of providing for all your needs.