


(Continued from Part 1. This concludes the article.)
As these CAD software options are 3D drafting programs, I strongly suggest purchasing a 3Dconnexion 3D mouse. It essentially provides a dedicated joystick used in conjunction with your normal mouse which you move as if you were holding onto the 3D object in real life and allows you to rotate and zoom in easily as doing so with a mouse can be frustrating without extensive practice. It is pricy at $150 (approximately the cost of a printer!), but well worth the expense.
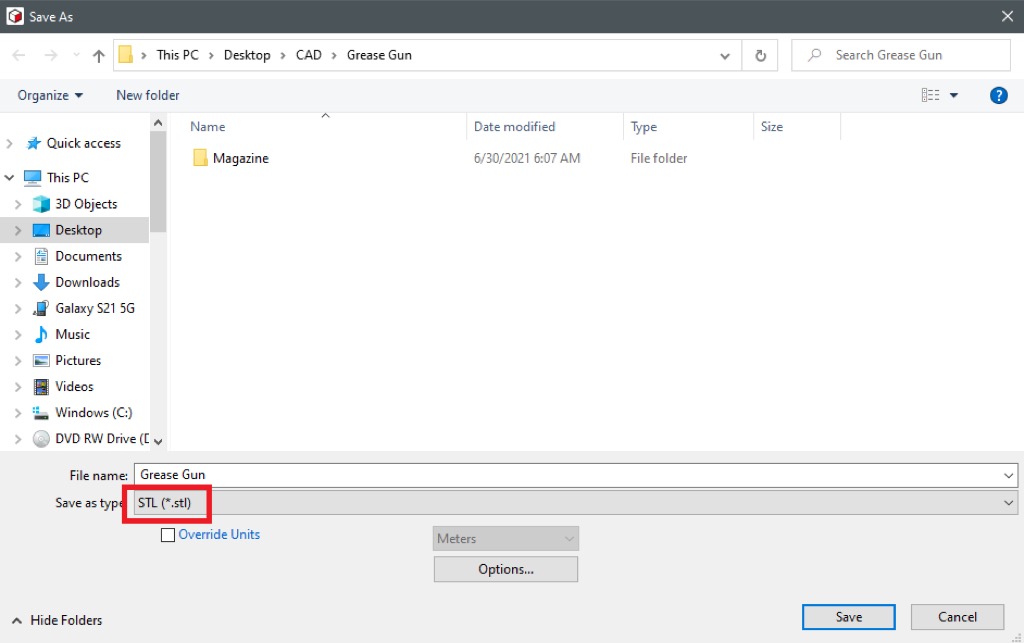
With the step file produced, it is then converted to a stl file using the CAD program. A stl file converts the 3D design into that made up of many small triangles (stereolithography). It’s an old standard dating back to the 1980s but is used because it simplifies the object for the computer by only detailing the coordinates of the object’s “shell”. The computer then knows that anything under the stl shell is a solid object, and anything outside is empty, and this makes it simpler to write a g-code from this, even though we as humans would be able to look at a step file and immediately understand what is solid and what is not. Converting a step file to a stl file in a CAD program is simple as “save as” and changing the file format in the save window to an stl.
From here the stl is then uploaded into a software provided by the 3D printer which allows you to position the stl object onto the platform or “bed” of the printer to get the orientation desired for printing. You then input the settings for the printer based on the material you are using and then save the result as a g-code file which is a text document. After uploading the text document to the printer either via a direct USB link or a sd card, you then can select the file in the printer screen and begin printing.
It should also be noted that in many cases one will not even have to design anything with CAD, as there are plenty of online repositories of CAD files that are freely shared which can be downloaded now and stored on a hard drive or DVDs for use in the future. The following is a list of some popular hobbyist additive manufacturing websites:
Thingiverse – This is the most popular database of stl files for 3D printing. Nearly anything you want can be found here. The issue is that the website is horribly run and has many issues. It is necessary to download the brave internet browser and download the Thingiverse Downloader extension by Jacopopsen in order to use this website.
Printables – This is a competitor to Thingverse which has a much better website design and consequentially people are transitioning to it. However as it is newer, it has a much smaller database than Thingiverse.
GrabCAD – This site does not have many stl files but instead CAD files like step files. These are much easier to edit than stl files and are useful for assisting one in creating their own files by eliminating a lot of tedious work.
Odysee – This is a website that displays the blockchain LBRY database which is a decentralized file sharing platform. It operates very similarly to Youtube, except rather than just videos it can also host files. Notable “channels” to download files from are Gatalog and AWCY, who are the foremost leaders in 3D printed guns and accessories and provide these files for download for free with complete documentation to assist the build.
DEFCAD – This is the original 3D printed gun group run by Mark Wilson who identified the application of AM as a check against gun control. To access DEFCAD you need a LEGIO membership which is much like a black side version of the NRA. This requires your ID in order to register to prove you are an American citizen. This is not for everyone as many prefer to maintain their privacy, however LEGIO is an organization worth supporting as much as the NRA (or GOA, if you are against Wayne LaPierre).
Choosing a 3D Printer
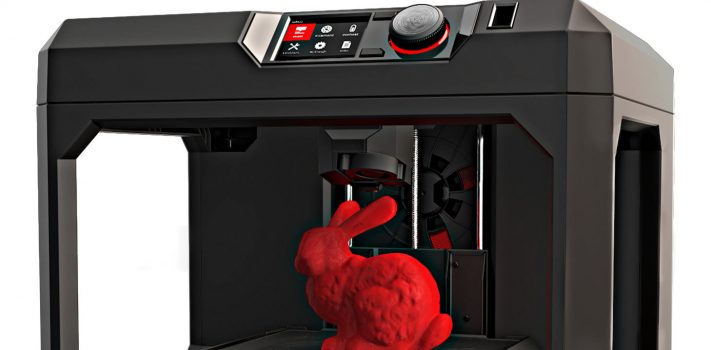
So far, we have covered the CAD aspect. The next is the CAM aspect which is fairly straightforward. The first consideration is selecting a printer. There are several AM processes available, but the one we will focus on is FDM (Fused Deposited Material). This involves injecting molten plastic on top of a bed (building surface) and moving the injection nozzle around in 3D space to create layers of material stacked on top of each other to create an object without the need of an injection mold.
There are many FDM printers on the market, but the most popular one is the Ender 3 due to its low cost. An Ender 3 can be nominally obtained from China for as little as $130. It can print nearly any plastic sold for FDM printing and has a working space large enough that one can print large objects like gun receivers or magazines. For trying out 3D printing this cannot be beaten before upgrading to higher quality, but much more expensive American-made printers.
Which Material?
Next is to consider the material. FDM printing material is sold as plastic filament which is wound up on spools. Typically, this is sold by the kilogram, although this weight is not exact, as it includes the spool weight. Consequentially the actual plastic received is often about 10% less. Most printers including the Ender 3 utilizes filament with a 1.75mm diameter. An old standard was 3mm/2.85mm diameter but this has been rendered obsolete and it will be rare to find it. There are a wide variety of plastics available but the two plastics to consider is PLA and ABS.
PLA is a biodegradable material that is essentially polymerized sugar. PLA is dense and rigid with a very low melting temperature which makes it easy to print with and produces very durable parts. It is especially useful for making the core for shell casting metals as the PLA burns off relatively cleanly compared to other plastics. In theory PLA should degrade under moisture, but most Chinese sourced PLA is often not true PLA and consequentially lacks the biodegradation, which for our purposes is a better characteristic.
ABS is the same kind of plastic used in LEGO toys. ABS is a significantly cheaper plastic than PLA at almost half the cost and is less dense (which produces lighter parts but also means a higher volume of plastic per kilogram spool). ABS plastic is difficult to print with because it has a tendency to not bond at the layers or warp due to its high melting temperature. However, once the settings are dialed down for ABS very cheap and durable parts can be produced which are more heat resistant compared to PLA, and this makes it a very useful material.
A critical asset for FDM printing is an enclosure. There are many designs available that can be made but the simplest is to print brackets and cover in plastic sheet. There are many versions of this design for download on Thingiverse. This enclosure is then placed over the printer while it is printing, and it helps to keep heat in and prevent cold air from touching the print. This normalizes the cooling rate of the plastic which in turn leads to better results. An enclosure is practically mandatory in order to print ABS well.
Upgrade to a Glass Bed
Another upgrade for the printer is a glass bed. This is most simply obtained by taking a $5 Walmart mirror and cutting it into squares the size of the bed dimension using a tile cutter and using binder clips to attach it to the bed. The benefit of a mirror over the factory provided PEI sheet is that a mirror has an essentially perfectly flat surface which ensures that the nozzle providing the first layer adhesion has consistently full contact. This is important because it prevents your print from detaching or shifting during printing which will cause a print to look almost like it was warped in the static of an old CRT monitor.
Another benefit is that a glass mirror is non-porous and chemically resistant which allows ABS resin (ABS dissolved in acetone) to be painted across the surface and provide a perfectly sticky surface for the molten plastic to bond to, ensuring the print does not detach. In order to detach the print from the glass after it is done, the base of the print is sprayed with 90% or higher concentration Isopropyl Alcohol. The alcohol works under the print by diffusion and with a series of loud cracks, it removes the print from the surface so cleanly you can pick up the print as if you placed it there yourself, and the space below the print will have all plastic removed to where the mirror is perfectly shiny once again. All that needs to be done to refresh the bed is to paint on more ABS resin.
Conclusion
With this, the reader should be fully equipped to begin practicing 3D printing and force multiply your emergency preparations. Whatever your end use be it printing respirator adapters due to a chemical warfare threat, making replacement parts for machinery, or maybe even just toys for the kids (or yourself), additive manufacturing is an adaptable technology that fits well within the needs of survivalists.
Earlier this year, I taught someone how to 3D print who later found themselves suddenly thrust into a national war with bad guys on both sides and him and his family stuck in the middle, and he has saved countless of his fellow countryman’s lives with his printer by printing tourniquets and other lifesaving equipment when supplies were otherwise non-existent due to the fighting. Ignore technological advancement at your own peril!