


In The Novice’s recent article Timekeeping When the Grid is Down, he asked for someone with a better knowledge to write an article for TEOTWAWKI clock and watch repair. While we’re waiting for that person to step up to the plate, and I hope they do, I thought that I’d offer some of the clock-repair basics I’ve learned in the past eight months.
I’ve always loved any kind of windup time piece. Some combination of the beauty, intricacies, and the mechanical aspects of clocks captured my imagination at a young age. Once I used my birthday money to buy $2.50 pocket watch. I soon had the back open to examine the marvels beneath the cover, watch the mainspring dancing about, and eventually ruined the spring by accidentally sticking a needle into it while poking around the gears. This is how one learns to be a mechanic.
At an auction last year was a grandmother clock (a small “grandfather” clock) which the auctioneer almost couldn’t give away. Anyone who frequents auctions knows that auction clocks never work. He finally talked one of the auction regulars into taking it for $30, although begrudgingly. When I got home, I couldn’t stop thinking about that clock. Wow, $30, what a treasure if it were running. I wondered just how difficult it could be to repair clocks in case I ever saw another deal like that.
My biggest concern was just exactly how they got all those tiny gears in place between the two brass plates which held it all together. Even now I still wonder. So the thought of trying to learn clock repair with my nine thumbs made me shudder. A week later I finally decided to man up and research clock repair to see just what it entailed. I quickly discovered I’d been making some dumb assumptions all along. Once I figured out the secret I realized, “Wow, I can do that.”
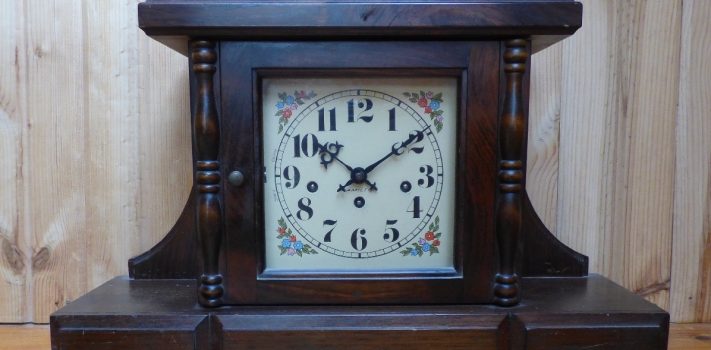
With a brain wired for a mechanical things and problem solving, fixing clocks soon became a fun challenge for me. In the past eight months I’ve been able to repair seven of the eight clocks I’ve attempted including wall clocks, mantle clocks, an anniversary clock (so named because it only needs to be wound once a year), and a cuckoo clock which is a little trickier. I have three more clocks (and counting) to work on as soon as I have time, maybe when I put the garden to bed and fire up the woodstove.
Not only have I learned a cool new skill, but I’ve learned many fascinating things along the journey. Like how exactly cuckoo clocks cuckoo. It’s ingenious! And how their pine-cone weights remove the need for mainsprings inside the clock.
THE BIG SECRET
Here’s the big secret: most clocks only need a good gearbox cleaning and an oil change to be completely functional again.
The majority of repairs don’t require disassembly, or separating the individual gears at all, but merely taking the “gearbox” out of the clock as a single unit. The whole concoction of gears and springs held together between two brass plates is called the movement, but for this article let’s call it the gearbox.
As The Novice mentioned, professionals use a vat of cleaning solution but I started out using 91% alcohol as recommended by someone online, then upgraded to Ronsol lighter fluid, and for future projects, I have Coleman fuel held in a small container for soaking the gearbox overnight. I also use special clock-lubricating oil with the all-important needlelike tip for applying oil to the gear axles.
THE REPAIR PROCEDURE
To begin, it’s important to remove the pendulum from its small hook to prevent the delicate pendulum spring from being bent and damaged while the clock is being moved to the work station. If the clock door won’t open far enough to rest on the work surface, remove it to prevent breaking the wood frame if the door is overextended.
Next, separate the gearbox from the clock case. This generally involves two simple steps: removing the clock hands by twisting a small nut, then removing the 4-6 screws which hold the gearbox in place. The pieces tend to be small so I use a mechanic’s magnetic bowl to catch and hold all parts as I remove them.
Once the gearbox is removed, I photograph it from every angle as a reference for reassembly. On more complicated clocks like cuckoo clocks I photograph everything inside the clock before touching anything, then the gearbox after removal.
Once photographed, I hold the gearbox over a wide white bowl and using the pointy flip-up nozzle on the Ronsol lighter fluid, I begin bathing the entire works, concentrating on the axle ends of all the gears. A few large gears such as the winding mechanisms axles aren’t as touchy so if some gooberization is missed there, it’s not super important. By catching the runoff in a white bowl the griminess of the fluid lets me know how effectively the cleaning is working, as well as how dirty the gearbox was to begin with. After a good cleaning I let it dry, then repeat the process.
Once the gearbox is well cleaned, all it needs is an oiling before putting it back into the clock case. The correct oiling technique is important and special clock oil should be used. A small plastic bottle costs $7.95 and has the requisite needle-like nozzle with enough oil for perhaps 30 clocks.
The most critical thing about the oiling is that applying too much will harm the clock in the long term. Since clock gears have no bearings the oil itself acts as a sort of bearing. The axle hole is small and precise and due to the principle of cohesion, oil helps hold the lightweight axle away from the edges of the brass hole. On many clocks, each axle end sticks out through a small indentation in the brass plate. Contrary to what seems obvious, this small well should not be filled with oil. A very precise amount of oil should be applied, just the smallest amount possible which will encircle the axle. When too much is applied, the excess runs down the face of the plate when the clock is returned to its normal upright position. As it streaks down the brass plate it drags most of the oil with it and the cohesion effect is lost. When the oiling is complete, stand the gearbox upright to be sure there are no telltale streaks. If there are, dab the remainder out and try again. Cotton swabs aren’t recommended since tiny fibers can stick to the axles and cause problems. I use a very small piece of paper towel folded into a sharp point.
After cleaning and oiling, put the gearbox back into the clock and reattach the hands but keep the pendulum out for now. Return the clock it to its normal location on the wall or mantle. Clocks lacking pendulums should start on their own once wound and upright. For pendulum clocks, put the pendulum back in place and start it swinging. While the pendulum is swinging test the chimes by moving the minute hand forward to the 12. When you hear some gears moving inside, slow down and inch the hand forward very slowly until the chiming begins. Another important clock rule: never move the minute hand backward. Some clocks are exceptions but I prefer sticking with the idiot-proof “never” rule. With the minute hand in the top-of-the-hour position, count the chimes. If it chimes the correct number, you’re good to go. If the number is incorrect, loosen the nut and move the hour hand ahead to the correct hour before cinching the nut back down.
After testing the chimes, if the pendulum keeps swinging, you’re in good shape. If it soon stops, it could be due to a simple problem. One common reason why wall, mantle, and anniversary clocks won’t run is because even though the gearbox is fine, the clock isn’t perpendicular enough to the floor of a room. When the clock is tipped even slightly, the pendulum doesn’t move an equal distance to each side of center and will quit running. Interestingly, with many clocks the pendulum is just barely a gnat’s eyelash away from perpetual motion. There is a single small gear regulated by a rocker arm attached to the pendulum where each tooth of the gear pushes the pendulum just that extra tiny bit to keep it in constant motion. The energy from the mainspring works its way up through all the gears, finally arriving at the pendulum gear to give the pendulum that little kick it needs.
The leaning-clock pendulum issue is easily repaired by listening to the tick-tock of the clock as it hangs on the wall, then gently tilting the clock ever so slightly toward perpendicular until you hear a smooth, even “tick-tock.” To work properly, the clock must make an even sound, not “TICK-tock” or “tick-TOCK.” You’ll know it when you hear it. Anniversary clocks have adjustable feet and a small circle on the clock base just below the bottom tip of the rotating pendulum. By adjusting the feet until the pendulum tip is pointing to the center of the circle, the clock is then perpendicular and should keep running assuming no other problems exist.
If your clock still isn’t running try re-cleaning and re-oiling. If that doesn’t work, you’ll need to seek professional help and probably a clock repairman as well.
SOME EXPERIENCES
One of my mantle clocks ran like a charm after cleaning and oiling, then quit not long after. I cleaned and oiled it again with the same result. I worked my way through each gear eventually discovering that one of them had just the minutest amount of play on one end of the axle, binding up the whole works. Chiming clocks with two mainsprings use one for the clock, one for the chime, and count the hours with a simple “bong.” Clocks with three winding ports generally use the center hole for winding the clock, the outside ones for the chimes, and produce a melodic sound as they count the hours. Fortunately, on my mantle clock the bad gear was on the chime mainspring. After unwinding the chime spring and leaving it idle the clock has been running ever since. It would take a professional with fewer thumbs than me to take the gearbox apart and fix the problem.
I’ve always been enchanted by anniversary clocks since I was a kid watching my neighbor’s endlessly rotating one way and then the other. It was fun discovering they have a different mainspring consisting of a long, very narrow, straight strand of flat metal called a torsion spring which the rotating-ball pendulum hangs from. I cleaned and oiled the anniversary clock and she came to life, running ever since.
I haven’t repaired any watches yet but the basic principles are probably the same: a good cleaning and oil change should fix it.
OTHER THOUGHTS ON TEOTWAWKI TIMEKEEPING
Before the advent of railroads with their time schedules there was no universal time, only local time. Once TEOTWAWKI arrives, local time will again become the norm using the “high noon” standard to calibrate timepieces. At that point, for those lacking functional clocks, I can’t at the moment think of a reason for time accuracy other than perhaps sentries keeping watch. Most of us will learn to know by gut instinct the approximate time based on sun position and our stomachs indicating mealtime.
One thing I check before bidding at auctions is the place of manufacture found on the brass plate of the gearbox. It could say Made in America on the clock face but the all-important gearbox is Chinese. I’ve only worked on two “Made in America” Chinese clocks. The one I bought 17 years ago ran great for 12 years but I haven’t been able to get it running again after repeated cleanings, probably due to a slightly bent pendulum spring. The other I bought for $30, a beautiful wall clock with $299.99 written in grease pencil inside the door. It’s been running for the past eight months after a good cleaning and oil change. Both Chinese clocks have a very rough “clankety” sound as they’re being wound where my German- and American-made clocks sound much smoother. Two of my clocks are stamped “Made in West Germany,” another interesting glance at history, and should last a very long time.
As The Novice pointed out, after the SHTF when no other options present themselves, Hoppes oil or WD-40 will get your clock back in business until you can barter for another timepiece or find a clock aficionado with the correct oil. Or you can just keep re-cleaning and applying a fresh dose of Hoppes until the clock quits running altogether. But that’s only after the SHTF. After cleaning, I oiled my first clock with WD-40 just to see if I could even repair clocks. The following week after learning I could add “apprentice clock repairman” to my resume of useful post-TEOTWAWKI skills, I re-cleaned and re-oiled it with my newly-purchased clock oil.
CONCLUSION
That’s about all I know about clock repair but I continue to learn with each new clock I attempt. The majority I’ve repaired have been running fine since I dusted, cleaned, and oiled them.
Go ahead and try these simple procedures, you’ll be pleasantly surprised at what you can do. Hopefully a professional clock repairman will submit a better article to bring us up to speed but in the meantime, there are plenty of online articles with better instructions than what my limited experience has allowed me to present here.
As a final note, my great grandmother’s antique wall clock, a family heirloom which was handed down to me, I saved to repair last after gaining some experience with less-important clocks. It was a very emotional moment when it started running again after so many years. I get teary eyed even now as I write this. I can picture her, all of 4’11” with her beautiful gnarled old hands, looking up at the old clock again and smiling, telling me what a good boy I am and telling me this certainly deserves a batch of her awesome oatmeal-raisin cookies. Here’s to you Grandma!