


My grandfather grew up on the wrong side of the tracks, and had to make do with just the things that he had. One of the skills that he learned was building a better cardboard box. He would fit and glue boxes together, and add wooden handles to make nearly indestructible cardboard tote and storage boxes. I have some of his old boxes that are 53+ years old, and they are still strong. My father never had the knack for it, but my uncle did! He would use the cardboard like plywood and fill edges with glue to add strength. He also built specialized tote boxes for things like his Ham radio gear, and RC aircraft supplies. If you have lots of cardboard available, then this is a good way to recycle it.
Grain is Strength!
The grain of cardboard is just like the grain of wood. The side with the small holes is the end grain. Almost all boxes are built with the grain running vertical, and crossed grains on the top and bottom. Crossing the grains adds strength to the top and bottom of the box. This is the same way that plywood works. So in building up boxes, we cross the grains to add strength.
Building up a Box
Here is the basic box-building procedure: Start with an existing cardboard box that is larger than the object that you want to place into it. You will lose anywhere from a ¼” to 3/8” or more, depending on the number of plies of cardboard that you use. I normally cut the top flaps off of the box. Start by gluing the inside flaps to the outside flaps with a waterproof wood glue.
Rectangular boxes will need a filler in the “step-down” section in the bottom-center. Match the filler grain with the flaps, and glue it down. Next cut a panel that fits the entire bottom with the grain opposite of the inner flaps, and glue it down. I normally go with three plies for the bottom, but more could be added if needed. Next, cut two panels to fit the sides with the grain running opposite and glue the three edges and face of the panels to the box.
Now, cut another two panels for the ends, and glue them into place. Repeat again with the grain running opposite. It helps to use weights to hold the cardboard down while the glue cures. Next, measure the height required plus 3/8” for a lid, and trim the sides. This will leave a square edge all the way around. Fill the edge with glue and let it dry. You may have to go over the edges multiple times, since some of the end grain will suck the glue into the corrugations.
The lid for the box can be made from four to five plies of cardboard. For a four-ply lid, cut one panel the size of the box, and three panels that will fit within the top of the box. For five, cut a second top panel. Make sure that the panels’ grains cross. Start by gluing the three smaller panels together, and then the top panels together. Next, align and glue the smaller panels to the top so that the small panels will fit inset into the box, and the edges of the top panels will be flush with the box sides. Fill the edges with glue.
Give the box and lid a few days to dry. You may then sand the rough edges of the box and lid with 220 grit sandpaper. You can now paint and decorate the outside of the box. Polyurethane spar varnish also works well to harden the box, and give water resistance.
Getting Creative
You are only limited by your creativity in what you can make. Dividers, supports, and handles can turn your basic reinforced box into something really specialized and quite useful.
Ninety-degree angles can be made by removing the web between peaks of the corrugations, adding glue, and folding. Your only limitation is that bends must be made at corrugation spacing. Curves may be made by slitting the web at one corrugation, moving to the next and slitting, and so on until you have enough to make the curve. Slitting should be done on the inside of the curve. Then glue the piece down, and after that fill the edge with a bead of glue. With the glue on the edge, you only need enough to seal the edge, not fill the entire depth of the hole. Sometimes though, the hole will suck up glue like you wouldn’t believe! Once it is in the proper shape, reinforced paper tape may be used to reinforce the slit side. This is the same method used in woodworking to produce curves in sheet material.
A Sample Box-Building Project
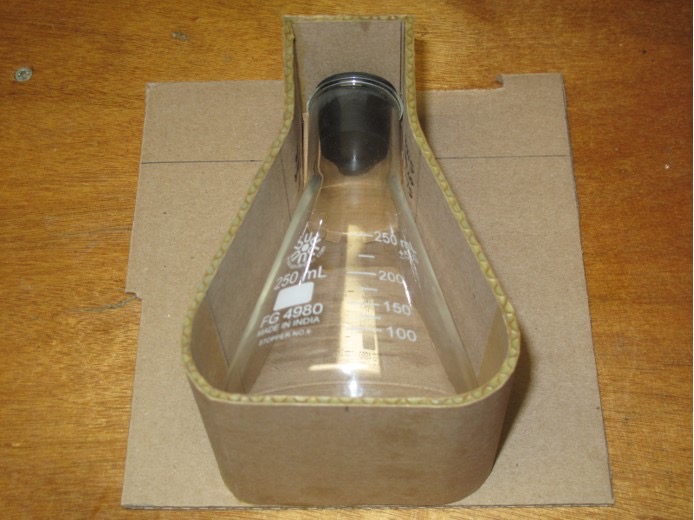
 The accomanying photos show a divider for a 250 ML Erlenmeyer laboratory flask. In the first picture, you can see the built saddle for the neck of the flask, and the layout. In the second picture, the full construction. You can see the material removal for the 90 degree bend on the right. The other 90 bend is a butt joint that is glued and reinforced with tape. While this is just a demo, it could be used in a box to keep the glassware separated to prevent breakage.
 I’m glad that I built this project at the bunker, as I learned that I am missing an important layout tool in my bunker workshop…a bow compass! Remember: You can’t anticipate everything! Another good reason to “live your preps”. It helps find your mistakes. During SHTF, this would have cost me some silver, instead of worthless fiat cash now!
My Early ProjectS: Weapons Cleaning Gear
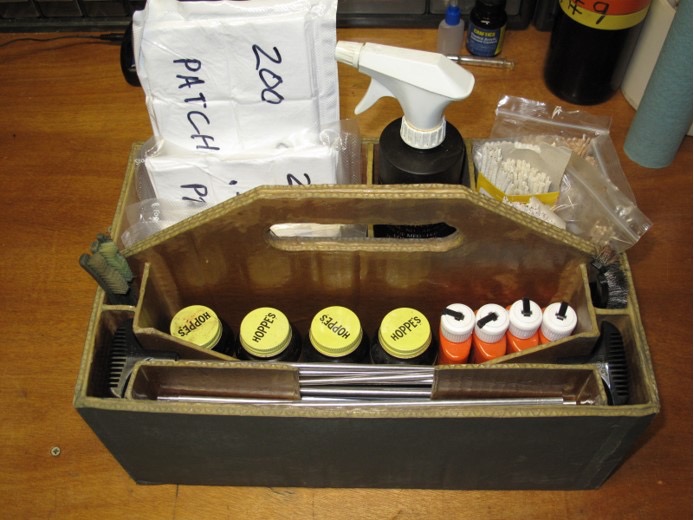
In the next photo is my bunker weapons cleaning tote. This has lasted 10 years so far, and it’s still strong. The inside is varnished and seems to resist the solvents and oils well. This was one of my first projects.
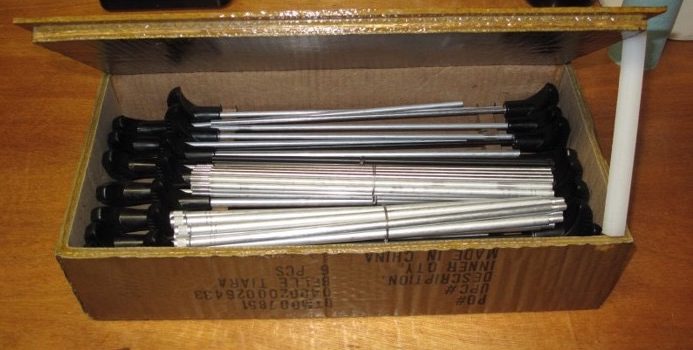
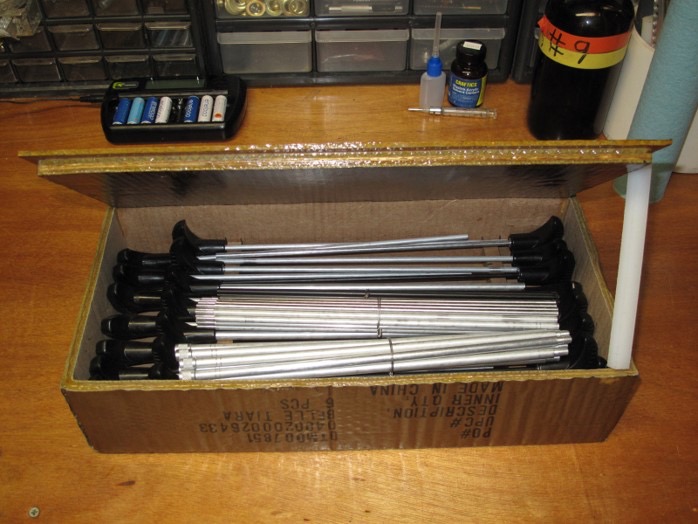
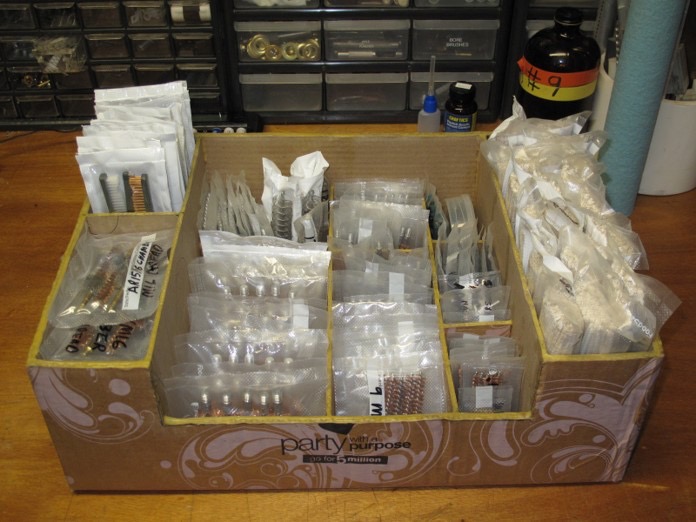
And here’s another project. The weapons cleaning accessory spares box. This was built for the arms supply cabinet.
Those are just a few examples.
So, as you can see, you’re only limited by your creativity with cardboard. Use your cardboard instead of throwing it away.
Thanks captain Nemo, I’m going to try this very informative article.
Great winter or evening project. This would be perfect for a few of my storage needs. Thanks for sharing.
Wow, this is pretty interesting! I have tons of boxes laying around. Looks like it just takes a little time…
Note to the editors: You totally missed a chance to publish this yesterday. Y’know, on Boxing Day?
*ba-dum* …..I’ll show myself out. 😀
Boxing day, very good Bear!
Love these.
You can also make furniture — tables and cabinets are really good options. Use your favorite search engine to see what others have done.
Agreed! When I was in design school one of our projects was to build a chair that would support your body weight using only cardboard and glue. Some pretty creative ideas! I was just annoyed because the small people in class had an advantage. I’m 6’4” so had to reinforce the chair quite a bit. card board is basically free lumber. I think of it as skeletonized MDF.
Very creative ideas Cpt. Nemo! Thanks for sharing.
Very nice and useful article Cpt Nemo. Were any Nautilus harmed in making this project? 🙂
Seriously a well written article, short and to the point. The Spar Varnish is a great point to add water resistance and additional hardening of the final product.
Now if anyone a better writer than I wanted to do something with the Art of Tin- Smithing I would be thrilled. A lot can be made with a few #10 cans and CAREFUL use of tin snips (they come in many styles right hand cut and left hand cut as examples). Rocket stoves, wood stove top ovens and such.
That’s a great suggestion, Michael. Points to a broader theme of creative re-tasking of materials.
This is soooo interesting. I was just looking online for cute storage boxes and yet I have a huge pile of great boxes to cut down and take to the recycling center. I had no idea one could make something strong that would last out of cardboard!
In other news: https://justthenews.com/nation/economy/2020-shattered-records-gun-buying-activity-amid-lockdowns-riots-presidential
Adding aluminum foil between layers (wrap corners to ensure coverage) will add protection for electronics. Dont forget top and its sides .
I don’t know about putting aluminum between the plies, as I don’t think the glue would stick well to the metal. Lining the inside of the box and lid with foil might work better. Though I would use copper foil, as aluminum creates an insulative oxide layer on the surface, and might prevent conduction. Copper compounds like oxide remains conductive, if I remember correctly (might be silver). 3M does make a copper shielding tape where even the glue is conductive. I’ve used that for making toploads on Tesla coils.
Lining the cardboard with copper or aluminum foil would make a good ESD surface or storage media for integrated circuits. You could press a DIP into the lined cardboard if you don’t bend the leads.
What is the best tool / knife to use to cut your cardboard?
I just use a box cutter knife, haven’t tried a table saw, but it might work.
I’ll add, keep the knife blade sharp and use a cutting mat. If you snap the very tip of the blade off replace it as it makes cutting way harder. I’ve also used scalpels for very fine detail work or cutting curves.
Tried the table saw. Clean cut on the top side, but a little tearing on the bottom. Still acceptable for projects though.
Really liked this. Cardboard is everywhere.
This is amazing, thank you! We have alot of cardboard, this will replace buying endless plastic bins that break regularly as well
I have always thought it interesting that the boxes that held bottles of solutions which are quite heavy were the ones glued instead of taped. They were so strong that sometimes I would have to use my feet to kick them apart in order to break them down for recycle at work. I have a question regarding rodents such as roaches and mice. Have you noticed any problems there or does the varnish help with that? Thanks for an interesting article.
I haven’t seen any problems with boxes that I’ve built, but that doesn’t mean that they couldn’t chew through them. I’ve had regular boxes that they’ve gotten into. The varnish may help keep them out, and sealing the edges with glue should help keep bugs out.
This is really great, thanks for sharing it. I have tons of cardboard boxes around, mostly for sending all of the cr*p (I mean fine products!), that I sell on eBay. I love the gun cleaning tote. Definitely going to try this out.
I’ve been repurposing boxes and cutting dividers to store all the canning jars that I pick up at thrift shops, but now you’ve put a nifty NEW craft project on my radar. Awesome!
I remember hearing about this 40 years ago and I’ve tinkered with it over the years. I never thought of building boxes specific for hard to store objects. I’ll have to explore that.
I typically use Amazon boxes, glue the bottom solid, then glue the sides inside the box to create trays. They are stiff, two layers on all sides, but they are not as sturdy as the author’s boxes. I have 3 of them that have acted as drawers in a purpose built wood cabinet sitting next to my desk. I’m thinking about adding more cardboard and thin strips of wood on the front where I pull them out of the cabinet due to stress at the corners. Wood boxes would have been more work, I wasn’t sure how long I would use the cabinent, I didn’t have thin wood to use for the drawings.
I wish you had provided photos or sketches of the steps. I am anything but mechanically minded, and as soon as you said to glue the inside flaps to the outside flaps, you lost me. Which are inside, and which are outside? Top and bottom flaps I understand, and also the sides of the box, but I have no idea what you are talking about.
Clearly other people do, but some of us need pictures. Thank you.
Picture a rectangular box. The inside flaps will be the shorter ones, and the longer ones the outside flaps. The inside flaps usually don’t meet in the center of the box.
The outside flaps usually have packing tape on them if they weren’t glued to begin with.
Hope that helps!
Hey Captain Nemo, great stuff.
I’ve shrunk plenty of boxes down in my day to make a custom size, but never thought of going to this level. Thanks for sharing. If lumber prices don’t start coming back down I’ll have to start using your technique for all my projects. 🙂
St. Funogas,
You’d love my grandfather! Most of his wood was scabbed from firewood. Just about every wood box handle was hand carved, and attached with roofing tacks. His old boxes used to be our good water source. His boxes would hold 4 to 8 Tropicana 64oz glass jugs of well water. We made regular trips to bring water home until my grandfathers death. The only box to fail was one in which a jug cracked and soaked the box. He was always in the 1/2 acre garden, cutting wood, trapping rabbits, and building things. We still have his raspberries and rhubarb in our garden.