


(Continued from Part 2. This concludes the article.)
Microgreens That I Have Grown
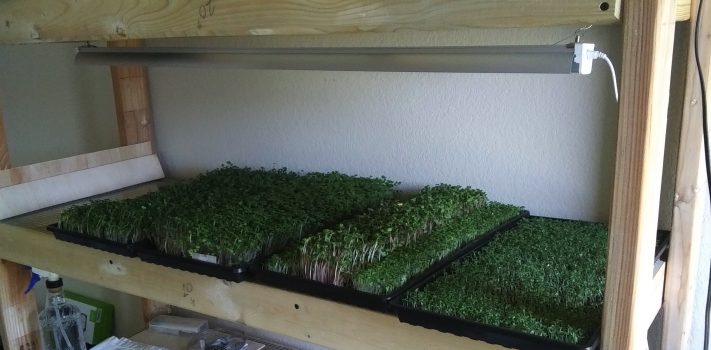
What follows are descriptions of some of the greens I have grown so far with a few observations I’ve made along the way. If you are planting trays several times a week, you’ll have overlapping harvest periods, and this gives you flexibility in terms of the different combinations you can make at dinner time.
Basil
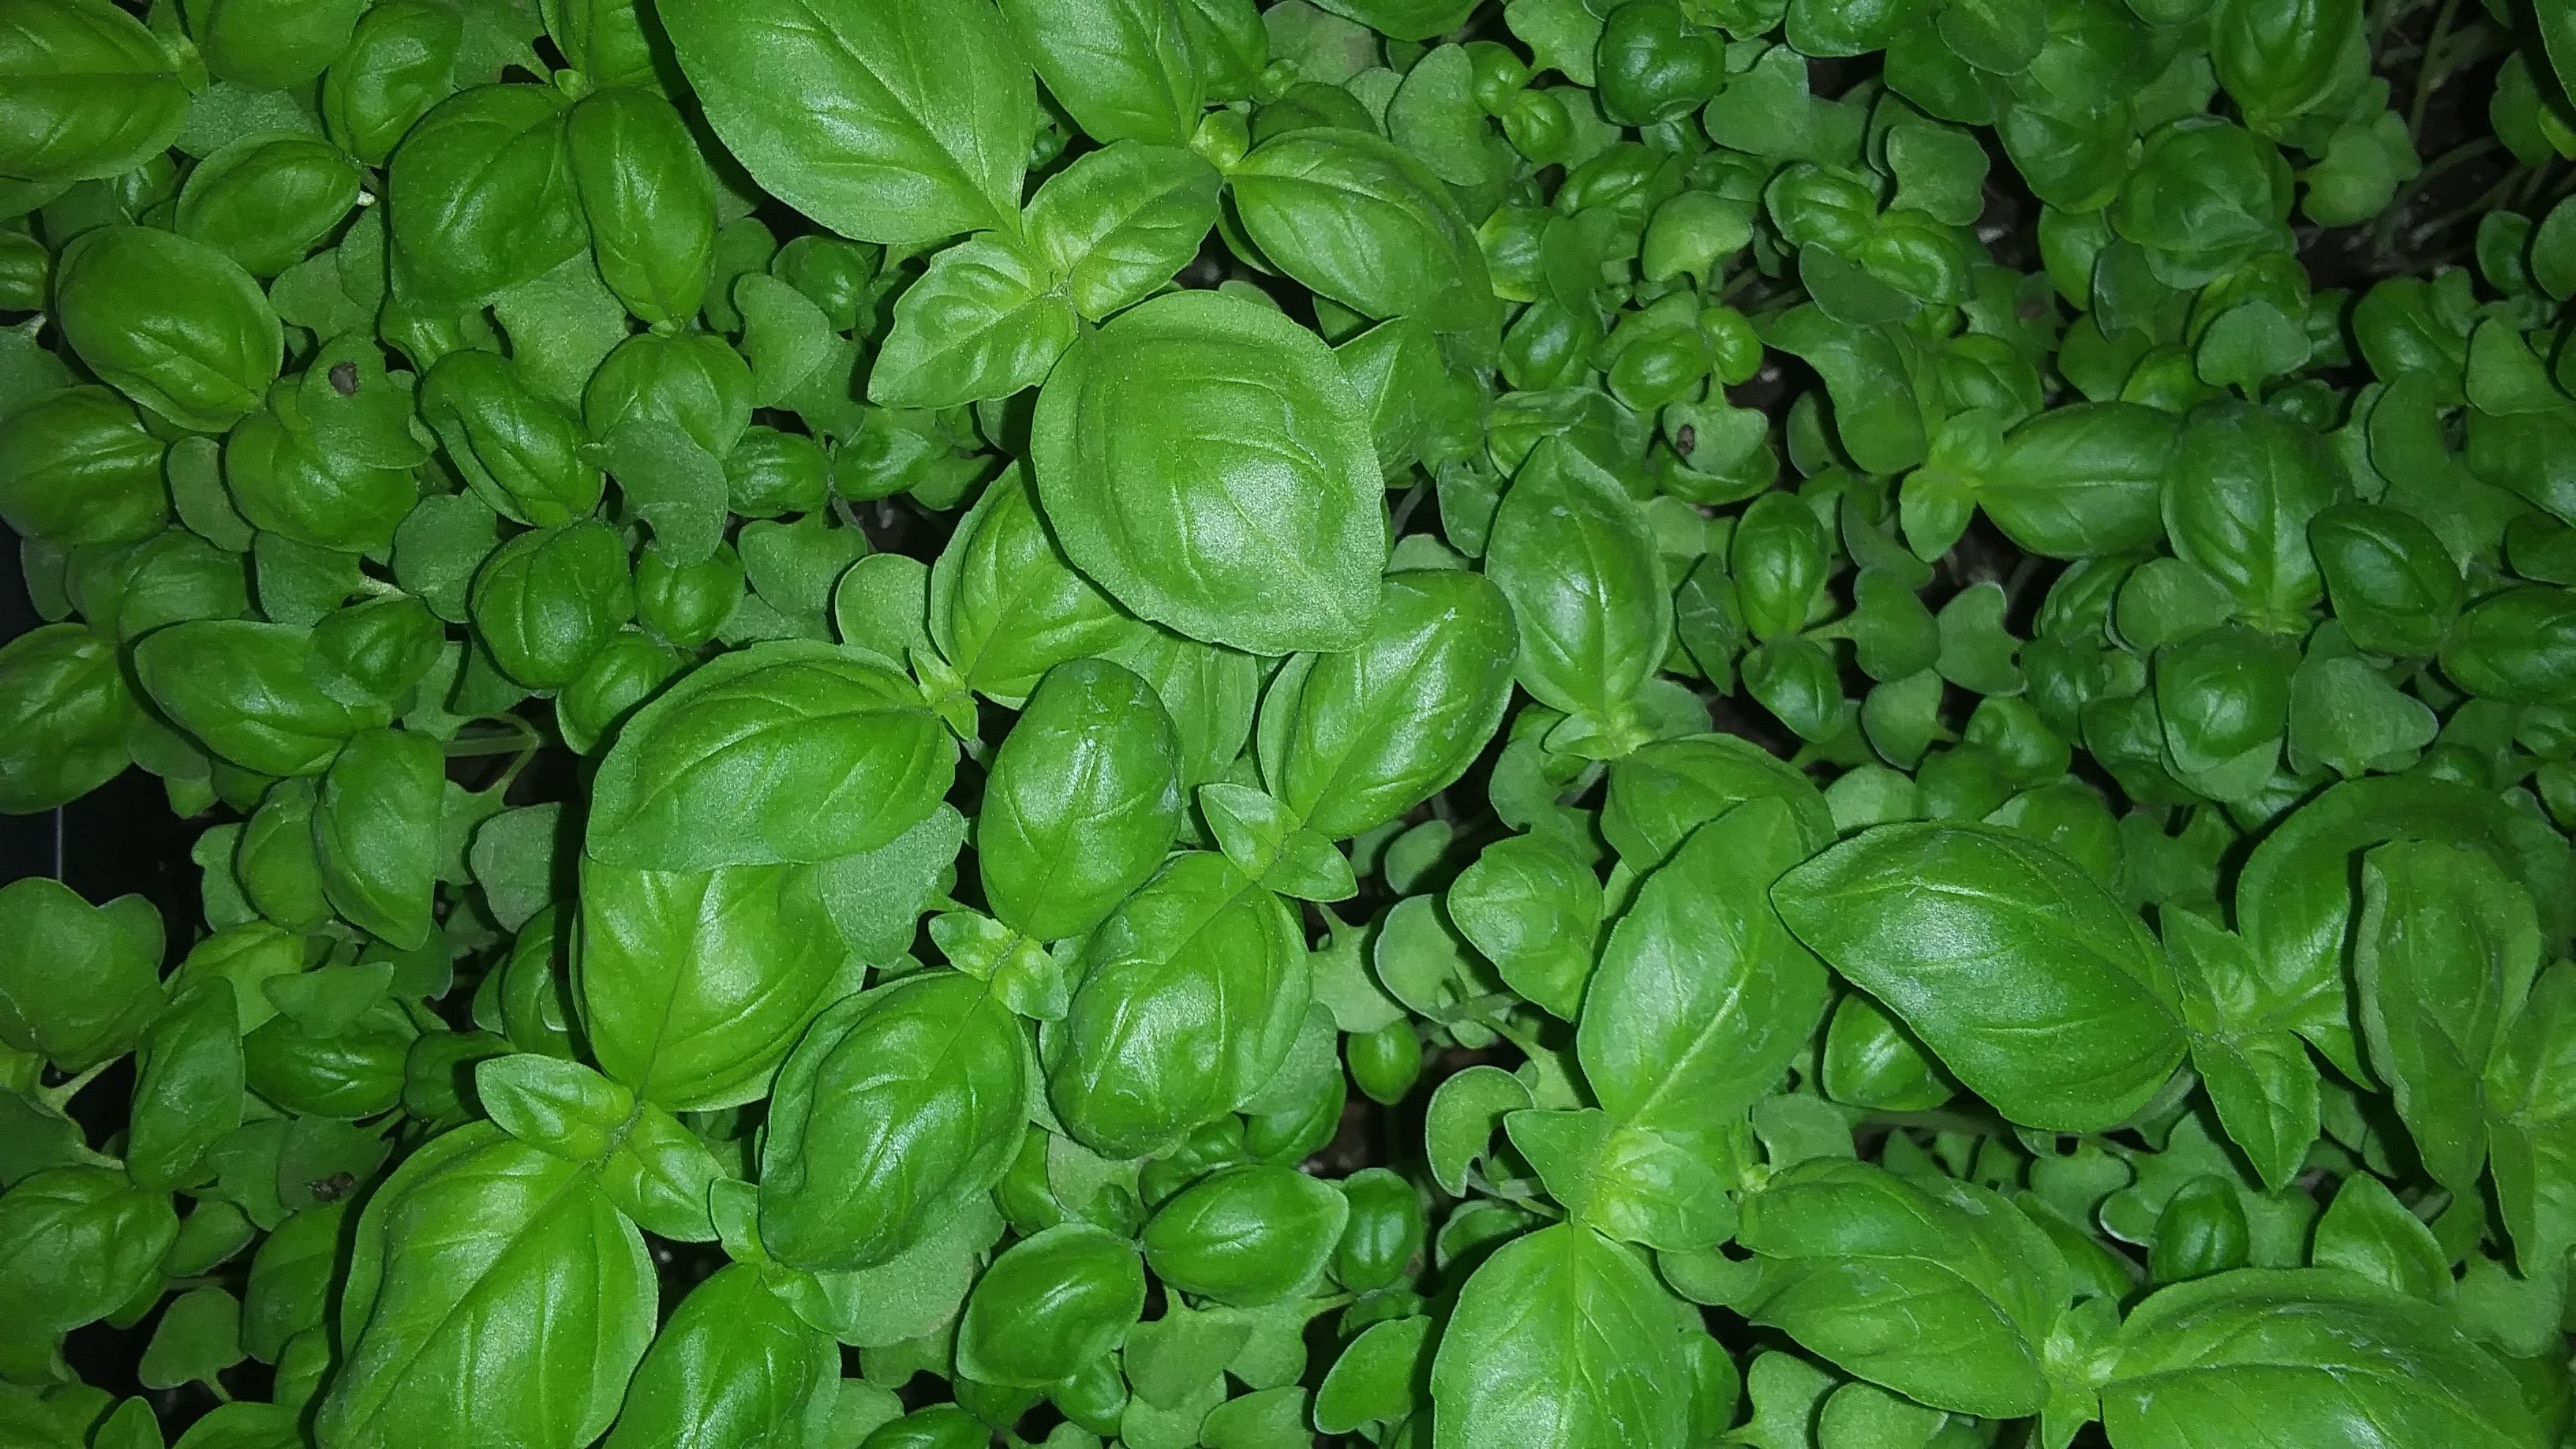
Basil grows more slowly, at least initially, but is well worth the wait. I sowed a couple 1020 trays more sparsely than I would normally, and let them grow for a full month. They went well beyond the microgreen stage and put on two to three sets of ‘true’ leaves (see Figure 15). I remain impressed that they were able to thrive for so long in only about ¾ inch of soil. We harvested both trays at once, and my wife made more than a quart of pesto from the foliage. That’s a real treasure if you can’t get to a grocery store.
Black Oil Sunflower
Sunflower could have been a contender for our favorite but, so far, we haven’t had any good seed. Both trays I grew had to be thrown out due to mold. The germination rate was abysmal. But my curiosity wouldn’t let me give up right away. I beat the mold back with a spayed mixture of hydrogen peroxide and water, then allowed the couple dozen plants which germinated to reach the harvest stage. They are robust in terms of size with thick stems and thick, waxy leaves, and the flavor is nutty and very similar to the flavor of sunflower seeds.
Reading reviews online from several sunflower seed vendors I noticed that there were several negative reviews for sunflowers in the spring of this year and, knowing that most Black Oil Sunflower comes from Italy, my guess is that there was a bubble somewhere in the supply line. It’s likely that huge quantities of this seed had to sit somewhere in suboptimal environmental conditions for much longer than normal, and that this led to the mold.
Like me, you may be tempted to purchase the Black Oil seeds sold as bird feed. Proceed with caution. The seed may be treated to prevent sprouting.
Buckwheat
Buckwheat is one of the larger seeds, but I have grown it without pre-soaking and have had no problems. Like radish it is tall with larger than average leaves. The flavor is mildly tangy. The hulls tend to hang on and you will likely find you have to remove some by hand around harvest time. One way to motivate them to let go is to gently drag your palm across the tops of the plants once or twice a day. If you have pets you will already be familiar with this behavior.
There is a health concern related to Buckwheat. (Please see “Health Risks”, below.)
Lentil
Being of a frugal bent, early on in this process I began to wonder if ordinary seeds as food stuffs in the local grocery store could be used as microgreens. I tried lentils from Target and they grew just fine. They make a very thin and tall sprout, with short thin leaves. The flavor was, for me, unimpressive. Everyone else in my family says they are good. For that reason, and because I am a tightwad, I continue to grow them.
A word of caution about growing from seed which is not sold as microgreen seed. Dried beans are sold with the assumption that you will be boiling them. I read that legumes may have salmonella on them. If there were germs on the beans, boiling would solve the problem but would kill the seed. So, before I pre-soaked these lentils, I washed them well with soapy water.
There are other grocery store seeds I plan to try, like Mung bean, but this leads me to raise another point of caution. Just because you can sprout it and eat it doesn’t mean you should. Kidney bean sprouts, for example, contain a toxin that may give you nausea and diarrhea. I will elaborate this advice below where I address health concerns.
Lettuce

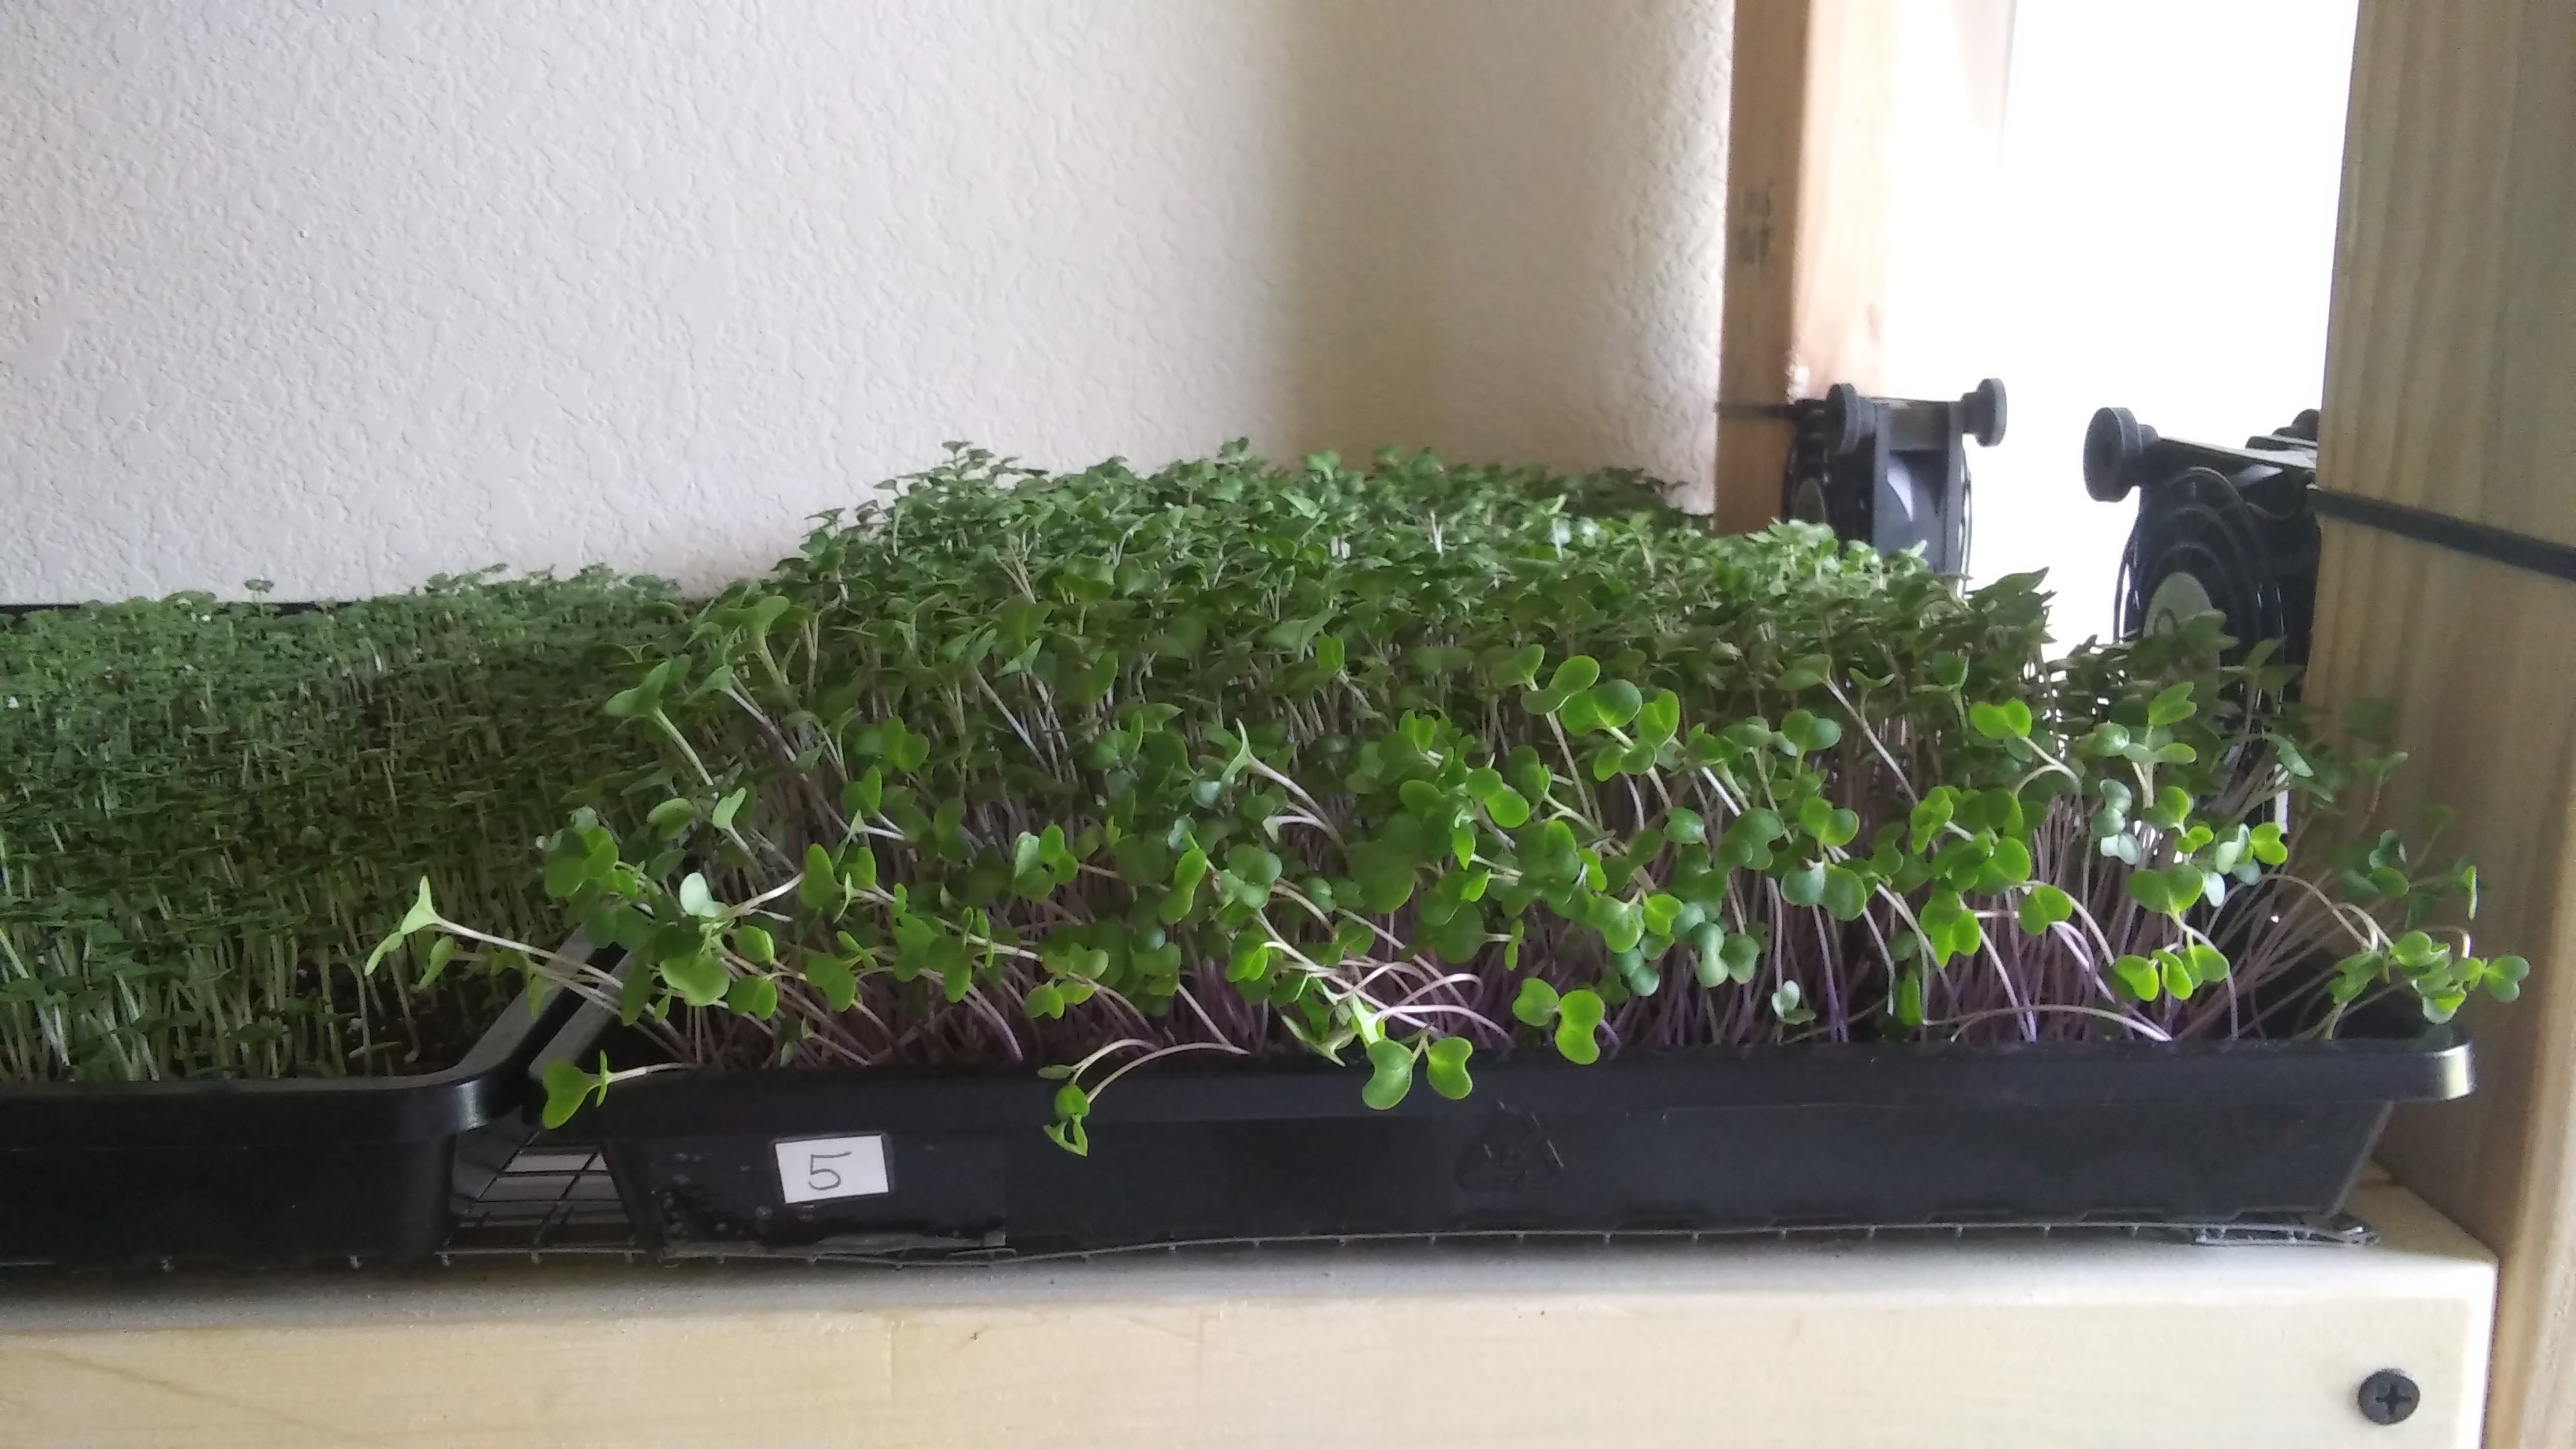
Like basil, lettuce is a good candidate to grow past the microgreens stage. Shown here is a tray of Romaine that grew for about a month (see Figure 16). I had sown it too thin, so I just let it take advantage of the elbow room and was pleasantly surprised by its luxuriant growth.
Mustard
A little of this microgreen goes a long way. It can be downright hot for some palates. I no longer grow a full 1020 tray of mustard, opting instead to sow some along with another seed type, or growing some in a smaller tray. You can get creative mixing seed types in a single crop so long as they will develop at about the same rate and to about the same size. Radish would be, for example, a poor choice for combining with mustard, because it grows so much more quickly, and so much taller.
The first time I grew mustard, I presoaked the seeds, as recommended by some. But when they soak, they become mucilaginous and very difficult to spread evenly across the tray. Since then I have direct-sown these and, while it might slightly increase the time required for germination, it hasn’t presented a problem. I only soak the larger seeds.
The first time we had the mustard greens we put them on corned beef sandwiches with mayonnaise, pickles, and my wife’s homemade bread. We loved it so much that we now coordinate our sandwiches around out mustard harvests.
Pea
As I’ve already mentioned, these were the first greens I grew. Technically, microgreens are grown to the developmental stage at which the first set of leaves, called cotyledons, appear. But most folks grow these considerably longer. By the time I harvest peas, they have put on additional leaves as well as tendrils. I’m not enthusiastic about their flavor. It brings to mind the damp clippings that adhere to the underside of my lawn mower’s carriage. But the rest of my family likes them. They add considerable volume to the salad and, when mixed in with more flavorful greens, I stop thinking about yardwork.
I have had a little mold on just about every tray of peas I’ve grown. This has been more of an issue with the Speckled variety, and less so with those called Thomas Laxton. There isn’t much of it; it seems to go after the few peas which don’t sprout. I find the mold when I remove the peas from blackout, and I’ve been able to control it by simply removing the moldy peas with tweezers. There has never been more than a dozen or two moldy peas. Another way to deal with mold is to spray it with a mixture of water and hydrogen peroxide, but removing the bad peas with tweezers doesn’t tax my inventory of supplies and is scarcely more involved.
One of the first things that attracted me to peas as a crop was their apparent low cost. Generally, five pounds costs around $20. But a 1020 tray of peas requires, give or take, about ten tablespoons of seed. The cost of five pounds of many of the other seed varieties is in the neighborhood of $50, but you can seed a 1020 with one to two tablespoons. A little math will show that pea seeds in fact are among the more expensive seed types.
But one thing peas can do which most other microgreens cannot is to keep growing after the first harvest. I have found that, so long as I don’t cut them too low, they will continue growing and allow us to take multiple harvests. Lentils also share this characteristic
Radish
Easily our favorite green, radishes can go from seed to table in about a week. They are among the larger of the microgreens and will add some measure of bulk to your plate. They are also, like mustard, a bit on the spicy side, so I recommend eating them along with other greens or in a sandwich (see Figure 17)
Salad Mix
This is a good staple, simply a mix of broccoli, kale, kohlrabi, arugula, and cabbage (depending on the selection of the seller). It’s delicious by itself, but I often sprinkle some mustard seed over the tray when I sow, or serve the greens with some other such as radish or pea.
In addition to these, I’ve also grown kohlrabi, kale, arugula, and Pak Choy with no problems. We love these and they will remain a part of our routine. I made an attempt at beets but found for many of them it was nearly impossible to get them to let go of their hulls. But they had beautiful dark red stems and a sweet earthy taste, so I will be going back to the drawing board on their account.
Health Risks
It’s worth bearing in mind that consuming plants in this way is a novelty in comparison to how our species has consumed them for millennia. Granted, sprouting is a health trend here in the U.S. that goes back several decades, and sprouts of some types have been grown and eaten much longer in other parts of the world. But it is a mistake to assume that the practice is unequivocally without risk. I caution you to do your own research and practice moderation.
It is one thing to eat the fruit of a mature plant, or to eat the mature plant itself, and another thing to eat hundreds of this same species at an immature stage. A good way to consider it, if only because it might make you ask questions, is that when you eat microgreens, you’re doing what a ruminant does when it bends its neck down and munches at the growth inches above the soil surface. That’s not typical human behavior.
I’m not a botanist, or any other kind of scientist, but I know enough to tell you that the biochemical constituents of a plant are in flux across its life span. Biochemicals, alkaloids, proteins, all these and more ebb and flow developmentally. Sometimes they are present in greater concentrations in one part of a plant and then later in greater concentrations elsewhere, in other tissue. Sometimes they are present and then disappear, and vice versa. Such is part of the mystery and wonder of nature. And it behooves us to respect it and take care and to identify when we should practice moderation (Buckwheat) or avoidance (Kidney beans).
Buckwheat contains a substance called fagopyrin. In the grain, which is used to make buckwheat flour, the concentration is low and causes no problem, but in the immature as well as mature plant it can lead, with overconsumption, to a hypersensitivity to sunlight that has been noted among veterinarians to cause skin disturbance and sun avoidance among cattle. I read an interesting account of a couple who had been juicing buckwheat sprouts twice a day for several weeks and developed this painful condition. Personally, I am unconcerned about eating them on occasion. I think in this case moderation is sufficient. Many vendors of buckwheat I have seen online are explicit with this information, but there may be other adverse effects for other plants that have thus far not been noted. I relate these things not just so that you will be careful with buckwheat, but also more generally as an example of how important it is to research first.
My stance on health risks is simple. I take the time to do the research, and I practice moderation. I eat several different types, and no type in large quantities. My belief is that risks are low. And the benefits are high, especially if you can’t get fresh produce. There are studies that suggest the nutritional content of the microgreens is greater than that of the mature vegetable, but that’s extra information I don’t critically need. They’re vegetables. Your body needs them. They are fun and easy to grow. Enough said.
Resources
The following are details of some of my information and materials resources:
The book Year-Round Indoor Salad Gardening: How to Grow Nutrient-Dense, Soil-Sprouted Greens in Less Than 10 Days by Peter Burke goes into greater detail than I have here. It’s available from Chelsea Green Publishing. I would be deceiving you not to point out that Burke’s book is less expensive on Amazon. Some, however, may appreciate the option to shop elsewhere.
Bootstrap Farmer has an excellent cheat sheet online that I have frequented for information on specific microgreens.
Their website includes a wealth of other related information, and they are also where I sourced my 1020 trays (although most recently when I looked, they were out of the shallow, no-holes trays).
Microveggy is another web site with summary information on specific microgreens, many of them unusual.
This online calculator is useful for determining appropriate seed quantity for your tray’s dimensions, by weight or by volume.
With a little geometry you can determine how much seed you need for circular trays, too. Note that it provides two sets of measures, one is conservative, and that’s my recommended starting point. The other, ‘ideal,’ is best left to the pros. I would rather undersow, and have a ‘light’ tray of greens I can still feed my family, than push the envelope and end up with a mold-forest I have to chuck out entirely.
Initially I was purchasing my seeds on Amazon, but eventually I had the luxury of time and was able to explore other options. One I have frequented often (sometimes just to browse) is True Leaf Market.
I’ve had no trouble with them and, with sufficient quantities, your shipping fee is waived.
The lights that I purchased were found at Amazon:
If you find pink light off-putting, I believe there are other options. But these have been fine. They get just barely warm. I set two lights to a shelf, so this provided enough lighting to cover three 4’ wide shelves.
Fans, likewise, were from Amazon. They are so quiet I often forget to turn them off. Three speeds. They’re sold in pairs and a pair shares a single wiring harness, so there is a 2.5’ foot limit in terms of how far they may be set from each other. The plugs are USB, so you’ll need either a USB-friendly power strip or a USB adapter.
One other item you may find useful in cooler temperatures is a grow mat. I offer this link as an example, not as a recommendation. I did not buy one. However, in colder environments, some people use these to heat a tray from the underside to stimulate germination:
Summary
Growing microgreens on a small scale is a practice that can be easily and inexpensively adopted. For a very modest initial outlay, you can purchase small quantities of several different types of seed and try the technique for yourself. You may very well have the minimum equipment you need already, i.e., a spray bottle, watering can, and some shallow dishes of any shape and size. If the practice suits you, then you can lay in larger quantities of seed and whatever items of gear you think best, and then carry on, replenishing your seed stores as needed, improving your technique, and making new discoveries. You are likely to recover these costs over time by the reduction in your grocery bill. Instead of being present only outside of, or at the tail end of, the process of the production and consumption of your food, you will now find yourself right in the midst of it.
I know it’s only a small part of the food I consume, but it brings me some peace of mind to be the agency of this miracle I would otherwise take for granted. Every single time I see the sprouts coming up it’s like a revelation. And on top of it all, you will be in a position, if the chips are down, to keep putting fresh green food on the table, even if it’s many months before you can start a full-size garden outdoors.
Well done.
The mold problem can be solved easily. Grapefruit Seed Extract (GSE) is highly effective at killing mold without harming plants or humans. One can make a 1:1000 dilute solution of GSE in water (3-4 drops per cup of water) and spray produce, and the produce will not mold. For example, I soak blueberries in a dilute solution and then they will store in fridge for weeks without degradation. Fresh tomatoes likewise, they do not rot as fast.
GSE is harmless to humans too. It is also a deworming substance for animals (diluted, in water) as it kills worms. It was first discovered when a biologist found his compost heap would not work if it had grapefruit seeds in it, as they killed fungi.
Thank you, Bert! Will check in on GSE… So much appreciated!
Bert, thank you! This is great information.
Wondering if this would work on house plants too? All of mine seem to have a nasty mold problem on the top of the soil. It’s either that or our water has so many minerals in it that it’s like a white layer on top of the soil. Plants seem to grow well but that white powdery stuff drives me crazy. I will try this.
Have a Rockin great day!
I’ve used the Nutribiotic brand of GSE for 15 years and it’s always been effective. In tests I sprayed dilute solution on mold growths and watched them dissolve / die in a few minutes. I believe it will work just fine for the appearance of mold on soil but will not damage roots underneath.
Very informative series on micro greens.
Really nice article! It has inspired me and I have now planted up some wheatgrass, peas, basil and parsley to give it a try. Thank you.
Thank you, DG! An outstanding third installment to your article.
From your post: “The first time we had the mustard greens we put them on corned beef sandwiches with mayonnaise, pickles, and my wife’s homemade bread. We loved it so much that we now coordinate our sandwiches around out mustard harvests.”
What a wonderful idea! Just loved it. One of my favorite things about microgreens is that the flavor flows so nicely through the greens, and little if any additional “dressing” is needed. Adding the mustard to the sandwich with a little mayo, some homemade pickles and fresh baked bread… Well, it just doesn’t get much better than this!
Again, very informative info. Thank you.
~ And Bert ~
Thank you for the GSE gem!
Great article. Clear , concise and makrs me want to give it a try this winter.
Hi D.G., excellent series, thanks for posting. I’d never heard of the concept before but will definitely be giving this a try.
As I thought about what seeds I already have a lot of, I began to wonder which of them I could sprout for microgreens and discovered some very long lists on various websites including the ones you mentioned. I have lots of lambsquarter, amaranthus, squash, marigolds, and cleome flower (beeplant) seeds. All these are usable for microgreens and cleome has other edible parts as well. You mentioned carrots and the most prolific weed in my area is Queen Anne’s lace, which is the same genus and species as carrot (Daucus carota), so I’m anxious to try that one. There are entire fields of it in my area so it would be easy to collect pounds of seed. I have several pounds of lambsquarter seed from a very large variety I selected and propagated, but can’t eat too much due to the high oxalate content. They don’t soften up very much when cooked with rice so microgreens sound like just the ticket to finally use all that seed. Since the younger plants have fewer oxalates, who knows, maybe the microgreens have little to none. I’ll definitely research that further. I also have a grain amaranth the just gets mushy when cooked with rice so that too makes a good microgreen and is easy to produce lots of seed in the garden.
This article lists many by genera by family: https://grocycle.com/types-of-microgreens/
The microveggy.com link you provided is also a great list.
Thanks again for the article, this is going to be a whole new adventure of discovery.
St. Funogas – Thanks for the oxalate information. I was worried about that!
D.G
Wonderful article! Definitely going to give this a try. Thank you for the step by step and especially the photos. I am a visual learner so this is perfect!
Have a Rockin great day!