


(Continued from Part 1. This concludes the article.)
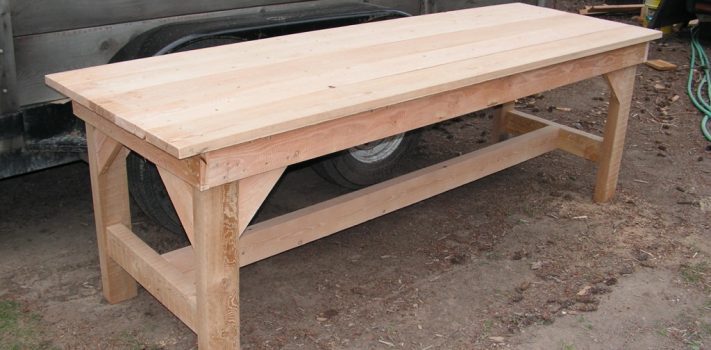
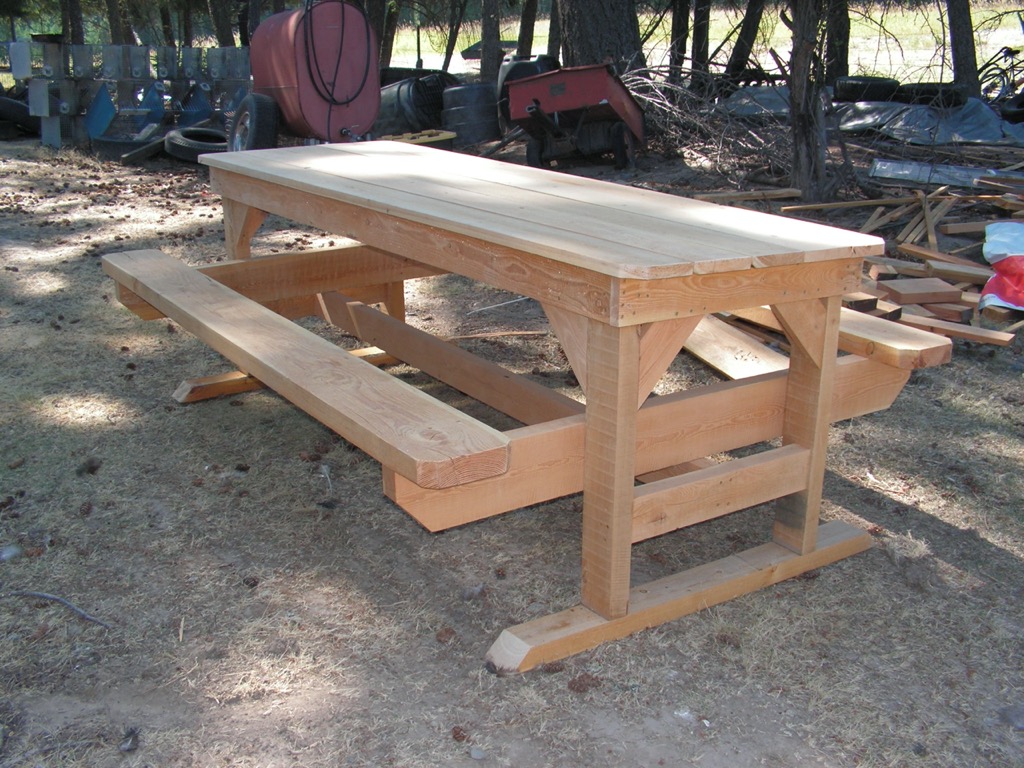 Table Project #2 was just the Project #1 design retrofitted with heavier lumber that supports seating for up to six people. It is very comfortable. This design is very sturdy and the table is stable enough that three people can sit on one side without tipping the table. The design lends itself to quick disassembly so that it can be loaded into a full-size 8-foot pickup bed.
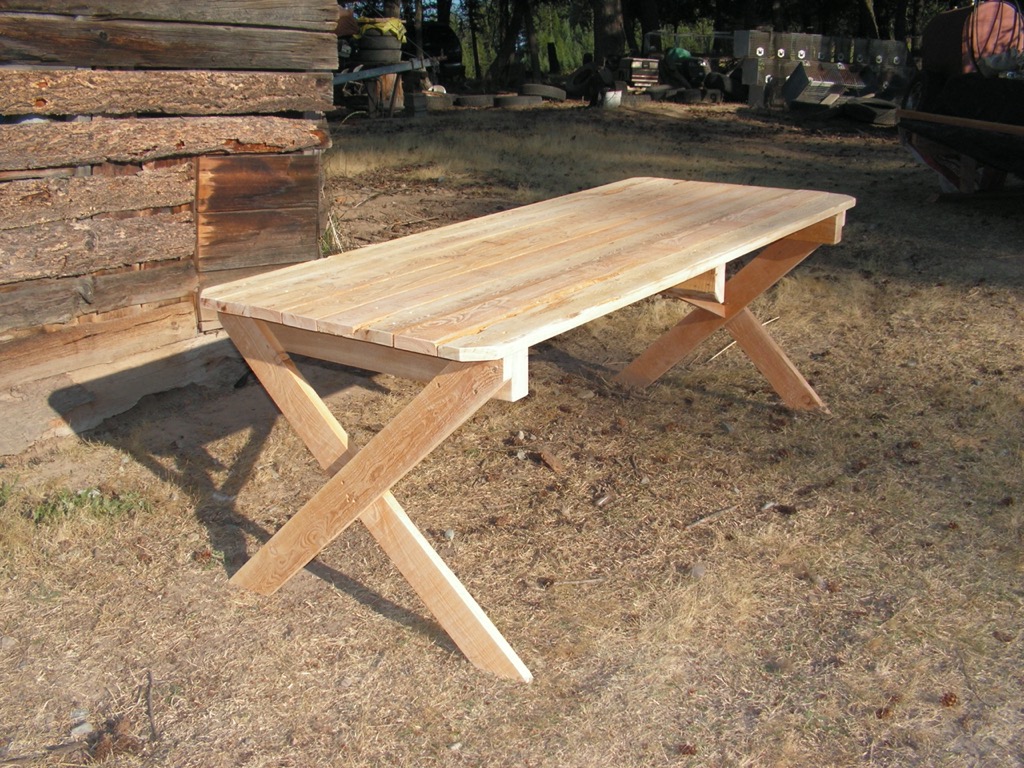 Table #3 is similar to Project #1, although its legs are different. There is no cross beam, so standard chairs can be pushed completely underneath the table and out of the way. It too can be modified to improve its utility if desired as can be seen in the next photo and Table #4.
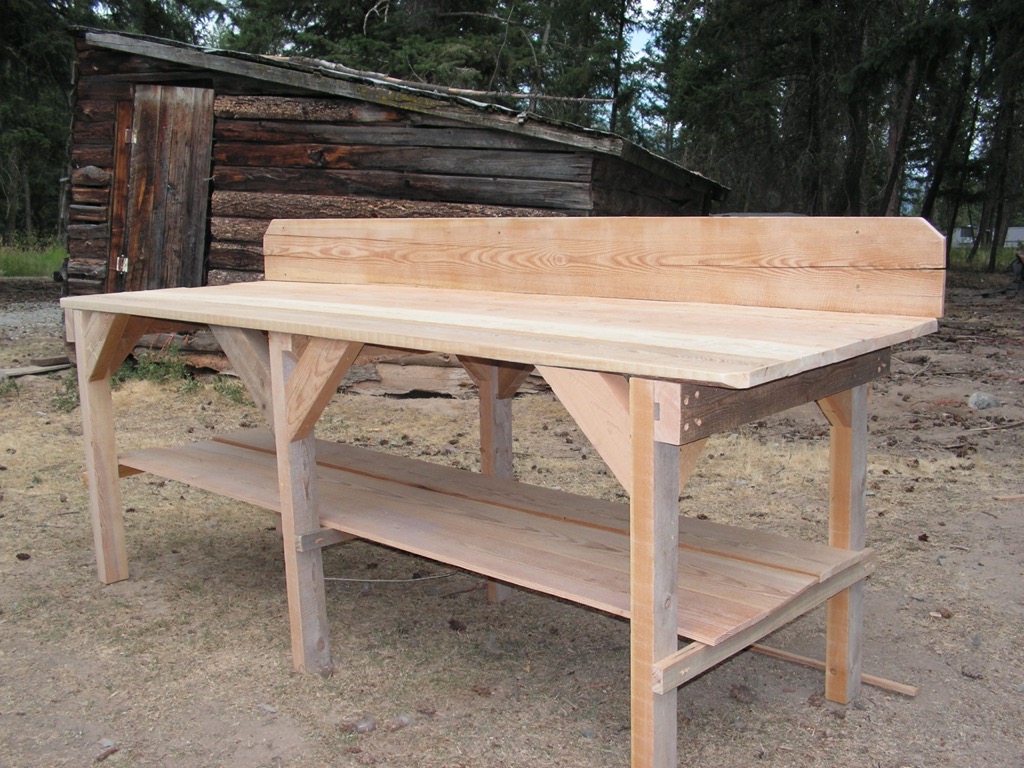 Table Project #4 is a typical workbench design. The backboard prevents objects from being pushed off to the rear, and a shelf has been added.
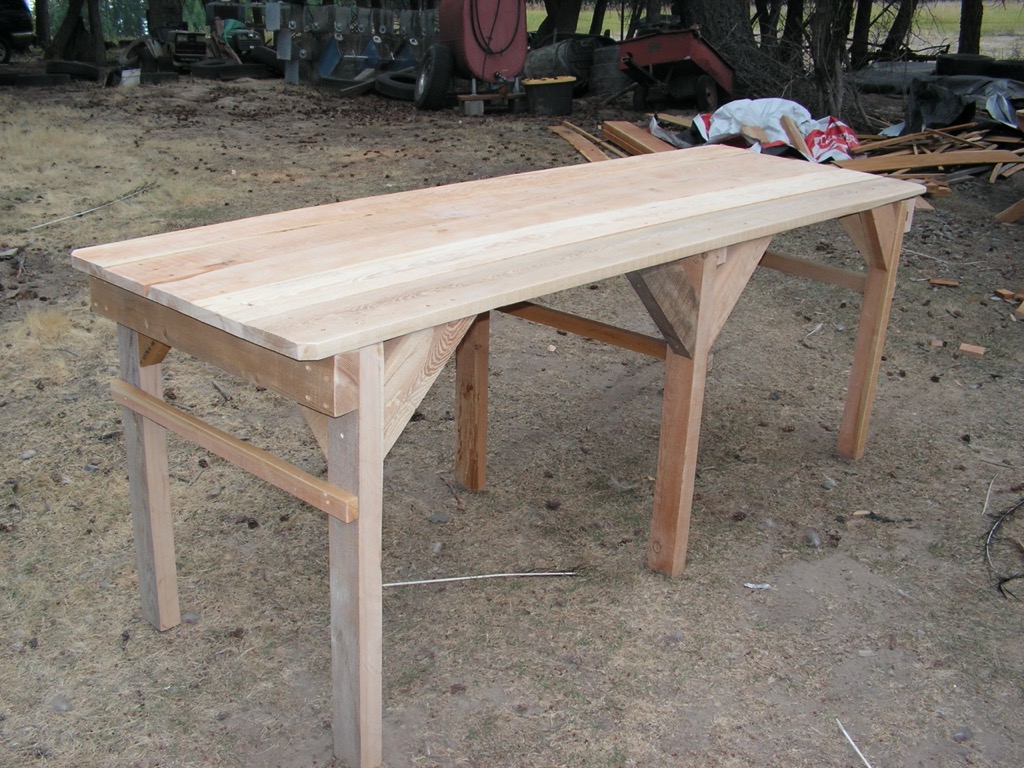 Table Project #5 is a fairly lightweight yet very strong table that easily supports 250 pounds. If there were two of me, then I would have tested it for 500 pounds. Despite the simple leg structure and lighter materials used compared to the first tables shown, it is quite sturdy. It was used as the utility table/workbench for my construction work for most of the summer and held up nicely. It might be my favorite table because it is so handy and strong.
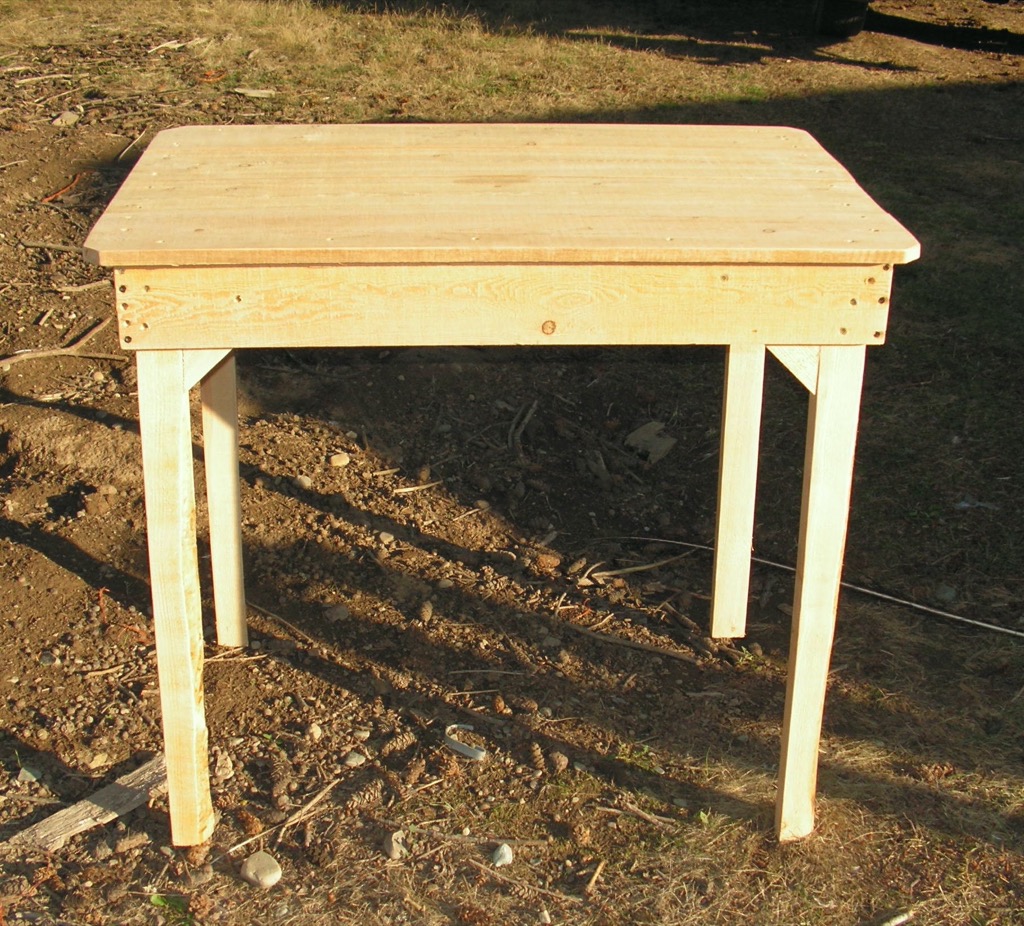 Table Project #6 was quick and easy to make. It is perfect as a desk or as a large end table. It can be easily picked up by one person. As seen here it measures approximately 2′ x 3′, but of course it can be made to larger sizes, as needed.
Shelf Projects
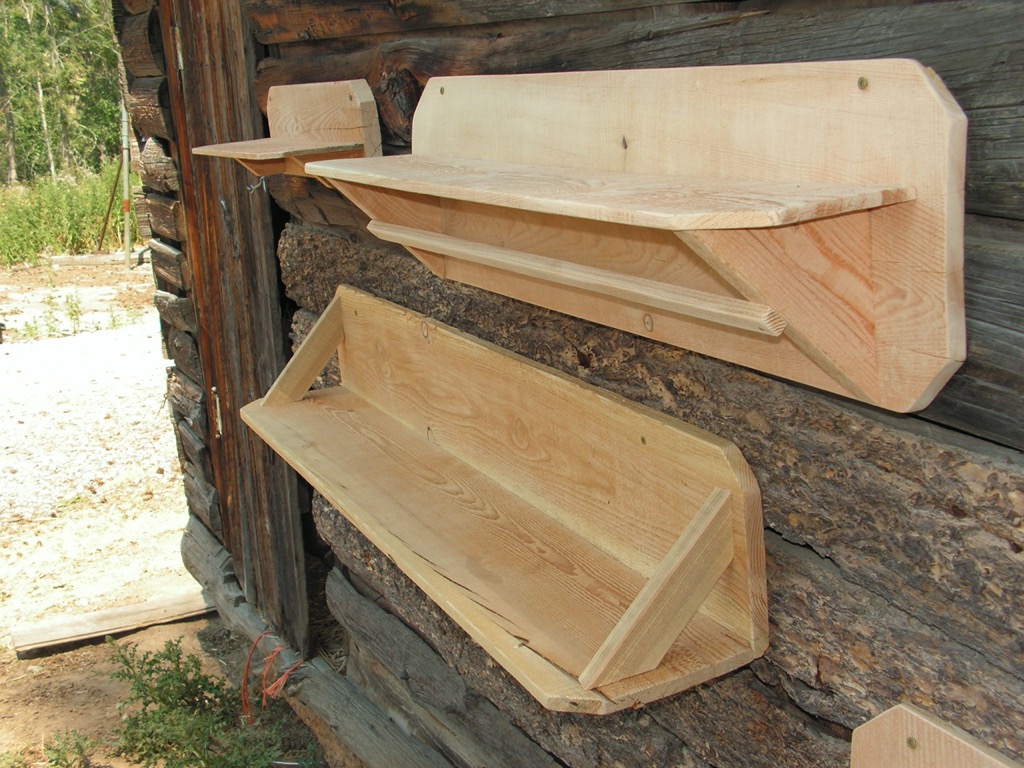 Small stand-alone shelves can be surprisingly useful. There are few commercially-made shelves that address this niche. The shelf on the top right includes a dowel that could be used as a towel bar for the kitchen or bathroom. These shelves were made with the odds and ends of lumber left over from other projects. The cost was just in the time and a few screws used. They are now mounted in various places in and around my cabin.
The Composting Toilet Project
 Sanitation in an austere environment will be a challenge, especially for those who have not given the topic enough forethought or practical consideration. This is one of three composting toilets that I’ve made that are set aside for such a contingency that yet to be determined, but where we must conform to primitive circumstances. This is one of three such that are each designed differently as the result of the availability of materials or the lack thereof. This is the easiest to construct and the lid is tight enough to keep flies out. This is the simplest design with a flip-up center lid that does not require a standard toilet seat.
A standar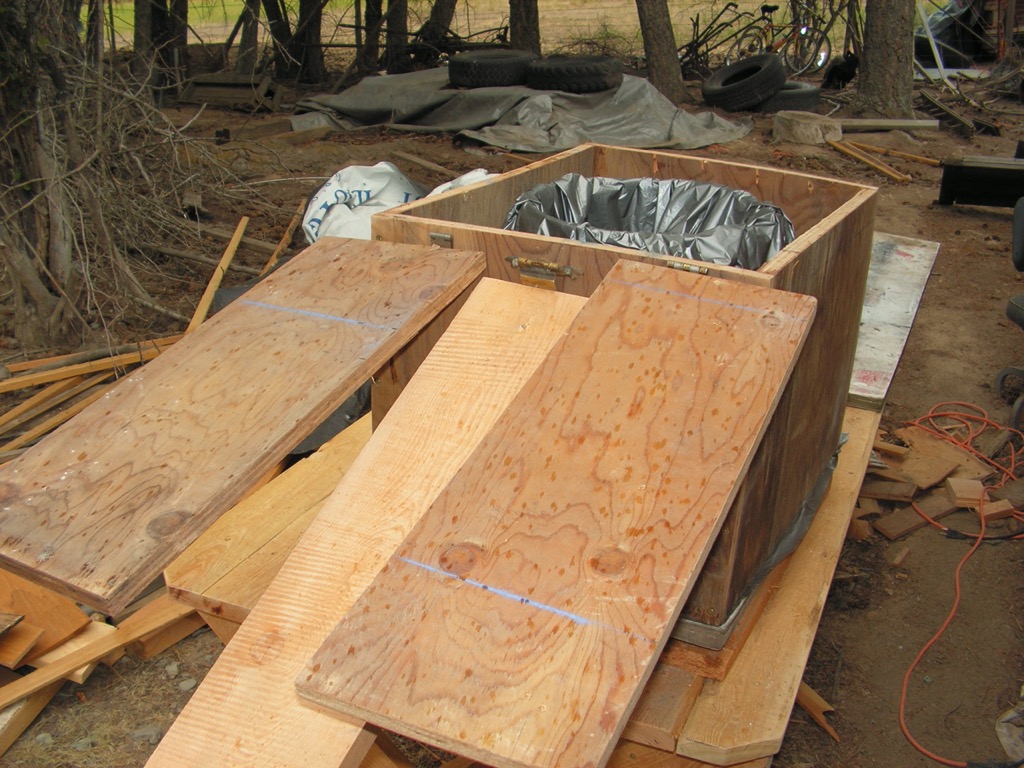 d toilet seat does not keep out flies without additional modifications, the use of silicone or weather stripping to seal the lid. I have found that is not as sanitary, in practice. The basic idea of effective sanitation practices requires that insects can not access the waste and spread disease. A design not shown here uses a Styrofoam seat that would be greatly appreciated in an outhouse during the coldest part of the winter. Another piece of Styrofoam board or plywood will seal up the open and prevent flies from entering. We can also use the ash from stoves to deter insects. All of my simple designs can be used indoors or outdoors in an outhouse as the bottoms can be easily removed and the toilet positioned over a 3-foot to 5-foot deep hole.
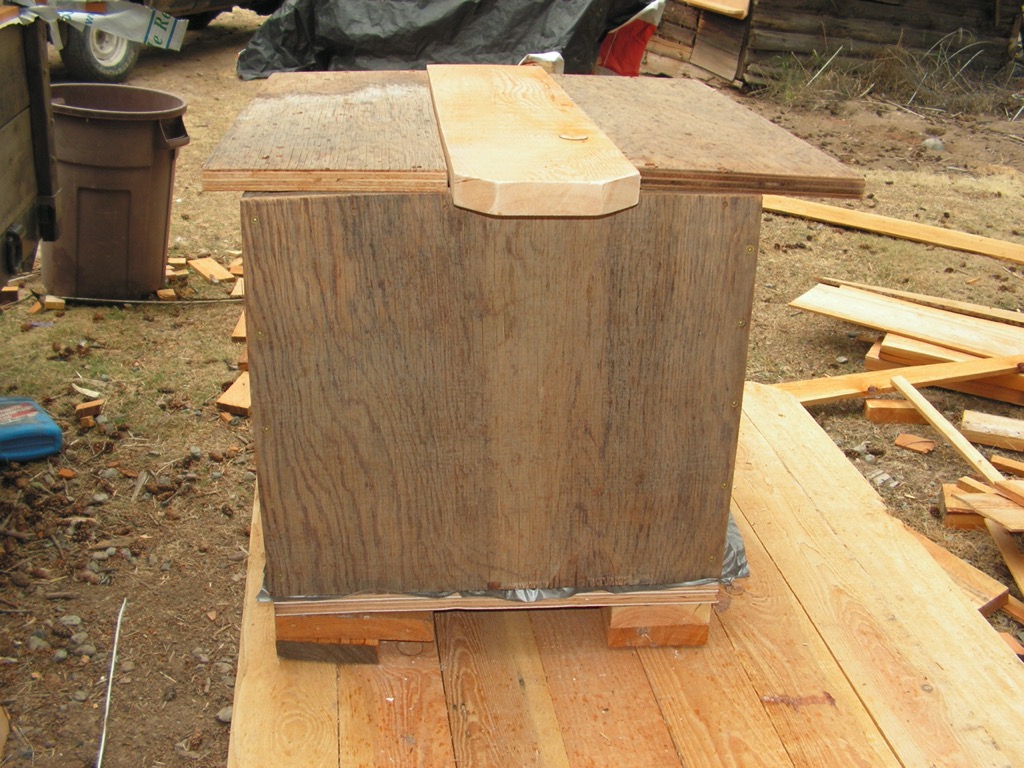
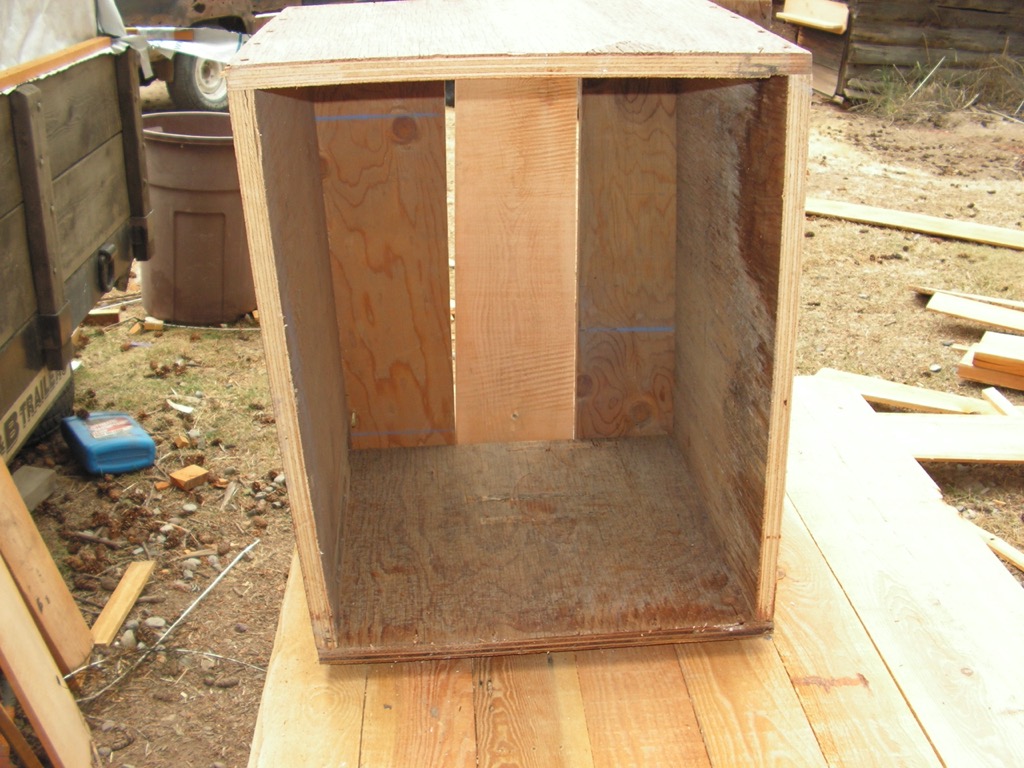
These simple toilets are solidly constructed using 3/4 inch plywood and are screwed tightly together. They are heavy enough to stay in place, yet light enough for one person to move to a new location or a freshly dug and empty hole. I believe that all three of my outhouse toilets are of a practical design and will withstand a decade of use even when exposed to moisture and freezing temperatures. And until they are put into service as toilets, they can be used as a strong box.
Bedframe Project
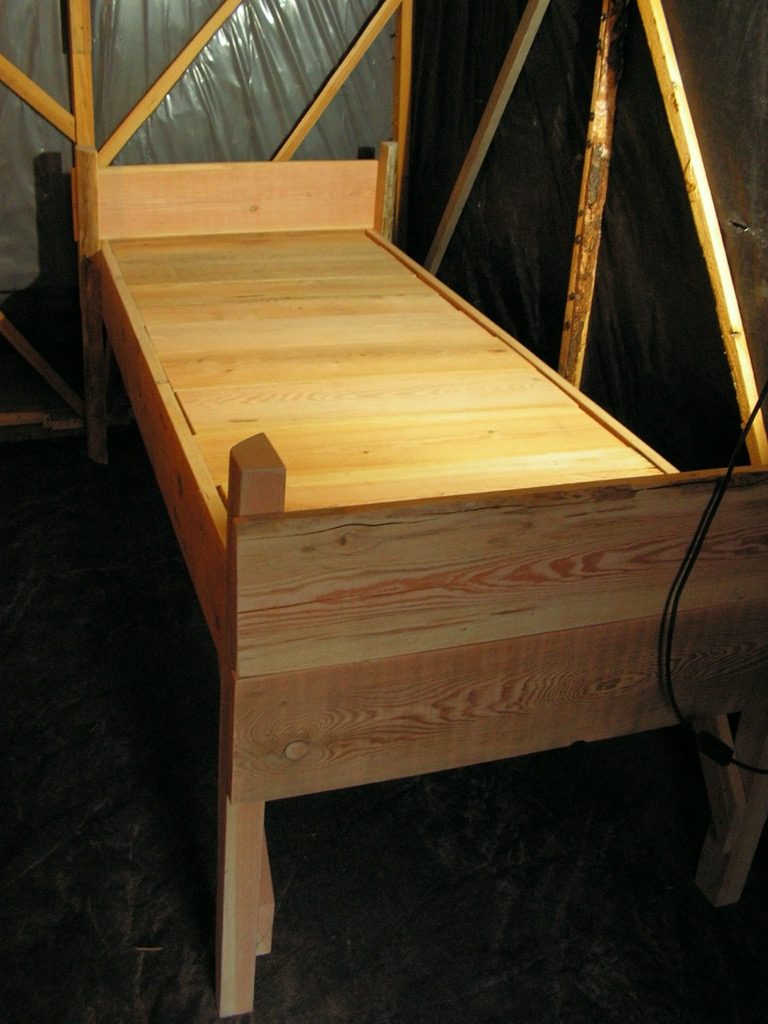 Here is a simple bed frame that measures 30 inches wide x 80 inches long and high enough to allow ample storage underneath. It is approximately 6 inches too narrow for a twin bed mattress. But there are plenty of foam padding choices out there that could be a good substitute. Foam padding has been used for the last five decades in Scandinavian homes and now there is a wide selection to be had in the U.S. The advantage of designing and building your own bed frame is that you can make the best use of available space — such as small cabins or trailers.
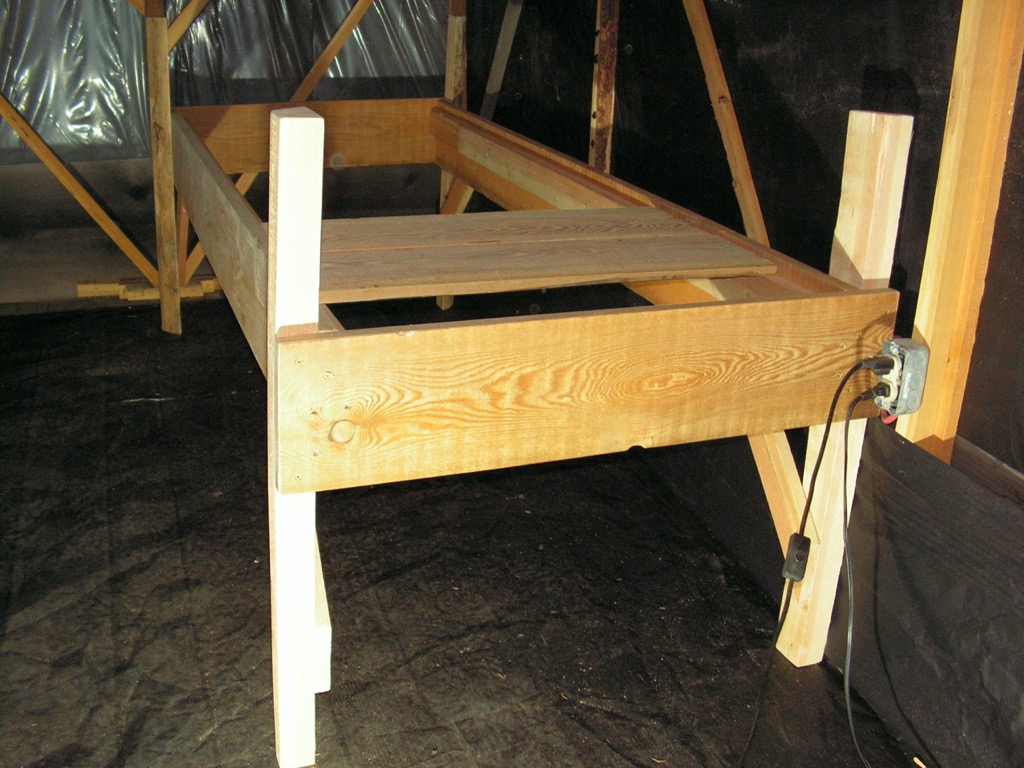 The slats are loosely held in place by the bed frame and can easily be removed to allow access beneath. Approximately twelve 6-gallon food buckets can be stored underneath with plenty of room on top of the buckets for other items. Used furniture is usually inexpensive, but it tends to be bulky. The square footage of our homes is now relatively expensive. In the future, building our own compact furniture might be the only viable option.
Sink Project
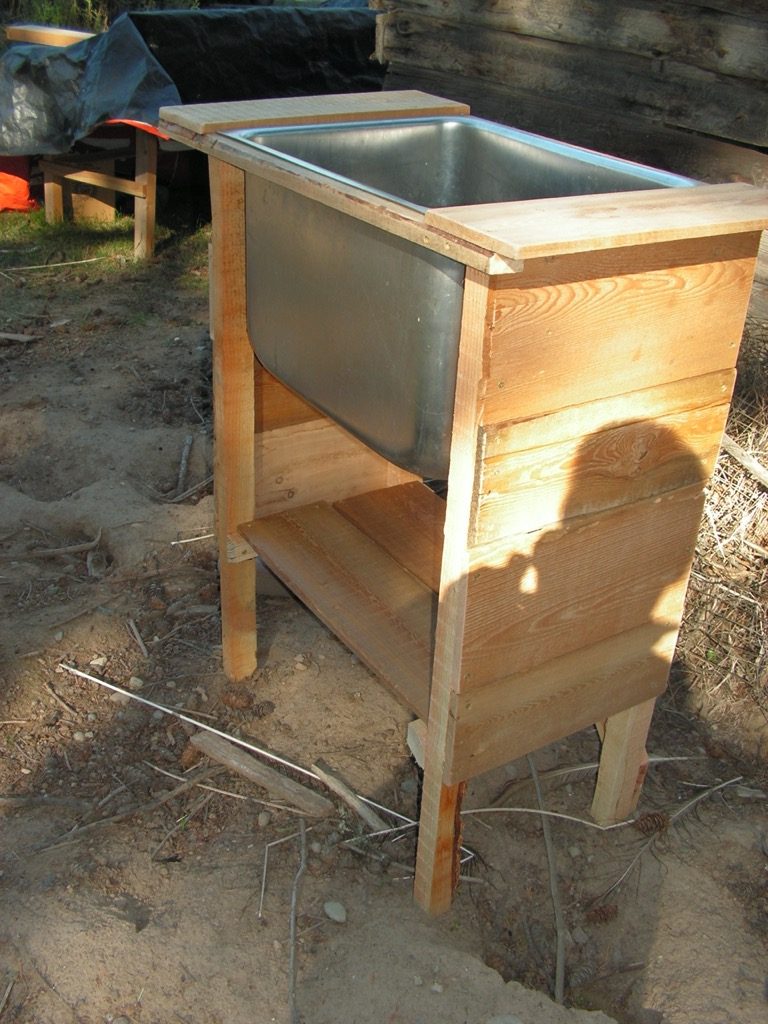 This is a homemade deep sink that is ideal for many tasks. It is large enough for washing clothes and processing veggies for canning. And it is portable. The drain could be anything from a board underneath the sink that diverts the dirty water to the rear, a 6-gallon bucket, or a standard 1-1/4 inch PVC or brass P trap or straight pipe plumbing that disposes of the grey water. Of course, we could also purchase a white PVC sink from a hardware store. But this sink was put together at an extremely low cost of less than $10. It is also made tall enough for the user to reach to the bottom of the sink without bending over even slightly. And it is just heavy enough to be a stable platform, yet light enough to be portable.
Sanding and Finishing Wood
As a practical matter, sanding your product can be performed with a simple and inexpensive sander. As a friendly advice, rough sawn wood produces lots of splinters. Particularly when working with Larch, it is a daily chore for myself to remove them from my hands when working with this wood. It can be difficult to locate most of these splinters and I would not want to attempt to remove them from my backside.
Working surfaces should be finely sanded starting with 60 or 80 grit paper to remove the bulk of the wood that can produce splinters and to sculpt the wood and to remove any sharp edges by making a chamfered edge that is approximately 45 degrees to the large surface area, or make a fully rounded edge that requires more time to create. Use a finer grit paper, either 120 or 180 grit before painting or apply an oil such as a 50-50 mix of linseed oil and mineral spirits for an inexpensive oil finish.
If a urethane finish will be applied, polishing the wood with 320 grit produces the best-looking results and reduces the number of coats of urethane required to completely encapsulate the wood with a water-tight barrier. One coat is not enough and if only one coat would be used, a transparent oil is best. In desperate times, lacking anything else, motor oil will also preserve wood and prevent rot. Do not use gear oil as the smell is not pleasant. Most wood can quickly be dried out after a rain and will last for years without a finish of any kind, but where surfaces need to remain smooth, a finish is required, or where exposed to the ground, a finish is needed to prevent rot. The bottom of the legs can be soaked with an oil of any kind, and this treatment will do much to extend the service life.
If you have soft skin then sand the surface with paper as fine as 320 grit. Or use slightly more coarse sandpaper and then coat the surface with paint, many coats of oil, or use a polyurethane to provide a protective barrier. The advantages of using an oil is that it can be reapplied months or years later without preparation work. A urethane will require sanding or lacquer thinner, and urethane flakes off as it ages unless many coats are applied to make a waterproof surface that encapsulates the wood. It looks good, but for use on outdoor furniture, it is high maintenance and is a more expensive finish.
Enamel oil or water-based paints require a primer that adds to the work and expense. Without a primer, there is the risk that a traditional paint will prematurely flake off as it does not bond well with some woods. Dilute latex or water-based paints and use this solution as a kind of primer for undiluted latex paint if an actual primer coating is not available. Lacquer-based finishes are hard, but are not as weather resistant. Yet something is better than nothing at all. Oils, oil based paints, or a latex stain (a kind of colored paint) is best and will last a decade or more.
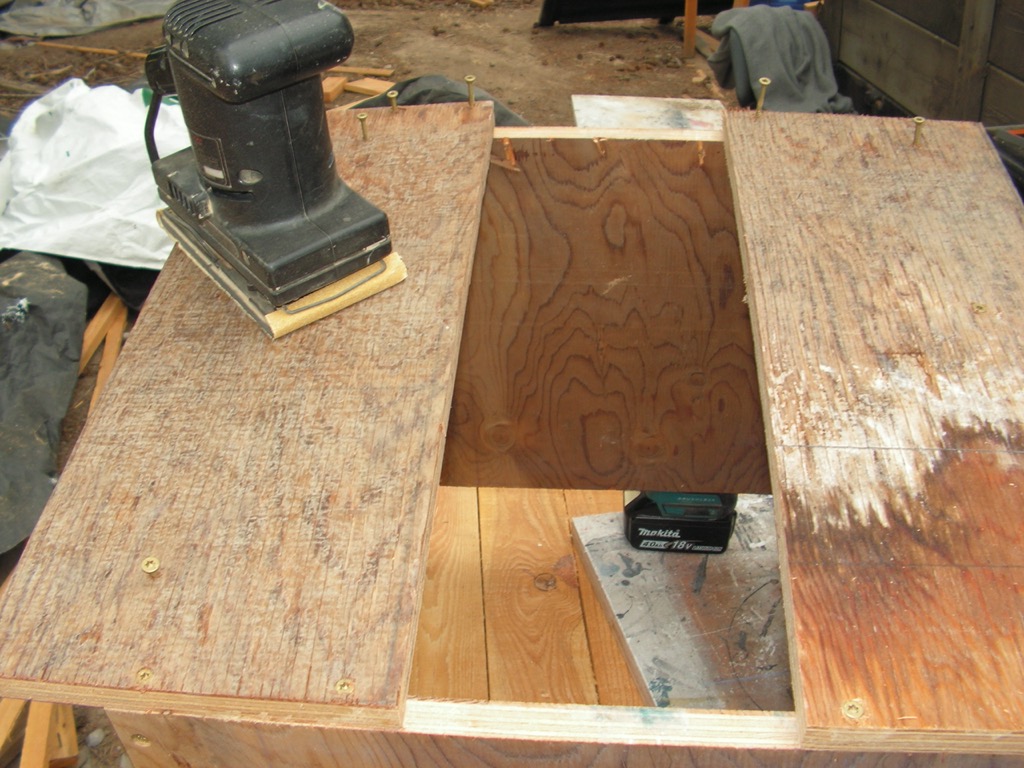 The old-fashioned orbital sander in the photo at right cost me $5 at a local resale shop. There is no need to spend lots of money on new tools when tools that are adequate can be purchased at a thrift store or what is now becoming a popular business, resale shops that sell used items. Resale shops are typically higher in price, but usually have a better selection.
If there is no power available to run a power sander, then a sanding block made from wood, or better yet, a block of wood with a neoprene or rubber pad glued to the bottom of the wood block will provide a good alternative method. But it will require lots of elbow grease. This method is best for removing the worst of the splinters only because of the manual labor involved. I’ve sanded many things by hand, from wood products to vehicle body panels in preparation for painting. It works if you will work hard and long. The ‘prep’ (preparation) work is the most important part of the finishing process, the paint or oil finish is secondary in importance.
These factors make a power tool made for sanding highly desirable be it air-powered or electrically powered, sanding is a very important aspect that is often underappreciated. Sanding can improve the work, and possibly make it ‘furniture grade’ in appearance rather than a rough or unfinished product. I’ve made plenty of furniture grade products and sold them. This tutorial has been about making simple and practical furniture on a budget — nothing designed “fancy”, for retail sale.
Conclusion
Utility furniture is a part of what we will need to adapt ourselves to bad times as our lifestyle will change and require us to work outside or inside and to adapt a less friendly social situation. These furniture pieces are examples that are well suited for any occasion and the variety of tasks we will likely have to perform to become as self-sufficient as we can possibly be.