Odds ‘n Sods:

Massive security breach hits popular web browser’s password manager – DSV

o o o

How To Disappear Completely – The Great Vanishing Act – G.L.

o o o

Hundreds of Aussies sign up for terror survival training. Isn’t the idea to NOT get yourself to be a hostage? So much for being in condition yellow and above! – A.S.

o o o

Video: MSNBC Host – The Borg Queen wanna-be. Your Kids Belong to the Collective

o o o

Controversy Erupts After NFL Quarterback Converts To Islam and Refuses To Stand for National Anthem… – W.C.


Notes for Monday – August 29, 2016

August 29th is a mournful day, as we remember the anniversary of the death of “The voice of him that crieth in the wilderness, Prepare ye the way of the LORD, make straight in the desert a highway for our God.” – Isaiah 40:3. John, the Baptist, who heralded the first coming of our Lord and stood true to his belief in the face of death, was beheaded on this day in 29AD.

In 1862, the Battle of Bull Run in Virginia began, along with the U.S. Bureau of Engraving and Printing.


Pat Cascio’s Product Review: Cold Steel Swift I & II

I’m one of these people who doesn’t sleep much at night. On a good night, I might get three or four hours of sleep. So, I spend a lot of time thinking. I sometimes come up with my best ideas in the middle of the night. I’ve often “written” my articles while in bed and put them down on paper later on. I’ve “designed” many knives while lying in bed wide awake, and then put the idea down on paper, and more often than not I can bring my idea to fruition.

My long-time friend Lynn Thompson, who owns Cold Steel Knives, is one of those gifted people in many areas. He’s gifted not just as a knife designer but he excels in shooting and hunting, with firearms as well as his own cutlery products, plus he is a well-known martial artist. However, I had no idea that Lynn could read minds, especially my feeble mind. Through his efforts and that of custom knife maker Andrew Demko, they produced the Swift I & II folding knives. Without a doubt, they some how got into my mind and stole this design, because this is about as perfect of a folding knife as I could design on my own. So, we can now add mind-reading to the list of skills that Lynn Thompson is superb at.

I have designed many fixed blade knives over the years and had them produced for me by several different custom knife makers, and more often than not they were able to decipher my crude drawings into what I envisioned. I’m no genius when it comes to designing folding knives, however. I presently have one drawing done, and it might come to completion, one of these days. Designing and producing folding knives is a whole different world, compared to a fixed blade knife. There are many intricate and detailed workings of a folding knife. Everything, and I mean everything, has to fit together perfectly in order to have a good folder.

100_6472

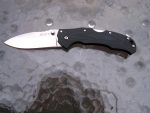
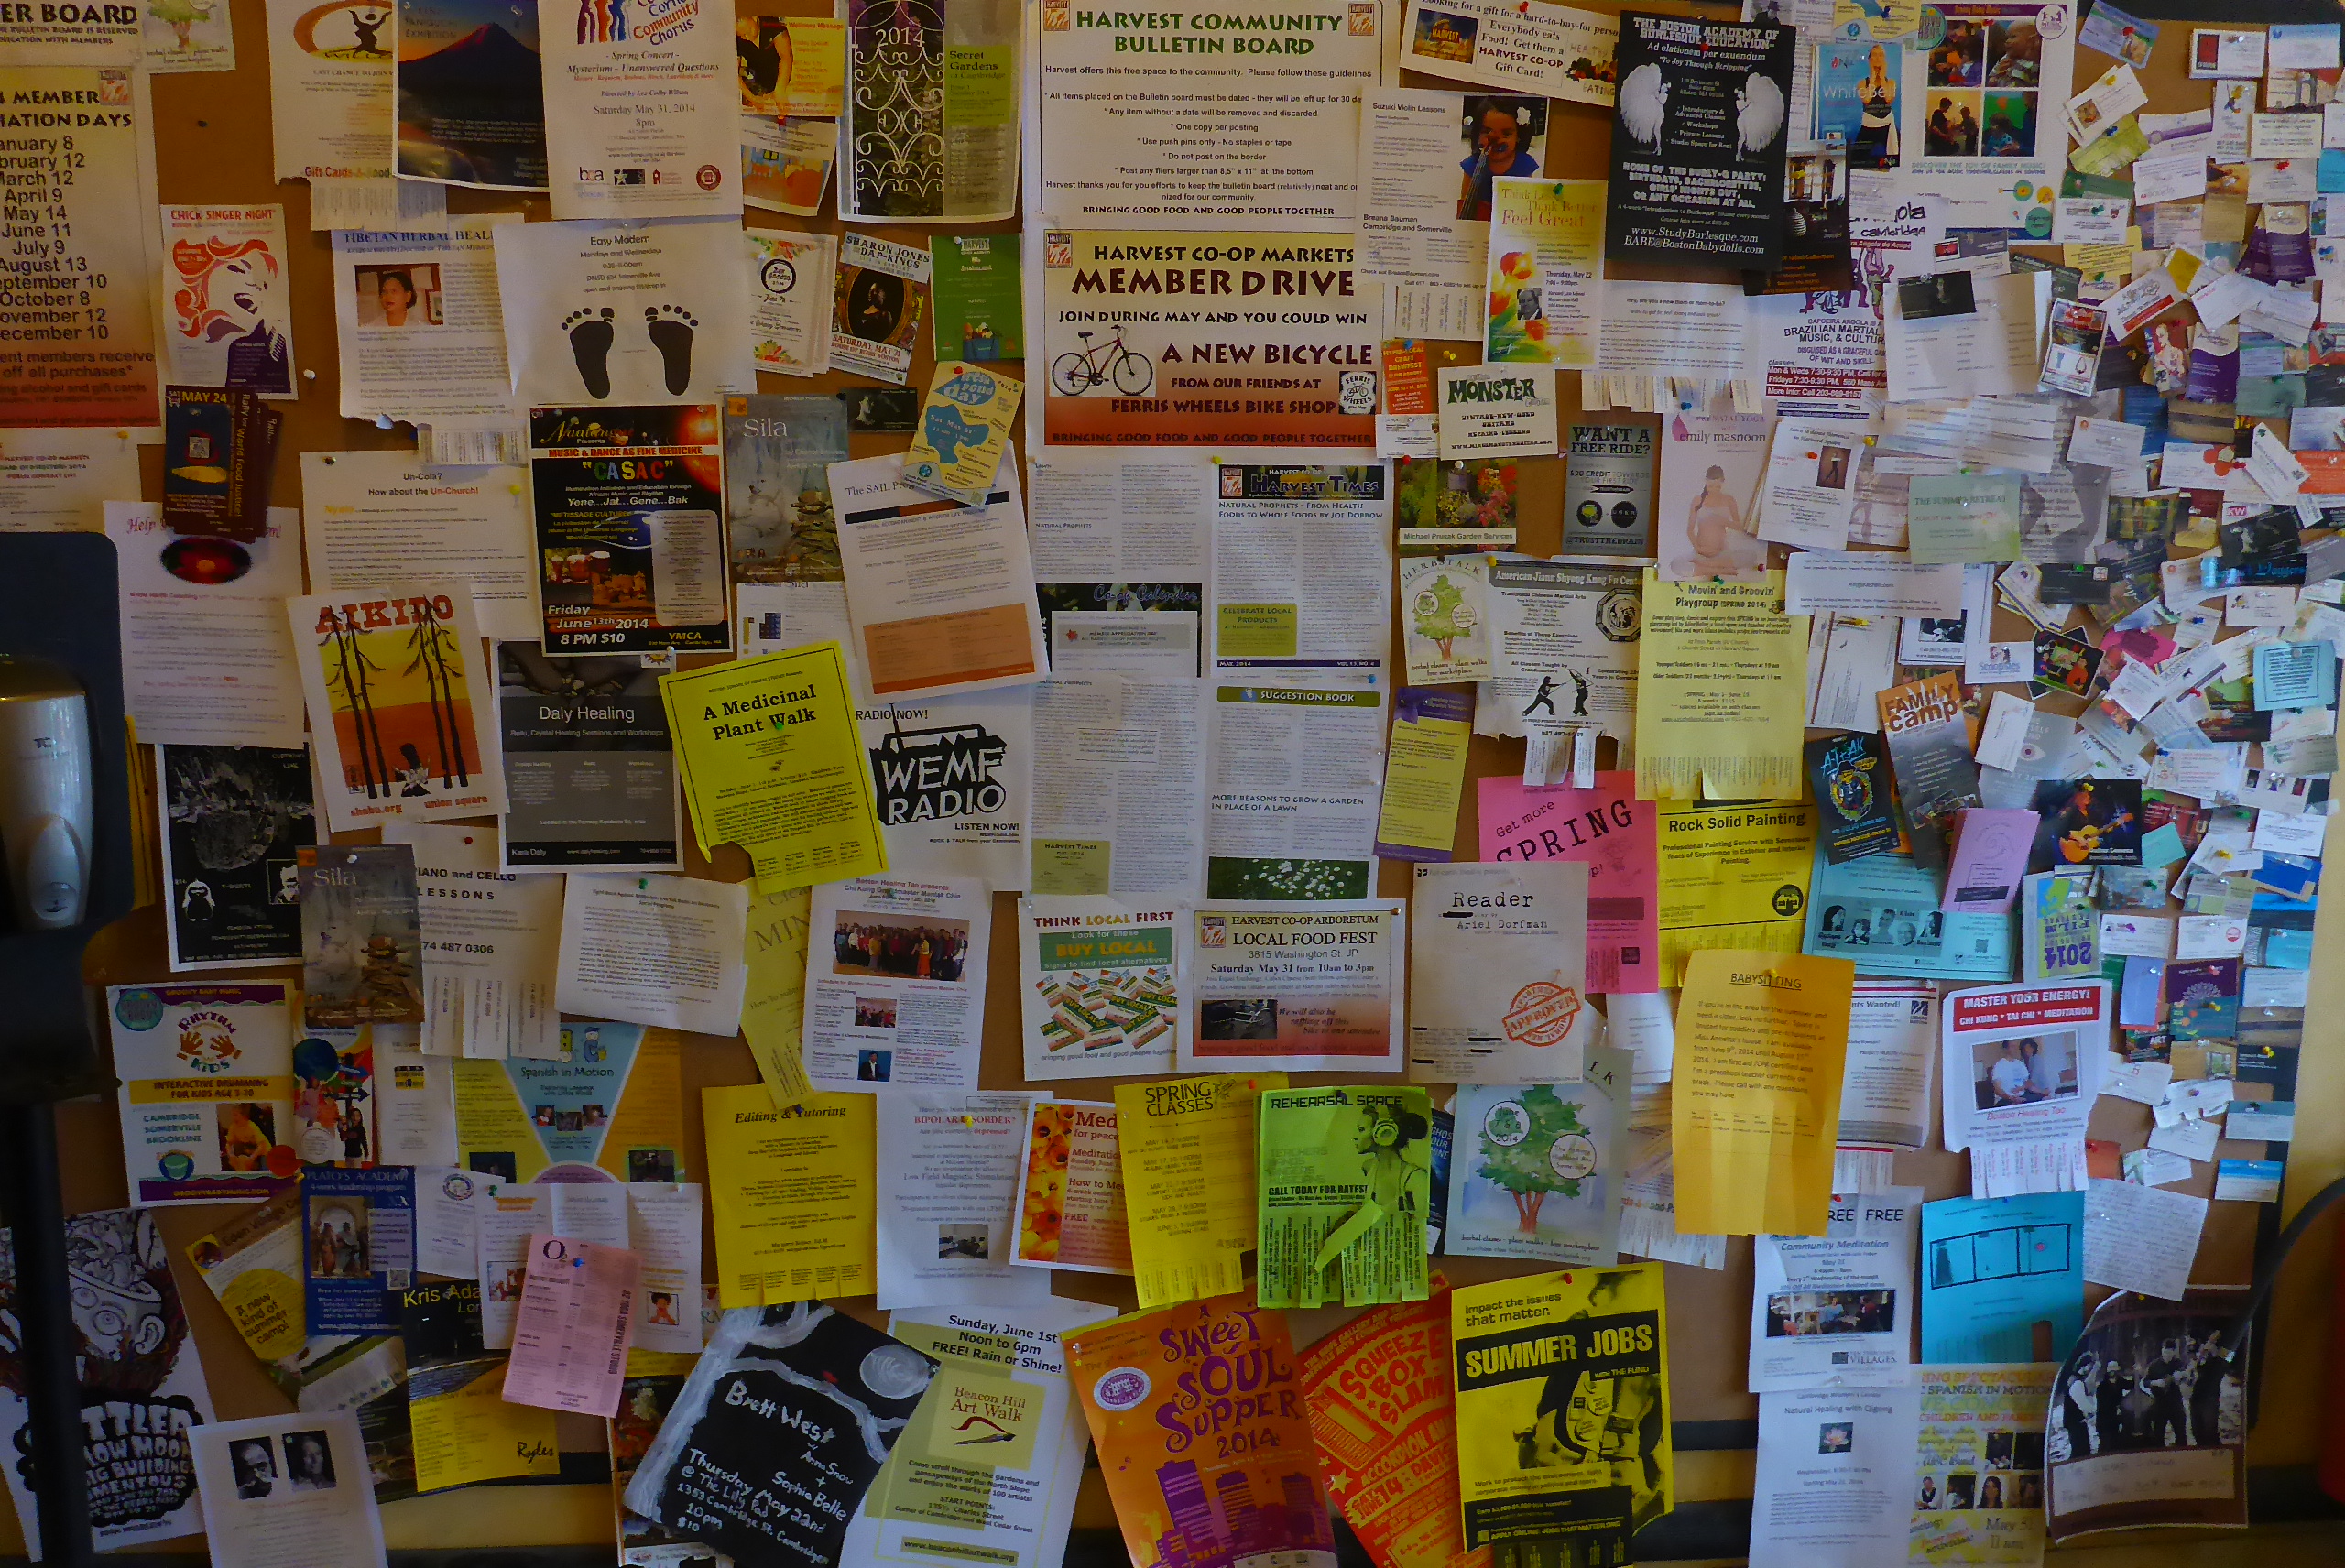
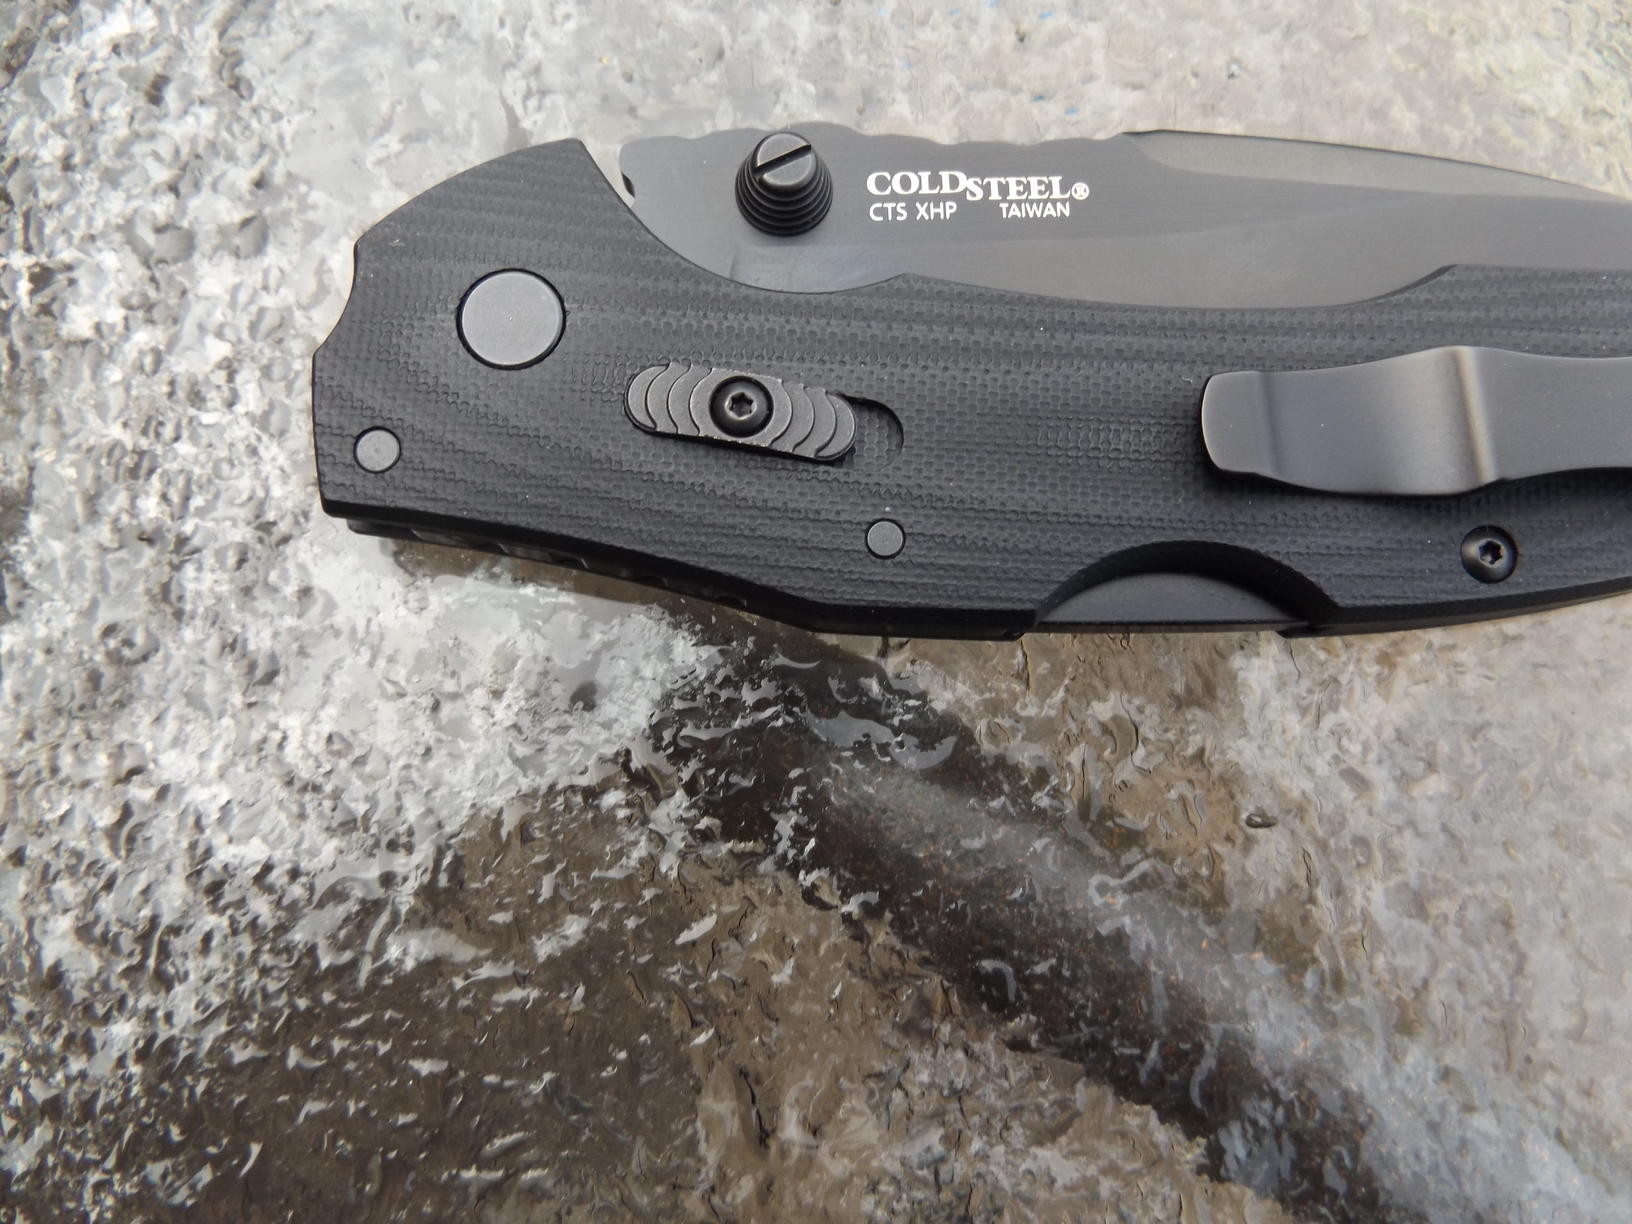
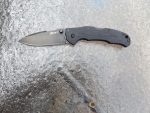
The Cold Steel Swift I & II are just such a folder, perfectly designed. And, to add to the complicated process, Cold Steel made this design into an assisted-opening folding knife, which is just a lot more complicated in the end. A quick look at the specs are in order on the Swift. We have a weight of 4.6 ounces with a blade made out of Carpenter CTS XHP steel. The blade is four inches long, and I’ve found that for my taste a folder should have a blade between 3.5 and 4.0 inches long; they just seem to work better for me. The handle scales are super-tough black G-10. The Swift I is an uncoated satin polished blade, while the Swift II has a DLC black coating for that subdued tactical look. We also have a reversible pocket clip, well sorta. Because of the curvature of the handle, a second pocket clip is included for those who carry in their left front pocket.

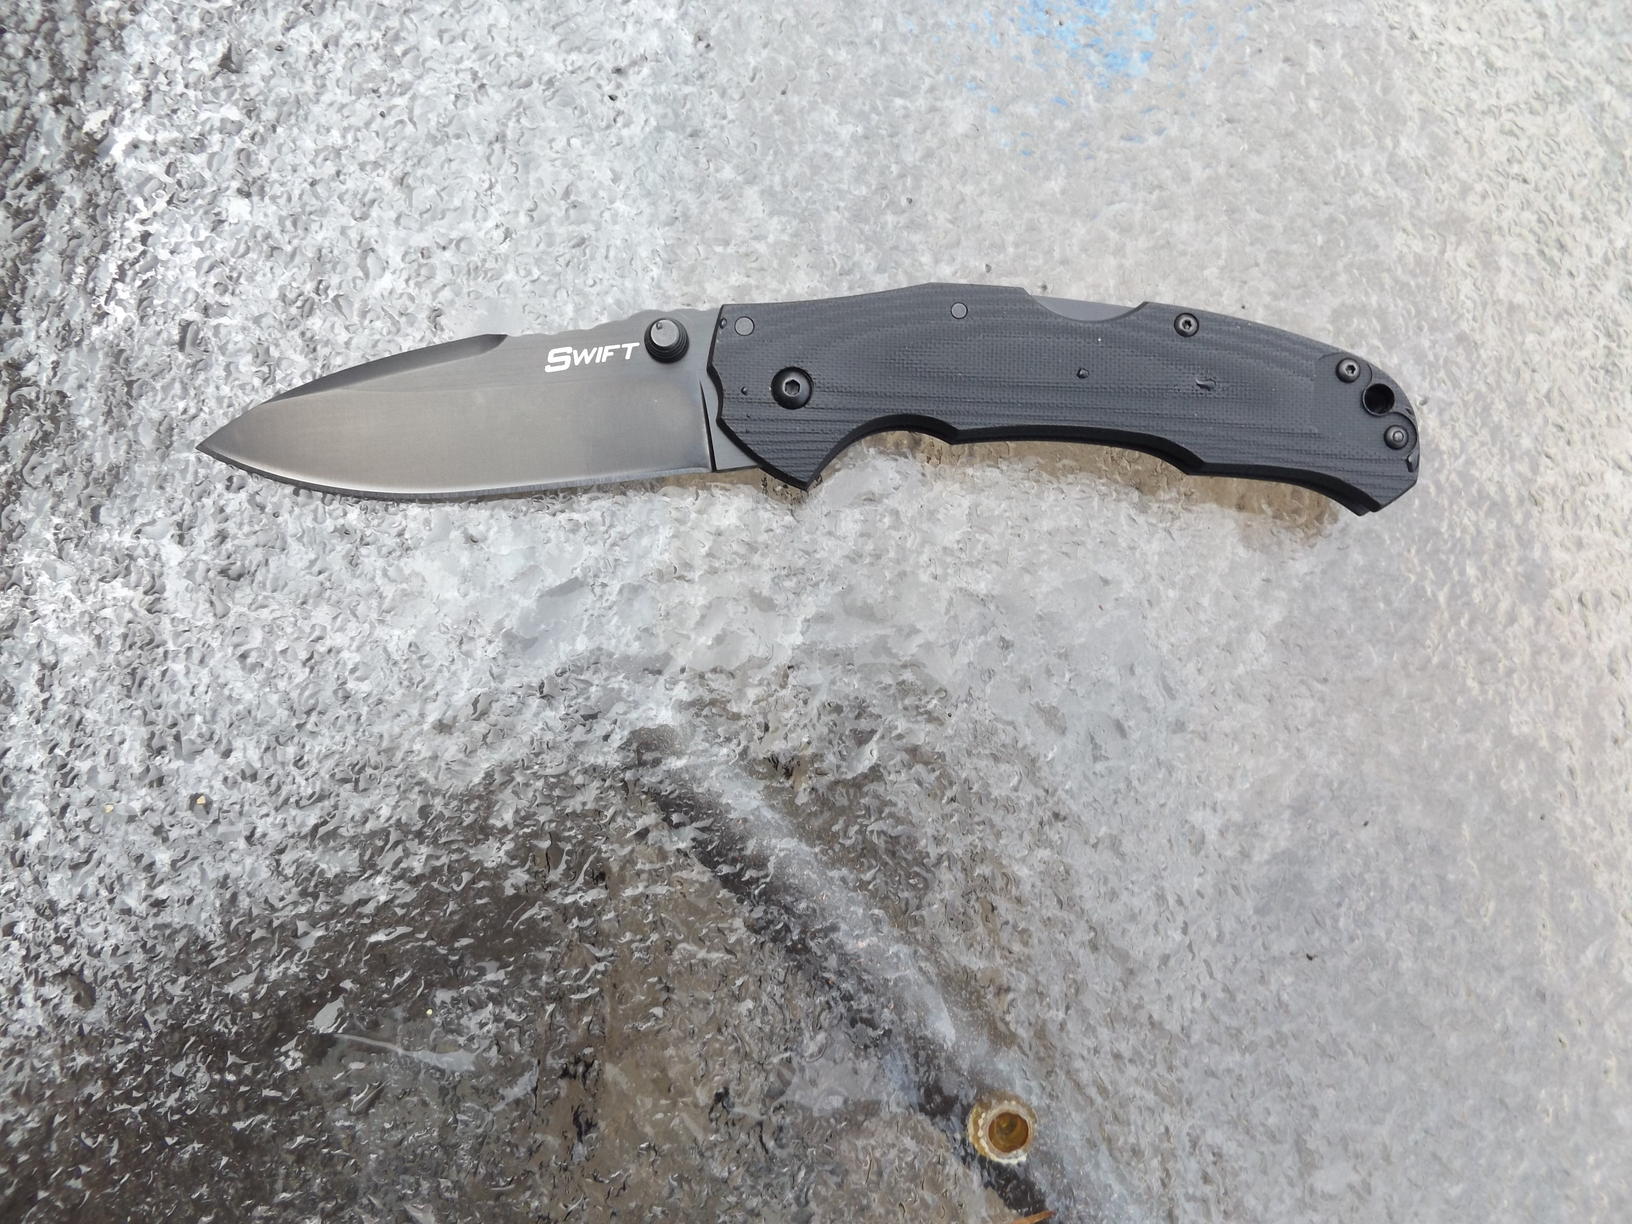
The proven Tri-Ad locking system on the Swift is one of the strongest, if not the strongest, in the industry, so there are no worries about the blade closing on you unexpectedly. The blade is a modified spear point design, which is very useful for many applications. The top rear of the blade has “friction” grooves as well as the top front of the handle for sure placement of your thumb in the fencing grip. We also have ambidextrous thumb studs for easy opening. Plus, the handle, as mentioned, has a curvature to it; it dips down and just fits my hand perfectly. The knife just feels perfect in my hand, period! And, as always, the blade is super-sharp, like all Cold Steel blades. They set the Gold Standard for sharp knives. Thompson and Demko also included a lanyard hold in the butt end of the handle, too.

100_6478

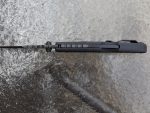
The Flash-Tek assisted-opening design is patent-pending, too. I don’t have a way to measure just how fast any assisted-opening knife, or for that matter, an automatic-opening knife opens. However, I will say this; the Swift might just be the fastest assisted-open folder I’ve ever tested, and it might be faster than an automatic-opening folder is. We are talking fast!!!

To be sure, the Swift is manufactured in Taiwan. If it were made in the USA, the price would be quite a bit more. I’ve said many times that you can get as good of a knife as you want out of Taiwan. You need a cheap 50-cent knife? You can get it. You want a thousand dollar knife? You can get that, too, and it will be worth the cost. So, don’t let being made outside of the USA bother you. I’ve tested thousands of knives over the years, and the quality is as good as you order from Taiwan.

The design of the G-10 handle scales are worth a closer look. While many knives– folders as well as fixed blade– have a “flat” design to them, the Swift has ergonomically CNC machined handles that are ever so slightly rounded, so as to not make holding the knife the least bit uncomfortable. This is important. It’s a small matter but important, at least to me, and it should be to you, too.

DSCF0437

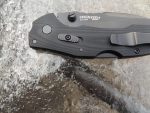
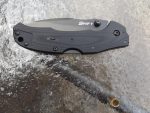
The pictures with this article show two different samples of the Swift. The satin finished uncoated blade is from the first run of knives. The black blade sample is a new and improved design, with the ”XS” (Xtra Safe) safety, that keeps the blade securely locked when closed, as well as locking the blade when it is open. It adds another measure of safety so there are no worries about the blade popping open in your pocket. It’s a great idea! Plus, the sliding “XS” safety is mounted on the side of the handle, not on the top. I can pull the knife out of my pocket and with my index finger release the “XS” safety, and then apply pressure to the thumb stud and the blade flings open, fast! And, if needed, I can apply the “XS” safety to lock the blade in the open position. It’s just another added feature that assures you the blade won’t close accidentally when in use!

Did I happen to mention that the Swift came super-sharp right out of the box? Yeah, I thought I did! However, as part of my testing I still like to put every knife I get through a series of tests, to see just how sharp a blade is. This includes cutting chores in the kitchen, as well as slicking newspaper. Many knives won’t slice newspaper because it is so thin. There were no problems with the Swift. I also cut cardboard, a lot of it, and this material is extremely tough on a knife blade. It will dull a knife is very short order, but I had no problems with the Swift, either of my samples. Cutting poly rope is an extremely good test of how well a knife will cut. Many knives, even though they are sharp, will simply slide right off the poly rope; the Swift had no problems.

DSCF0439

If you’ve followed my knife articles, you know that one tough test is cutting through blackberry vines and we have more than we need in western Oregon. Blackberry vines are wicked, especially the long thorns on them and the vines themselves are tough. I take a single swipe at a vine, and if a knife blade doesn’t cut completely through one of these vines the edge of the blade needs some work. I had no problems with the Swift. Just one clean swipe and the vines were cut into two pieces. During all my testing, over a long period of time, I didn’t need to touch-up the blade. It held the super-sharpness it came with. However, at the end of my test period, I just ran the Swift’s blade over the crock-stix to touch it up.

Some years ago, Cold Steel had a line of custom folders, and they were custom in every way and form. They were made in Japan, and they were expensive. I tested several of them, and they even exceeded the quality of custom folders made by some of the best custom knife makers in the country, bar none. However, they were a little bit on the spendy side, beyond the reach of many consumers. The Swift is as good as any custom folder I’ve tested. Yeah, it is that nicely made!

DSCF0440

As I always do, I pass knives around to the guys (and girls) at the local gun shop I haunt, and every one of them loves the way the Swift felt in their hand. The manager of the gun shop is very picky when it comes to knives and guns and can usually find something to complain about, but he had no complaints about the Swift, none! I even put on my magnifying gunsmith goggles to take a closer look at the workmanship of the Swift and couldn’t find a thing wrong with the workmanship at all!

In the past, I have disassembled some folding knives– assisted-opening, manual-opening, and even automatic-opening types– and some, I wished I hadn’t taken apart. They were a real bear to put back together. I was very tempted to disassemble the Swift to see what the Flash-Tek assisted-opening design was all about, but I regained my senses. I didn’t want to have to put the parts in a plastic bag and send it back to Lynn Thompson with a plea to put the knife back together for me. I’m dumb but not stupid! LOL!

DSCF0442

I hope to see the Flash-Tek assisted-opening mechanism on some more of the Cold Steel folders. I like it, a lot! It is fast and smooth, very fast, and very smooth in operation. In the meantime, I’m going to consult with some legal minds and see if I can file suit against Cold Steel for getting inside my head and stealing this design. Gotta be some legal recourse. LOL!

Full retail on the Swift line varies, according to which model you want. However, if I had no other choice but to pay $240 for the Swift I or II, I’d sure pull the ol’ credit card out of my wallet and get one. Its top-notch material, extreme detail to quality, workmanship that’s second to none, fast and smooth opening, what’s not to like? Check one out at your nearest dealer, and you’ll buy it.

– Senior Product Review Editor, Pat Cascio


Recipe of the Week: Old World Sauerbraten, by G.M.

Ingredients:

  • 3½ to 4 lbs beef rump or sirloin tip
  • 1 cup water
  • 1 cup vinegar
  • 1 large onion, sliced
  • 1 lemon, sliced (unpeeled)
  • 10 whole cloves
  • 4 bay leaves
  • 6 whole peppercorns
  • 2 Tbsp salt
  • 2 Tbsp sugar
  • 12 gingersnaps, crumbled

Directions:

  1. Place the meat in a deep ceramic or glass bowl.
  2. Combine water, vinegar, onion, lemon, cloves, bay leaves, pepper, salt, and sugar; then pour it over the meat.
  3. Cover and refrigerate for 24 to 36 hours, turning the meat several times during marinating.
  4. Place beef in a slow-cooking pot.
  5. Pour 1 cup of marinade over the meat.
  6. Cover and cook on low for 6 to 8 hours.
  7. Place the meat on a serving platter, then strain the meat juices and return them to the pot. Turn the control to high and stir in gingersnaps.
  8. Cover and cook on high for 10 to 15 minutes, then pour over meat.

Makes 8 servings.

o o o

Do you have a favorite recipe that would be of interest to SurvivalBlog readers? Please send it via e-mail. Thanks!


Letter Re: Dehydrating Tray Solution

Hugh,

I’ve noticed a couple of letters from people writing in and asking about the problem of smaller veggies falling through the trays with the tier-style hydrators. I wrestled with the same issue in the beginning and started out by using aluminum foil stretched across the racks. That proved to be impractical for long-term usage because each time you moved the rack in or out of the dryer the edges of the foil would catch on the sides and tear, not to mention the trick of getting them into the dryer without everything falling all over the floor. Additionally the veggies would stick to the aluminum foil. It was pretty time consuming just getting the food off without all kinds of little pieces of foil stuck to the food, so that technique ended up being basically a one-time thing, as you had to put new foil on all of the racks with every new batch. After that, I began molding the aluminum foil into cookie sheets. That solved the tearing problem but not the sticking issue. Finally the light went on. August2016064After a good bit of searching I found two styles of what I call throw-away cookie sheets at the dollar store. The perforated pans are actually throw-away pans for grilling veggies on the grill. You get a set of two for $2.00 (a dollar a piece). I have a ten-rack dehydrator so it cost me ten bucks for a set. They work great. There is very little sticking, and they’re heavy enough to be able to scrape stuck-on food without tearing. I use a steel spatula for this, but the sticking issue really only happens with the mixed veggies, peas, carrots, and corn. I use the perforated sheets for better air circulation on things like broccoli, cauliflower, zucchini, squash, diced potatoes, mushrooms, and onions. All of these just slide right off after drying. There’s no sticking whatsoever. The non-perforated pans are used for the frozen mixed veggies from the store, corn off the cob, and peas. One note of caution about either of these styles: Don’t use even the perforated pans for any kind of fruit. The sugar glues the food to the pans. I’m talking Super-Glue! I always put fruit, no matter how small, directly on the racks themselves. Maybe I should have included this as another learning-curve take-away in the article.

August2016063

The size of the pans in the pics is ¾” x 10-3/8 x 15”. (Those are inside dimensions.) This was the closest size I found to matching the rack size. Being a little wide as they were for mine, you may have to fold two of the edges up and then squash the corners flat with a pair of pliers for a nice flat fit in the dehydrator. But after that’s done they slide in and out nicely.

After about six or seven uses, they will get a bit of the grunge factor working from the sugar in the veggies. This is what causes the corn and peas to stick. I have cleaned them by both soaking in the bath tub and then washing with soap, and also by using a Brillo pad followed with a soaping. Soaking first works the best. The bits and pieces of food that are stuck rehydrate and just float off. Then all that’s needed is a soaping. They last forever it seems. I have a set of each type in reserve and am currently only on my second set after using this system for years. I really liked the non-stick pads that your wife found. Will definitely be looking into those.

August2016062

I have always avoided using any kind of vegetable sprays in dehydrating because of the rancidity factor. For shorter-term storage and usage, sprays may not make any noticeable difference at all, but if you’re shooting for maximum long-term storage years I don’t think I would recommend it. I can’t speak with absolute authority here because I haven’t done a side-by-side test of something that has been stored for say five years; one with pans sprayed with oil, the other not. But the reason I shy away from this concept is I remember when I was doing research on dehydrating hamburger, many of the videos and articles stressed over and over again that the better the meat was rinsed of the fat the longer it would store before turning rancid. It was the amount of residual oil that determined shelf-life; oil eventually goes rancid. I have some that has been in storage for a little over a year now so it might be time for a test.

August2016061

Lastly, if you do have the cash to spend, Excalibur seems to have the market on this problem we’ve been talking about. Their trays are made of a fine screen which cures the fall-through problem. I can’t speak to the sticking problem as I’ve never owned one of these. Their smallest four-tray units start at around $110 and the different models go all the way up to $1,000 for their stainless steel commercial unit, with many of their nine-tray dryers coming in at around $300, give or take depending on the amenities. And they offer a big selection. But again, keep your eye on Craigslist for a great buy on used! – M.P.


Economics and Investing:

The Royal Bank of Scotland becomes the first bank to set negative interest rates. – G.G.

o o o

“I’ve Never Seen Anything Like This Before” – The Housing Markets In The Hamptons, Aspen And Miami Are All Crashing

o o o

Items from Mr. Econocobas:

Global Central Bankers, Stuck at Zero, Unite in Plea for Help from Governments – You have to read between some lines here, but what I read is Helicopter drops of money in some form will be needed and we have to make sure people understand what they have been doing to us is giving us inflation not future taxes. This is a fine line because they can’t have people really understanding monetary policy or even understanding inflation. Central banks NEED inflation in order to operate and besides the debt that has already accumulated cannot be paid off with taxes ever. They know this, and they don’t really want people to understand this, but they need them to have an expectation of inflation without actually understanding where it comes from..

o o o

SurvivalBlog and its editors are not paid investment counselors or advisers. Please see our Provisos page for details.


Hugh’s Quote of the Day:

“For the gods perceive things in the future, ordinary people things in the present, but the wise perceive things about to happen.” – Philostratus (c. 170/172 – 247/250), called “the Athenian”, a Greek philosopher of the Roman imperial period


Notes for Sunday – August 28, 2016

August 28, 1883 is the anniversary of the abolishment of slavery throughout the British Empire.

o o o

Readers of SurvivalBlog who use our RSS feed to stay up-to-date will notice that the entire article is no longer available via RSS. You must now click on the “Read More…” or the article title to actually read the entire article. We know this an inconvenience but we have had a series of copy-cat blogs who are posting the entire articles on their own sites using the RSS feed function. Most of these sites are little more than click-bait trying to get you to purchase products from their Amazon store or in their site. After dealing with a couple of sites that absolutely refused to adhere to our copyright and reposting rules on our provisos page, we have had to take the step of truncating the feeds. We’ve even had one site claim in our DCMA complaint against them that they are the originator and we are the poorly behaved competition. Perhaps we will loosen the feed restrictions again in a few months after these fly-by-night sites have collapsed and are gone.

o o o

Thanks for bearing with us over the last 24 hours. The server crashed for an unknown reason and our host brought it back up today. If you missed yesterday’s posts, be sure to read them as well. – HJL


My Tomato Process- Part 3, by Sarah Latimer

Freeze Drying Tomato Sauce

I am absolutely thrilled with the results from our Harvest Right Freeze Dryer! I can not only dry fruits, vegetables, meats, and herbs, but I can freeze dry meals. With that accomplished, I began to think about sauces. Sometimes a recipe will call for just a tablespoon of tomato paste. Who wants to open a whole home-canned jar or even a store-bought can of tomato paste just to extract one tablespoon? Then, you have to figure out what to do with the rest before it spoils and (I almost can’t tolerate thinking of it) it has to be thrown into the trash. When you have invested your time, energy, know-how, resources, and maybe even some emotional attachment toward the full cycle of making tomato sauce, from seed to sauce, you count every drop as precious. Hopefully, you have gallons of sauce as a truly sweet and satisfying reward for your efforts, but each drop is a reward for the many months of care and resources invested. You don’t want any to end up in the trash or compost, which is reserved for the unedibles! So, with this in mind and knowing that some recipes just need a tablespoon or a cup, it is wonderful to be able to have freeze-dried tomato sauce powder available. (I would imagine it might be possible to make this through long-term low heat dehydration if some lemon juice was added to help preserve it during the slow processing as well, but I have not experimented with this. We’d need someone to write in who has done this to tell us if it is plausible.)

I simply make my sauce as described in Part 2 of this article series, let it cool to where it is just lukewarm, and then pour about four or five cups of the sauce onto each of the four freeze dryer trays. If I am putting thicker sauce onto the trays, I can pour the sauce directly onto the trays and then load the trays with the sauce on them into the freeze dryer. However, if I am putting sauce that contains a lot of tomato juice (and just isn’t cooked down much) to where it is runny, then I leave the trays in the freeze dryer and simply slide them out about 1/4 of the way, which is far enough that I can ladle in the sauce and slightly tilt the tray to distribute the sauce without removing the tray altogether. I find that it is very difficult to avoid spilling liquids in these trays when I am carrying and loading them into the freeze dryer, so pouring liquids into trays that are already loaded into the freeze dryer works best for me.

Once the trays are loaded with tomato sauce, I set the freeze dryer’s freeze time setting for eight hours and the drying setting also for eight hours. This is usually enough drying time, but occasionally an additional two hours of drying is required. The newer Harvest Right model makes adding more dry time easy. I just remove the food, lift it to check, and if it isn’t ready put it back in, close the pressure valve, and push the “more dry” button and “start”. If, when I test any freeze dried food, it isn’t brittle and won’t crumble easily and/or it feels as if the food is holding any extreme temperature (either heat or cold) then I assume there is some liquid holding in that temperature and put it back to assure that there is no moisture. (I learned early on in the freeze drying experience that just because food seems dry to the touch, it may not be dry inside, when months later I found a vacuum sealed jar full of moldy freeze-dried potatoes. The potatoes had seemed dry but weren’t completely dry inside. It was quite disappointing to have to throw food out! However, we learned.) With tomato sauce (and most foods), it is the area against the bottom of the pan that is most likely to retain moisture the longest, so be sure to lift to check the tomato sauce, which will be like a solid piece of powdery styrofoam when finished freeze drying. I cut the pieces of “styrofoam” into sections that are about 3”x3” and then place those into my wide mouth Mason jar funnel that is part of the canning tool set and then use the flat bottom of my rubber mallet wood handle to pound the “styrofoam” tomato sauce into powder inside the jar. My rubber mallet’s flat wooden handle works great for pounding all kinds of powders and spices into our Mason glass storage jars. Any tomato sauce powder left in the freeze dryer’s tray is also scooped into the jar, as I don’t want any tiny bit of sauce lost.

To make about 1/2 cup of reconstituted tomato sauce, I just pour 1/3 cup of water into a cup and spoon tomato powder into my water until I reach the desired thickness I want. It usually just takes about two or three heaping tablespoons of powder to get what I’m looking for. Mix with a fork to break up any chunks and it will blend with the water quickly. To make paste, you will just about double the amount of powder, or use what is necessary to reach the thickness you want. The amount required depends upon the density of your powder, which is determined on how much you pound it into the jars. I can put about two or three quarts of my liquid tomato sauce in one quart jar, once the sauce is freeze dried and turned to powder.

Freeze Drying Salsa

When the tomatoes, onions, cilantro, garlic, and jalapenos are ripe and available, it is “salsa time”. Our family wishes it were salsa time all year long, as it is one of our all-time favorite snacks and is quite healthy too. It is just a problem that tomatoes and these vegetables are not available in our garden year ’round. I have tried canning it, but that drastically changes not only the texture but the flavor too. I still use the canned version salsa for some recipes, but we don’t like it by itself as a dip. Cooking the vegetables changes and combines the flavor, so there are no crisp, distinct individual vegetable flavors. We get no punch from a chunk of sweet onion or a kick from a bit of jalapeno. So, what could we do? We found that we could freeze it and still retain some distinct flavors between the vegetables, but the texture wasn’t quite as good as fresh, especially when it was frozen long term. We also has some issues with freezer burn and leakage with a some Ziploc bags that either weren’t sealed well, were defective, or were dropped and split open (sometimes without notice) while frozen and only discovered in the messy thawing process. Sauce just wasn’t easy to package and store in the freezer in small bags it seemed, but since it could be frozen and still keep a good flavor we decided to try it in the freeze dryer. Voila! We got our answer.

Now, for the off-season salsa cravings, we have freeze-dried salsa that is easily reconstituted in just the amount needed for the moment. There is no need to open or defrost a whole quart when there is just one person requiring a half cup for a snack or the family needing only a cup to use on top of tacos.

I make batches of the salsa per the recipe that I am sharing below, and pour about four to five cups of salsa into each of the four freeze dryer trays, with the trays still in the freeze dryer and just pulled out 1/4 of the way while I load them. (I opt for the stainless steel trays rather than aluminum ones, as I believe the stainless steel are healthier and more durable. There is no concern over them reacting to tomato products.) The trays should not be filled all the way to the lip but should have a little bit of expansion/ripple room, about one-quarter of an inch, so it doesn’t overflow or splash out for any reason. Then, I set it to freeze for eight hours and dry for eight hours.

When checking to see if the salsa is done, again be sure to lift from the bottom to check the vegetables that were lying against the bottom of the tray, as they will be the last to dry. If they are crisp and crumbly when pinched, then remove trays and break or cut the salsa into pieces about 3”x 3” squares, placing those in the jar funnel and pushing them into the jars with a spoon rather than crushing with the rubber mallet. You do not want to crush your salsa vegetables, but you do want to break up your squares a little. There will be much more air space in your stored freeze-dried salsa jars than in your freeze-dried tomato sauce powder, because your salsa is not crushed into a fine powder like the tomato sauce.

To reconstitute salsa, spoon some dried salsa into a bowl and sprinkle cold water over it until the vegetables have absorbed water and there is a little extra liquid in the bottom of the bowl. If this doesn’t make enough reconstituted salsa, add more dried salsa and water. Stir and let sit for a minute or two, stirring every thirty seconds, to be sure the water has distributed throughout all of the vegetables before serving. It just couldn’t be much easier or faster, and it tastes so very good!

Freeze Drying Tomatoes

There are times when we want some cubed tomatoes and not just tomato sauce in our meals and recipes during the off season. Why pay in the neighborhood of two dollars or more per pound for organic tomatoes, if you have a garden and a freeze dryer? We use them in casseroles, on tacos, and in pasta dishes. Meaty, fresh tomatoes, with peel left on, can be cut into cubes up to 1/2 inch in diameter and freeze dried. I place the cubed tomatoes in a single layer on a freeze dryer tray and freeze for eight hours and dry for nine hours. (The whole process takes more than 17 hours but is usually done in roughly 24-30 hours. There is time required for transition between processes and pressure to build.) Once the tomatoes are dried, I use a spatula to gently scoop them into wide mouth quart Ball jars and lids and vacuum seal them. I also always label the lids of all of my jars, so I can easily look into a box of jars and draw out the one I need.

To reconstitute the tomatoes, simply let them sit in cool water between fifteen minutes and an hour. They will have lost some of their firm texture but remain quite useful and certainly economical.

Recipe: Sarah’s Smoky Garden Salsa

Ingredients:

  • 8-10 meaty, large Roma-type tomatoes
  • 1 large Spanish onion, cut in half and coated in olive oil
  • 4-8 jalapenos (preferably red ones, if available; quantity depends upon your heat level preference)
  • 4 tsp chopped garlic
  • 3 Tbsp white vinegar
  • 2 tsp Hickory liquid smoke
  • 3 Tbsp firmly packed, chopped cilantro
  • 2-3 tsp salt, to taste

Procedure:

  1. Over high-temperature grill or searing burner, place tomatoes, jalapenos, and oil-coated onion halves. Grill until onions and jalapenos are blackened a bit on two sides and tomato skins are blistered all over. Remove to a plate that will catch liquids; let cool
  2. Once tomatoes are cooled enough to handle, peel skins and place them into a food processor or blender. Cut onion halves in half again and add to food processor also.
  3. Cut stems off jalapenos and remove most of the seeds; add to the food processor/blender along with the garlic, vinegar, liquid smoke, cilantro, and salt.
  4. Pulse in the food processor on low speed until the onion, tomato, jalapenos, and cilantro are well chopped and all is blended but not pureed. (You may need to pulse.)

Recipe: Sarah’s Tomato Meat Sauce

Ingredients:

  • 2 pounds Italian sausage, casings removed, or ground beef
  • 1 large onion, finely diced
  • 1/4 cup minced garlic, or to taste
  • 2 quarts tomato sauce
  • 1/2 cup chicken broth
  • 1 large bell pepper, diced (I prefer red bell pepper, but any color should work.)
  • 2 Tbsp dried Italian herb seasoning
  • 1/2 cup chopped fresh basil, or 2 tablespoons dried basil
  • 1 tsp salt
  • 1/2 tsp ground black pepper, or to taste
  • 1 Tbsp fresh parsley, chopped
  • 1 tsp crushed red pepper, or to taste (optional)

Procedure:

  1. Heat a large, heavy pot over medium-high heat and stir in sausage/beef, onion, bell pepper, and garlic. Cook and stir until the meat is crumbly and evenly browned, about 15 minutes. Use a potato masher to mash and blend the meat mixture every few minutes. Drain and discard any excess grease.
  2. Stir in tomato sauce, chicken broth, Italian seasoning, basil, parsley, salt, black pepper, crushed red pepper, and one cup of water.
  3. Simmer on low for 6 to 8 hours.

Notes: Simmering time can be reduced, but recipe is best if not rushed. If reducing simmer time, also reduce amount of water added accordingly. Additionally, I usually make my own beef-based Italian sausage to use in this recipe, but you can use what you buy at the store or any Italian-seasoned venison, turkey, or other meat also.

Best Wishes for Your Tomato Harvest

I’m wishing you a great bunch of tomatoes this year and for years to come, whether you choose to enjoy them all fresh, can or freeze dry tomato sauces, freeze dry cube tomatoes, or make lots of salsa and other sauces. Maybe you dehydrate or sun dry tomatoes. (It has been a long time, but I used to enjoy sun-dried tomatoes that I stored in oil, though I found it challenging to keep the bugs away.) However you enjoy tomatoes, I hope you have begun or soon will begin to know that pleasure and health benefit and that something here has been useful in that pursuit. Blessings.


Letter Re: Low Tech Cooking

Hugh,

One of your readers was asking about low tech cooking methods. He should search for Haybox Cooker. Articles will be found at Mother Earth News, Instructables, and elsewhere. It’s a very old method of first bringing food to a boil, then setting in an insulated box, and using fine hay to surround the cooking vessel. I’ve used blankets and towels, and it works wonderfully for soup, stew, making your own yogurt, and even for beans. Also, a sun oven is invaluable for low tech inexpensive cooking. Yes, you can and we did buy an expensive one, but our son made one with a box, foil, Styrofoam, and a sheet of glass, and it works just as well. Again search for plans at Instructables. I have made biscuits, bread, stew, soup, beans, lentils, rice, mac & cheese, et cetera. You just have to be sure to orient it to the sun occasionally.

As for good sources of protein that are cheap, lentils, which cook in about 20 minutes, are good as is making your own seitan. Seitan is easy, cheap, and I’ve made it in the solar oven and on the grill. My recipe calls for baking it not boiling it. Beans do require a longer cooking time, but again you can use the haycooker or sun oven, and they are extremely versatile being used plain, in soups, making burgers or loafs, and can be seasoned for lots of variety. Think of hummus or refried beans. They’re easy to make yourself. – B. in Florida


Economics and Investing:

The sinister side of cash. Here comes the propaganda machine to attempt to take us to a cashless society. Why be concerned? Imagine a system where everything is cashless. You cannot do anything if the system is down for any reason. Moreover, who is to say that they cannot arbitrarily decide to restate the value of the number of “units” in your account(s)? – P.S.

o o o

Jim Rickards: “There Will Be A War On Gold”

o o o

GOLD & DEBT: The 1929 Great Depression vs The Next Great Collapse – It is truly amazing the amount of U.S. Debt and value of Gold compared to 1929… right before the Great Depression. We are in serious trouble.

o o o

Why Do Americans Have Such High Incomes and So Little Savings?

o o o

SurvivalBlog and its editors are not paid investment counselors or advisers. Please see our Provisos page for details.


Odds ‘n Sods:

Wranglerstar: DJI Phantom 4 Drone vs Angry Cow! One of our favorite Vloggers uses a drone to herd cows. – T.J.

o o o

Won 6 Olympic metals but shunned by media – W.C.

o o o

SurvivalBlog reader K.C sent in this link to Nat Geo Maps. Are you looking for a standard quad 7.5 minute map? Here is your chance. They are already formatted to print out on US Letter.

o o o

Off grid living in Central Oregon!The latest ad on our sister site SurvivalRealty.com

o o o

Louisiana Officials Demand That Self-reliant Locals Stop Surviving The Flood Without Permission – H.L.