
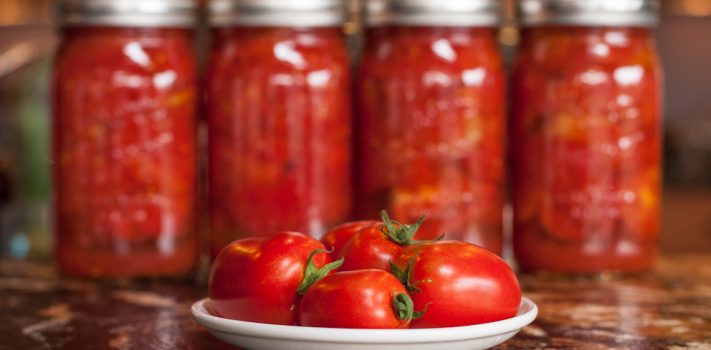


Making and Storing Tomato Sauce for the Long Haul
Crushing, Peeling, Seeding
There are a number of ways to do this, but I am one who likes efficiency. I just have too much to do to take time to do things the “hard” way. Of course, I like to do things myself, but why make it more difficult than it has to be, right? At some point, if the grid goes down and the solar power system fails, I may be forced to boil and peel tomatoes and hand crush them or use a hand-cranked crusher/separator, but until that happens I am using the electric tools available to me. I am a huge fan and power user of my KitchenAid mixer and my KitchenAid FPPA Mixer Attachment Pack. For making tomato sauce, the mixer’s little motor and crusher/strainer attachment does the job in a matter of minutes that I remember my parents having to do with the old Norpro Sauce Master manual crank system over the course of hours and days. I may have to return to that some day but not today. I simply attach the KitchenAid crusher/separator attachment and the KitchenAid strainer extension tray I like to use, put a tall Pyrex bowl underneath where the tomato juice/sauce will come out and a small bowl at the end where the skin and seeds will be dispensed. My tomatoes are washed and sorted. Now, I set up a slicing board, over half of the sink between my buckets of tomatoes and the mixer. Then, I cut the tomatoes that are too large to fit into my crusher opening into halves or thirds and fill my crusher tray. When the tray is filled, I turn on the mixer motor and begin crushing that batch of tomatoes by pressing tomatoes, one at a time, through the machine. It seems to just take about two seconds per tomato. It works especially fast if you have a helper who can trim any questionable spots and cut tomatoes while you fill the crusher. It crushes, strains, and separates the tomatoes faster than I can cut them, pick them up, and put them in the opening.
I put a two-quart Pyrex measuring bowl underneath the strainer to catch the pulp and juice and a one quart bowl underneath the separator to catch the skins and seeds. As the Pyrex bowl fills, I dump the pulp/juice into a large soup pot that I start heating on the stove. As the seed/skin bowl fills, I dump this into planters that are filled half way with soil and then mark the various planters with which type of tomato the seeds came from, or I separate them into locations so that I know and can mark the pots after I have completed the tomato sauce-making process. (These pots of seed are left outside all winter to dry, ferment, and then develop into plants in the spring when the rains and warm temperatures come.)
Cooking the Tomato Pulp/juice Into Sauce or Paste
Cooked tomatoes and sauce are very healthy with antioxidants and loads of vitamins and nutrition. For the bulk of my tomato sauce, I don’t add a thing; I just boil it down, at a low simmer to the right consistency, which is usually about half of what I started with, since I use mostly meaty tomatoes designed for sauce or paste. It is important though to stir it occasionally on the bottom to avoid any scorching. If you are using very wet tomatoes, you will need to cook longer and down to 1/3 or maybe even 1/4 of what you started with to get a hearty sauce consistency. Cooking to paste requires even more simmering. Most people will add salt to their sauce for preservation and flavor, but we are a low-sodium family, so I use very little or none. Preparing a big batch of tomato sauce takes hours, so plan accordingly, and keep an eye on your sauce so that it doesn’t scorch or overflow your pot. When you begin boiling your tomato pulp-juice, it may froth up under a heavy boil, so do not fill your pan full. Leave at least a couple of inches of pan above the level of tomato juice at the start so that you don’t lose any of that precious sauce. Just simmer it on low and stir the bottom occasionally, until it reaches the consistency you desire. It’s especially important to stir frequently as it gets thicker.
Most of the sauce I produce is just plain so that it can be used in many ways– tomato meat sauce, marinara, chili, soups, stews, and so forth. However, sometimes it is handy to have a jar of seasoned tomato sauce ready to use. I usually make at least one large pot of my Italian Marinara Sauce and/or Tomato Meat Sauce, either with or without meat, to both pressure can and freeze dry each season. Yes! You can can meat sauce! Mixed with acidic tomato sauce, lean cooked meat is quite safe to be pressure canned. I have opened up, and our family safely eaten, jars that had been stored for multiple years. (Even lean meats alone can be safely pressure canned. However, it is important to note that pressure canning is not the same as water bath canning. Meats must be pressure canned.) I also freeze dry some sauces for individual servings or to use in recipes.
When I am faced with the sizable task of making either my Italian Meat Lasagna or Vegetable Lasagna, which are family favorites that I make with my own homemade creamy lemon ricotta cheese, it sure helps to simplify the process by already having my sauce made ahead of time– whether in canned form or freeze-dried form. Both work great, though when a large quantity is required I usually reach for the canned sauce and keep the freeze-dried sauces for when I just need a little for a recipe or for an individual serving. I have successfully stored tomato sauce for four years without any problems. I am confident it would store much longer, but I use it before it gets any older than that, as part of our food rotation; our larder does not get old. Food very rarely gets discarded, because we store what we eat and eat what we store. It only gets given to the animals if by some circumstance there is an accidental spill that contaminates it. It just doesn’t get “old”, so I don’t have a personal maximum storage life testimonial to share with respect to tomato sauce. Sorry! Well, actually I’m not so sorry.
It is a healthier lifestyle that we have grown into, thanks to the survival/homesteading mindset! Growing massive quantities of vegetables, herbs and spices, and fruits and processing them for the year, baking our own bread from freshly ground flours, making some of our own cheeses, and raising chickens and such has led to active lives and stronger bodies, the knowledge that our food is real food and not loaded with preservatives and fillers, and the consumption of much fiber and nutrients without any toxic pesticides, genetically-modified organisms, antibiotics, or contagious disease. Living this lifestyle and storing the food that we eat and then eating what we store in a systematic way has been a financial benefit, but even more so a physical and emotional health benefit.
We know that we are to wisely use what God has given us and store up when we have the ability to do so. He gives us many lessons about this throughout His Word– the Bible. From a weekly perspective, we are to work six days and prepare ahead to rest on the seventh. We are told the story of Joseph, through whom Egypt and the entire world was saved because he led the people to store up in the time of plenty for the time that was coming when there would be famine. There are many more examples of a time to work and store up and a time to use what is stored and to rest. Having what we need stored up gives the mind and body a peace and ability to receive God’s rest and comfort when it is time to do so.
Tomato sauce is one of the easiest things to store. If you are just beginning on the journey of food preservation, this is a great place to get started, and canning is a wonderful place to start since so much can be canned. However, if you are on a budget, many people will tell you that water bath canning is the least expensive way to get started, but you may be like me and soon find that you are frustrated that there are many things you cannot water bath can. Then you will eventually have to buy a pressure canner anyway. It is my strong suggestion, for economics if nothing else, that you simply invest in a good pressure canner right up front and avoid the water bath canner investment altogether, unless you are only planning to can tomato sauce and fruit jellies. Even then, it takes much longer and therefore more energy to do so with a water bath system. When the grid goes down, fuel resources may be in short supply and in the heat of late summer when the garden is at its height I don’t want to have to stand over the heat of a water bath for an hour or more when I could simply have 15 minutes of boiling within the pressure canner. The simmering tomato sauce will be challenge enough.
Canning Tomato Sauce (My Step-by-Step Process)
At the point that I begin making the sauce, I usually load my dishwasher with more than enough wide mouth quart Ball jars and lids for my batch of sauce, and I run these jars through the dishwasher on a sanitizer setting, which takes about two and a half hours. This is the easiest way I have found to sterilize and prepare my jars for canning. Even though the jars may be new, there may be chemicals from production, dust, and bacteria or viruses residing on them. I want to get them as clean as possible. Note that I pressure can, and the sterilization process needs to be more strict for water bath canning. (In water bath canning, jars and lids should be boiled in water for several minutes immediately before being filled with hot contents. Follow instructions in the Ball Complete Book of Home Preserving for water bath canning.) I leave my jars in the dishwasher to continue steaming and to stay clean and out of the way until my sauce is ready later in the day.
Some tomatoes are not as acidic as others and require lemon juice, vinegar, or citric acid to reach a safe acidic level for canning. If you are not sure, you should err on the side of safety. Lemon juice is my recommended additive, because it adds the best flavor. Just add about two tablespoons of bottled lemon juice into each of your quart jars before adding the cooked tomato sauce. It will get mixed up in the canning process.
Once the sauce is the right consistency, I remove the jars from the dishwasher and place them on a clean jelly roll/cookie sheet. Then, I take a funnel and set it on top of the first jar to be filled. If adding lemon juice, this is the time to do it. (Be sure it is not cold lemon juice coming out of your refrigerator when you pour it into hot jars or you risk breaking them.) I ladle the hot sauce into the jar, leaving about 1 1/2 inches of space below the jar’s top rim, and then I set a clean, new, sterilized flat lid on top. I repeat this, filling all jars until I have used up my tomato sauce. If there is only a partial jar of sauce at the end, that jar goes into the refrigerator for use right away or to be added to the next batch of juice that will be boiled down to sauce within the next week. (I reboil this stored sauce with the tomato juice to kill any bacteria that might have grown in it during the few days it was in the refrigerator.) Then, I loosely screw on the rings to the jars.
My pressure canner, which is an All American brand 21.5-quart size, holds seven quart jars at a processing. I put the canner on the stove, add several inches of hot water, and set the jars into the canner so that the jars are not touching one another or the side of the canner. It takes some careful placement to accomplish this, but it can be done. I believe in all our years of canning, we’ve only had one jar break on us during canning. (Don’t be afraid of pressure canners; just be thoughtful and careful to follow procedures! It is easy, safe, and an excellent means for preserving food for the long term!) After all seven jars are in place, I check the water level. It shouldn’t be more than about 1/3 of the way up the jars but does need to be several inches. We just need enough water for steam to continue without running dry during our processing, which takes about 15-20 minutes for quart jars of tomatoes in pressure canning. (When water bath canning, tomatoes canned in quarts require a minimum of 45 minutes of processing.)
I set the canner lid on top, adjusting it to sit balanced and turn to latch it in place. Then, I lift two opposite bolt locks and simultaneously turn the knobs to gently lock the lid down, not tightening completely yet, until all bolt locks are in place and I can adjust the lid’s spacing to keep it evenly balanced in the final tightening. That lid bolt lock tightening is the hardest part, but it is not difficult. The trick is in properly setting the lid in the beginning and then, working opposite bolt locks simultaneously, tighten it down so that the lid sits flat and even all the way around until it is then locked down tightly. It gets easier with practice! Once the lid is securely locked down, put the weight on the steam outlet, with the appropriate about of pressure for your elevation in the top position. Consult the Ball Complete Book of Home Preserving with any questions about the proper pressure weight for you to use.
Turn your stove on to high heat and let the water come to a boil. When the weight begins to rattle wildly, turn your heat down to medium-low so that you only hear an occasional rattle every 15-20 seconds or so and begin timing your processing. You need to process from this point at least 15 minutes for quarts of tomatoes. (Other foods require more time, and sometimes much more.) After I’ve processed at least 15 minutes, I just turn the stove off and let my canner cool down before removing the lid. Several hours later, I will remove the weight. If there was no steam coming out when I removed the weight and the canner is only slightly warm or cool to the touch, I will then open the lid. I use a jar lifter from my canning tool set to gently lift each jar onto a cookie sheet that has a dish towel spread out over it to catch the water that runs off the the jars. At this point, I check to see that the lids have all dipped down with a vacuum, indicating a successful canning, and I dry off my jars and label the lids, using a black Sharpie marker. I always mark the process, contents, and date. So, in this case, I might write “Canned Tomato Sauce 8/16”. When the jars are completely cooled, they go into the larder at the back, so that the older tomato sauce can be used before this new tomato sauce.
In Part 3 of this series on processing tomatoes, I will describe how we freeze dry sauce and tomatoes and will also share some of my tomato recipes, including my very popular salsa recipe, which I freeze dry and can reconstitute in the winter with great success. Yummy! Have a blessed, safe week, y’all!