


(Continued from Part 2.)
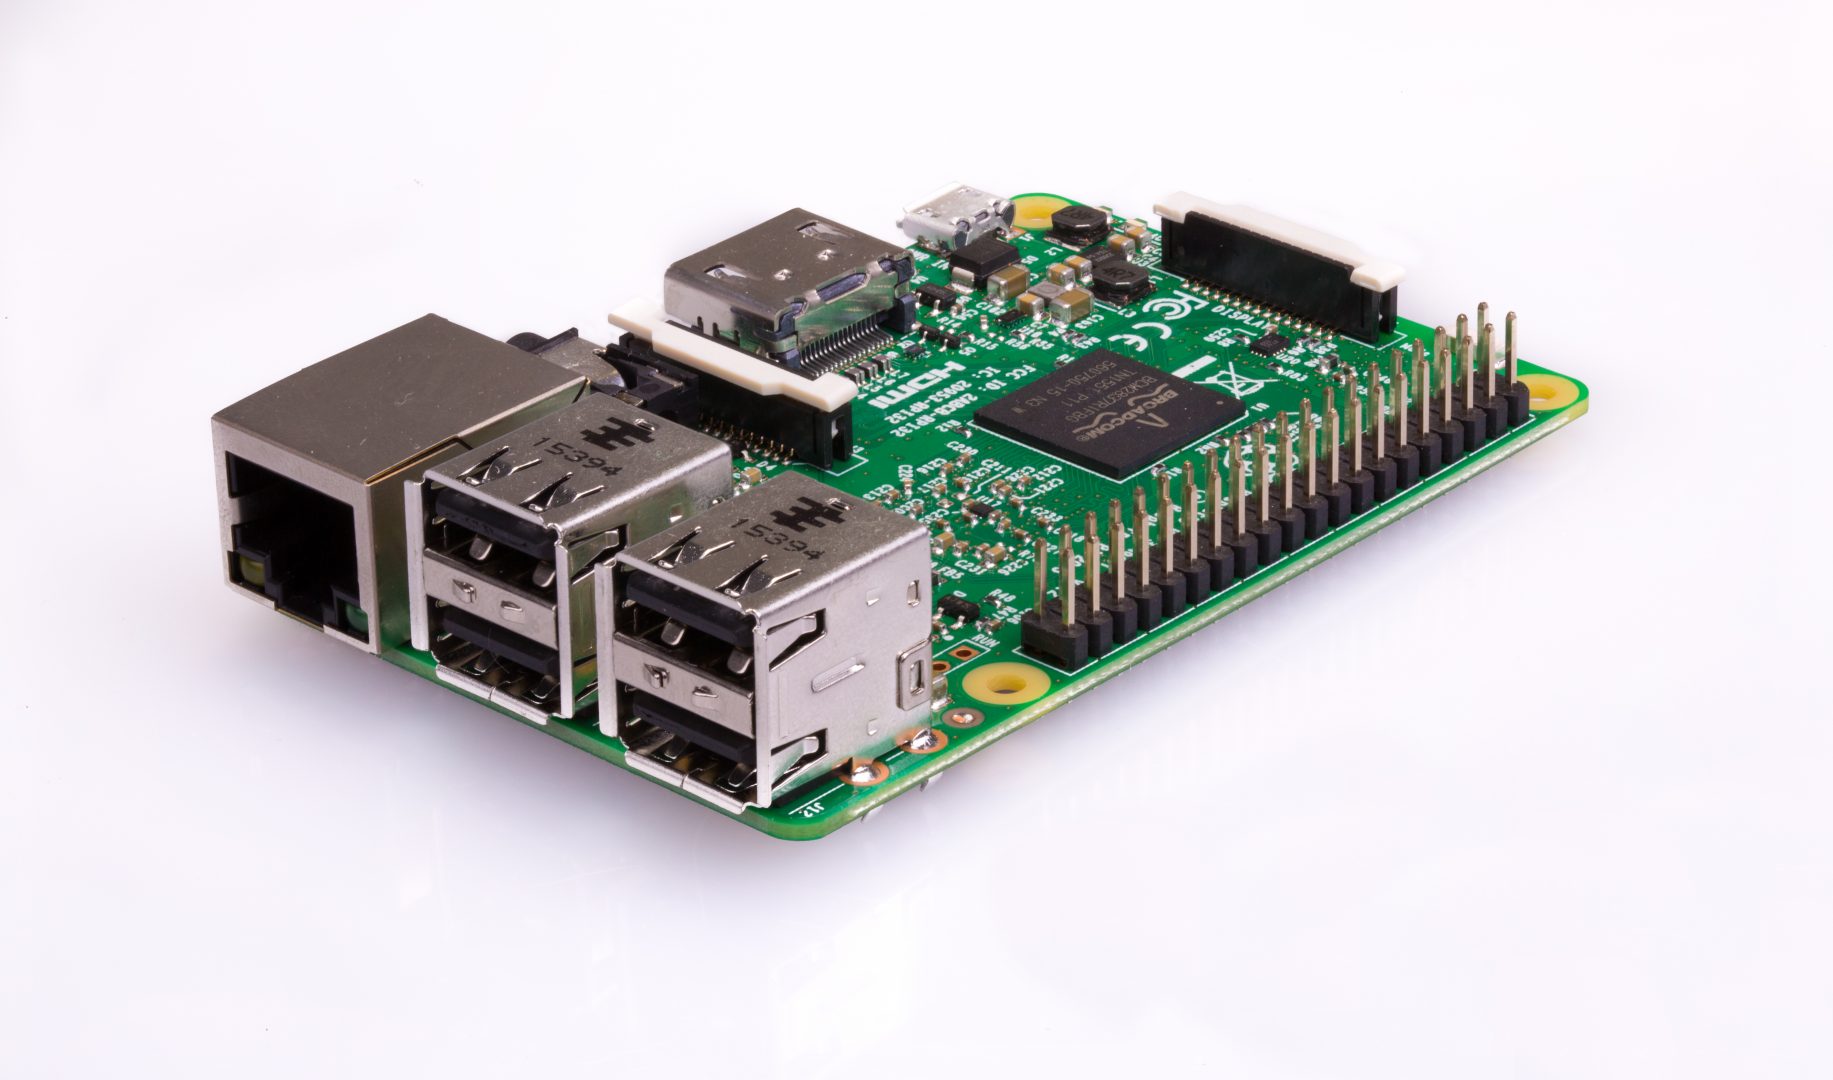
Now we’re ready to start plugging in hardware. Below is a picture of the what all of the connections will ultimately look like for your initial set up if you have a wired home network:
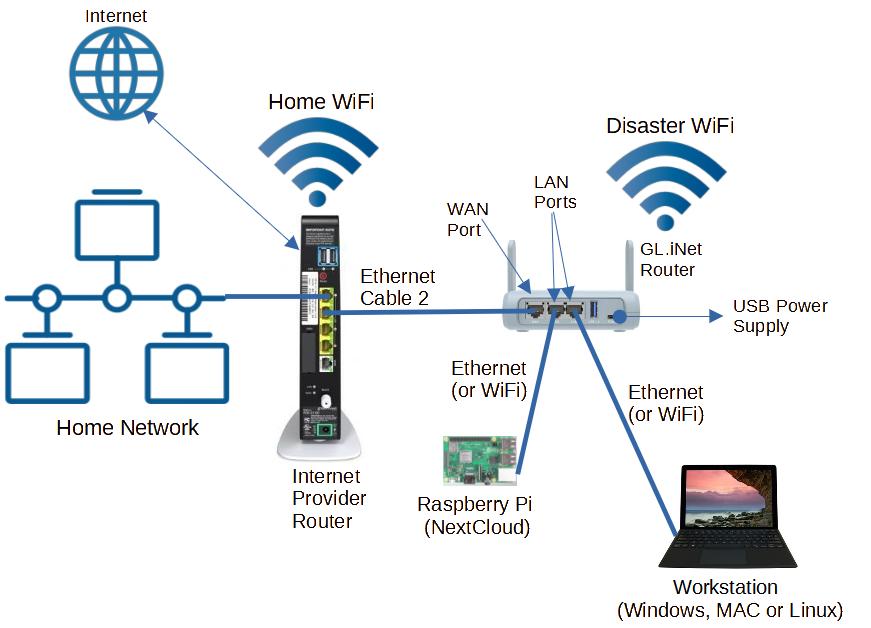
And here’s what the connections will look like for setting up in a cord-cutter network:

The first thing you want to do is set up the GL.inet router. Before connecting any network cables you should plug power into the router and let it boot up for 30 seconds or so. Then plug an Ethernet cable into your laptop/desktop computer and plug the other end into one of the ports labeled ‘LAN’ on the back of your GL.iNet disaster network router. Note: Don’t connect the router to your home network yet. While I recommend initially using a wired Ethernet connection, you can also connect to the disaster router to set it up using WiFi on your laptop. On the bottom of the router you’ll find the name (SSID) of the default WiFi network the router creates – typically ‘GL-XXXXX-NNN’, where ‘XXXXX’ is the model number of the router and ‘NNN’ is a three-digit number. For example, the default on mine is ‘GL-MT1300-421’. The default password for connecting to the WiFi network is usually ‘goodlife’ (without the quote marks).
Once you’re connected to the router, open up a web browser. I prefer the Brave browser, but any browser other than Microsoft Internet Explorer should work. In the address bar at the top of your browser type in ‘http://192.168.8.1’ and hit Enter (no ‘s’ at the end of ‘http’). You may get a warning that the site you’re connecting to isn’t secure – you can tell it to ignore that and continue. The following page should then appear:
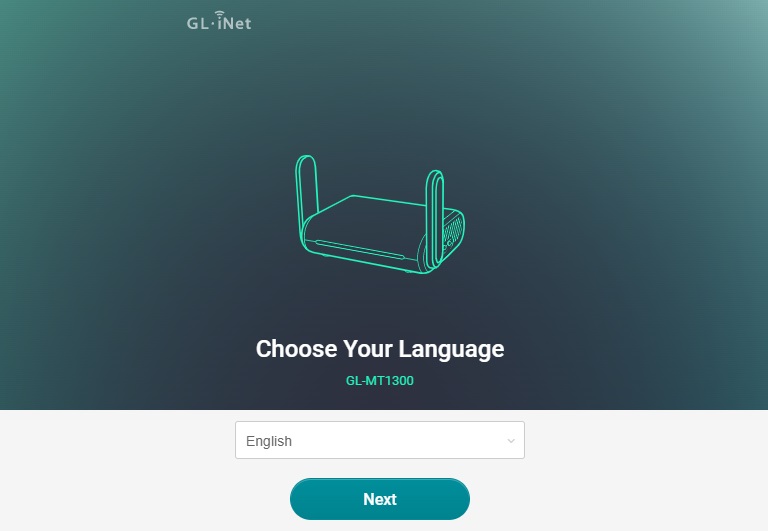
Select your preferred language and hit ‘Next’. The next page will ask you to enter and confirm a password for the router:
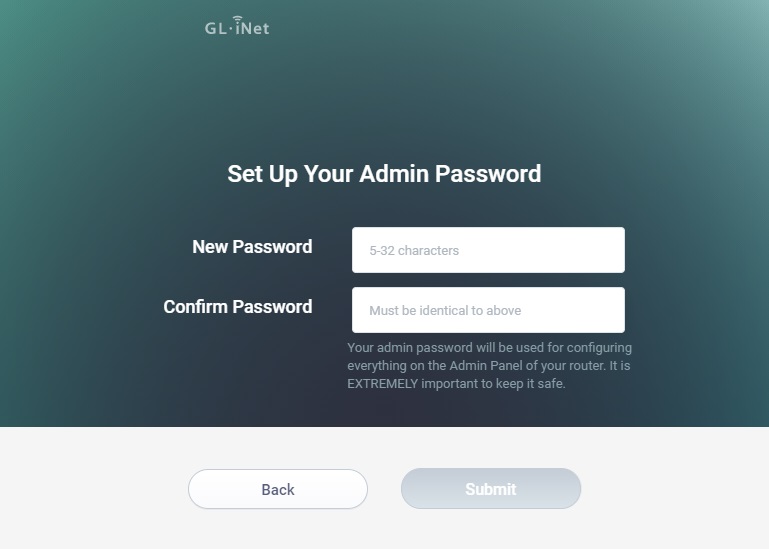
In my case, I only plan on connecting this network to the Internet for short periods of time when I need to do updates and only deploying it for any length of time in off-grid remote locations or disaster scenarios when hackers shouldn’t be too much of a problem, so I’m not too worried about using a super-strong password to protect the router. I actually attached a label to the bottom of the router with the password so I don’t forget it (which is a bad thing to do normally, but this is just for disasters!). Once you’ve entered and confirmed your password and hit ‘Submit’ the main admin panel will be displayed:
Now is where the setup will diverge a little, based on the type of home network you have. If you’re a cord-cutter you can skip this part and proceed to the next section. If you have a wired home network, check that third number from the IP V4 address you wrote down earlier – if it’s not ‘8’ then you can skip the rest of this and go on to the next section. If the third number in your home IP V4 address is ‘8’ (for example, 192.168.8.44) you’re going to need to change the network address the GL.iNet router uses to avoid a conflict with your home network. On the current router Admin Panel page, click on ‘More Settings’ at the bottom of the left frame, then click on ‘LAN IP’ under that. The following screen will be displayed:
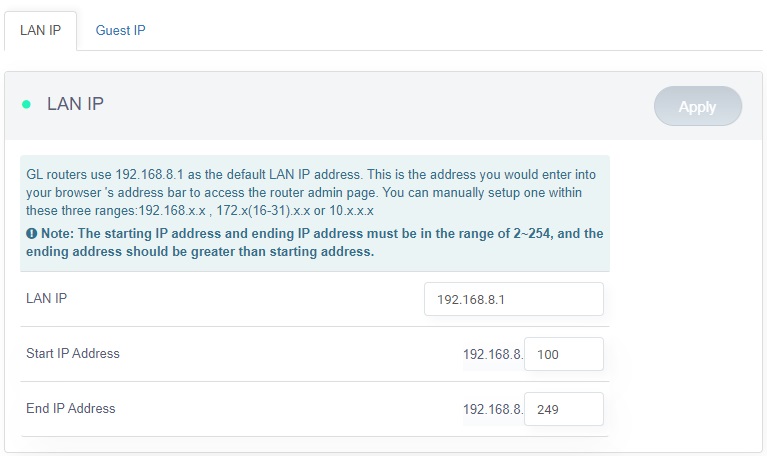
Click on the field to the right of ‘LAN IP’ and change the third number from 8 to 10 – e.g. change ‘192.168.8.1’ to ‘192.168.10.1’. Then click ‘Apply’ and wait for your router to reboot. Once that’s done (it takes around 10-15 seconds) your browser will tell you the web site you were connected to isn’t responding any more, so you’ll need to enter ‘http://192.168.10.1’ in your web browser address bar to get back to the router’s login page – enter the password you set up earlier and you’ll be back at the main admin panel page.
Connecting to the Internet
Now that your workstation and router are set up, the next step is to connect to the Internet so you can get the software you’ll need. If you’re a wired home network you just need to connect the ‘WAN’ port of your GL.iNet disaster network router into your ISP’s or home router to get started. If your ISP router is in an out-of-the-way location you can get a really long Ethernet cable and temporarily run it to a convenient desk or table – Ethernet cables can be up to 328’, and a 50’ cable is only around $9.00 USD. As shown in Figure 2 you want to connect the ‘WAN’ port on your GL.iNet router to any empty ‘LAN’ port on the back of your home router. The LAN ports on your home router will either be the group of ports that are all the same color (typically yellow), or they’ll have an icon that looks like this:
After a few seconds, your workstation should be connected to the Internet – you can test this out by opening up another tab in your web browser and entering ‘survivalblog.com’, which should bring up the SurvivalBlog web site. If it’s not connected wait a few seconds and try again.
If you’re a cord-cutter and only connect to the Internet via your cell phone or tablet using a cellular provider (e.g. AT&T, T-Mobile, Verizon, Cricket, etc.) you’ll need to set up something called ‘tethering’ – that’s where your phone acts as a temporary interface between your disaster network router and the Internet. You’ll need an appropriate USB cable to connect your phone to the USB port on the back of the GL.iNet router, and they’ve provided some instructions on how to set it up here. The USB port on the back of the GL.iNet router is USB-A, so you’ll need a cable with that on one end and USB connector that fits into your phone on the other end. Note that both your phone and your cellular plan have to support tethering for this to work. If it’s not supported you’ll have to connect your laptop to the Internet via free or paid WiFi somewhere to download the various software packages we’ll be using, then return home and plug your laptop back into your disaster network to finish setting it up.
What I’ve described are two of the most common scenarios for connecting your disaster network to the Internet in order to set it up, but there are dozens of other possibilities that would take too long for me to cover. If you have a different kind of set up in your home or you run into any issues connecting your GL.iNet router to the Internet, there are some good forums where you can ask for help.
Once your router and laptop are connected to the Internet the next thing you should do is make sure your router’s software is up to date. Follow GL.iNnet’s instructions for updating here.
Set Up WiFi
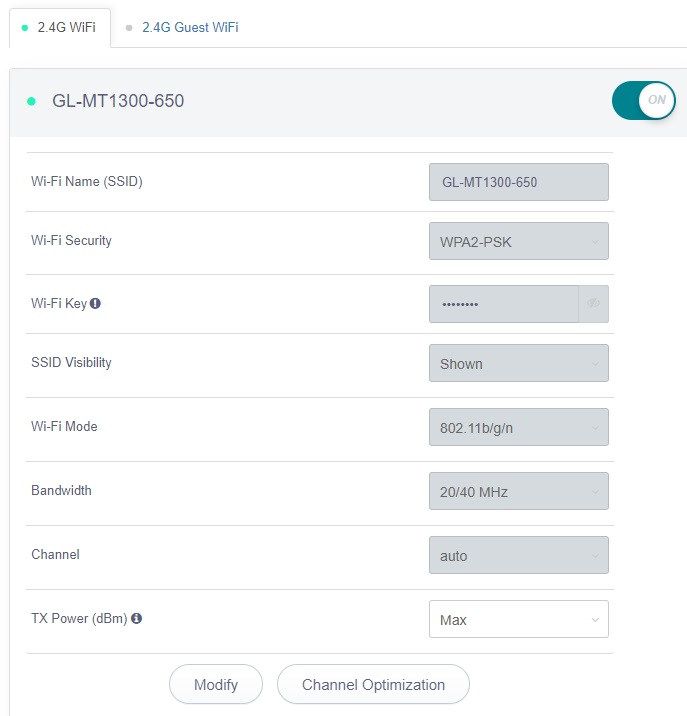
This is also a good time to get your disaster WiFi network(s) set up. Make sure you’re on your router’s admin panel page (http://192.168.8.1 or http://192.168.10.1 if you changed it) and log in, then click on ‘Wireless’ on the left side. Here’s the page that will be displayed in the right frame:
As I mentioned earlier, the router has a factory-configured WiFi network named something like ‘GL-MT1300-421’, which is documented on the label on the bottom as well as shown on the ‘Wireless’ page (‘GL-MT1300-650’ in the figure above). A quick note on WiFi – there are two types of WiFi networks, based on the radio frequencies they use – 2.4GHz and 5GHz. 2.4GHz provides less bandwidth (speed) but greater penetration of obstacles (distance) than 5GHz. The GL.iNet routers support both types (scroll down on the Wireless page to see the 5GHz info), and provides a standard as well as a ‘Guest’ version of each via tab at the top of each network section. You can configure all four WiFi networks (2.4GHz/5GHz standard/guest) at the same time if you want, but doing so will consume more power. The guest networks can be useful because it doesn’t allow anyone connected to them to make changes to the router’s configuration; anyone that can connect to one of the non-guest networks and knows the router’s password can access the router’s admin panel page and make changes. Note that some older mobile devices only support 2.4GHz WiFi, while many newer ones support the faster (but shorter-ranged) 5GHz. I recommend that you enable at least one of each type of network.
You can turn any of the four networks on or off via the slide switch next to the network’s name, and change the factory network names (SSIDs) and passwords (‘Wifi Key’, ‘goodlife’ is default for all) by clicking on the ‘Modify’ button at the bottom of the network’s information, entering the new information and clicking ‘Apply’. I changed my network names to ‘wifi24’ (standard 2.4GHz), ‘wifi24g’ (guest 2.4GHz), ‘wifi5’ (standard 5GHz) and ‘wifi5g’ (5GHz guest), and used one simple password for the two standard networks and a different one for the two guest networks. I recommend leaving all of the other settings alone unless you understand WiFi network configuration. I also wrote the network names and passwords on a small label that I keep stored with the router. Note that if you chose to connect your laptop to the GL-iNet router using WiFi instead of Ethernet, you’ll need to re-connect after you’ve changed the network names and the router has rebooted.
Once you’ve made sure the router’s firmware is up to date and configured your WiFi network(s), you should test everything out by connecting one or more mobile devices to one of your disaster WiFi networks and making sure they can access the Internet.
(To be continued tomorrow, in Part 4.)