Making, modifying, and using threaded fasteners seems to me to be a pretty basic part of repairs needed in keeping things running. I realize that the following information is not likely to be directly used by many of the readers due to the use of a metal lathe and the terminology. An amateur machinist should be able to make threaded fasteners as described. In any event there are absolutely a number of good ways to accomplish making a threaded fastener. Understanding that this just scratches the surface of the topic, I hope that it will reach a few folks and maybe generate some discussion on how we will make and repair items in the future if needed
A metal lathe is the queen of machine tools, sometimes described as the mother of all machine tools. One of the most commonly encountered types of metal lathes is the engine lathe. These tools can turn, drill, bore, and thread steel and other metals into useful shapes. The effective use of the metal lathe normally requires years of experience to gain knowledge and skill.
While not often seen in most small home shops, many people know someone from their work or family who has access to a metal lathe and a machinist. While not a common thought to most people, the ability to make a nonstandard threaded fastener could mean the difference in getting a repair done or not. Examples include the very unusual screw diameters and threads per inch found on firearms, cameras, aircraft, and instrumentation. Another use, not shown here, is for making those very large threaded fasteners used in farm and industrial machinery. The lathe also makes it easy to modify an existing screw or bolt.
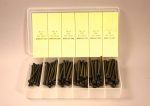
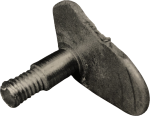
 I recently needed to make an unusual screw for an antique but serviceable firearm. I turned to my trusty old box of Brownell’s blank screws. These blank screws come as a kit. The kit includes numbers 4, 6, 8, 10, and ¼ inch diameter blank screws with lengths of around 2 ¼ inches. This long length often comes in very handy. Common head sizes are used and a very nice screwdriver slot is already cut into each screw head. The screw slots are narrow like those on many of the screw slots commonly found in firearms.
 If you have a metal lathe and can turn metal to a specific shape why would you need to buy screw blanks? A very valuable feature of these screw blanks, and the reason that I use them, is that they are made of a tough, tempered steel and require no further heat treating. An amazing number of new and obsolete gun screws can be made from this assortment. The current part number for this kit is 080-011-000. Refill packages of specific blank screws are also available as are other assortments.
Another excellent way to get the proper toughness for a threaded fastener is to purchase a Grade 8 bolt that is larger than needed and cut it down to the desired dimensions. Grade 8 bolts have 6 evenly spaced radial lines on the head. In addition, for best service, you must size and properly torque your threaded fastener.
You can use these screw blanks in their existing sizes or further turn down the shank diameter or head to make smaller screws. The desired physical properties of the steel remain. A die in a hand held holder, a die in a lathe tailstock fixture, or the metal lathe itself can be used to cut a screw thread on these blanks.
Of the thread cutting choices the least desirable is the die used by hand. It is difficult to maintain alignment with the screw shaft and to get consistent threads part to part. A dedicated die holding lathe fixture can mitigate this to a great extent. What happens when you don’t have a die to match the needed screw thread? Cutting these small threads in the lathe is a useful alternative to hand-cutting threads with a die.
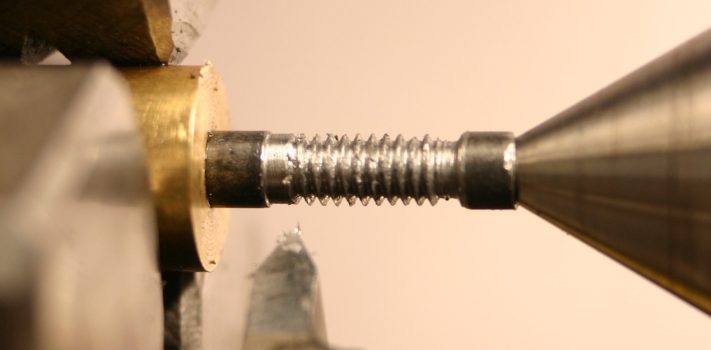
As an example we will make a gun screw. Of the screw cutting alternatives only the lathe can first cut the work to a specific diameter. If you don’t have the proper die and need that screw in a hurry it is sometimes the only alternative. Lathe cutting a screw is often the only realistic way to perfectly match an old screw from an antique firearm, one with uncommon dimensions, or one from a foreign manufacturer. A screw pitch gauge set is highly recommended to determine the actual threads per inch.
Check the lathe alignment before you start work this kind of work. The metal lathe must be set up such that centerline of the tailstock is in line with centerline of headstock. One way to test this is by using an indicator attached to the lathe faceplate and measuring all the way around the tailstock center. You will have to decide how much tolerance is okay, but obviously the smaller the runout the better.
Any error that causes a tapered cut between centers can usually be adjusted-out by carefully moving the tailstock one way or the other. Once you think this adjustment is correct do a test run with a piece of scrap. Centerdrill the end of the scrap, extend it as far as you will when threading the screw blank, support it with the tailstock center, and make a cleanup pass along its length. Measure the diameter at each end. The diameters should be exactly the same, if not then normally the tailstock is adjusted side to side and the test repeated until the taper is gone. This is not the best method when using a worn three-jaw chuck but will get the alignment close enough for better results.
One potential problem area can be the up and down relationship between the headstock and the tailstock, with the tailstock commonly being higher than the headstock by design to allow for eventual wear. Fortunately, misalignment up and down generally creates less problems than the side to side misalignment.
I strongly recommend that you obtain a fairly recent copy of Machinery’s Handbook, which is a reference book on machine design and shop practice and covers threading and threading terminology extensively.
 Many gun screws are not standard sizes due to age and history, indeed many are often downright oddball. If possible get the dimensions of an existing and correctly fitting screw. If no screw is available then it is sometimes possible to make a cast of the threaded hole with Brownell’s Cerrosafe. Cerrosafe, more commonly used to make chamber castings, works extremely well for this use. Follow the instructions when using Cerrosafe.
Measure the screw thread’s outside diameter with a micrometer. If need, turn the blank screw body to this diameter using light cuts with a sharp tool. This process also works for a screw that has the right size head but a larger than needed threaded area. The shank is cut to diameter and length and then threaded, just like a blank screw.
A less than precise but generally useful method can be used to determine how deep to cut the thread into the screw’s shank is to use an existing sample. Please note that for this to work the diameter of the sample screw’s threaded area and the diameter of the blank screw shank have to be identical. Be aware when making a gun screw in this manner that you can wind up with a thread that will not fit the part. This is due to manufacturing decisions such as the type and class of the screw threads made when the part was designed. Additional tries with changed dimensions or threading tool profile may be needed.
Put the existing screw in the lathe with the head in the chuck. The threaded end of the sample screw can be supported loosely in a drill chuck in the tailstock. Put the tip of cutting tool on the crest of a thread and zero the cross slide. Move the tip of threading tool over the root of the thread and move the threading tool all the way into the root. Read the cross slide and you will have the thread depth. When using a sharp “V” threading tool you will not actually extend far enough into the root of the screw thread to get an accurate reading if a rounded or flat root thread form is used on the existing screw. This method is certainly not perfect and has obvious limitations but seems to give acceptable results.
Looking in Machinery’s Handbook you will sometimes find that dimensions taken from a standard screw in this manner are different from the published specifications for that screw. Often, mass-produced screws are made to the smaller end of the acceptable dimensions. When feasible you may wish to make standardized screws entirely from the Unified Screw Threads tables and calculate the thread depth in the normal fashion. If you do this you may want to learn about the three-wire method of measuring threads.
The screws being made needed a length of around .900 inches. The sample screw has a diameter of .131 inches. For the 6-40 thread a number 6 screw blank was chosen. The shank of the blank screw as it came from the box was .140 inches. While 6-40 is a standard thread and is precisely described in Machinery’s Handbook, the screw dimensions will be taken from the sample to illustrate the method used when published screw dimensions are not readily available.
(To be concluded tomorrow, in Part 2.)


