


Do you remember your first assigned chore from childhood? Starting at age four, I was tasked with walking up the ridge to my grandparent’s home every Monday around five o’clock to bring home our portion of the week’s pinto beans. To my knowledge, my grandmother fixed pintos every Monday from the late 1940s through the late 1990s. On Sunday evening she would spill out the dry beans on her kitchen table, then “look them” for stones or debris then sweep them into a large bowl to soak overnight.
On Monday morning the beans were rinsed, moved into a large pot, covered with water and set on the wood cook stove in preparation to feed the family and whomever might stop by. A little bit of salt, pepper and a piece of cured streaked meat were the seasonings and as surely as night follows day, the beans were served along with stewed potatoes and cornbread. Given that leftovers were heated on the stove top, any beans not eaten early in the week would be approaching refried consistency by Thursdays. When my mother took over fixing the beans, the recipe stayed the same and the beans were tasty but the low and slow wood stove imparted flavor couldn’t be duplicated.
Several years ago, a friend of my wife’s mentioned that she and her husband had begun growing their own pinto beans and bragged on how much better they tasted than store-bought dried beans. Having said the same thing to others myself about home-grown carrots, tomato, broccoli and umpteen other vegetables, I had to stop and ask “Really?” After all, we are talking about a dried bean – how could the flavor be much different between store-bought and homegrown? Shortly thereafter the proverbial gauntlet was thrown when we had a pair of dishes ruined when store-bought dried beans failed to hydrate and soften. Thus, the challenge of growing our own dried beans was accepted. Spoiler alert: my wife’s friend was right.
 At the time we had a couple of years’ experience growing field peas and research indicated that we could grow drying beans in the same manner. Our growing process begins with driving five-foot-tall T-posts about every eight to ten feet apart to mark out forty-foot-long rows. We then run 14-gauge galvanized fencing wire at roughly 10 inches and 48 inches above ground level. The wire is wrapped around the two end T-posts and short pieces of wire are used to fasten the intermediate posts and wire together.
Early on, we wrapped the primary lengths of wire around the intermediate posts but found that we damaged the wire and shortened its service life as well as had no ability to easily tension the trellis throughout the growing season if needed. We install drip tape along the length of each row on the up-hill side of our trellis posts. Next, we weave jute twine between the parallel trellis wires and secure the twine after every third wrap using a square knot. The intermittent knots prevent the twine from falling away in long spans should it decay or break during the growing season prior to the bean vines reaching the top trellis wire.
To prepare the soil for planting, I run a small Mantis tiller along each side of the drip tape then create a furrow on each side using the corner of a garden hoe. We have found that double rows work well for drying beans and field peas as long as drip irrigation is available. Next, we sprinkle about one and a half cups of a general purpose fertilize (10/10/10 or triple 17 are the most available options here) to each furrow. The furrows are back-dragged to slightly bury the fertilizer, and then the bean or pea seeds are planted. Up until this year, we hand-planted all of our seeds.
To make the process easier on aging backs, we would wear a cloth carpenters’ apron to hold the seed and carry a three-foot-long piece of ¾ inch PVC pipe that we dropped the seed through to keep from bending so much and still control the placement of the seeds within the rows. This year we invested in a garden seeder from Agri Supply Co. and after a slight learning curve, the addition cut our bean and corn planting time by a lot.
Depending on the weather and variety, we have had sprouts break the ground in as few as three days although some varieties have taken close to two weeks. Thus far in our experience, most drying style beans are bush type and common wisdom is that the trellis is not necessary. What we have found though is given our dense planting style with the double rows and the prevalent North wind here, the trellis keeps the beans upright through drying and we lose far less to ground spoilage with the trellis than we did prior to using them. Around the midpoint of the growing season, we will use the drip irrigation to apply liquid fertilizer. This year we also installed three-foot-wide geotextile between the rows to minimize the need to weed. This has really helped thus far and I anticipate we will have less ground loss as the beans begin drying out this fall. By treating the fabric carefully during the season then shaking it off and rolling it up for winter storage, we have been able to get five or more years of use out of it in other areas of the garden before having to buy replacement.
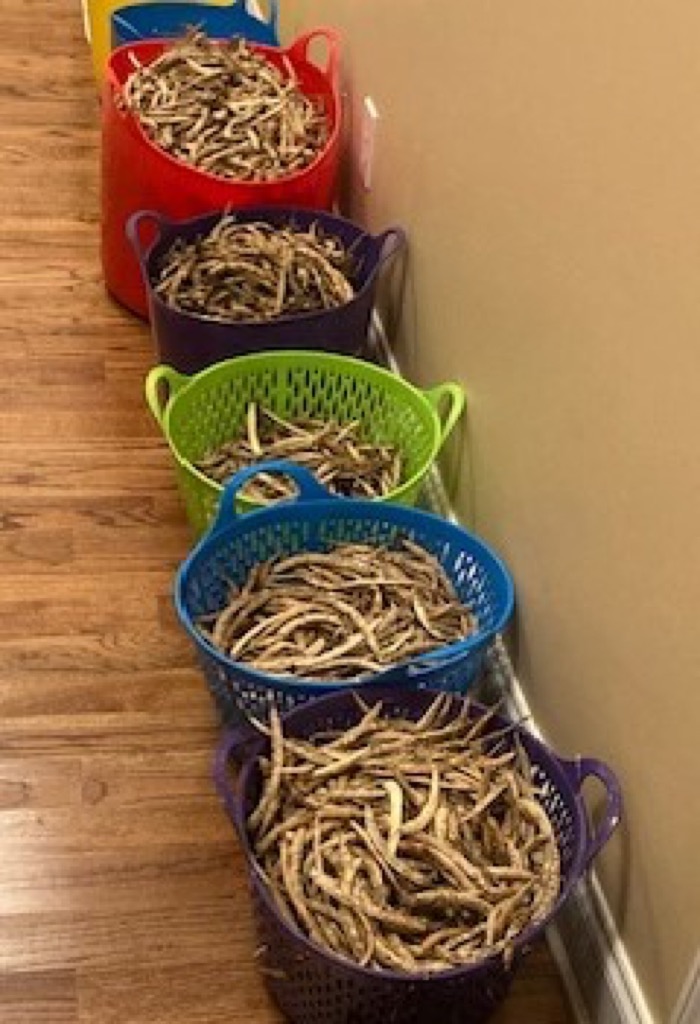 We harvest the dry pods once the seeds create a rattle within the shell and the shells themselves are brittle. By this point in the life cycle, most of the leaves have fallen off the plant and it is possible to harvest the pods by the handful. We harvest into and store the pods in flexible tubs made by Tuff Stuff Products. Their sieve/colander style tubs are especially convenient if further drying is necessary since the structure is so breathable. We try to leave the pods on the vine until everything has reached full dryness, but the threat of a weeks’ worth of rain will see us collecting the produce early so we don’t lose the crop to either mold or busted pods due to the impact of driven rain, each of which have caused us loss in the past.
 If we cannot start shelling immediately, we store the tubs in our greenhouse using a basic box fan to further dry them. On occasion, the shelled produce will not be fully dried even though the outer shell seemed ready (field peas seem to be worse for this than beans). In this event we spread the shelled peas out in a single layer on a clean sheet and leave a fan running over them until a seed type dryness is achieved. Taking the time every day to stir the mass and expose different parts of the bean may not actually help with drying but we do so anyways.
I have witnessed three different methods for shelling dried beans. Some folks will crush the dry pods on a tarp or in a pillowcase then either pick out the beans or use a fan to blow the chaff away as the beans fall into a collection vessel. The method I prefer is to lay a towel across my lap and place a handful of dry pods on the outside of my right leg. I individually shell the beans into a small bowl and discard the empty pod into my lap. After several handfuls, I transfer the mostly clean beans into a storage box and toss the accumulated hulls into a spare tub.
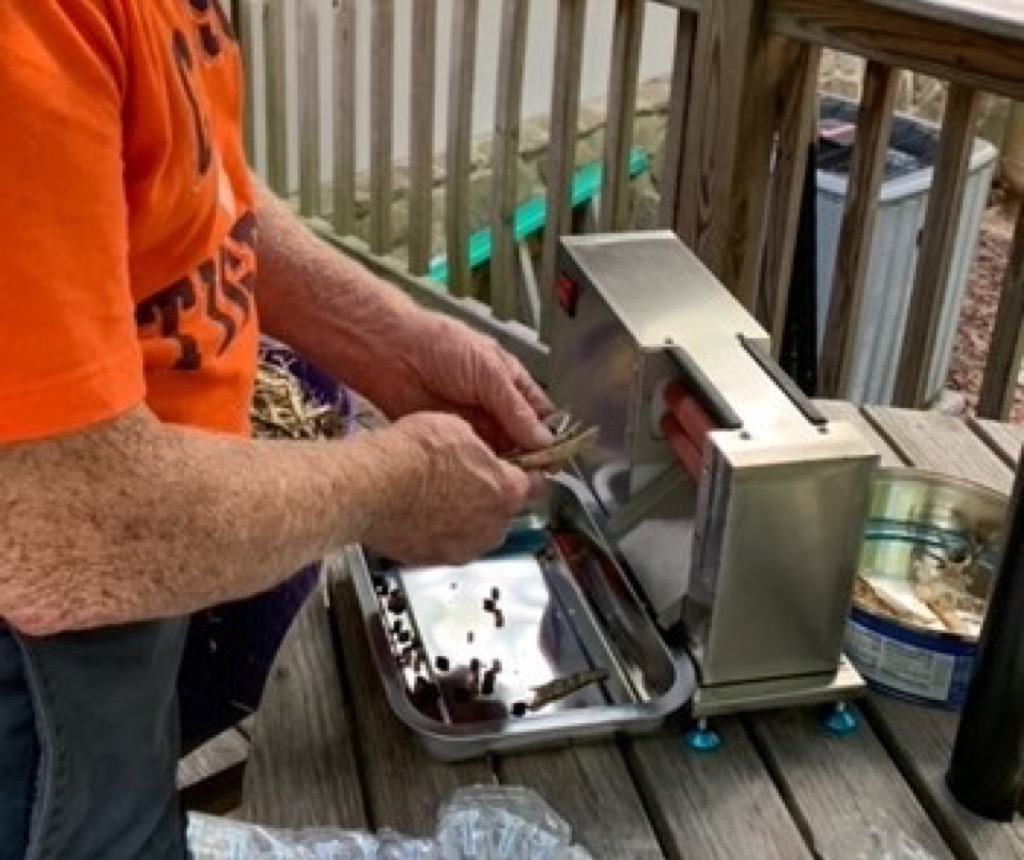 Our final shelling option came about thanks to my father-in-law, in 2022. My wife mentioned that it was time for us to start harvesting beans and field peas but we were tied up with work and it would be winter before we could get around to shelling. He told her that he would like to shell all of our beans so he would be contributing to the farm. That season we had harvested eleven tubs spread across four varieties, so probably 7 or 8 bushels in all. When he came over to get the beans and realized the extent of his commitment, he hauled three totes back home with him and without our knowledge went online and ordered an electric sheller. True to his word, all eleven totes were shelled and for Christmas that year we were gifted a slightly used electric bean sheller with the admonition that we could shell the beans from now on and he would consider coming over to help if we were in a bind.
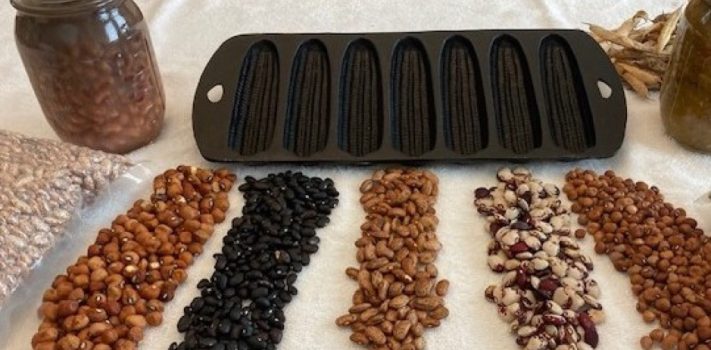
I have not used the electric sheller yet because we only harvested a couple tubs of black beans last year having lost the red beans to rain and struck out trying garbanzo beans for the first time. This year we have black beans, speckled butter peas and zipper cream peas planted. The plants all look healthy and the pods are filling out well. Both pea varieties were purchased at our local nursery. The black beans came off of the shelf at a Publix grocery store last year. We have had difficulty finding affordable black bean seed over the past few years and as an experiment, in 2023 we purchased a pound of store-brand beans from Publix to try as seed stock. We had solid germination and yield in ‘23 and on a lark, we tried the remaining beans as seed this year. The growth has surpassed last year’s. Granted, it will be two more months before we harvest, but all looks promising. We have kicked around the idea of planting the harvest in subsequent seasons but we plant the different varieties within feet of each other and suspect that with cross-pollination occurring that our seed would not breed true. If however a true emergency situation occurred, you can be assured that our possibly hybridized beans and peas would be planted in recognition of any harvest being better than no harvest.
As an aside, our Blue Lake green beans are shaping up to be a failure this year. The vines are over six feet tall and have been covered with white blooms for months but have had no bean set or development. We suspect the higher than usual heat in late May and all of June was responsible but honestly just don’t know why. For any of you reading this who have never gardened but hope to start, be ready for setbacks and head scratching when the unexplainable happens. Failures are an inescapable aspect of farming or homesteading.
Push through your discouragements when they occur and celebrate your successes.
In addition to pinto and black beans, we have grown butter beans, calico lima beans, cow peas, Carolina crowder peas and had such a successful harvest of pink eye purple hull peas in 2020 that we haven’t had to grow them again. Pressure canning dried beans/peas using the Ball Blue Book method is straightforward. Having ready-to-eat homegrown beans is a time saver on busy nights and personally satisfying to view on the shelf. However canned beans take up so much space that we have primarily stored the harvests as dry loose beans in recent years. We do vacuum seal some one-pound packs for convenience, but most of our dry legumes are stored in breathable plastic shoe boxes kept in a cool dry corner of the guest room.
(To be concluded tomorrow, in Part 2.)