


I believe fire by friction is one of the most valuable skills we can have in our bag of tricks. Beyond “simply” making fire, the process provides a sense of freedom that people interested in prepping, survival, and outdoor skills no doubt highly value. It also provides important insight into human ingenuity. It can enhance appreciation for those who came before us and exposes how dependent we have become on the modern, consumer-based system. In this post I will demonstrate how to successfully create a bow drill set. To demonstrate fire by friction, I have made a bow drill set from scratch in my garage, accompanied by pictures of the process. It is winter here, and it is pretty cold out. As such, the garage will have to do.
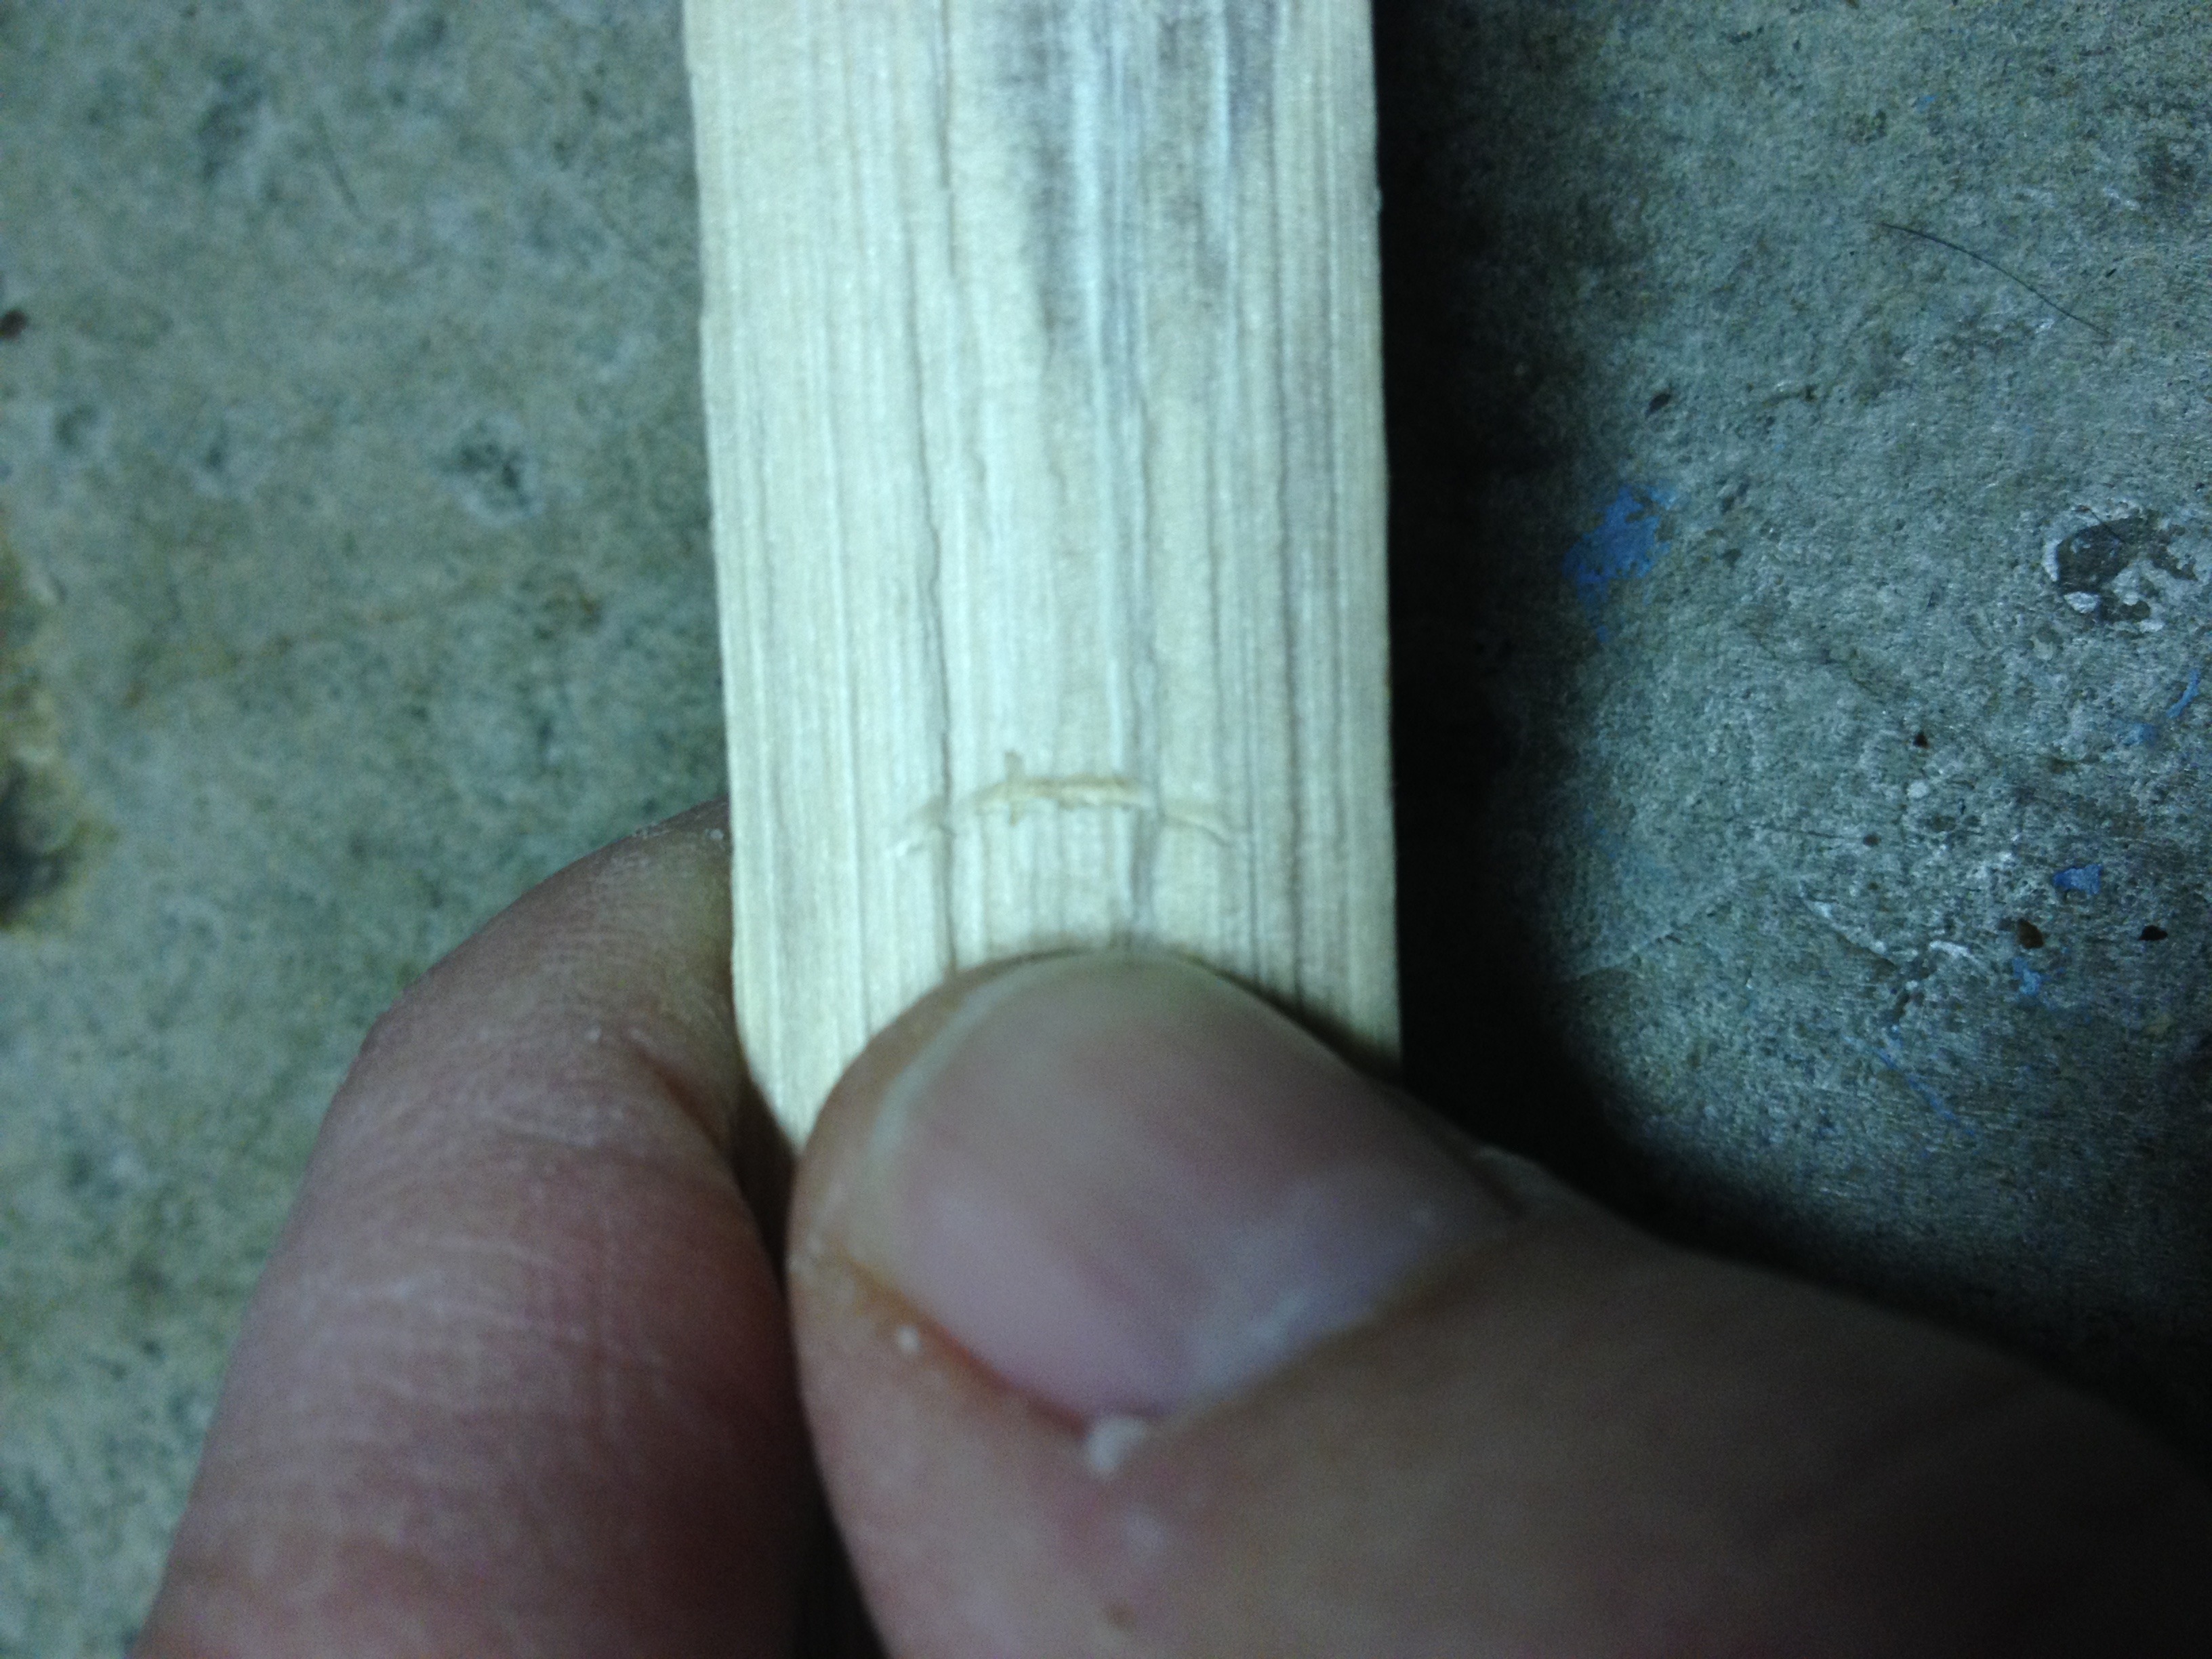
It can be overwhelming attempting to memorize all the different species of plants that are useful for edibles, medicinal purposes, and fire making. However, the fingernail test has proven to work time and again when selecting woods ideal for use in a successful bow drill set. When we are searching for wood to make our set, we are looking for what is called “hanging dead.” Hanging dead are dead tree limbs that are not touching the ground, collecting moisture. Moisture is our enemy when creating fire. Once you find a dry sample, you then want to baton (split) a section of the wood to perform the fingernail test. We are looking for a soft wood that, when you press your fingernail into the inner portion of the wood, your fingernail leaves an impression. If your fingernail leaves an impression in the wood then you have found a piece that should work for your bow drill set (see figure 1).
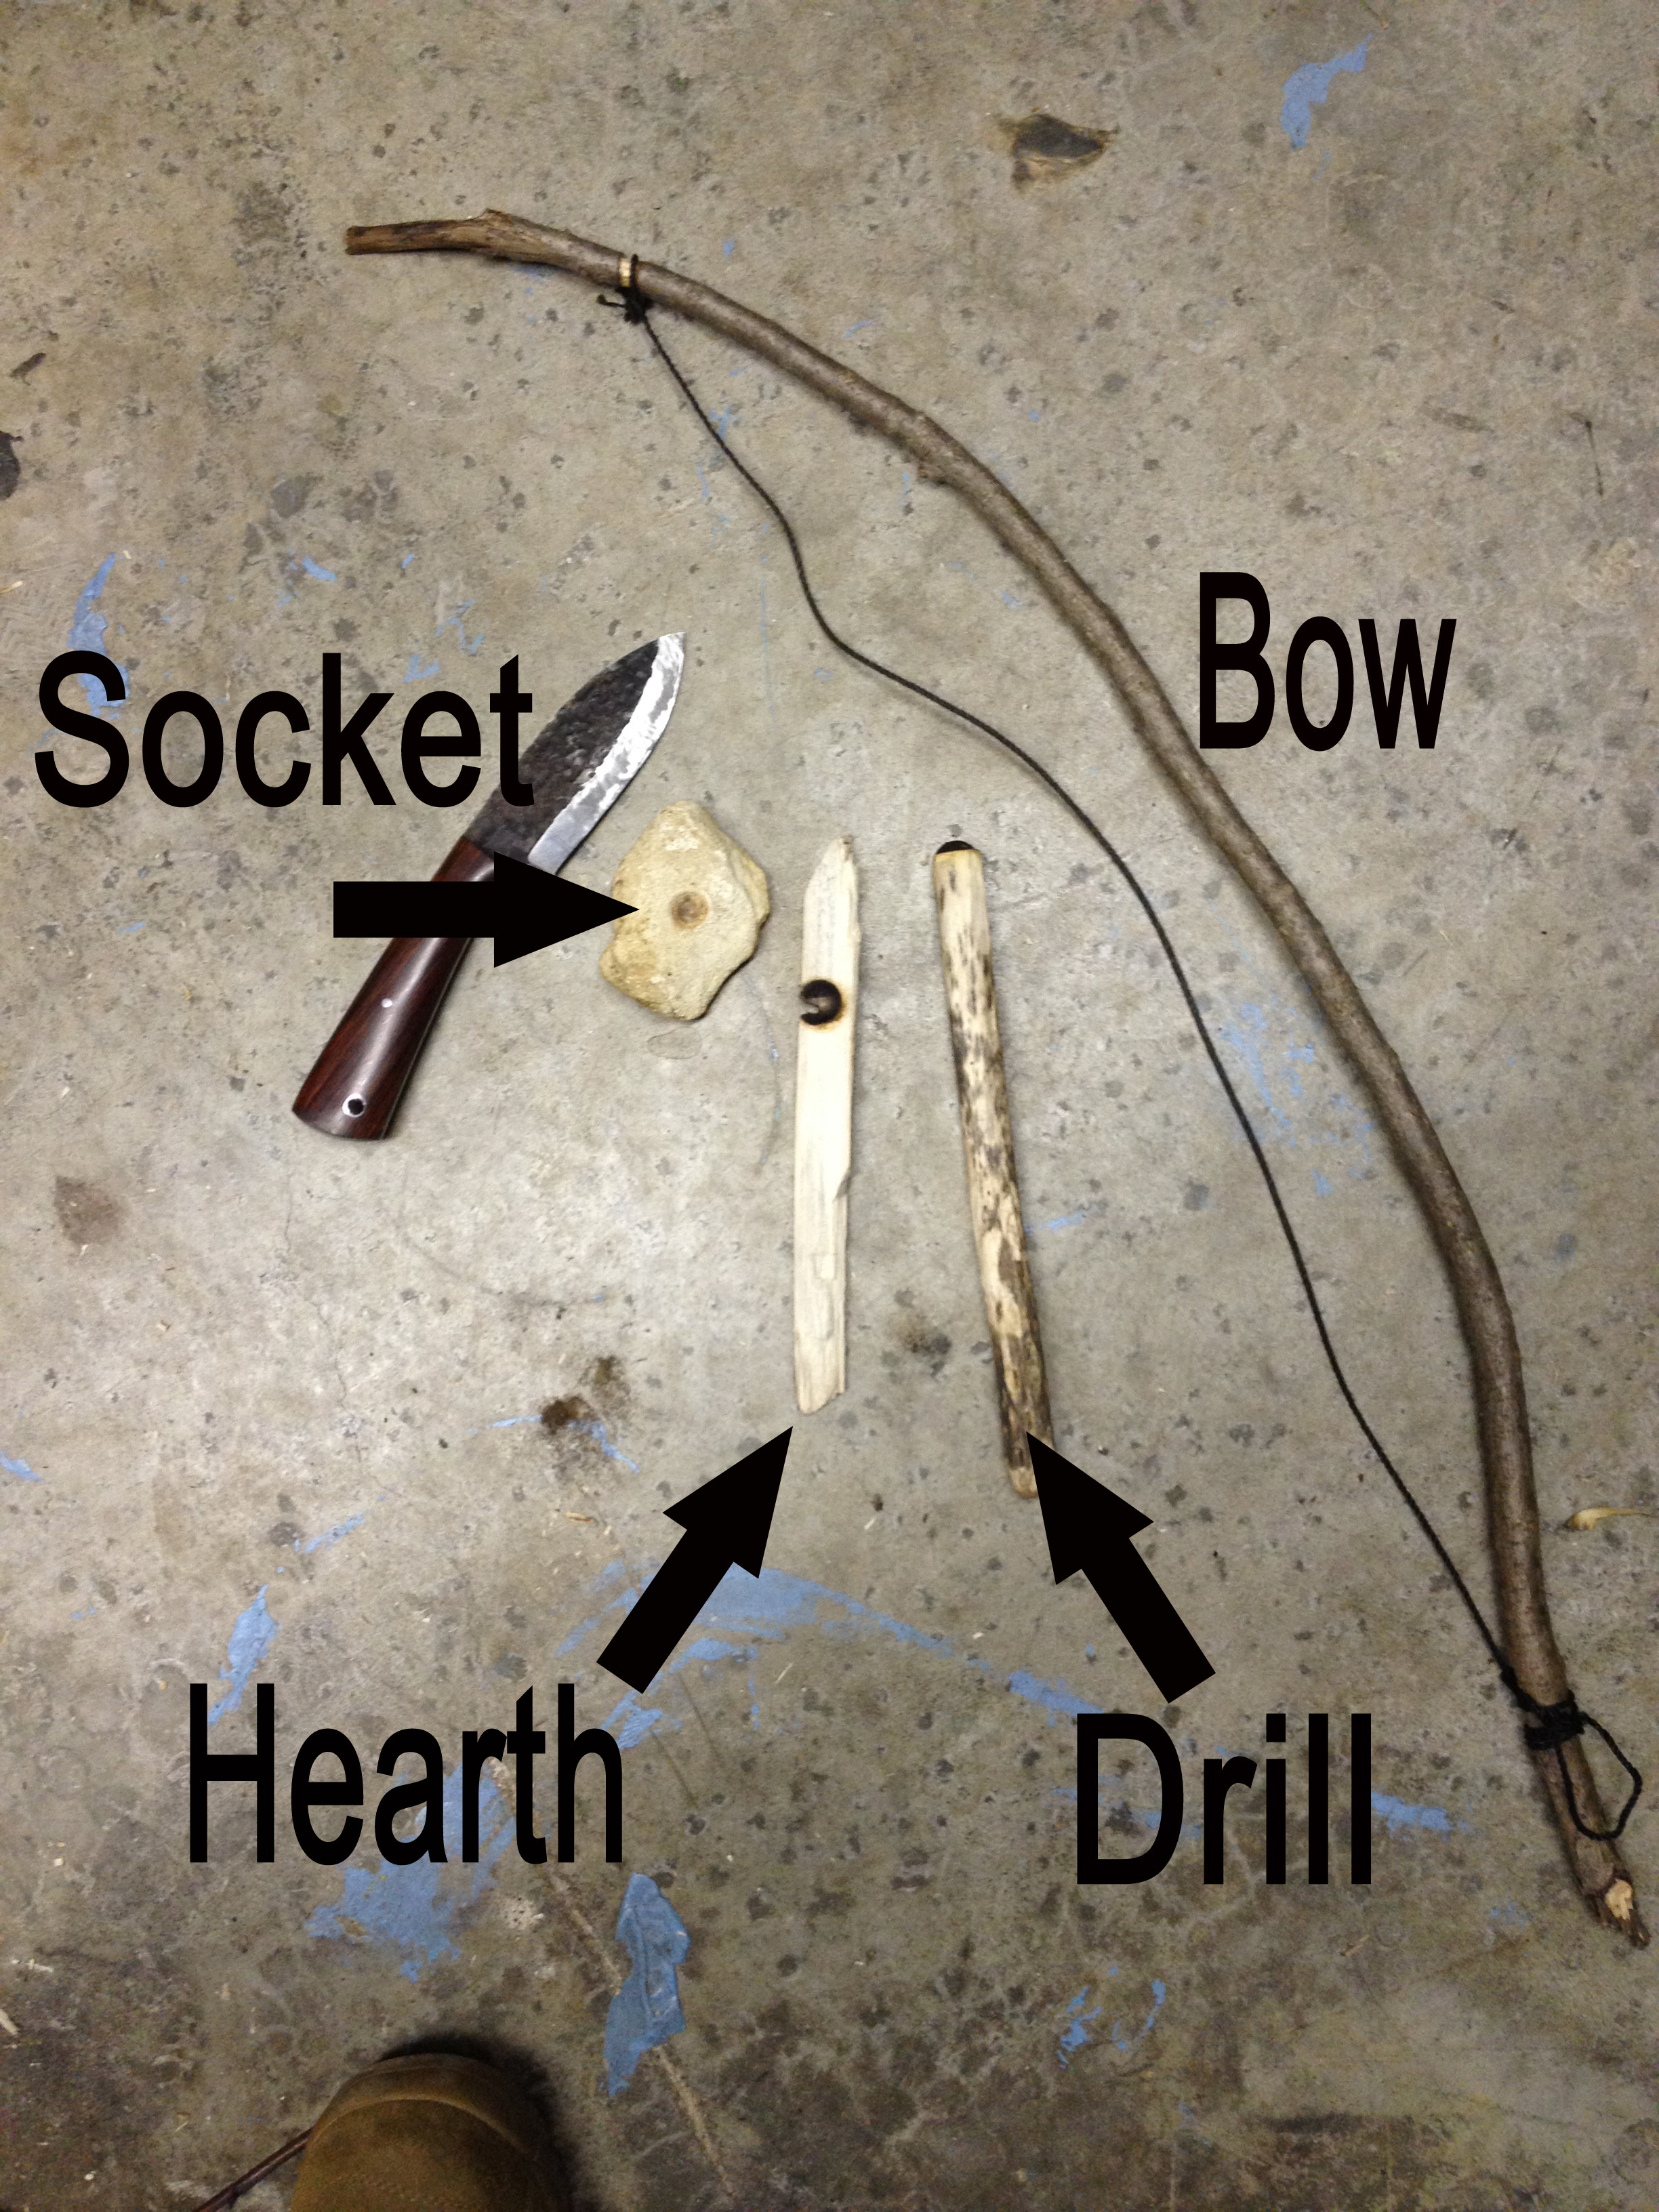
The components of a bow drill set are a bow, drill, hearth, cord, and socket (see figure 2). You want you make your drill and hearth from the same piece of wood that passed the fingernail test. Once we have found that sample, we use it to make our drill and hearth.
A brief but important note: When you initially start out searching for your hanging dead soft wood, you should also collect tinder and lots of it. Soon our bow drill will be complete and we will make an ember. Once you obtain that ember, you want to make sure that ember becomes a flame. For this, we need tinder. So, collect dead, dry grasses, cedar bark, or similar material in your region that you can use to make a “bird’s nest”. The cedar bark and grass you want to roll around in your hands in a balling motion to allow the fibers to break down a bit. This will assist with the ember catching fire. Once we get an ember, we are going to carefully dump that ember into the bird’s nest and blow on the ember to obtain a flame. So, to be clear, when you think you have enough tinder, get some more. You can never have enough. Pro tip: If you collect dryer lint for tinder to keep in your BOB, lint that is derived from cotton can smother your ember and may significantly hinder making a flame. To be clear, cotton will burn well with a flame, but it can smother an ember. Now, back to the bow drill…
Ideally, we would like the wood for the drill to be as straight as possible. Finding a perfectly straight piece means you were very lucky. For the rest of us, we may need to carve on our drill in order to straighten it up. For the drill, I like the length to be approximately the size of my forearm (wrist to inner elbow; see figure 3). The width of the drill can vary, but I try to work with a piece that is close to the width of my thumb or index finger. This is nature, so approximates will make do. Cut off the desired length from the hanging dead, and begin shaving off any burrs or knots to smooth up the drill. Should your drill have some slight curves, you will want to eyeball a straight line through the drill and began shaving the wood with the goal of minimizing any curves.

Once you have knocked off the burrs and attempted to straighten the drill as much as possible, you will then want to shave a dull point at both ends of the drill. Note: Your ends do not need to be, and indeed should not be, like a spear point. Just shave off enough so that the ends taper, such that they are narrower than the shaft.
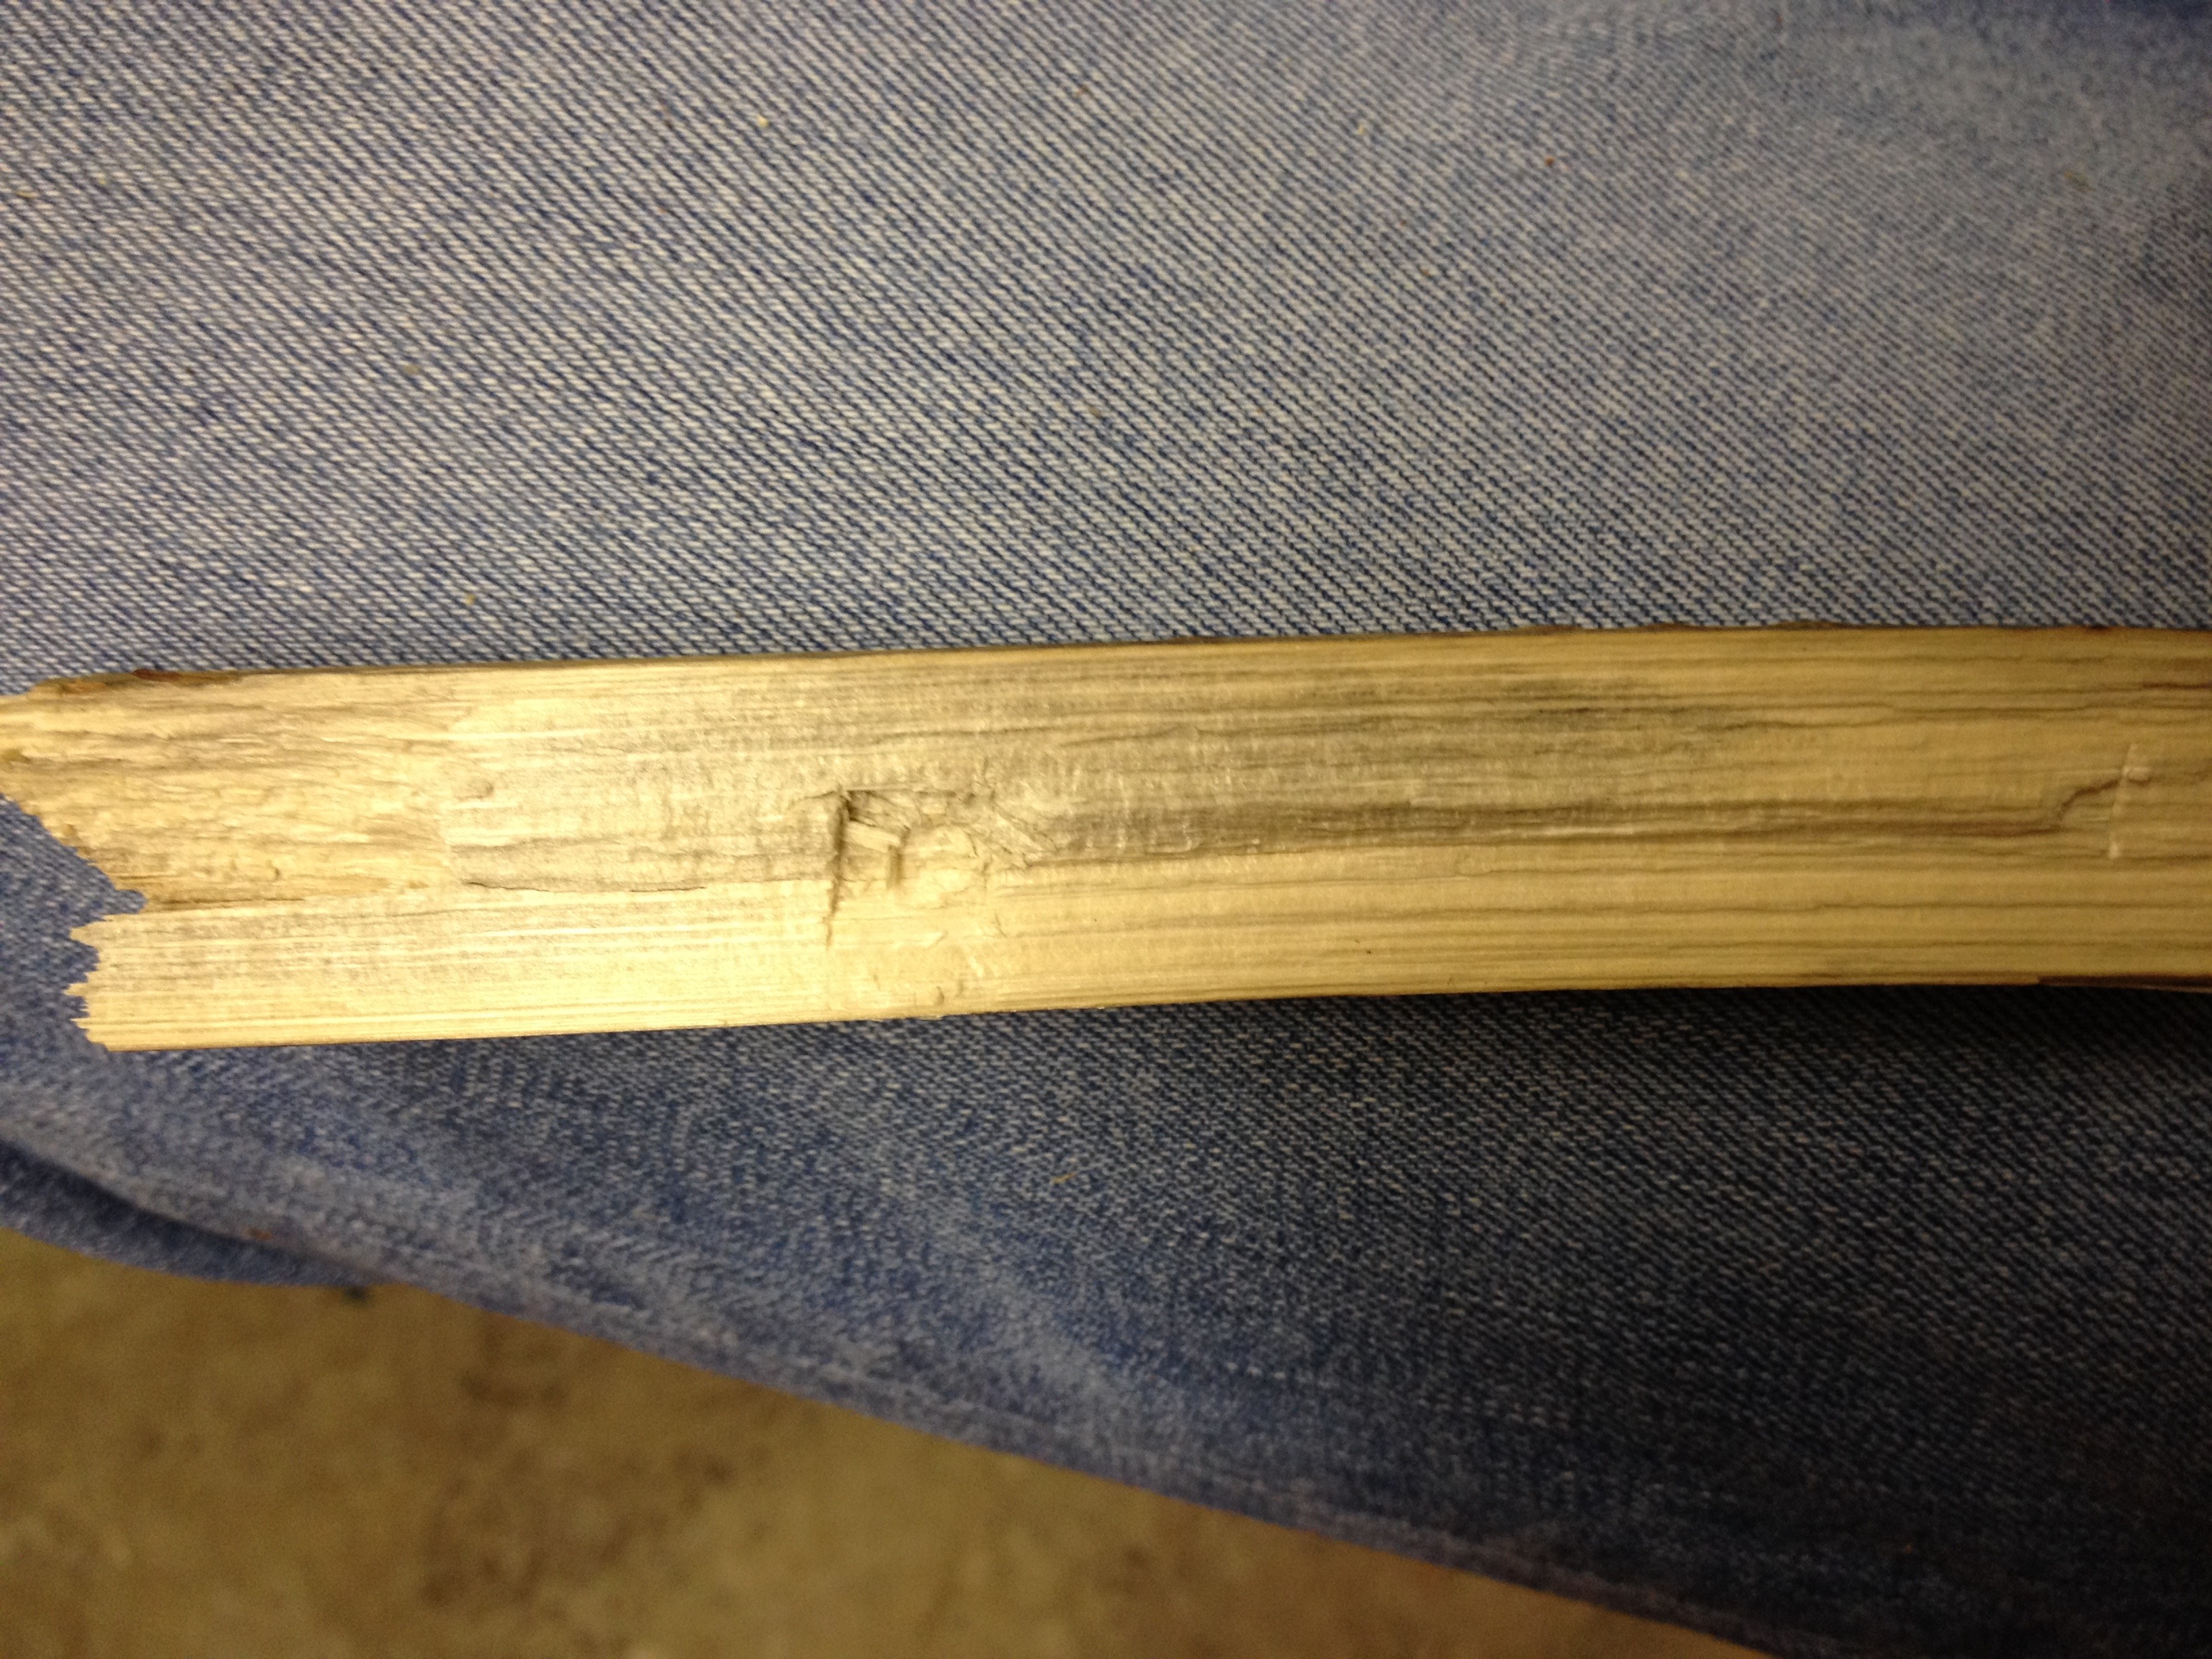
For the hearth, you want to take a section of your hanging dead (obviously not the drill) and split the piece in two down the middle. Take one section and carve a square into it and begin lightly carving out the square. This lightly carved out square is where your drill will begin to mate with the hearth (see figure 4). Without this square indentation, you may experience the drill slipping off the hearth during mating, which is very frustrating.
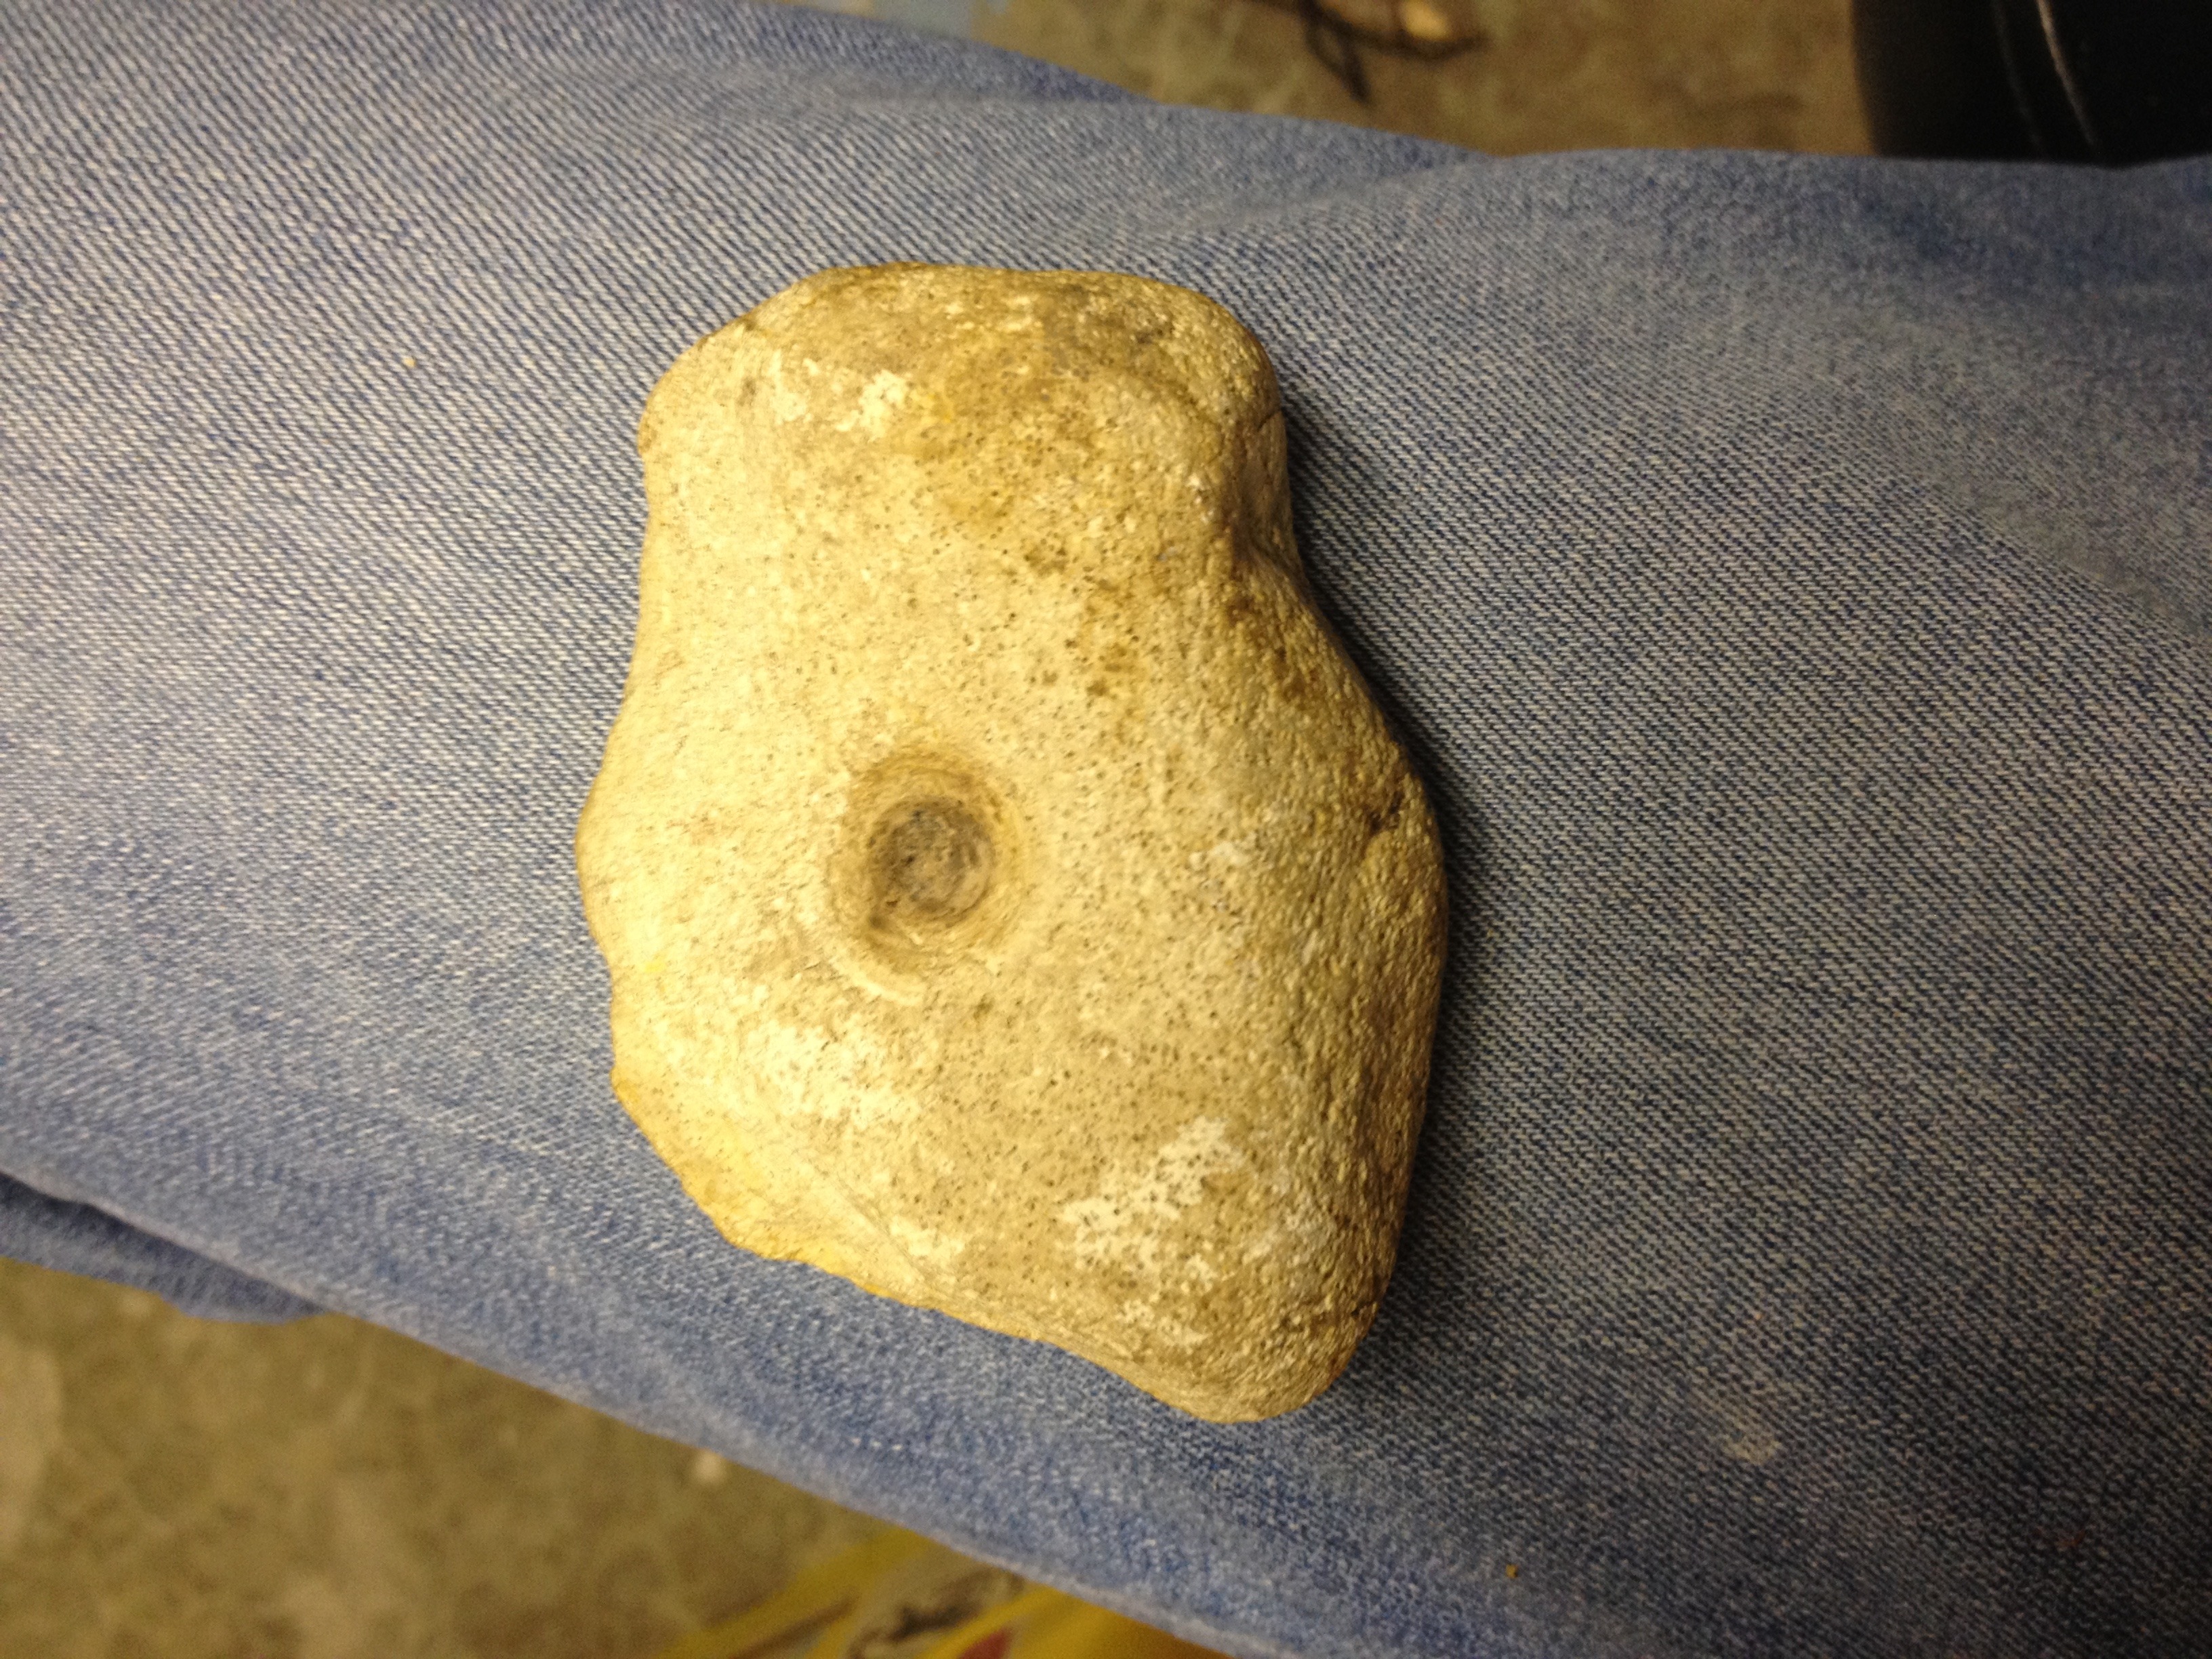
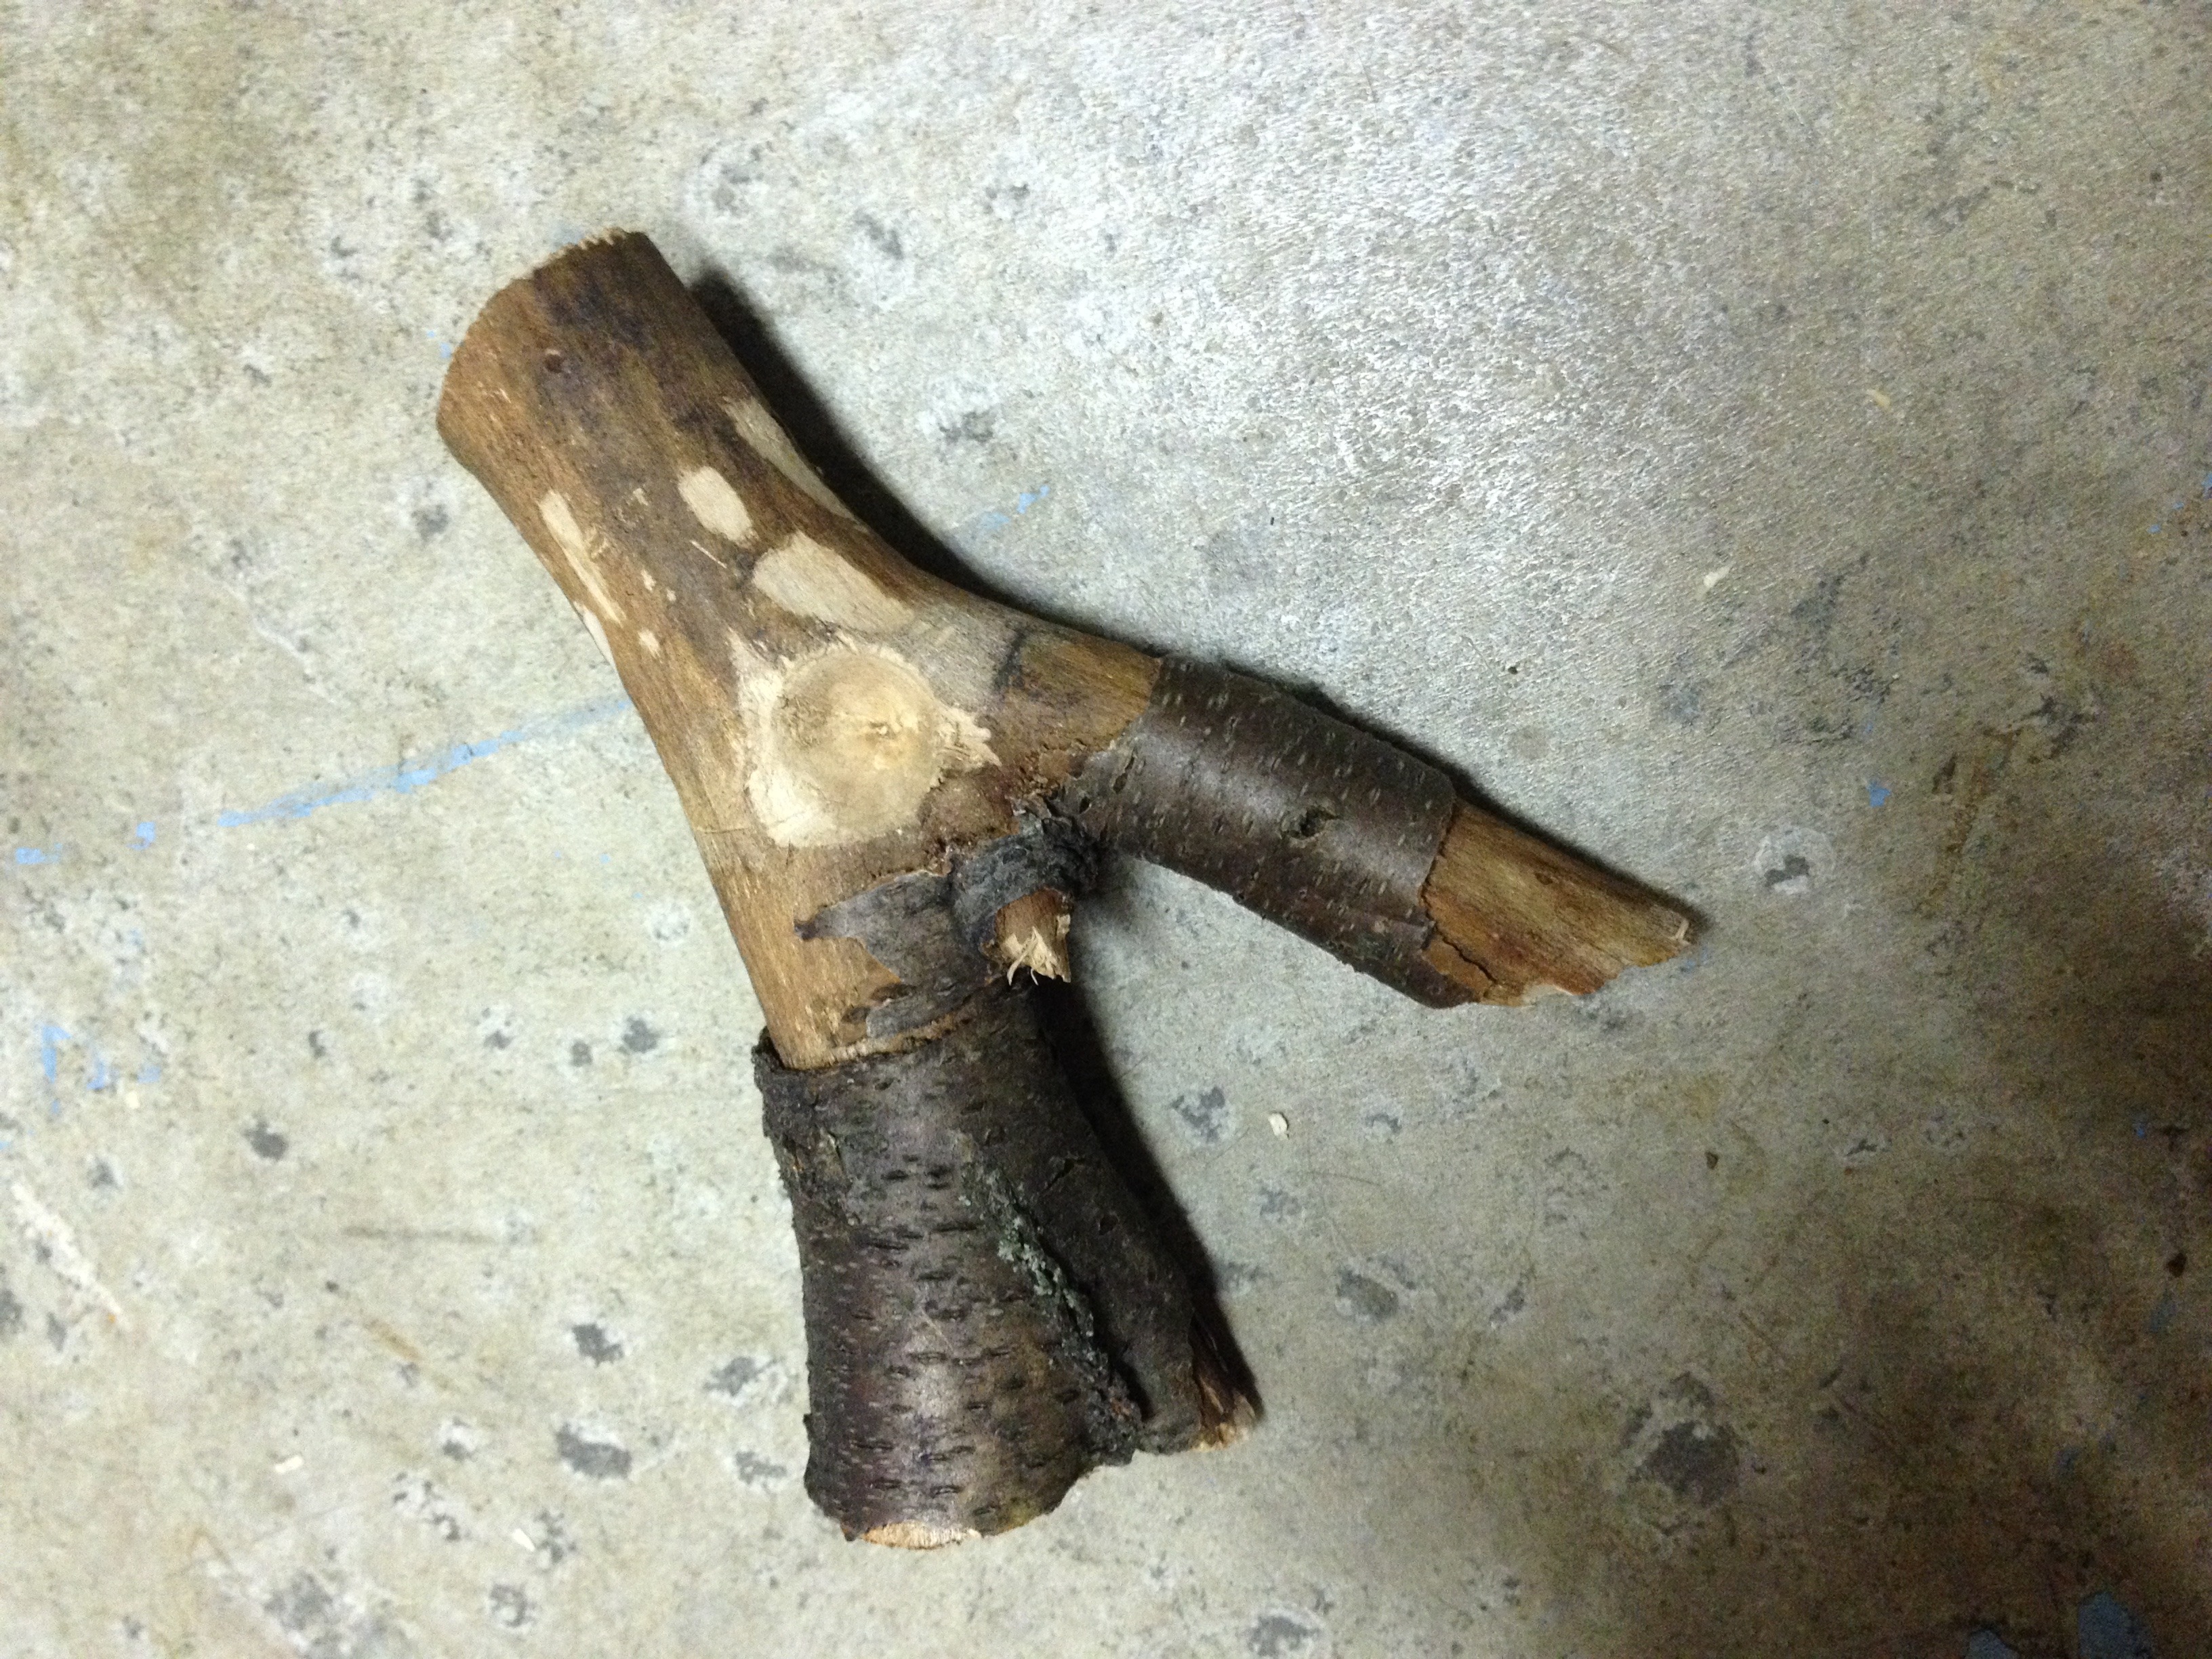
Next, we need to create our bow and socket. I prefer to use a sandstone rock for my socket, in which I carve out a little pocket for one end of my drill to mate to. However, if you are in a region that does not have sandstone, you can use a section of hard wood by using the “Y” of a branch. Carve out a little pocket for one end of the drill to mate to (see figure 5).
To make our bow, we are looking for a piece of wood that has a natural curve to it. This piece needs to be fairly strong, as weak wood will collapse under stress. To string our bow, you can use natural cordage, 550 cord, bank line, et cetera. Just about any cordage we can find will do. However, I have found 550 cord to be a bit too smooth. It begins to slip once you start applying speed and pressure to your drill. As such, bank line or similar cordage that is a bit rougher will contribute to your success. To string your cordage to your bow, you will want to carve out a small notch in the bow for the string to attach to (see figure 6).

String your bow with a little slack in the line. You do not want the line to be too tight or too loose. If the line is too tight, once you thread the drill in the line, the drill will want to kick out of the hearth. This will create problems later in the process. If the line is too loose, you will not be able to get enough tension on the drill to spin it as we apply downward pressure. Play around to find the happy medium. Now we should have all the parts we need to make our fire, and it is likely you will have worked up a light sweat. Take the end of your drill that you plan to mate to your socket and rub it lightly on your nose, or rub your finger on your nose and wipe the oils on the end of the drill that will mate to your socket. The light sweat we have worked up will double as lubrication between your drill and socket. Do not lubricate the end of the drill that mates to the hearth. Remember, moisture is our enemy!
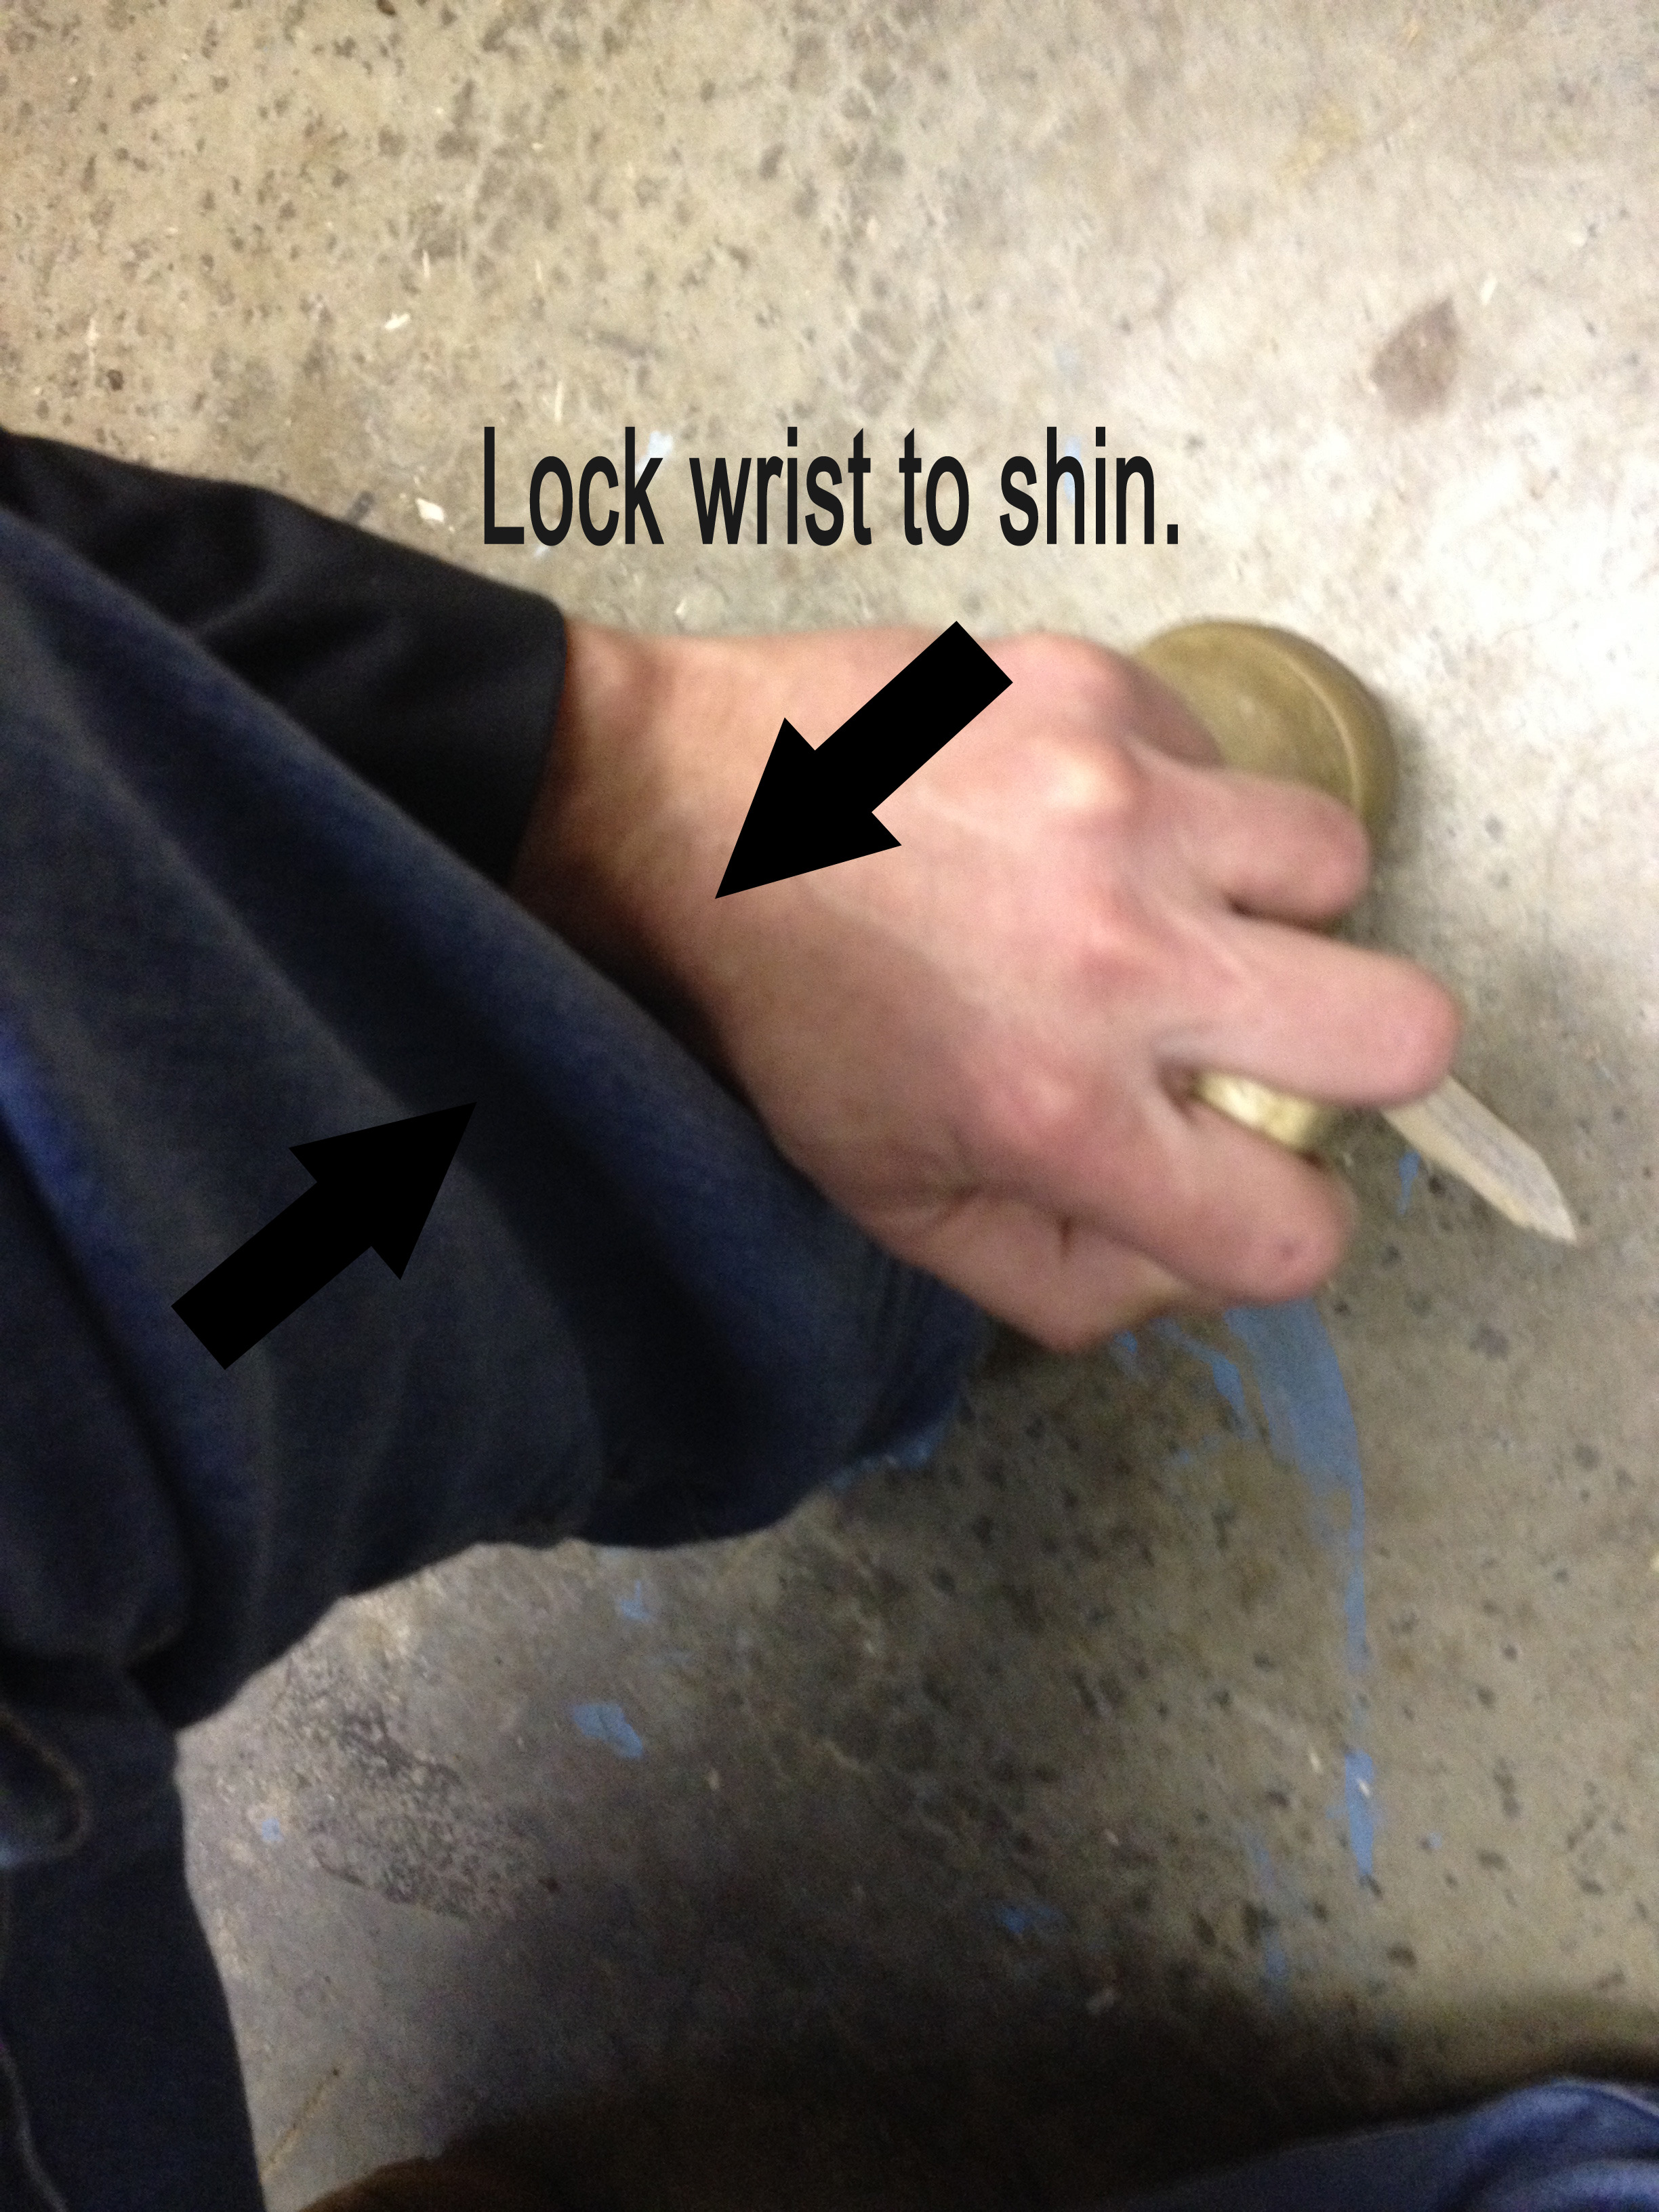
The correct posture is very important when working your bow drill set. As you place the hearth under your foot, you may need to lightly rotate your foot forward or backward, with the goal of making the hearth as level as possible. String your drill in the bow and place the drill in the square we carved in the hearth earlier. Take the socket in your hand and place it on top of the drill. You want to make sure that you lock your wrist in to your shin as you begin working your bow (see figure 7). Locking your wrist in to your shin really makes the difference between success and failure.
Take a knee on one leg and place your opposite foot on the hearth. Again, good posture is critical. Make sure that the knee you are resting on is out of the way of your bow hand movement. This is why we initially cut our drill to the length of our forearm, so as not to hunch over and get in the way of our bow hand movement.
Once you are stringed up and in the proper posture, begin moving your bow slowly back and forth in a straight, horizontal line. You want to make long strokes and use all of the string. Moving your bow in a straight line is important, as that motion is what keeps the contact point of the string and drill from walking up and down your drill. You want to avoid the string walking up and down the drill as much as possible. The amount of pressure you apply with your socket hand is very minimal at this point. You only want to apply enough pressure to make sure the drill and hearth stay together. Slowly increase the rate of your bow movement. Again, use long strokes and all of the string that you can.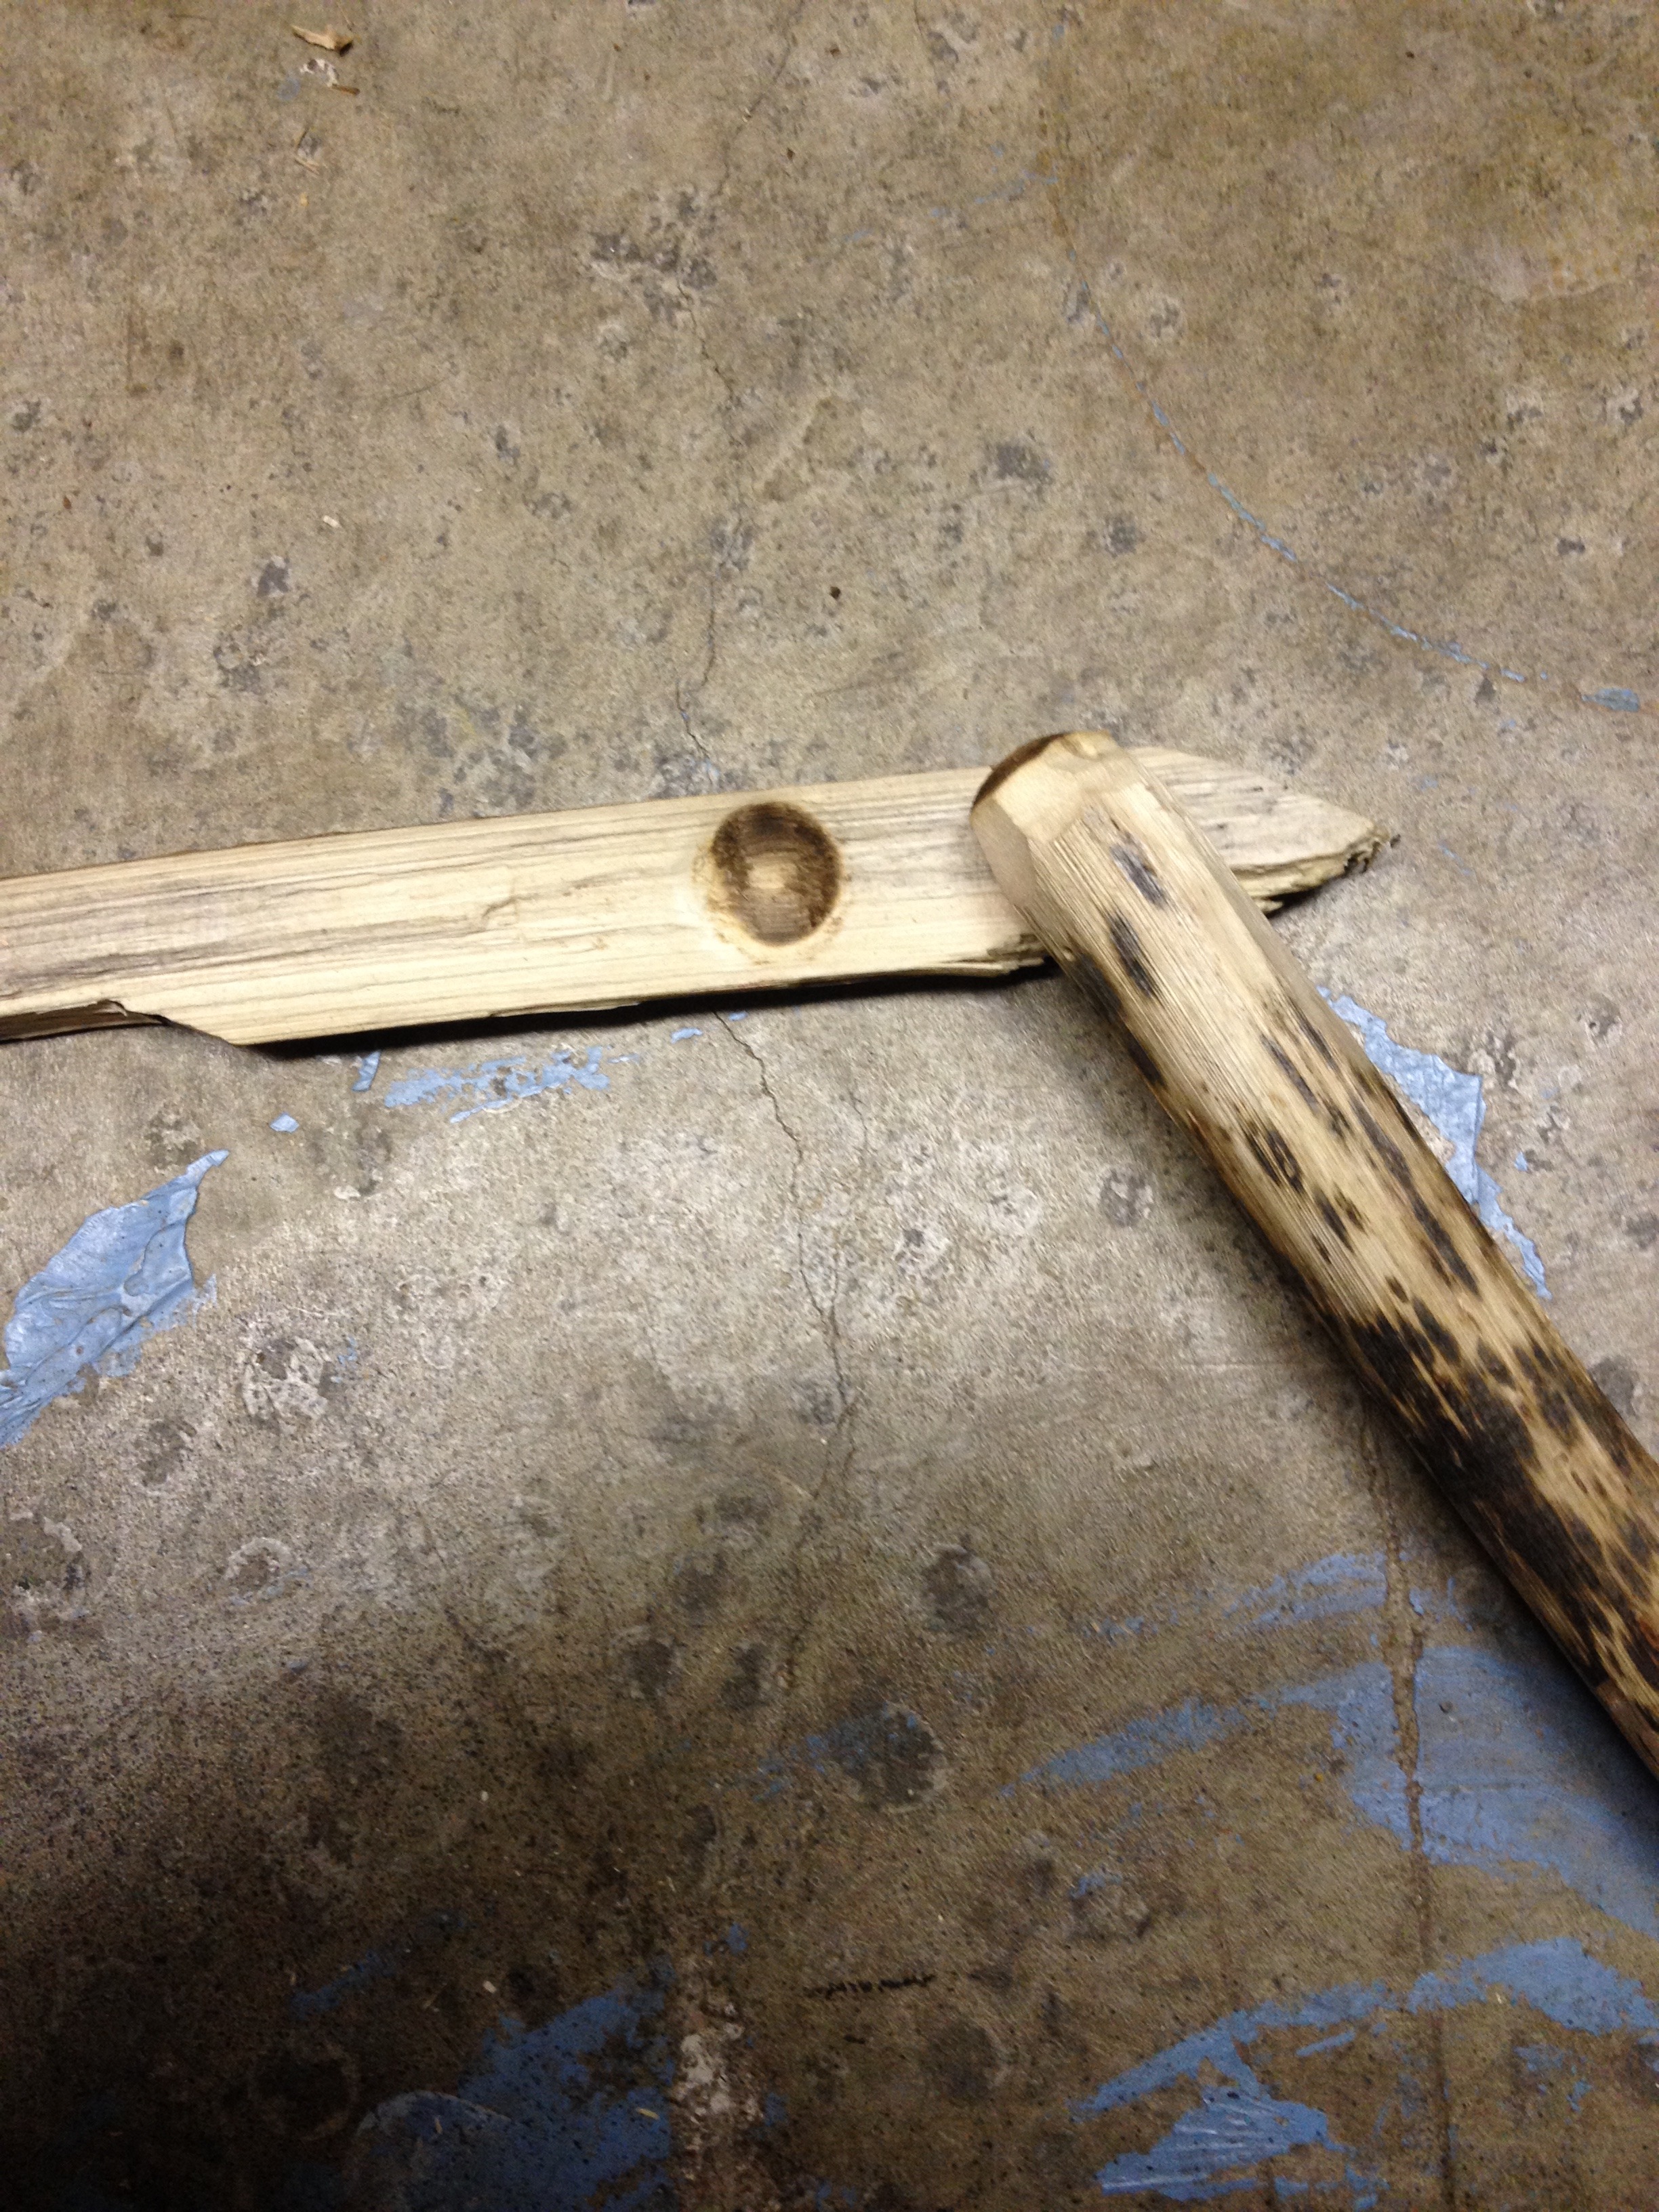 Try not to use short, fast movements. Depending on your wood, a few seconds of applying the proper technique will have mated the drill and hearth (see figure 8). Once you achieve this mate, stop! Pick up the hearth and sit down because you are now going to carve our notch for the embers to fall out.