


Imagine a time when radio was just some experiment in the labs or basements of inventors trying to figure out the phenomenon of sounds being heard over the air. Seems a bit of a stretch? During the period of 1904 to 1915 the first types of radio transmitters were developed which produced continuous sinusoidal waves: the arc converter (Poulsen Arc) and the Alexanderson alternator. These slowly replaced the old damped-wave spark gap transmitters. Besides having a longer transmission range, these transmitters could be modulated with an audio (voice or music) signal to transmit sound by amplitude modulation (AM) radiotelephony.
So why bother with such an archaic form of technology when modern electronics offer so many finer ways to listen to music or voice programs? Imagine a world that would have very few radio transmissions going because there is no electricity. Think TEOTWAWKI: Something has happened, we may or may not know what but no matter the reason for some time there is no electrical grid and may not be one coming back for who knows how long. You say, well then if there’s no electrical grid then we won’t have to worry about listening to the radio will we? And you would be correct to some degree; however, sooner or later someone, the “nice government folks” or maybe someone setting in their basement (or cave) is going to start broadcasting something that you will be able to hear.
By their nature, crystal radios only pick up AM (Amplitude Modulated) radio frequency waves that can travel immense distances, especially at night. So, no crystal FM radios in this article folks. Just an old-fashioned crystal radio that needs no batteries to operate. In this article, I’ll discuss the building and operation of a basic early-1900s AM crystal radio kit and one that can be duplicated with items scrounged from any radio or television set that may be in the garage, attic, or even the junk yard. But first, a look at a schematic diagram of a crystal radio in its basic configuration, then I’ll go into detail what each part does and the process of assembling the radio.
Electromagnetic waves that are generated in the radio frequency spectrum have power in them that can be picked up easily with certain types of elements and or conditions. About 35 years ago, I worked as a nighttime station engineer in an AM radio station. One of my functions was to turn down the transmitter power at sunset from 50,000 watts (RF) to only 10,000 watts per the FCC regulations. AM radio signals can travel much further after sundown than during the daytime since the atmospheric conditions during the daylight can interfere with the signals more than they can at night. So, using a crystal radio for listening to whatever may be broadcast will be a nighttime activity as opposed to daytime — unless of course, you live near a radio station. Oh, but what a wonderful world of entertainment and exploring it can be if you have patience.
What may be broadcast is up to The Powers That Be (TPTB) especially in a TEOTWAWKI scenario were having any kind of radio or television or even a computer may be ruled as a subversive activity. Do you think this is not feasible? Did you know that in many countries around the world citizens must pay a fee and obtain a license just to have a television, while some countries ban or block radios of any kind? During World War 2, in the Axis countries, no one was allowed to have a radio receiver, and if you were found with one, then it could get you shot immediately.
So, a general requirement I set forth with my project was that it be very light, under a few pounds, and does not need any power of any kind to receive radio signals. Yes, I know that now in some countries, including the United States, AM radio is being phased out, and new station licenses will not be available. But this doesn’t change the fact that AM radio waves can transmit literally around the world with great efficiency and clarity. I’m betting that during a TEOTWAWKI event. TPTB are going to remember this and use whatever AM broadcast frequencies they choose to get their nefarious propaganda out. You say: “Well, I just won’t listen to it”. Maybe so, but there will be human beings who will just want to hear other voices and maybe even some music. Just ask Axis Sally or Hanoi Hanna, or Tokyo Rose. And I haven’t even mentioned some whacky old geezer (like me) who may have a one-tube AM broadcast transmitter setting in the basement capable of transmitting good music and news a few miles … oh yeah, this rabbit hole can go pretty deep.
THE CRYSTAL RADIO KIT FROM UNITED NUCLEAR
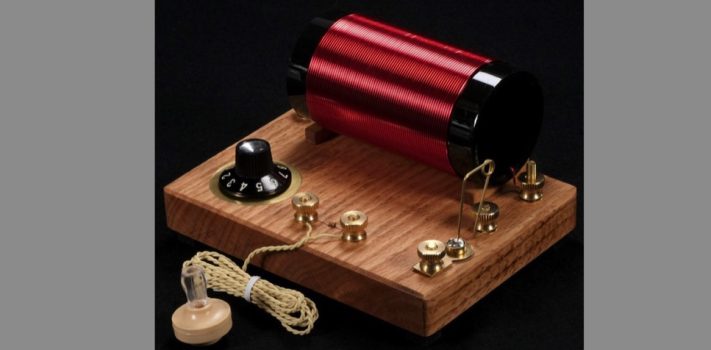
I bought a crystal radio kit from United Nuclear Scientific Equipment and Supplies.
(Disclaimer: I bought this kit using my own money and I am not sponsored by Nuclear Scientific in any way.)
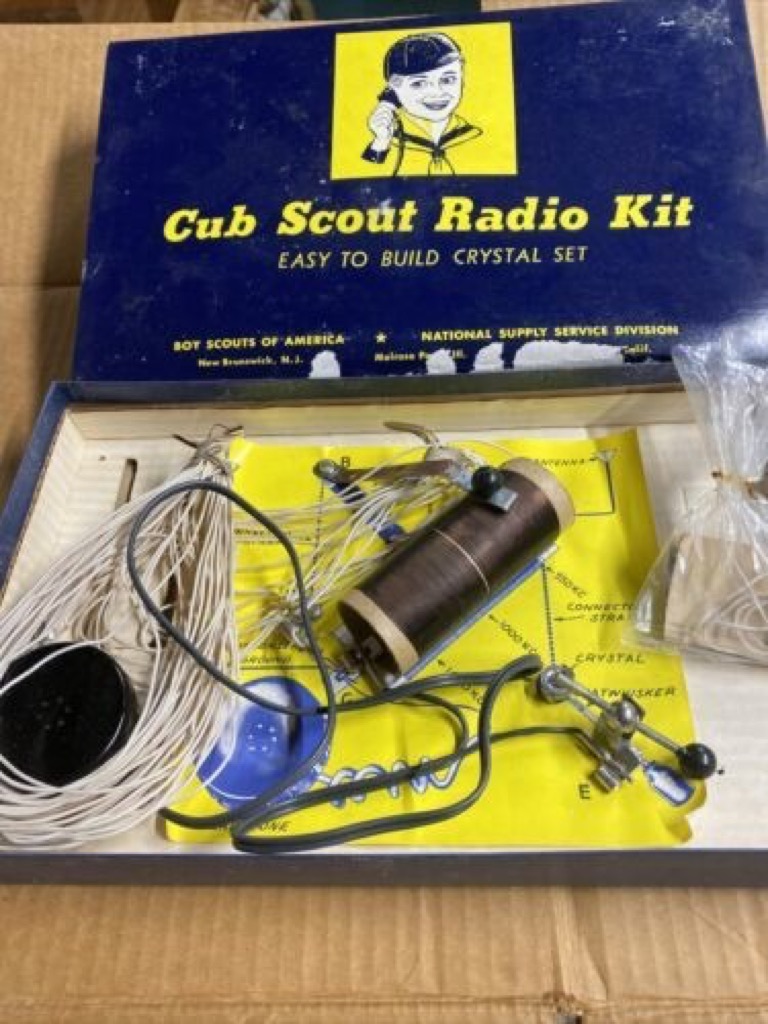 I first started in electronics at a very early age by building a Cub Scout Crystal Radio Kit as a requirement for a promotion to a higher rank; I think it was from Bobcat to Wolf? As I remember, that kit (in 1959) was a whopping $3.95, a tremendous amount of money at that time. It was all in what we now call “Junk Silver” … that’s approximately $156.75 in today’s inflated Federal Reserve Notes (FRNs). To a young boy of 10 years old it was a solid fortune. I collected a lot of soda and beer bottles, mowed a lot of lawns, and did any chore that I could do to raise money to buy that kit. Our Den Mother also had a campaign selling Christmas and all occasion cards through the local Boy Scout office and each scout that sold items could earn points towards gifts from the companies that supplied the cards and stuff we sold.
The day finally arrived when I had enough money to buy that radio and it was about two weeks from the time the order was sent on the day it arrived. I would run home from school fast as a cheetah (beating even Johnny Wilson who was the fastest kid on the block because he was so tall) upon looking in the mailbox (no radio kit) I went inside feeling like I had been ripped off when my mother spoke the magic words: “There’s a box for you that came in the mail this afternoon.”
 So, let’s delve into this kit that should be here any day now; wow talk about feelings of deja vu. The biggest difference for now is the cost of the kit from Nuclear Scientific is $117.70 including the kit, and the shipping. Somehow I feel that I am getting a better deal now than way back then because the quality of this kit and all the components included are so much better; if you take into consideration the silver currency of that time frame, and the fiat currency today, plus the fact that mom will not be getting on me for being up into the wee hours of the morning listening to radios stations from all over the world. How I wish she were here to see me, still playing around with radio stuff until the wee hours.
THE KIT AND ITS GLORIOUS THINGS
My kit arrived yesterday afternoon in the mail. But I didn’t open it right away because I was met with a “honey-do” list that I conveniently had “forgotten” to take care of. So now I’m setting here at my bench and just being a young man of 10 years old again marveling at something which to me is a work of art.
The Instruction Manual:
There are nine pages (both sides of the paper so 18 pages total) of very well-written and concise instructions of how to assemble the kit. I must add, though, the crystal radio of any kind be it a kit or just a “home-brew” set-up can be somewhat intimidating if you are as young as I was those many years ago, or have very little electronics experience at all.
The way that United Nuclear wrote the manual for their kit is a work of art; it is not easy to write a manual of a technical nature having done so myself several times for major manufacturers of much more complicated assemblies. They start out with the history and operation of crystal radios, so right off the , there is a teaching moment. A STEM project for anyone that would benefit from such education; that is to say, everyone, even an old guy like me.
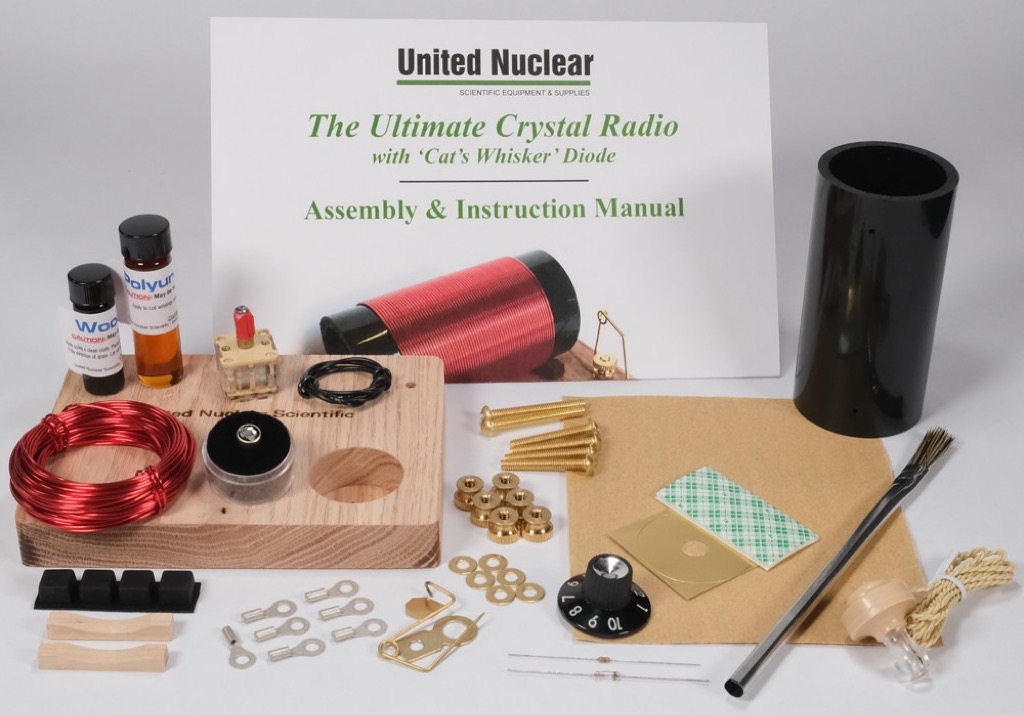
I suggest that one completely read the whole manual first. Don’t even unpackage the parts yet … and they are indeed well packaged and sorted out in the order in which they will be needed so as you progress with the build you should have a package just for that stage. So, read the manual first, then do a 100% inventory. This is going to be easy because of the way they are packaged in nice transparent bags. There is a color pictorial of the inventory in the kit. All you will need to do is look at the photo and compare the items in the kit as delivered. My kit was complete and nothing was missing or damaged.
PAGE THREE OF NINE:
Okay, here we go … page three is the page where you will start construction of the kit. This will involve measuring and stripping wire to specified lengths. I’m going to make this easy for you because the nice folks who wrote this manual kind of mixed up the lengths and such that made me set and think to myself “Self … WTH? Okay, so I’m somewhat OCD in wanting to do things in what seem to me a logical order; you know like shortest to longest and such .. not short, really long, somewhat long (oh and two of those ..)
Cut:
- 2 each: 2.0” wires
- 1 each: 2 ½” wire
- 1 each: 3-1/2” wire
- 1 each” 6.0” wire
And remember “Measure twice …. Cut once.
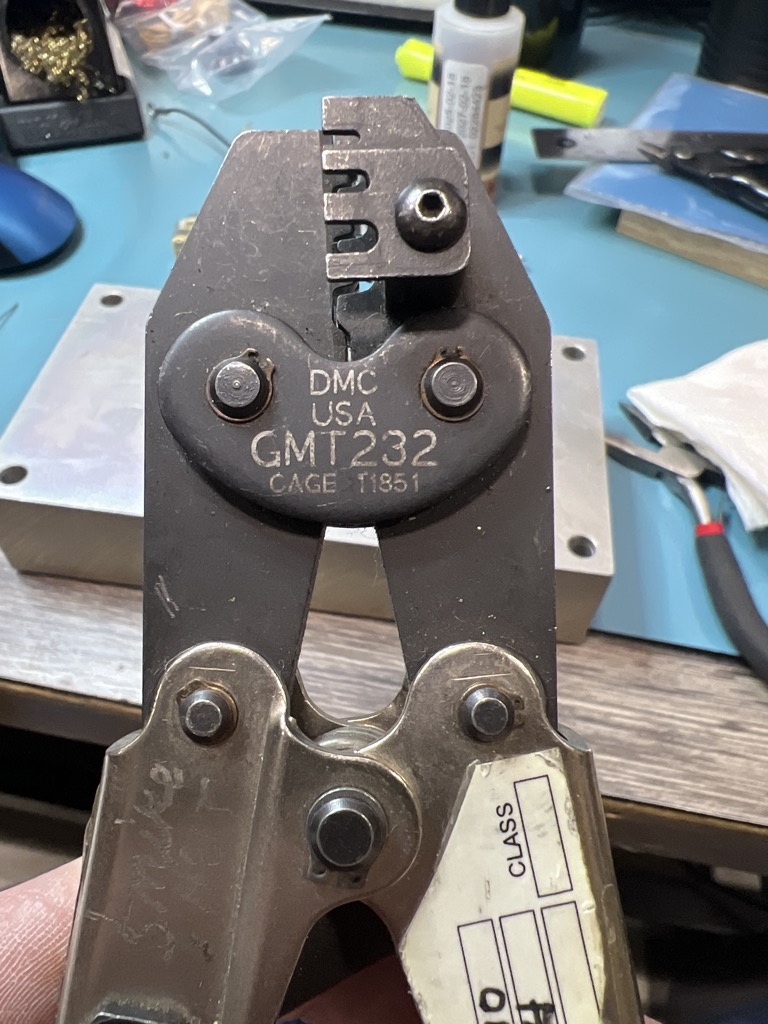 Next in the steps, you will strip the wire ends about ¼” on both ends of the wires. This is where my gazillion of dollars in tools comes in handy that I’ve collected over the last 50+ years in electronics and aircraft work … but a simple wire stripper will do just fine. As for crimping, I have a DMC-232 crimping tool that I used in my Avionics career. These can be bought on eBay for around $60 and up. I chose to both crimp and then solder the ring terminals on in order to make a foolproof solid connection in the wire to connector and minimize the possible resistance of a bad or loose connection in a circuit that has very small voltages involved.
(To be concluded tomorrow, in Part 2.)