


(Continued from Part 3.)
Flashing
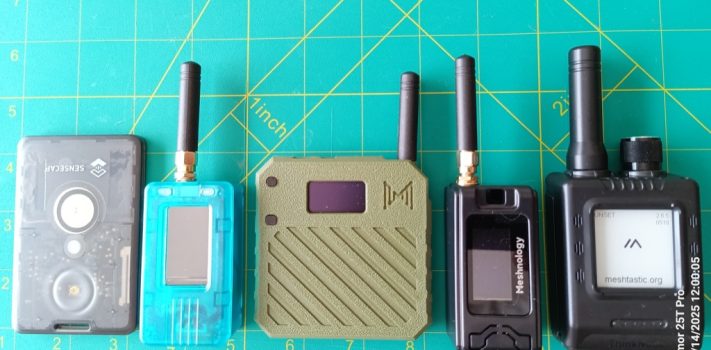
I’ve covered a lot of details regarding how Meshtastic works, so let’s walk through an example of configuring an actual device to see how it all applies. Note that one of the results of Meshtastic currently being primarily a hobbyist activity is that there are multiple ways of doing things. For example, you can connect a Meshtastic device to a PC via serial (over USB) or Bluetooth, you can manage the device from a PC using an Internet-based web interface, a locally hosted web interface or a Command Line Interface (CLI), you can update the firmware on a device from a PC via a different Internet-based web interface or another CLI (with different options for different types of microprocessors), and you can configure/manage a device from the Android/iOS apps (but not update the firmware). I’m going to focus on the USB-connected web-based option on a Windows PC for flashing firmware and the Bluetooth-connected Android app for managing/interfacing in my examples since those tend to be the most common approaches.
Most Meshtastic devices you buy will come with some version of the Meshtastic firmware pre-installed. However, there may be cases where it isn’t (like the Meshnology T114) or an older version is installed so you’ll need to install/update the firmware yourself (referred to as ‘flashing’). First, connect your device to your PC using a USB data cable – Windows should recognize the device as a serial (COM) port. If you get an error here you may need to download and install some additional drivers – check out https://meshtastic.org/docs/getting-started/serial-drivers/ for more details. Also, be aware that some USB-C cables may only support charging and not data transfer, so if it doesn’t work try a different cable. Once the device is connected open a web browser and go to https://flasher.meshtastic.org/ – this bring up the Meshtastic flashing page:

First you need to tell the flasher what kind of device you’re trying to install the Meshtastic firmware to by clicking on the ‘Select Target Device’ button. It will pop up a huge list of possible devices:

You then need to select what type of device you’re trying to flash. If you don’t see your specific device listed, keep in mind that some devices use a board manufactured by another company – for example, the Meshnology N30 and N33 I mentioned earlier both use the Heltec V3 board, so to flash either one of those you need to click on the Heltec V3 option. Note that if you’re just upgrading a device that already has the Meshtastic firmware installed to newer version you can click on the ‘Auto Detect’ button at the top and the flasher will attempt to automatically choose the correct option for you.
Next you need to select the version of the firmware you want to flash onto the device – I recommend that if the flasher had already filled this in you stick with the option it selected. If you click on the firmware button it will display a drop-down list of available firmware versions:

You should always select the latest stable (Beta) version – I strongly recommend you avoid the Alpha version unless you really know what you’re doing.
Once you’ve selected the firmware version click on the ‘Flash’ button – a window showing information for the selected firmware version will pop up – just scroll to the bottom and click ‘Continue’. The flasher options window will pop up:

Notice the ‘Full erase and install’ toggle button on this window – turning this on will erase all configuration information on the device prior to installing the new firmware. If this is the first time you’re installing Meshtastic or you want to completely wipe a device to start over with a clean configuration go ahead and turn it on. In the future when you’re just upgrading to a new version of the firmware leave it turned off to preserve your current settings on the device. Now click the ‘Update’ button – a window will pop up asking you to select the COM port the Meshtastic device is connected to. The specific COM port may vary depending on your system, but don’t worry – if you select the wrong one you’ll get an error message at the bottom saying the connection has time out. Just click ‘Update’ again and try another COM port. Once you hit the right COM port you’ll see a series of status messages scroll by in the bottom window along with a ‘percentage done’ count. Wait until it hits 100% and you’re done, so you can close the flasher tab in your browser and unplug your device from your PC.
Configuration
Now you need to install the Meshtastic app on your cell phone. I’m going to be using the app on Android, but the iPhone interface is very similar. You can install the app using your phone’s app store, but for Android I recommend you download the APK from F-Droid (scroll down the page until you see the first ‘Download APK’ button) and save a local copy – that way you can easily copy the APK and sideload the app on newly acquired phones after a disaster if the Internet isn’t available. I have no idea how to do something like this on an iPhone, so you’re on your own with that.
To connect to the Meshtastic device, first make sure Bluetooth is turned on on your phone – WiFi and cellular can be turned off. Then start the Meshtastic app – here’s what you’ll see:

Turn on your Meshtastic device following the manufacturer’s instructions, make sure ‘Bluetooth’ is selected in the connection bar at the top of the app, then click ‘Scan’ – the app will scan for Meshtastic devices, and if there are multiple ones present it’ll give you a list to select from. If this is your first device it should only list one, usually with a name like ‘Meshtastic’ followed by four characters (‘e010’) in my example. Click on the device and it will try to pair with it. Most of the time pairing will require you to type in a PIN for the device – if you have a small display on the Meshtastic device it may display a PIN you need to enter on your phone. For devices with no display the PIN is usually either ‘123456’ or ‘000000’. Once you’ve successfully paired with the device the app will display an overview screen:

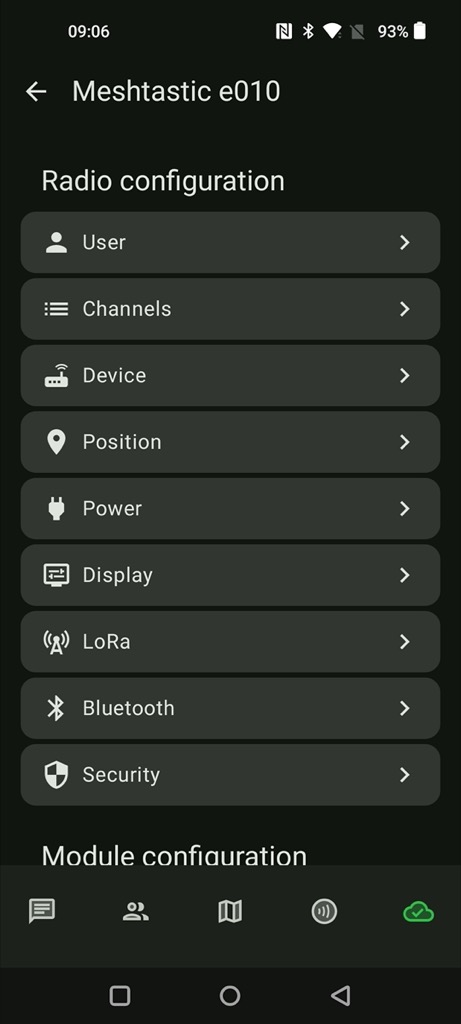
To configure the connected device you need to select the three vertical dots in the upper right corner and select ‘Radio configuration’ from the menu”

The following configuration menu will be displayed:
The first thing that you have to configure when setting up a new Meshtastic device is set to to the correct country region. Select the ‘LoRa’ configuration option and the LoRa configuration page will be displayed:
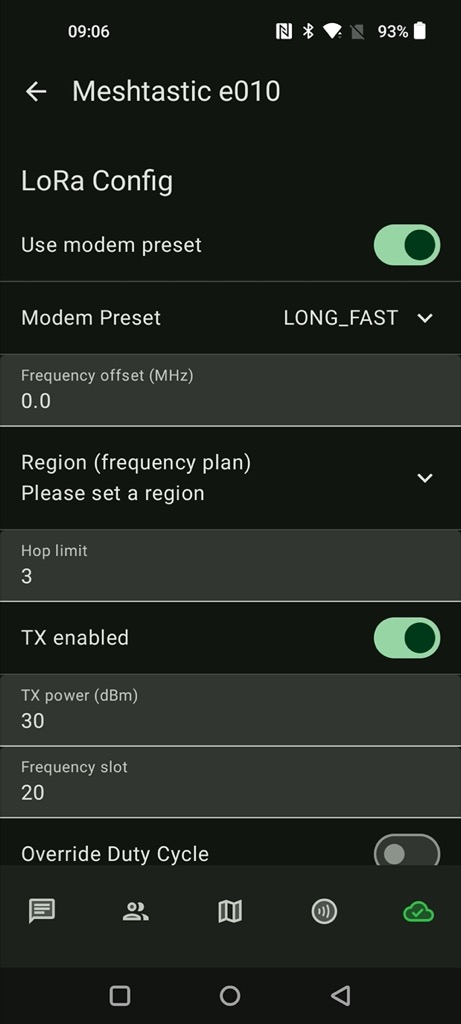
Click on the ‘Region’ field and select your correct country region from the drop-down menu. Now, at the top of the same page find the field called ‘Modem Preset’.
(to be concluded tomorrow, in Part 5.)