Nuts can serve as an important supplement to your diet. Most nuts have a significant amount of nutritional value, including protein, fat, carbohydrates, and various vitamins and minerals. In a grid-down situation, knowing how to harvest and process nuts could be of tremendous value.
When I recently relocated to my new home, I was fortunate enough to discover that I had both black walnut and shagbark hickory trees on my property. I also have many oak trees and maple trees. As I have recently focused on improving my foraging skills and have read several books on the topic to improve my knowledge, I saw this as an opportunity to learn more about nut gathering and processing. While I feel that I have competency in many prepping-related skills, nut processing is definitely not one of those areas.
This journey started when a visiting relative, who is an arborist, walked me around my property to tell me what kind of trees I had. After his visit, my wheels started clicking about future projects related to these various trees.
Hickory Nuts
As I was quite busy for several months making repairs and updates to my new home, I had not paid a lot of attention to the wooded areas of my property. I had noticed many empty nut husks (outer shells) on the ground but had not paid too much attention to them other than to think to myself that they made quite a mess and wondered if they might be used to burn as fuel in my fire pit. After the visit by the arborist, I knew exactly what they were. Sometime later, I mentioned these trees to a couple of locals visiting me and inquired as to whether or not the nuts were edible. They indicated that they didn’t think so. A little more research on my part indicated the contrary.
The most popular and tasty hickory nut is the pecan. However, there are many types of hickory nuts. Of the various types of hickory trees, my research indicated that only a few varieties have nuts worth harvesting, because the nuts of many are too small to eat. Even though it was late in the fall, I decided that I would try harvesting and processing a small batch. It had to be a small batch as the squirrels and deer had eaten the vast majority of them.
When shagbark hickory nuts fall from the tree, they are enclosed in a small green outer husk that is a little larger than a golf ball. Removing this outer shell is fairly easy as most of them that I gathered had started to split open. Some of them had de-husked themselves when they hit the ground. I was able to gather a small amount of these nuts and then stored them until I had time to process them.
A few weeks later, I started cracking the nuts open to get to the nut meat. I discovered rather quickly that the nuts were extremely hard and couldn’t be opened with a basic nutcracker. As I had no other nutcrackers at my disposal, I decided to crack them in the vise in my workshop. That worked well but was a fairly slow and tedious process. I picked the meat out of the open shells using a standard nut pick. I found that the nut meat was quite tasty and tasted almost sweet. At least that’s how it tasted to me. However, the amount of the nut meat in the shell was disappointing. I was only able to gather a small amount. My wife will use it in some upcoming baking she is planning. Next year, I will start gathering hickory nuts a lot earlier in the fall so that I have a bigger supply to process.
While researching hickory nuts I came across a Cherokee recipe for Kanuchi soup, which is made from a ball of ground up hickory nuts, shell and all. I may try my hand at making that next fall.
Black Walnuts

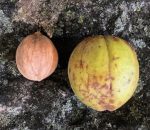
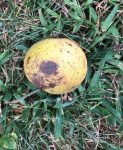
 The outer husk of black walnuts are much larger than the hickory nuts. They are about the size of a small apple. The inner nutshell is also much larger than most other nuts that I have eaten previously. Processing the nuts is much more laborious than hickory nuts. I also waited too late to gather my black walnuts so the deer and squirrels feasted on most of them. When the nuts fall from the tree the hulls are mostly green and gradually turn black. Many of the videos I watched on processing them said to only process them when they are mostly green. But an older relative told me that it was better to process them after they turned black. So I gathered a small supply of both green and black.
Getting the nuts out of the husk is no small task. There is a significant amount of black pulp material between the nut and the outer husk. I learned the hard way that the pulp stains your hands and it takes several days for the stain to wear off.
First, I spread out the husks on the ground and stomped them. This allowed me to remove most of the outer materials by hand. The black ones opened up a little easier than the green ones. To avoid stains on your hands, you should wear rubber gloves when doing this. Don’t freak out when you see small grubs in the pulp. It is my understanding that they are to be expected.
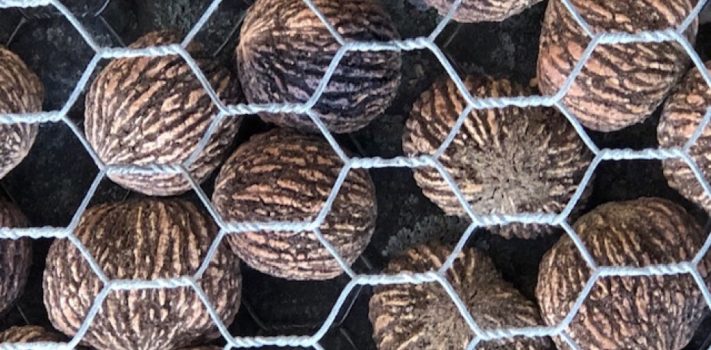
After the first step, some of the black pulp is still attached to the shell, so you have to remove that. I saw several methods of doing this during my research but decided to place some of the nuts in a 5 gallon plastic bucket filled about halfway with water. I then used a cordless drill with a paint mixer attachment to agitate the nuts in the water, causing them to smack against each other, gradually removing the pulp. I had to pour out the water, refill and repeat this process until the nuts were clean. Any nuts that are found to float in the water are bad, so I tossed them. I processed them in this manner until all the nuts were cleaned.
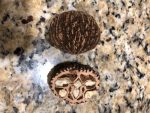
 I then placed the clean nuts on homemade drying racks in a shed on my property to let them dry out, cure and protect them from hungry animals. Approximately three weeks later I de-shelled the nuts. The walnuts were even harder than the hickory nuts. I started out using the vise, much like I did on the hickory nuts, but resorted to whacking them with the hammer, which worked quite well. After I cracked open the nuts, I removed the nut meat with a basic nut pick. This took a few hours, but the walnuts had much more nut meat in them than the hickory nuts. Black Walnuts have a stronger taste than English Walnuts, but I really like it. We have already used the walnuts in some baking dishes. I have been snacking on them as well. I will definitely start gathering black walnuts early in the fall next year before the wildlife gets them.
JWR Adds: Walnut husks also make an excellent natural dye, for fabrics. And if you work with them enough, you soon will find that they also dye your hands, quite well!
An Acorn Debacle
Early this fall, I had the opportunity to attend a foraging workshop/hike in a nearby state park. A park ranger was our guide and certainly seemed to have a great deal of knowledge on wild edibles and medicinals. As part of that workshop we were taught how to make acorn flour. We were even given some acorn cookies that were surprisingly tasty! So I thought I would try my hand at making acorn flour. I also watched several videos and read several articles on this topic, but did find a lot of conflicting information on the process.
I have many types of oaks producing acorns of all sizes on my property. I selected the largest ones that I could find. During the workshop, I learned that you must leach all of the tannins out of acorns in order for them to be edible. Shelling some of the acorns was quite easy. I used a standard nutcracker for this process. After I shelled the acorns I placed them in a large bowl filled with water in my fridge to start the leaching process, changing the water a couple of times per day as part of the leaching process. You are supposed to continue doing this until the water is no longer discolored. You then dry the acorns, and grind them into a dark acorn flour.
If I had continued this process for a few days I think things would have gone well. However, I grew impatient and ground the acorns in the food processor and then boiled them in water on the stove. I ended up with unusable acorn porridge which was useless and tasted awful.
A few weeks later I planned to make a second attempt on this project. I started shelling the remaining inventory of nuts that I had previously gathered and left on my porch. However, over those weeks almost all of the nuts had started sprouting and became infested with insects, so they were useless. I should have placed them in my freezer after I gathered them. I will try my hand at making acorn flour next year and will strive to be more disciplined and patient in the process.
In Closing
I am learning a lot through trial and error about nuts and other resources we can harvest from trees. I have also learned to be very skeptical of “how to” online videos. You might want to watch many of them on any topic you are researching and compare and contrast them before proceeding on any new project you plan to try out.
Over the coming months, I plan to buy or build a press or some other mechanism that is more efficient for cracking nuts. In the next few weeks, I also plan to try my hand at making maple syrup. Hopefully, that will go well. It seems like an easy process. What could possibly go wrong? I hope this article was helpful or at least slightly entertaining. I know some people have nut allergies. If you’re one of those people and read the article anyway, I really appreciate it.


