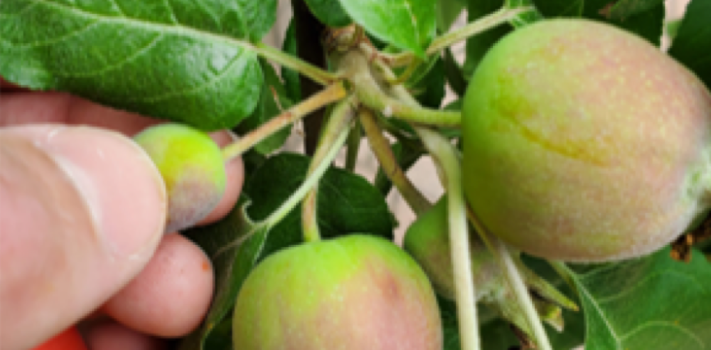
When I see clusters of apple trees in box store parking lots, I wonder how many of them will actually become productive. The trees are usually clones of great varieties, like honey crisp and golden delicious. But for many well-intentioned homeowners, coaxing quality fruit on a consistent annual basis from these trees can be a challenge. This how-to article will describe how to thin fruit to increase reliable apple production.
Warning, thinning fruit is very counterintuitive (see Figures 1 and 2). This article will describe cutting seemingly healthy “baby apples” from your tree. But, anyone would agree, one healthy apple is better than four small, insect-ridden, or sickly apples!
What: Thinning of fruit refers to removing developing apples from a tree.
Why: Simply put, we thin fruit to (1) allow for larger and healthier fruit and (2) to keep branches safe from breaking under heavy fruit loads.
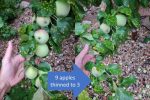
Thinning fruit allows the tree to put its energy into producing higher quality fruit; a tree has a fine amount of root/leaf volume so limiting the amount of fruit allows more resources per apple. Thinning also plays a role in keeping the tree from producing biannually. Trees you are counting on for life-sustaining food that only produce every other year are an obvious problem. Some apple varieties are more likely to get into a biannual production cycle than others, but I’ve never heard of a variety you couldn’t force to have consistent annual yields. Thinning is just one element in breaking a tree of biannual production, the tree also needs adequate water, protection from bark damage (e g., rabbits in winter), fertilizer and insecticide correct for apple trees in dose/type/schedule, and trimming/pruning. Issues with any of these other elements may also motivate a tree to produce biannually.

Sometimes a tree will set 4 or 5 apples on a single spur. There is no way this number of apples can grow to full size from a single spur as the peduncles (i.e., that little “stem” protruding from the top of the apple) won’t be long enough to allow them to grow to full size. Furthermore, the amount of resources needed to grow that many apples off a single spur is likely too much for the tree resulting in smaller fruit. Lastly, the airflow around the fruit, when wedged together around a spur, is much less resulting in increased risks of fungus issues. Wedged together fruit also means less sunlight reaching the fruit which reduces the coloring of the fruit. Lastly, wedged together fruit makes a perfect place for insects to live or feast harassed by predators.
How to thin
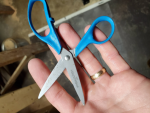
Tools needed, (1) ladder (step ladder for smaller trees), (2) scissors or pruning shears (scissors are fine since we are not cutting woody tissues when thinning fruit), (3) cleaning solution for cutting tool (I dilute “household” bleach in clean water at a ratio of 1 part bleach to 9 parts water), (4) disinfectant wipes. Figure 3 depicts my favorite tool, “kids scissors”.

We are thinning to remove (1) obvious sickly-looking fruit, (2) fruit likely to cause branch breakage, and (3) fruit that is too crowded on a fruiting spur (see Figure 4). Sickly-looking fruit will normally have a yellowish or lighter color than healthier fruit, but it could also be darker if it is rotting. Just use common sense, if it looks sickly it probably is. The peduncle (i.e., the stem of the apple holding it to the tree) on a sickly apple tree will appear smaller and withered relative to a healthy fruit’s peduncle.
Fruit likely to cause branch breakage needs to be removed. During a storm you don’t want to lose an entire branch because you were greedy. The rule of thumb that I use is to remove enough fruit so the branch doesn’t noticeably sag. When an inevitable late summer thunderstorm rolls through the orchard you want to avoid suffering catastrophic losses via heavy branches swaying in the wind and breaking. I try to remove more fruit from spurs near the end of the branch, leaving at least one apple per spur or one apple every 5-8 inches until roughly halfway back to the trunk. Then you can get greedy and perhaps increase too two apples per spur or less space between apples along the branch.
Just remember, a heavily laden branch swinging in the wind could totally separate from the tree leaving you with no fruit, and that the apples will grow much bigger later in the year! So when in doubt, over thin. You will have a lot more issues with branch breakage on trees that have not been properly trimmed/pruned… if you have pencil thickness branches extending feet off your tree trunk you probably didn’t do a good job trimming/pruning your tree in previous years.
When thinning to avoid issues with undersized apples, I leave 1-2 apples per fruiting spur. You may find the tree will set more than 2 apples, I’ve seen five in my Wolf River variety! I usually leave 1-2 of the largest-looking apples hanging side by side (i.e., I try not to leave apples hanging on top of each other from a spur since then the are always touching). Further out on the branch (distal from the trunk), I leave 1 apple per spur, or roughly 1 apple per hand’s width (i.e., roughly 5-8 inches) since fruit hanging further from the trunk puts more strain on the branch.
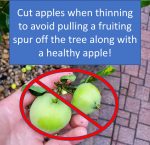
The process of removing the fruit is simple. If you time it right, most of the sickly fruit will just fall off into your hand with a gentle massage. If the fruit didn’t immediately fall off, then I just cut the peduncles near their center. Cutting is important, don’t pull them off as you may damage the spur and cause the apples you want to leave to fall off, or damage the spur for future year’s production (see Figure 5). After working on a tree, I clean my cutting tool by sticking it in my chlorine solution for a few seconds and wiping it with a disinfectant wipe. Sometimes I’ll do this a few times while working on a single tree.
If you see any obviously infected twig (e.g., blistering/peeling/splitting/black bark) I remove all of it and immediately thoroughly clean my cutting tool. I like to use scissors for cutting peduncles because scissors are easier on your hands than shears. You don’t need to worry about cutting the peduncle super close to the spur or branch (if your apple variety is spurless). Normally we never want to leave dead tissue on or near the tree, but a little half a peduncle isn’t going to cause issues.
After cutting or massaging the fruit from the tree, I let it drop to the ground. After I’m done with the entire tree or section of orchard, I then go in and clean the fruit from the ground. Leaving rotting fruit under your trees is a bad idea; insects will be attracted that could do damage to the healthy fruit you left on the tree.
When: When to thin fruit
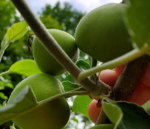
If you have the time and resources, you can thin your trees twice each year. As shown in Figure 9, the trees will often naturally thin themselves to some degree. The first natural thinning occurs when the fruit is small, roughly 0.5-1 inches in diameter. The second when the fruit is larger, roughly 1.5-2 inches. These sizes are just estimates. The trees will let you know they are ready for a thinning because they naturally thin themselves! My trees, in zone 5a Wisconsin, have their first natural thinning in early June, and the second in mid-July. But these dates are estimates and change within a few weeks year-to-year.
When a tree naturally thins itself, you’ll see sickly-looking fruit under the tree. If you look closely at the tree, you may notice some sickly-looking fruit remaining on the branches with withered fruit stems (i.e., peduncles). Therefore, you don’t need a calendar reminder for when you should be thinning a tree… you just wait for the tree to do it itself. With that said, if you have done a good job pruning and or have a variety that isn’t seeing copious amounts of fruit for its size, it is possible your tree won’t do any natural thinning. Therefore, the time to thin can be any time that suits you post fruit set. I would recommend thinning asap after fruit set.
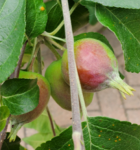

If your trees only have a single natural thinning, or none at all, you should still examine your tree for damaged fruit. Any fruits with obvious holes, insect damage, or a misformed shape I remove during the thinning process. If they have insects on them I also try to kill them and or directly place the infested apple in a bucket so I can get it away from my orchard.
Rules for thinning
Cut out all sickly-looking fruit, remove fruit from overloaded branches until they do not noticeably sag, leave only 1-2 apples per spur or 1 apple per every 5-8 inches.
In Closing

I hope this article was helpful! As previously stated, there is a lot more to cultivating a successful orchard than thinning. Thinning is not a magic bullet for success. Other pieces of the puzzle include trimming, dormant pruning, fertilization, insecticide/fungicide, watering, and summer pruning! You should find good online advice online from University-affiliated agriculture extension offices, albeit in my experience they won’t be image rich like this article. This article was borne out of me reading such expert advice from ag extension articles and books and then trying it out in my home orchard.

