


(Continued from Part 1.)
Figures 4 and 5 (below) show a little more of the process of tracing. Note that the shorts themselves are moving around a fair bit.
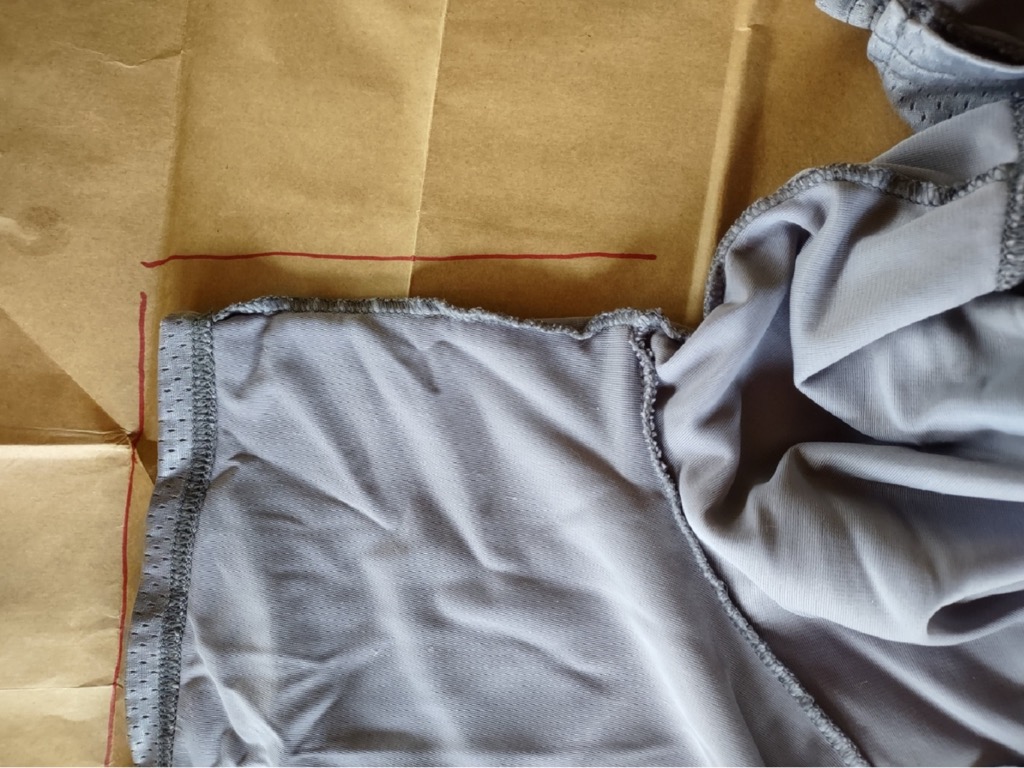

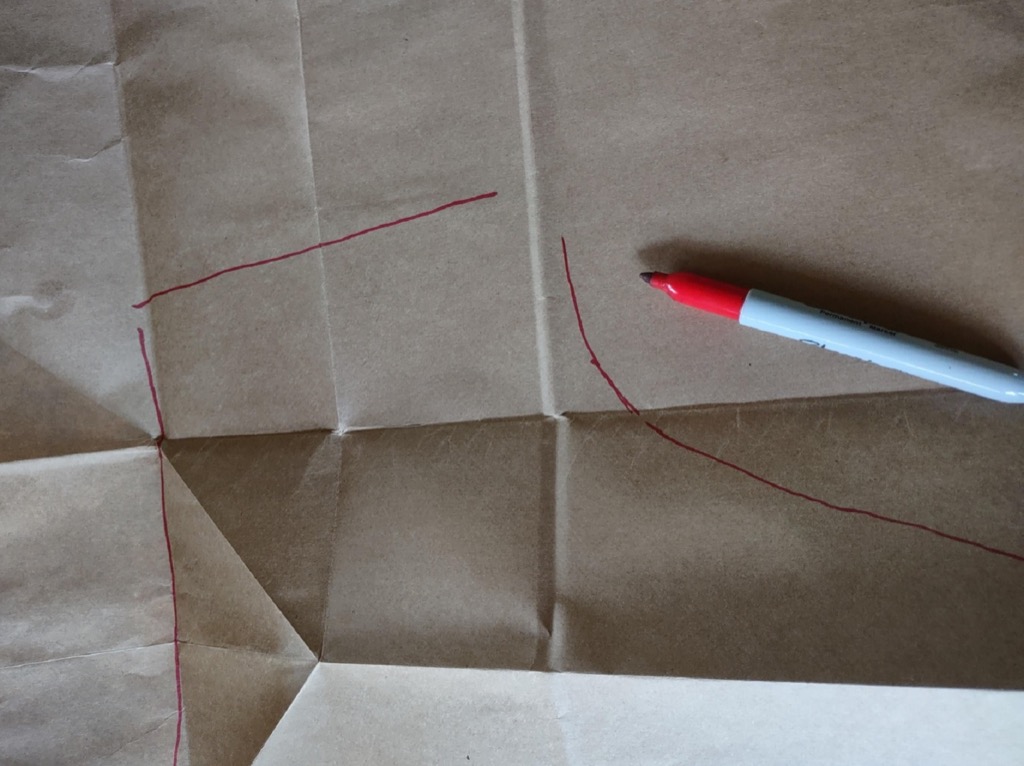
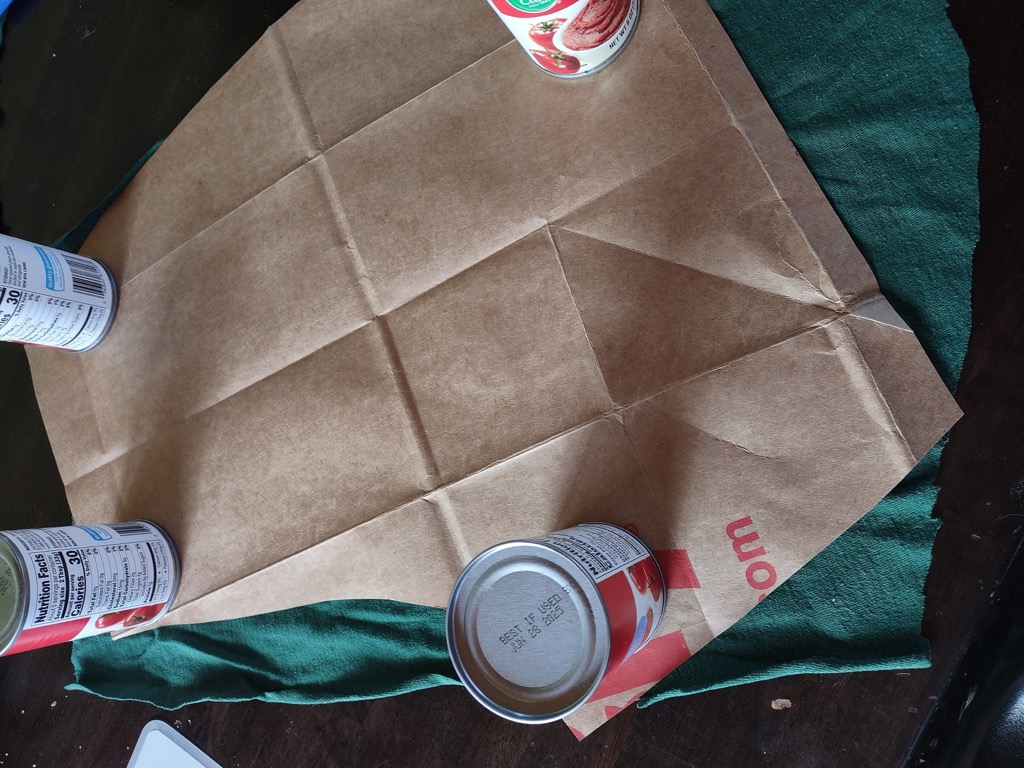
Figure 6 shows that using this method of keeping parallel to the seam you will wind up with a gap. That’s not a big deal. Extend the lines out and you’ll be done drafting the pattern. The little error here doesn’t matter. Extend the lines and you’ll be fine. Then cut the pieces out.
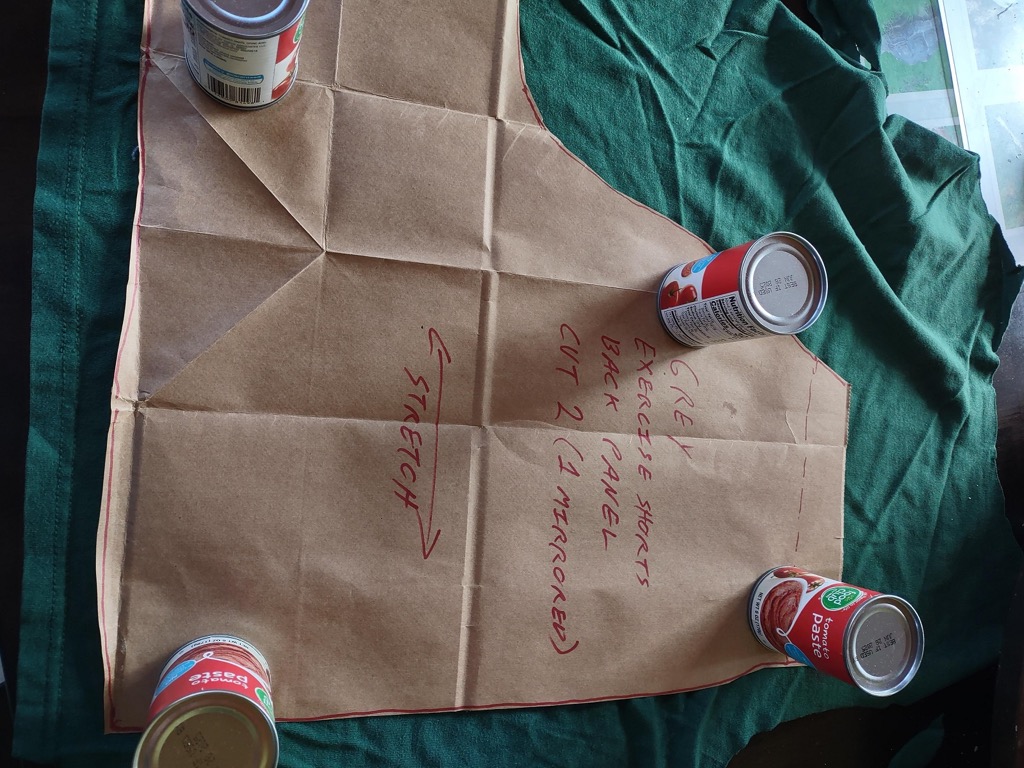
Next, you’ll need to make some notes on the pattern itself. Knits stretch more one way than the other and you want to mirror this in your clone. So which way does that panel in the garment stretch? Make that note on your pattern. What garment does this pattern make? What panel is this and how many will you need to cut? Your goal here is to write the information you need so that you can make your second or third clone from the paper alone.
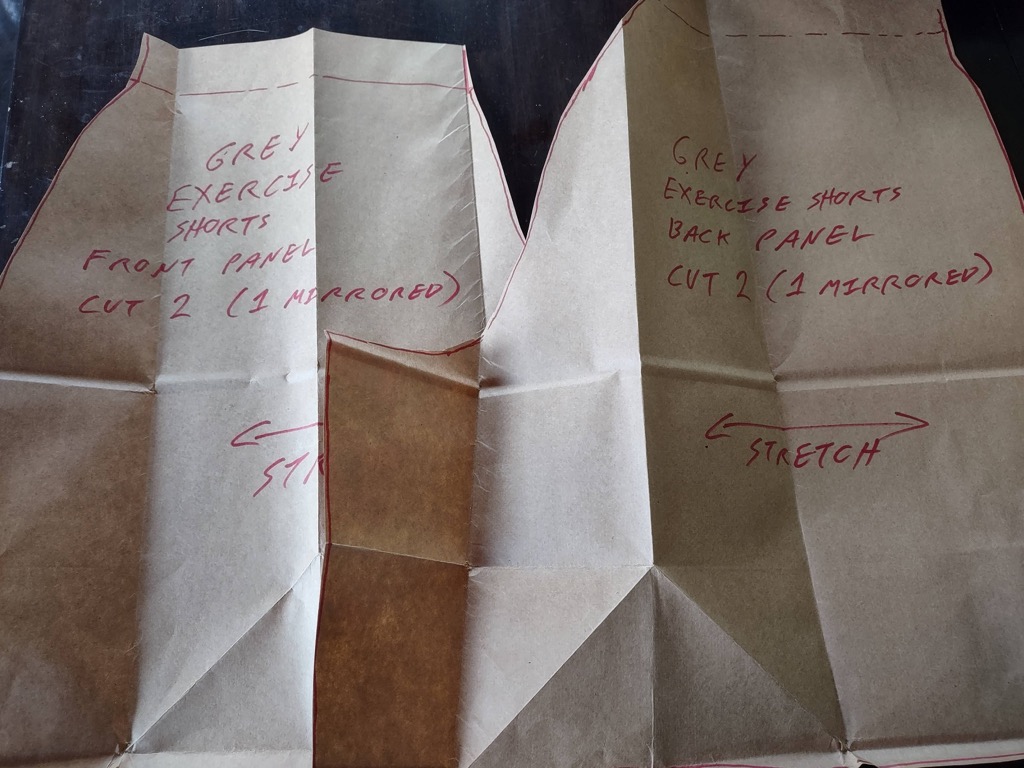
I also marked which parts were the waistband so I could fold that down for the next part. After the project finished I actually just cut the waistband off the pattern entirely. In the original garment that is bunched elastic and I’m not dealing with that. Figure 7 shows my final pattern.
Paper Back to Cloth
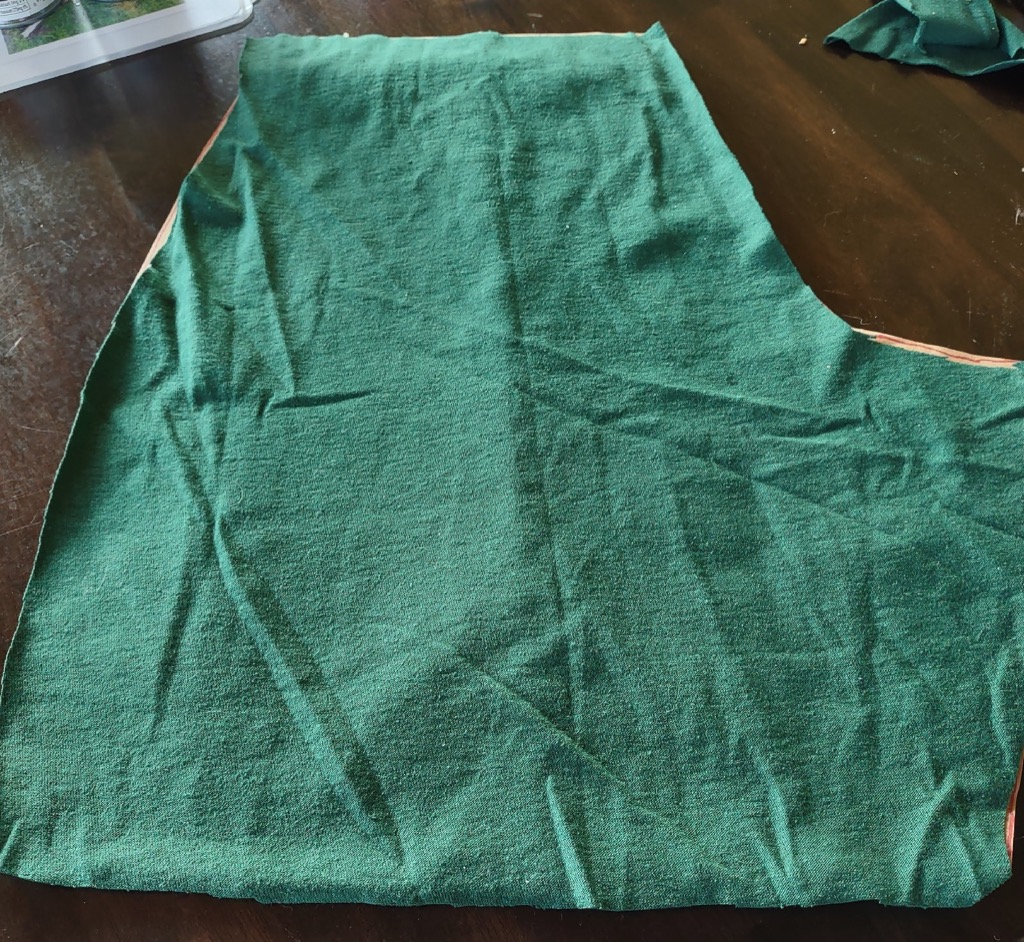
Now that we have a pattern that tells us what we need it’s time to cut cloth into panels for our clone. In this case, I have a donor long sleeve t-shirt that I’ve already cut into its panels and there is just barely enough cloth to do all the short panels. The shirt’s former front and back fits the rear short pattern nicely. Line direction of stretch on the pattern with the stretch in the cloth Figure 8.
The two former sleeves barely fit the front panel pattern Figure 9. I have to cheat a little bit to make it work, I’m off on the grain structure and I’m a little short for the corner of the pattern. Skipping ahead, I can say these cheats were not fatal to the garment. Scrap woodworking can work.
As you can see I’ve placed the pattern on the cloth and weighed down the pattern so it doesn’t move using cans. I’ve also seen people use small sandbags, large washers, and hockey pucks while other people will pin the pattern down to the cloth. Tuna fish cans are excellent for this I found out later. What method you choose ultimately depends on how slippery the cloth you’re working with is and how professional you want the finish to be. These are exercise shorts, so cans worked fine to keep the pattern and cloth still while I cut out the cloth. Figure 10 shows the cloth panel on top of the paper pattern.
A final point here: your cloth has a “right side” and a “wrong side”. A lot of times it looks pretty close with knits but keep it right side up while cutting. When you need to cut the mirrored panel, flip the pattern, not the cloth. Then you will have mirrored cuts with matching “right” and “wrong” sides. Does it really matter? Depends on how easily embarrassed you are. It would look a little wonky to have your left front be “right” and the right side “wrong”. I recommend exercise clothing and PJs as starter garments for this reason.
Choosing Thread and Threading Your Needle
For thread, any all-purpose thread will be fine. Sewing on a machine with old thread can be dicey, but sewing by hand you don’t really have that difficulty. For this you don’t need premium thread and you don’t need to worry about color. If you choose a shade close to your fabric it will be harder to see the stitching and this is seen as a good thing by most seamsters. This is SurvivalBlog, so any all-purpose thread will answer our purposes.
For threading the needle there are two main options. The first option is to simply thread the needle and move the needle to the center of the length of thread. This leaves a double thread coming from the needle. To keep snarls and tangles down (and strengthen the thread): pull the double thread, starting at the needle, across some beeswax. This sticks the two threads into one and helps them slide through the garment as you sew.
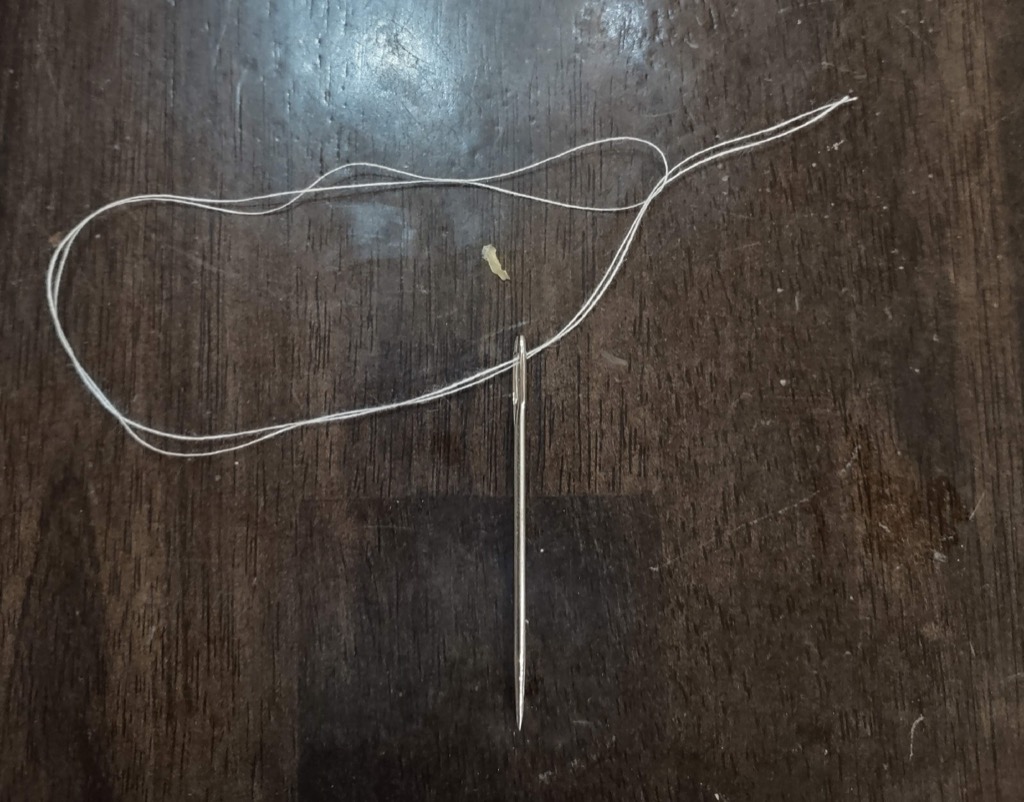
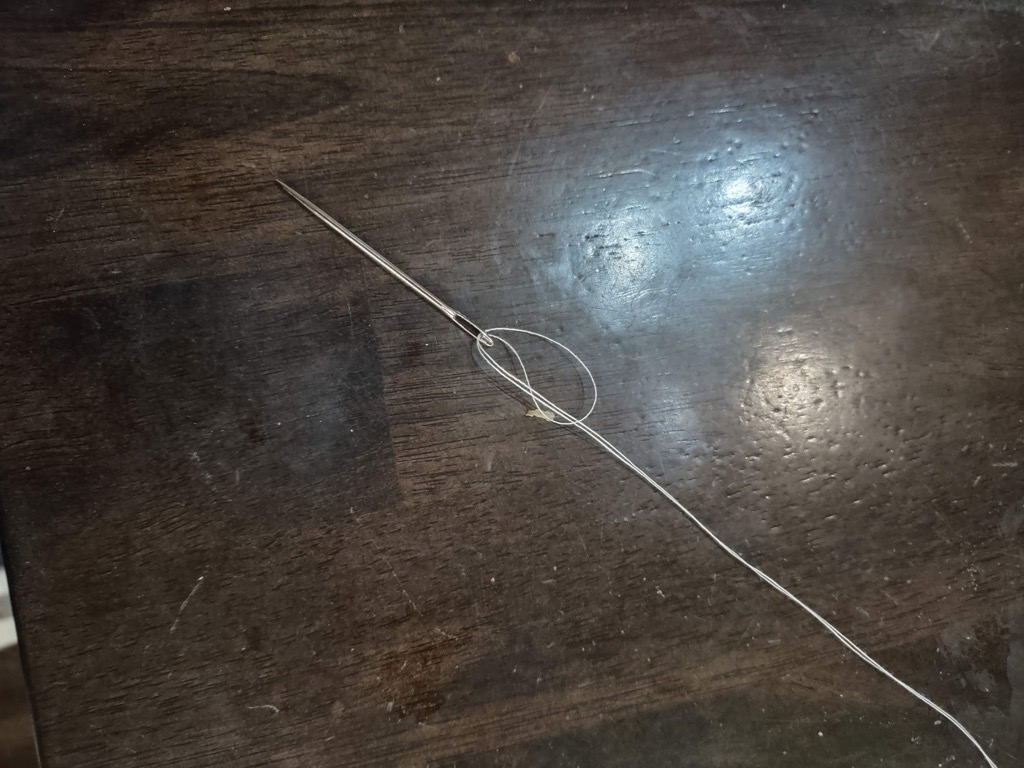
I prefer the second option which is snarl-free and doesn’t require adding wax. Pull out an armspan of thread. Gather both ends together. Now, thread both ends through the eye of the needle. For a moment you have a needle hanging on a double thread. Holding onto the two ends in one hand, find the loop at the other end and thread both ends through the loop and tighten while holding to the needle. This puts a lark’s head knot around the eye of the needle with two tails coming away. I’ve demonstrated this with a large-eyed needle and short thread in Figures 11 and 12. It is a costume maker’s trick and a good one. It seems like more work but the time you save in snarls is well worth it and you don’t need wax. I invariably thread my needles like this.
French Side Seams
Alright, you have 4 panels that need to be joined together. Put the rear panels together and see how they would fit, the top that will join a waistband is the point to match them on. Now you know which is “left” and which is “right” when the correct side of the fabric is facing out. Same for the front panels, again joining them at the band area. This is the equivalent of dry fitting in woodworking.
Now that we know where each panel goes, we can decide the order of joins. As long as all 4 panels wind up facing the right way and in the right place it doesn’t matter. Here’s the bomb-proof method though: Join the side seams first. The Left Front panel and Left Rear panel in a left side seam. Then join the Right Rear and Right Front in a right side seam. Then join the rear panels together. Then the front panels. Then the inseam.
The side seams are dead simple so we start there. We’ll be using a French seam. This is a little more complex than some other options but I think it plays to the strengths of hand sewing. The French seam is a double seam which makes it strong. I also think it’s an elegant solution to keeping the raw edges neatly tucked away. This would be far more important for a woven piece because cut woven fabric frays in a way that knits don’t. Knits do roll at the edges so it’s worth doing right. For a video of the French Seam technique while the grid is up, I recommend this video.
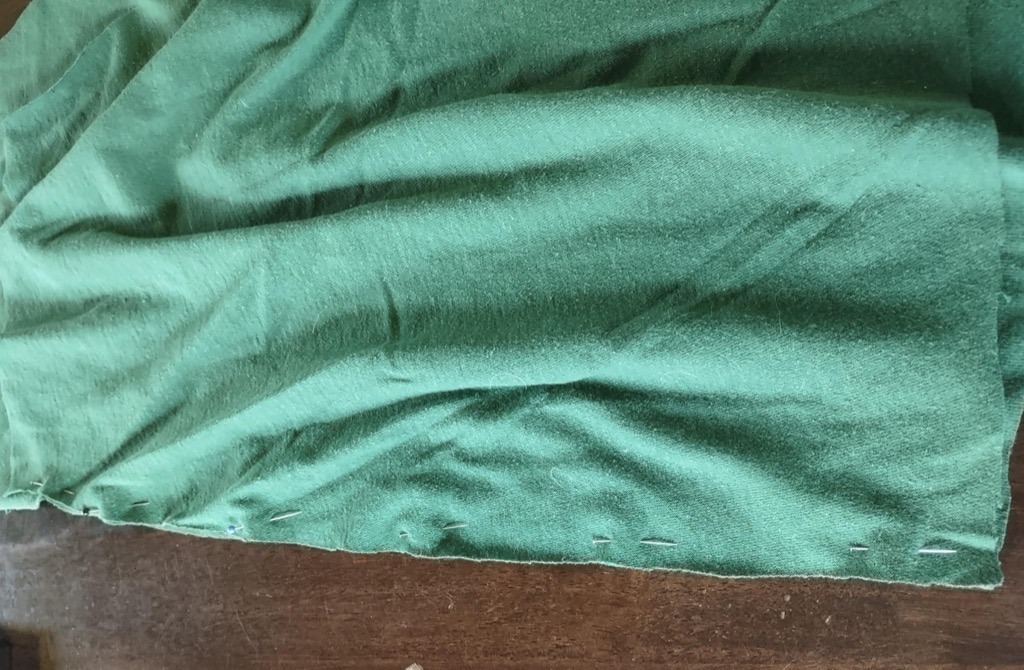
Pin the pieces, correct sides of the fabric facing out (wrong sides facing each other inside) Figure 13. You will probably be tempted to skip this step. Trying to cut without a pattern and trying to sew without pinning may both be possible but it’s bitten me in the rear when I’ve tried. Pinning the panels is worth it in my view.

Sew along the length, removing pins as you go. Sew as close to the edge as you reasonably can. I sewed the seam with a simple running stitch Figure 14. The running stitch is what everyone can puzzle out with sewing. Down through both layers, up through both layers, down through both layers and so on. I’ll teach the back stitch for next part of the French seam. For now, make the running stitch along the entire length of the piece. I saw a tailor who for something like this would do a single backstitch and then a running stitch for the length of the needle and then pull through. Rinse and repeat. If that doesn’t make sense to you yet, don’t worry, it will later if you pursue a similar project.

For the second step of the French seam, flip the pieces so the wrong sides are facing out. Position the panels so the raw edges from the first step are pointed inwards. Now pin again (see Figure 15) and put a second seam as close as reasonably possible to the first. This time we putting a stronger stitch, the back stitch.
The Backstitch
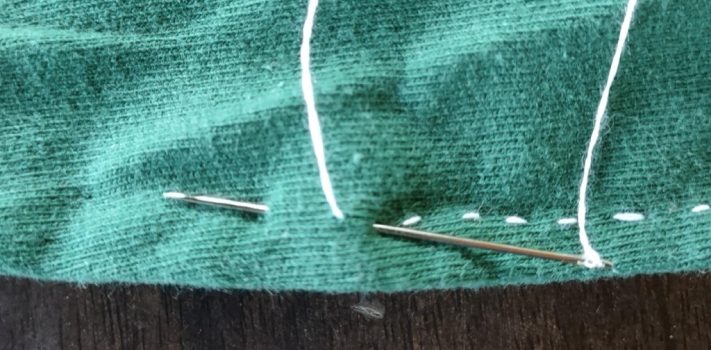
The backstitch is arguably the most important stitch. This stitch is my default stitch to use because it is strong and works almost everywhere. I’ve used it patching clothes and heavy travel bags. The front and back side of the stitch look different and it can be used in almost any context. A good general rule to note here is that the smaller stitches you use the stronger your seam will be and the longer it will take. I’ve read of professional seamstresses moving one thread in the weave at a time, possibly true, certainly excessive for our situation. Good to remember though: smaller is stronger.
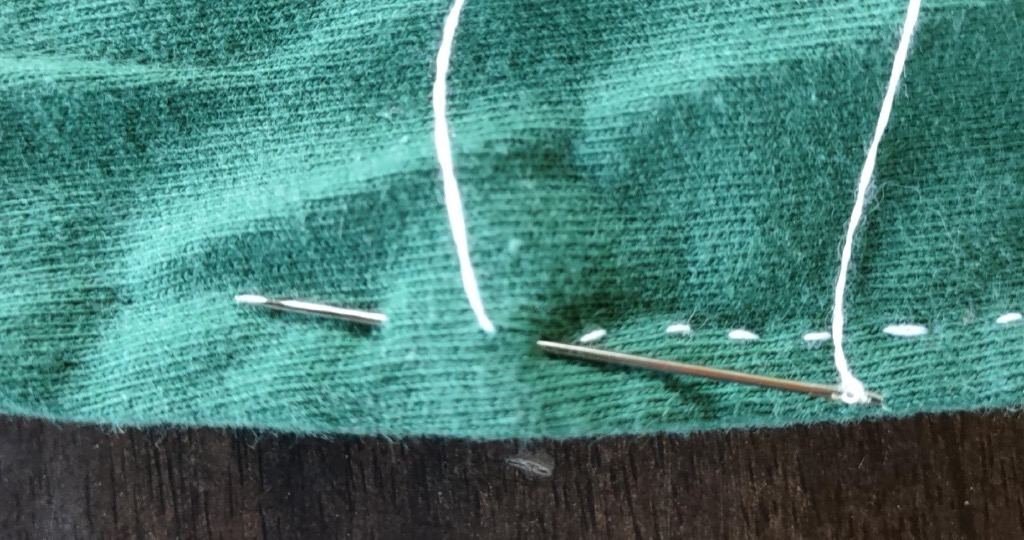
To stitch a backstitch you begin from the back. I like to work right to left. Start close to but not completely at the right edge of the line to be sewn. Come up from the back and then down to the right (behind where you came in). Go down and come up to the left of where you first began Figure 16. That’s your first stitch and now we can get into the rhythm. From where you came back up, split the difference between where you came up and the stitch on the right and go down through it, come up on the left. Split the difference on the right to go down, come up on the left.
Now that you’ve sewn both lines the seam is complete. Flip the panels one last time so your right sides are facing out and you’re done. It can get confusing about which sides should be out but if you take your time you’ll be fine. For most sewing (without a French seam) you will begin with the wrong sides facing out because you only flip the seam once. Because the French seam sandwiches the raw edges between the two lines of sewing you start and end with right sides facing out. Doing this with a machine is slightly different and involves a larger seam allowance and trimming but the principle is the same.
Repeat this process to join your other front and back panel in a side seam.
(To be concluded tomorrow, in Part 3.)