


People have been making wine for almost as long as there have been people. In the Bible, we’re told that Noah, after disembarking from the ark, “was the first to plant a vineyard.” (Genesis 9:21)
This article will give you some how-tos, whats, and whsy on making wine at home, as well as a brief description of how I got into it.
How I got started on making wine at home
The first time a friend of mine, Pastor B., visited our home, he gave us a bottle of homemade apricot wine. It was incredible. I picked his brain on the subject of winemaking.
“It’s really pretty simple,” said Pastor B. “It comes down to this: You give the yeasts sugar in a nice place for them to live. They eat the sugar, poop alcohol, and pass carbon dioxide gas. When the alcohol content gets high enough, they die, and your wine is done.”
When pressed further on specifics, Pastor B. gave a simple recipe for winemaking: Three pounds of fruit and three pounds of sugar per gallon of wine.
For years, I’ve made jam and jelly from wild berries and fruits, as well as from fruit that we grew. But now that the kids have left the nest and established their own households, we don’t use nearly as much jam and jelly. I’m a compulsive forager, and I hate the idea of wasting usable berries and fruits. Pastor B.’s gift and his explanations opened a new vista for me, and I asked my husband for a winemaking kit for Christmas that year. My husband obliged me, and it’s become something that we do together.
Why make wine?
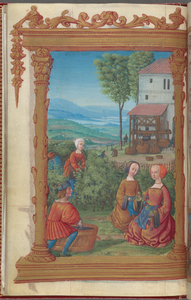 Originally, wine was safer to drink than water. Anything Noah made would be a LOT safer to drink than flood water, and after being confined on a small, enclosed boat for 370 days with a lot of animals, it’s understandable that he might be looking for something to get the smell out of his nostrils. Wine is a low-tech way of preserving fruit or vegetable juices, or herb essences. Wine is a flavorful beverage to accompany a meal, or it can be part of a light meal. It can be used as a medicine or as a nutritional supplement (what used to be called a “tonic”) as well. All of these uses are thousands of years old. In the Bible, Paul instructed Timothy to consume some wine for a stomach ailment (1 Timothy 5:23). In medieval Europe, when women were discouraged from consuming wine, they were allowed to have dandelion wine because of its medicinal properties.
Elderberries and hawthorn berries have documented medical properties. Elderberries are used as an antiviral and antioxidant, and hawthorn berries have been used to promote heart health, reduce high blood lipids, and reduce high blood pressure. Fireweed and tart cherries are both used to reduce inflammation and relieve pain. Dandelion has been used to reduce blood pressure, is a diuretic, has been used to treat kidney stones and intestinal worms, and shows promising antitumor activities.
Different compounds in these plant materials behave differently. Some of the compounds are water-soluble, which means that they can be extracted in a tea or infusion. Some are oils or are soluble in alcohol, which means that they can be extracted in a tincture. Wine extracts both the water-soluble and the alcohol-soluble compounds, giving us the benefits of both. As the government takes over more of our health care, medicinal homemade wines are an attractive option.
Disclaimer: I am not a physician. Just because something is used for a medicinal purpose doesn’t mean it actually works. (Consider the fact that the Romans and the ancient Chinese used urine for mouthwash. No, I really don’t recommend that.) I base my choices of medicinal use on peer-reviewed papers or books by reliable authors, and I try things to see how they work for me. I encourage you to do the same.
Another reason to make your own wine is that commercial wines here in the US are loaded with chemicals, particularly sulfites. In winemaking, sulfites have multiple uses: They prevent the growth of wild yeast strains or mold, they stabilize wine when fermentation has reached a desired point, and they’re used to stabilize a wine that is back-sweetened. To a large extent, sulfites are used to produce a uniform wine and to shorten the aging time. Interestingly, European wines have about 100 times less sulfite than American wines. Sulfites can cause migraines and other problems when consumed in the quantities that present in American wines. By making your own wines, you can control the sulfite content and keep it at an acceptable level.
What to use to make wine
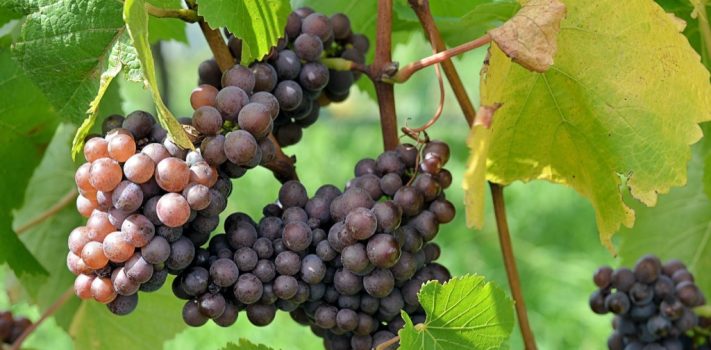
Most of us have neither a good supply of grapes, nor the ability to plant a vineyard like Noah did. Here on very arid acreage in the Redoubt, if we planted grapes, we’d have to irrigate the daylights out of them. We don’t have a source of irrigation water except for our well, which is about 600 feet deep. Everything we grow is carefully considered in the light of how much it costs us to pump water up 600 feet. Grapes don’t pass the test.
I grow plums and tart cherries in my home orchard. A friend has an apricot tree in her yard, and she has been very generous in sharing the fruit with us. My neighbors grow peaches and blackberries, and they also share with us. I return their generosity by giving them a bottle of wine from each batch made with what they provide. I have rosebushes around my deck, and rose petals, seasoned with cardamom, make an interesting wine that goes well with curries. The dandelions in my lawn also make a good wine and the jackrabbits leave plenty of them for me. (Dandelion wine has been made for at least a thousand years.)
In the areas where I like to hike, I can pick wild currants, saskatoons, huckleberries, wild plums, chokecherries, elderberries, and hawthorn berries. Any of these make exceptional wine. Also, fireweed grows in some areas as part of the succession after a burn, and that makes a very interesting wine. Pastor B. sometimes blends different fruits or berries. Recently, he gave us a bottle of elderberry-black cherry wine that we shared with a special visitor, and it was excellent.
Mead is honey wine, with or without added fruit. It was beloved of the Vikings, who drank it out of decorated horns. If you have beehives or a good source of raw honey, then mead is wonderful. I don’t, but wish I did.
Wine can be made from things that either don’t taste that good fresh, or should be avoided fresh. Hawthorn berries are really underwhelming if you try them off the tree, but they make an amazing wine. Elderberries will make you sick if you eat them raw, but they make a wonderful wine that is comparable to a very good chianti. Sour wild plums that are nearly inedible make a very pleasant wine.
 The degree of ripeness of fruits and berries affects the color and flavor of wine. If you like a pale, dry wine, then use fruit that is slightly underripe. Ripe fruit produces a darker wine. The difference is most evident in plum wines, which range from a pale yellow color through a dark honey color to different shades of red. I have never tried making wine from vegetables, but in The Early American Cookbook, by Hyla O’Connor, she mentions use of carrots, beets, and potatoes for winemaking. Apparently, parsnips and onions have also been used in winemaking. I have never tried using vegetables.
Grains, such as rice, wheat, or barley, can be used for winemaking. Rice wine has been a staple in Japan. I have never tried making wine from grains.
Herbs and flowers have been used in winemaking for thousands of years, either to flavor a grape wine, to flavor mead, or as the basis of a wine.
Needed tools
The most basic tools needed by a home winemaker are:
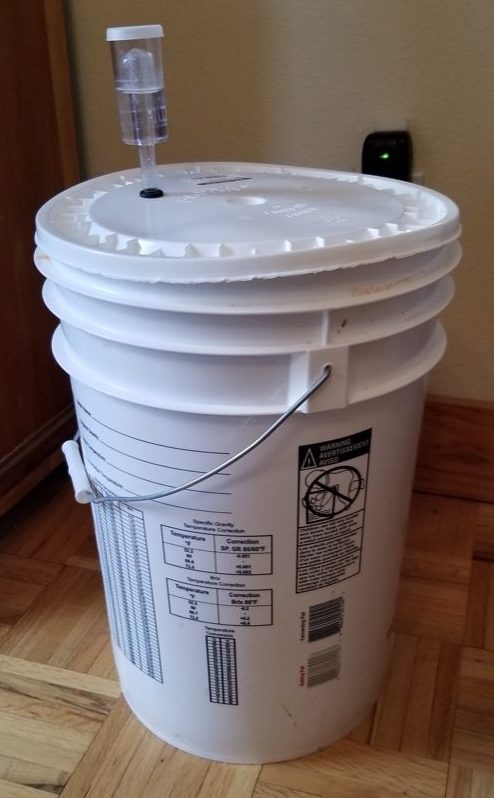
- A primary fermentation vessel (like a food-grade plastic bucket with a lid)
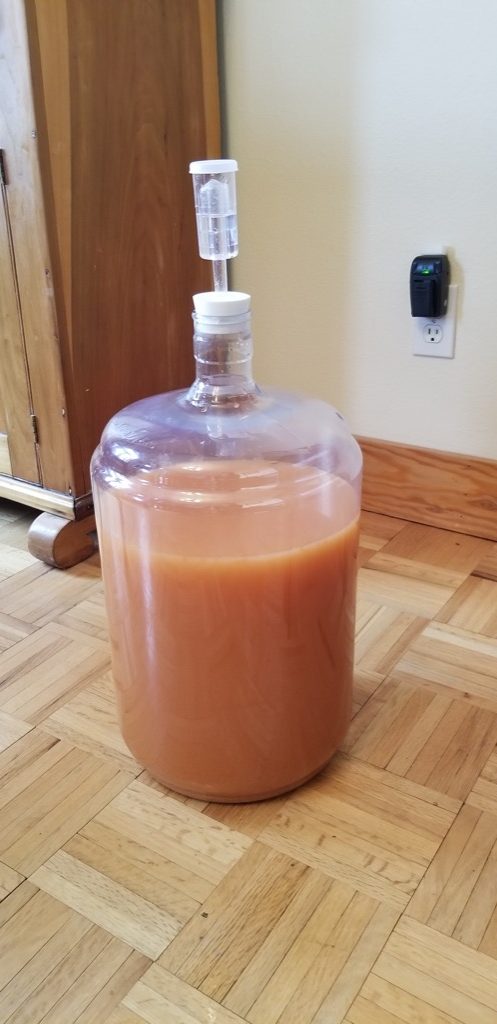
- a secondary fermentation vessel
- a stopper for the secondary that accommodates an airlock
- an airlock that will fit both the primary and secondary
- bottles
- corks that fit the bottles.
Additional useful tools are:
- A hydrometer (for measuring specific gravity; also called a hygrometer)
- siphon tubing
- a thief (plastic or glass tube with a one-way valve that allows small samples to be drawn from a secondary for sampling or testing)
- An auto siphon (which is kind of like a pump and a siphon combined)
- a straw (glass or plastic tube with a valve at the tip for filling bottles)
- a device to insert corks into bottles
- a washable nylon mesh or cheesecloth bag. (I use nylon.)
- an accurate scale (I recommend this highly.)
When Pastor B. talked about “a nice place for them [yeasts] to live”, he was talking about primary and secondary fermentation vessels. Yeasts like a wet environment in a dark place. This environment can be created very simply: Thousands of years ago, fermenting grape juice was stored in a cow’s stomach (after the stomach had been removed from the cow). More recently, people have used large plastic trash bags as a fermentation container. Pastor B. uses a plastic trash bag inside a clean trash can.
Plastic worries me, because studies are showing that a lot of plastic microparticles are in our bodies, and that’s not good for us. Glass and inert plastic (polyethylene terephthalate, called PET) carboys and brewing buckets are available at reasonable prices, and they make wonderful fermentation vessels. That’s what I use. It’s good if the secondary vessel has a small opening to limit the amount of oxygen that gets in, which is why carboys are really nice.
 Never use any tools or vessels made out of aluminum, iron, or copper, for winemaking. Use only glass, stainless steel, wood, or inert plastic such as food grade PET. Clean and sanitize all equipment before using (avoid abrasive cleaners). If it’s been sitting around for any length of time, clean it again, because it’s better to be safe than sorry. Brewing supply houses sell non-toxic, non-abrasive sanitizing agents such as phosphoric acid or sodium carbonate peroxyhydrate for sanitizing equipment, and you don’t need to rinse it afterward. (Phosphoric acid is an ingredient in commercial colas. It’s one of the reasons that the stuff never goes bad, but it’s also why I don’t drink colas. Just because you can consume phosphoric acid doesn’t mean that you should.)
These tools can be obtained through online suppliers such as Midwest Supplies, North Mountain Supply, or even Amazon. Brick and mortar brewing supply stores also exist in many places, and very often, the staff is knowledgeable and can answer any questions that you have. You can also find some things (like carboys) available used at a lower price than you’d pay for new equipment. Winemaking kits are available from Midwest, North Mountain, Costco, and others, and vary in price starting at around $100.
I do not endorse any particular suppliers. (A special note: I “anti-endorse” Amazon, because the CEO of Amazon has stated that he doesn’t want business from people who hold the beliefs that I do. I’m happy to oblige you, sir.)
When buying carboys and primary containers, be mindful of how much weight you can lift. Glass carboys are heavier than PET. By the time you add several gallons of liquid, it can be very heavy. We don’t use any glass carboys larger than three gallons (which weigh eight pounds empty), and no PET carboys larger than five gallons (under a pound and a half empty). Our primary fermenting pails hold six gallons.
Smaller carboys and fermenting pails take up less space, so if that’s a concern for you, that’s another good reason to choose smaller vessels.
How to make wine
If you’ve never made wine before, I recommend following a recipe. Recipes can be found online, or you can get books of wine recipes. I have used both, and as I gain experience, I’m learning to improvise. What follows are some general guidelines that will help you avoid frustration and make wine that you like.
Start every batch using freshly cleaned and sanitized equipment. Don’t forget to clean and sanitize stoppers and airlocks.
If using fruits with pits or cores, pit or core the fruit, and cut it up. Cherries, chokecherries, or wild plums need not be pitted, but do not crush or crack the pits. Avoid pureeing the fruit or berries; it’s possible to overprocess.
You may want to peel your fruit. But I rarely do so, because the peels contribute a lot to the color and the flavor of the wine. If the peel is tough (like mango) or bitter (like some species of wild plum), then peel the fruit before freezing it.
If possible, freeze the material that you’re using for your wine. Freezing ruptures the cell walls, and allows for easier release of juices.
Allow your winemaking material to thaw when you start your batch of wine. This may take a full day. If you’re using a nylon mesh bag, put the material in the bag inside the primary fermenter. In a large stainless steel pot or pan, heat unchlorinated water and add sugar. When all of the sugar is dissolved, pour the hot sugar water over the material. Allow the mixture to cool to room temperature.
At this point, you may wish to add several different chemicals, which can be purchased from brewing supply companies. Here is a list of possible chemicals, and what each one does:
- Pectic enzyme – helps extract juice from fruit, berries, flowers, and herbs. (Even after freezing the material, I use this because I want every bit of goodness in my wine.)
- Acid blend – a blend of malic acid, citric acid, and tartaric acid which occur naturally in fruit. Wine needs to be within a certain acid range to taste best, and this is used to adjust acidity. If this is used, it’s best to add it before fermentation. (I use it in almost all my wines.)
- Yeast nutrient – food grade diammonium phosphate to keep the yeast healthy.
- Campden tablets – sodium or potassium metabisulfite that is used to prevent growth of wild yeast that can spoil wine, and prevent further fermentation after sweetening. It can also be used to neutralize chlorine, but I have never used it for that. (I use it only to prevent growth of wild yeast, and I use the minimum effective amount.)
- Tannin – used in some wines to give smoothness and body. I use tannin in my apricot wine. It comes in powder form. If you prefer not to buy tannin, you can use strong black tea.
- Grape concentrate or raisins – used to give body to wines, especially floral wines.
After adding any chemicals, cover the primary fermenter, and allow it to stand for at least 24 hours.
After 24 hours, add the yeast, and attach the airlock. Put the primary in a temperature-stable place, preferably in the dark. The temperature is important, and should not go below 60F or above 90F.
(To be concluded tomorrow, in Part 2.)