


(Continued from Part 2. This concludes the article.)
I have had difficulty determining the stored volume since water enters from the springs and out of the extra washed stone surround during drawdown. On multiple occasions, I have filled two and a half IBC totes virtually back-to-back and left the pump intake baffle submerged without stirring up the bottom sediment. Thus, my best estimate is that I have around 650 gallons stored in the channel cistern at all times. Throughout the years, I have measured the springs’ output from as high as 8.3 gallons per minute down to a low of 3 gpm. Taking a rough average of flow as 5 gpm, that translates to 300 gallons per hour or 7,200 gallons each day, every day that I can harvest to sustain gardens, orchards, or with minimal treatment — our family.
After digging the spring cistern, I needed a way to get the water from the lowest point of our property to the orchard at the upper reaches. My initial plan was to reuse a deep-well electric pump. After putting together a materials list and an installation plan, I recognized that this option was going to be more expensive than I originally expected because the lower flow requirements for irrigation would require a pressure tank and the wire and conduit costs were already higher than I wanted. I was also concerned about the voltage drop the pump would experience given how far the electric line would be running from the closest source down to the cistern.
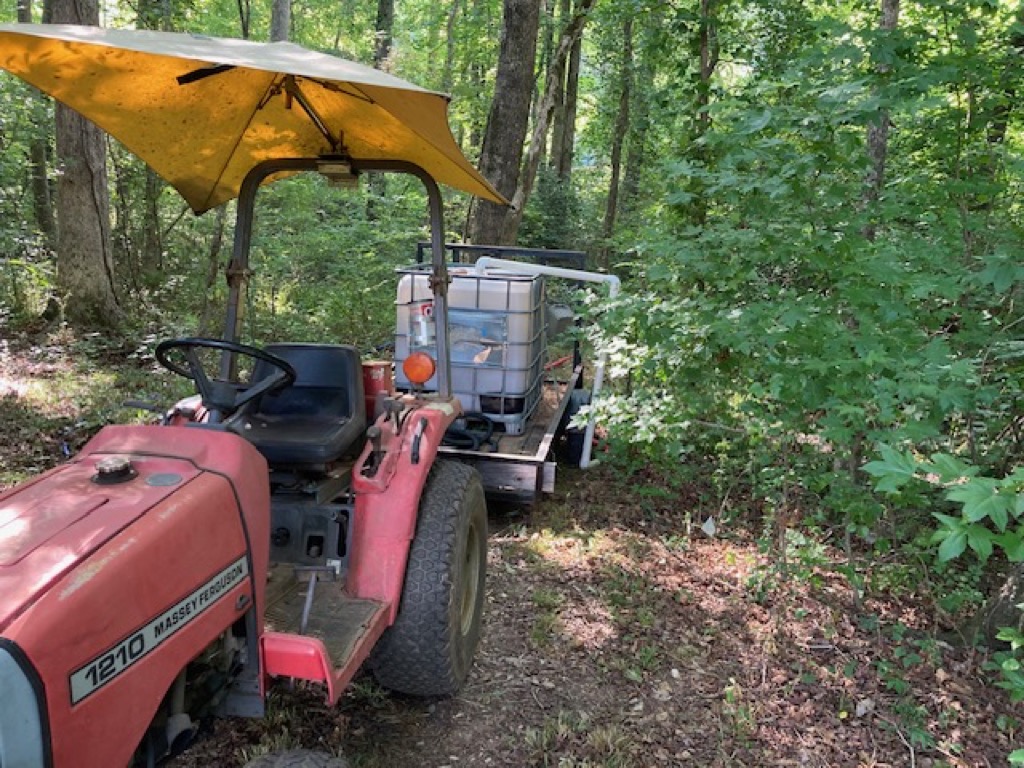 During this planning stage we began pumping and hauling water from the cistern to “flood” irrigate new trees and raised beds. Our “water buffalo” consists of a 275-gallon IBC tote strapped to a 5’x10′ utility trailer we tow with a small tractor. A 2” female PVC adapter is threaded onto the tote drain, this is connected to a 1”x2” PVC reducer into which a six-inch section of 1” PVC is inserted. To the 1” PVC pipe we have attached a 24-foot x 1-1/4” corrugated plastic sump pump hose. We had to build up the 1” PVC pipe with wraps of gorilla tape to form a “tight enough” seal between the pipe and sump pump hose before locking the connection down with a hose pipe clamp. Lastly, we wrapped a ridged piece of copper wire around the discharge end of the sump pump hose to hand the end on the IBC cage so we don’t have to physically turn the valve on and off and can simply hang the discharge end high enough to prevent spillage as we drive our buffalo. A two-inch discharge gasoline-powered trash pump is used to fill the tote, we can collect 250 gallons in under two minutes.
 It was after hauling water for a season that I had my eureka moment realizing that a modification to the irrigation system my parent used when I was a child could serve our current irrigation needs. Gravity pressure is all I need!! If a storage tank was placed above our highest contour of trees, we could use gravity to supply the entire farm. We are already fans of drip irrigation and in recent years have dialed in on the quantities of vegetables for each season to the point we are repeating the same layout year after year.
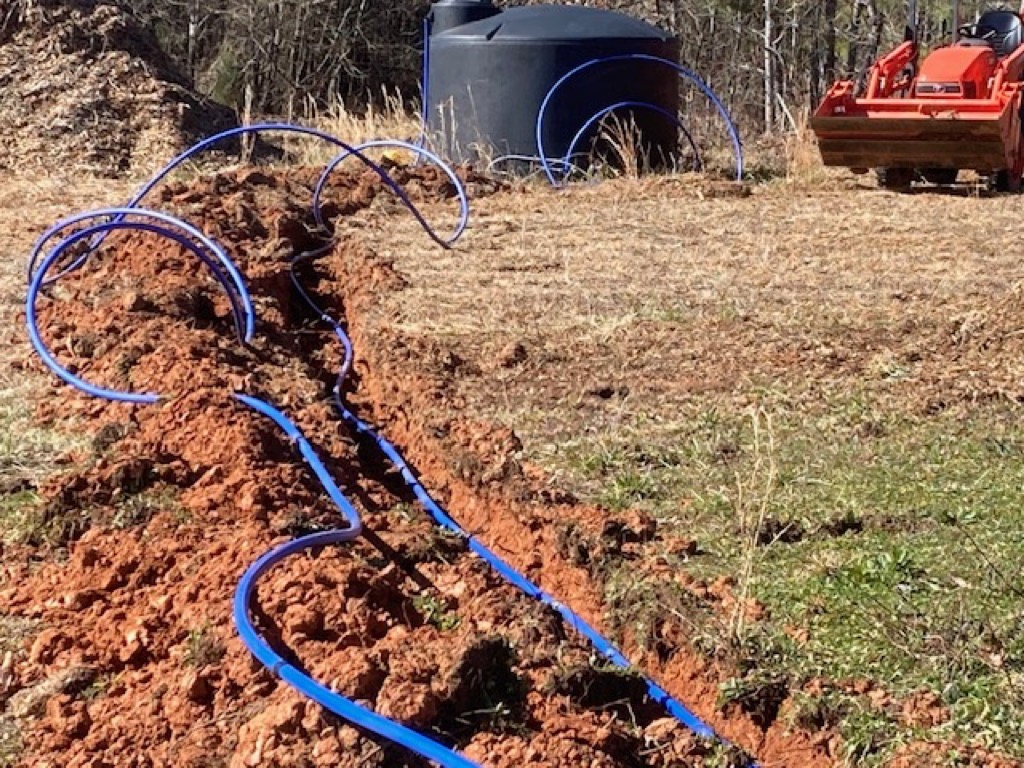
I began searching for a black poly tank and after eighteen months, I located a price-discounted, new/old stock 1,500-gallon tank. After placing the tank, we ran a 1-inch burial-rated pex-type water line from the spring cistern to the new gravity tank and a second line from the tank down to our primary garden. For the orchard and berry grove we dug in a line of the same material along the upper property line, and lastly ran buried lines to the undeveloped central portion of the property and connected a spur from the cistern pressurized supply line to a third/ overflow garden at the southern extent of our meadow.
To fill the tank, the same 2” trash pump is used. Cam lock or banjo type resin connectors are installed on the pump inlet and outlet ports so we can easily switch between 1 inch or 2-inch discharge lines. Additionally, there are a ball valve and a boiler drain pairing installed within a few feet of the pump within the 1-inch line that feeds the hill top storage tank. The ball valve is used as a back up to the pump’s internal backflow device and the boiler drain allows me to verify prime and pressure discharge without having to walk all the way up to the storage tank. The pressurized line discharges near the top of the poly storage tank, and the irrigation supply lines all discharge from six inches above the bottom of the storage tank.
Necking down the trash pump discharge to 1 inch in conjunction with the 600 feet of line friction and 36-foot elevation gain results in about a 15 gpm flow. Through trial and observation, I have learned that filling the pump fuel tank just over half full allows for transfer of 400 gallons without drawing the cistern low enough to run the pump dry. Best of all, by running the pump out of fuel, I find there are less issues getting it restarted, if I have not cranked it for several weeks.
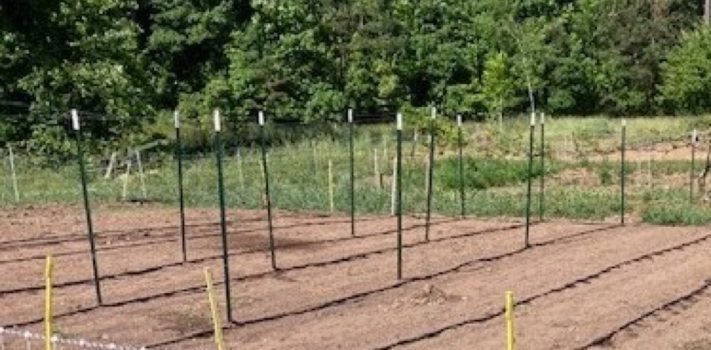
There was a sense of relief when we reached this stage of spring and irrigation development. Around this same time, we began using drip tape for our row plantings. As mentioned earlier, we also had developed a strong understanding of the planting quantities required to meet our needs. For instance, we plant 30 tomatoes at ten per row using cattle panels suspended on 8-foot tee posts where trellis rows are seven feet apart. We plant sixteen peppers, either in a four-by-four pattern or in two longer eight plant rows. We plant two rows of 5 hills each for melons and pumpkins and always have three 7 hill rows for squash and zucchini.
For our row crops, we settled on 40-foot row lengths and use 7 foot spacing for beans but only three foot row spacing for corn, sweet potatoes, okra, and the spring/fall brassica gardens. This “standardization” probably seems over the top to some, but it allows us to reuse pre-assembled irrigation patterns, weed barrier (in the melon patch especially) and individual row length drip tapes from season to season. We are fortunate that growing zone 7B/8A permits us to keep edible crops of one type or another in the garden eleven months out of the year and being able to reuse irrigation and garden supplies saves substantial time and money.
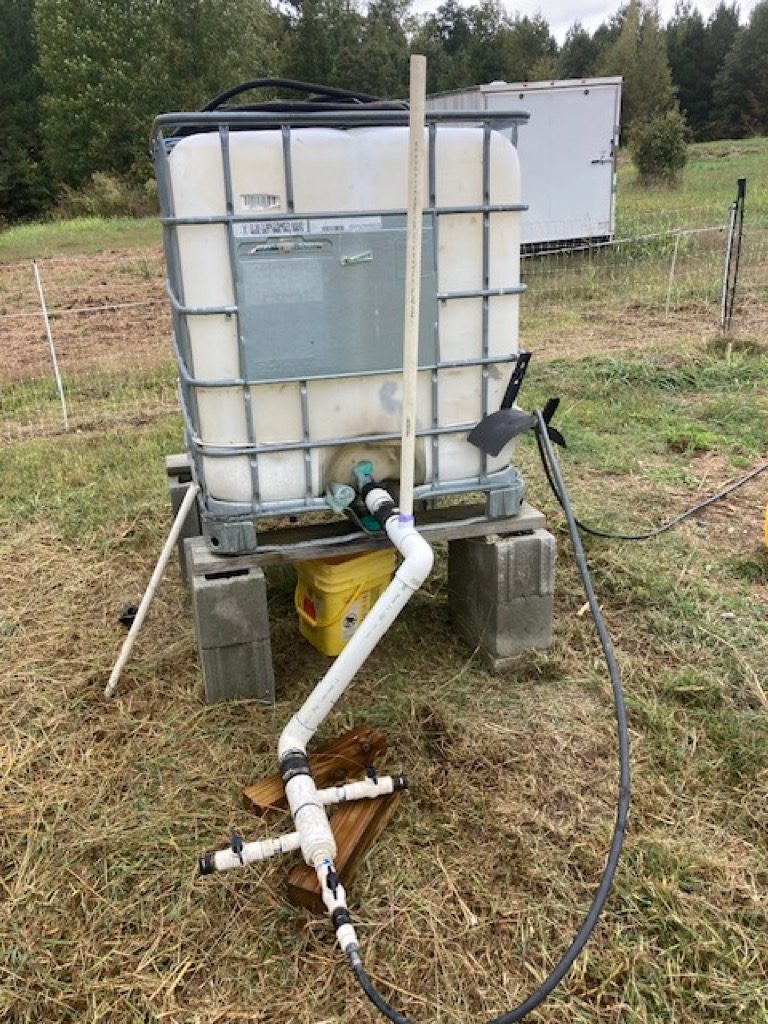
The most recent substantial addition we made to our irrigation system is installation of elevated 250-gallon totes in both of our large gardens. Remember me mentioning the late-night question of “did we turn off the water?” Early on in using the gravity system we became distracted and over-watered because we failed to move the supply from one crop to the next. Now we fill the totes from the hilltop tank and “batch water” the individual garden zones. We have a brass ball valve mounted to the IBC tote frame to control flow from the hill top tank. For occasions where less than a full tote is needed, we hang the supply line leaving the tote over an inexpensive garden hose hanger, suspended from the tote cage. In this manner we can meter the application in roughly 50-gallon increments. By the way, since switching to the totes and using them in a open atmosphere, our working pressure is less than 8 psi so we don’t need pressure reducers for the drip tubing or drip tape as we once did.
 For drip irrigation emitters to function properly and for the long term, the water used needs to be free of suspended materials. The manufacturer(s) we buy from recommended filtration for drip tube at 120 mesh and 155 mesh for drip. Mesh if you are unfamiliar with this scale, refers to the number of equivalent spacings per linear inch of a permeable sheet. Our current filtration efforts include drawing water from the hill top tank from six inches above the bottom and only at times removed from filling activity that may have stirred up solids.
Next, we have an 80 mesh filter mounted inline with the tote fill piping. I recently received a 155 mesh filter and plan to install it downstream of the 80 mesh for use in the upcoming year. We have plans to paint the tote black before summer given algae will grow in the natural source water if we fail to drain the tote during each use. Small bits of algae broke loose early last summer and clogged the ¼” squash drip lines multiple times and I know that failure was my fault for not keeping on top of tote “hygiene”. To deliver the irrigation water, we have a manifold with valves and garden hose quick connectors attached to the tote drain with 2 inch no hub rubber couplings. Currently, we can water up to three zones simultaneously.
So, what is the difference between drip tube and drip tape? Drip tube is a rigid and sturdy plastic line that connects with barbed fittings, works fine in looping configurations and currently costs around 70 cents per foot in 500-foot-long rolls. Drip tape is a flattened, highly flexible soft plastic tubing that “inflates” once water is supplied. It uses a sleeve and nut style of fittings, works best in linear configuration and only costs 8 cent per foot when purchased in 1,000-foot rolls. In our experience both are excellent options for your garden. Drip tube is more difficult to install and requires more fastening to keep it in place. Once it is in however, we can essentially forget about it until the end of the season.
We use drip tubing under our tomatoes and peppers, some sections of which are now twelve years old. By far the irrigation line workhorse for our gardens has become drip tape. It installs very quickly, is durable enough to get four years use and it is very easy to patch if we cut it with a hoe. This said, two drawbacks are that it tends to develop pinhole leaks if the line is kinked hard and its lightweight nature makes it susceptible to bunching under intense sunshine or high winds (at least prior to the plants growing tall enough to protect the tape). Our solution is to place a partially filled sandbag on the terminal end of each line. Each of these products is available with a variety of emitter spacings and emitter flows. A last benefit is that fully dissolvable liquid fertilizer can be applied via drip irrigation.
I made our fertilize chamber out of a piece of five foot long 3-inch PVC pipe by gluing a cap on one end and a female adapter sealed using a threaded plug on the other. I used a set of the garden hose quick connectors for my water inlet and outlet connections by tapping the PVC and connecting with 3/8” x 2” bass nipples. To use the system, I seal a 5-gallon paint-filtering mesh bag of soluble fertilize inside the chamber and connect the apparatus between the tote outlet and zone supply line using a short garden hose.
If you have never tried ground level watering then I encourage you to do so. The description I have just provided has evolved over 25 years and none of the work was accomplished quickly. I view our current system as an 8 out of 10 which is an improvement over our early efforts but there is still work to accomplish and improvements needed. We hope to have the orchard lines upgraded by spring and I really need a few warm days to get the garden totes painted black before we start gardening this year. We started broccoli, cauliflower, cabbage, and pepper seeds this weekend so my current focus will be regulating the greenhouse temperature.
I wish you all well for this year’s gardening seasons.