


I’m a young man who considers himself a prepper. I love to pore over survival manuals and guides, stock up on resources, and prepare for an apocalypse. It grants me peace of mind in a crazy world. One day while reading a book on self-reliance, I came across a recipe for brewing amber American ale. I thought it would be a fun and simple thing to try, and when finished I could store some for an emergency and give some away to family and neighbors, potentially earning goodwill. When I did a bit of research however, I ended up going down the homebrewing rabbit hole, checking out many books from the library, buying loads of equipment and ingredients, and eventually brewing my first successful batch.
Now, why would a prepper want to homebrew? How could this benefit a survivalist? Something that stood out to me in my research is that alcohol can be used in emergencies to extend the life of the gasoline in your car. Oddly, there are some similarities between beer and gasoline, the most important being ethanol. Ethanol is used as an additive in gasoline, and more ethanol in gas contributes to better performance. You should only put alcohol in your tank as a last resort, as it is bad for your engine. The ratio for alcohol and gasoline should roughly be 1:4. [And of course it can only be used in cars that are rated to burn E85 (or more) ethanol. That rating is marked right next to the gas cap on any recent-production gasoline engine cars and trucks.]
Another benefit is that alcohol is actually a preservative, which is why wine gets better with age. In ancient times, when water was polluted and unsafe to drink, humans would brew beer because it was safer to drink. Storing beer can be an effective thirst quencher after a long hot day of work in a post-apocalyptic world, and it will not go bad until well past your lifetime. If your beer has sediment, like mine did, then you will find that it is very rich in vitamin B, which is another added advantage of homebrewing. In a SHTF situation, standard currency may become unreliable and people may be hesitant to accept it in exchange for labor or supplies. A fresh case of homebrewed beer is an item perfect for bartering.
When I first became interested, I needed to check the legality of the task, and I spent a lot of time looking into the laws of my state. Virginia code Title 4.1, Chapter 1, § 4.1 – 200 states that an individual may brew beer at their home, just not too much, and the amount given away may not exceed a certain amount. I advise prospective homebrewers to check the law in their own states. The law did not say anything about age, which was my biggest concern, so I just interpreted it as a green light, and went ahead with my plan. I am just 15 years old. I was very surprised when my parents were on board with my idea, because I have a tendency to jump from one interest or hobby to the next. Maybe they just wanted free beer. They assumed I was interested in the chemistry behind it, which I was not. I walked to the library and checked out manuals about homebrewing and books about beer in general. I learned about the different types of alcoholic beverages, which style of hops were most commonly used in certain brews, different malts, and the difference of solid versus liquid yeast, and most interesting, water chemistry.
Water is arguably the most important part of beer, as it is over 90% of the beverage’s content. One common saying in the homebrew community is, “If you like the taste of your water,then you’ll like the taste of your beer.” A homebrewer might still want to find their local area’s water report though. You may easily be able to find it online, or you may have to contact the company directly and request one. If neither of these options work, and you are dead set on receiving information on your water, you can purchase water testing kits, or send a water sample to a lab to get a report back. There is a lot to unpack from a water report. You will need to look at the different minerals and elements, which affect the mouthfeel, bitterness, and overall taste.
You can find tablets for water from companies such as LD Carlson, and you can balance all the different minerals at your leisure. A homebrewer may want to use distilled water for brewing, but I would strongly advise against that, as the water won’t have certain minerals that are needed for yeast activation. Unless you plan to rebuild the water chemistry from scratch using distilled water, do not use it in your brew. There is a chemical called chloramine in most tap water, and it is used to sanitize against unwanted organisms, and it keeps your water drinkable. However, when chloramines react with polyphenols, a compound that both malt and hops possess, it creates chemicals known as chlorophenols. Chlorophenols have the same taste and smell as dirty swimming pool water, which are not favorable qualities in beer. One method of removing chloramines from your water is simply by adding what is known as a Campden tablet. One Campden tablet can remove chloramines from twenty gallons of water. Wait five to ten minutes for the Campden tablet to dissolve, and the chloramines will be gone.
In the original recipe I found in my survival manual, there was a list of ingredients I would need for my brew. After nagging my dad to spend his weekend off from work driving me to a brew store distant from us, he agreed. The store was perfect. It had everything I needed and more. We ran into a very helpful man who, when asked for advice, happily reiterated things I knew, but he also had some suggestions that I am glad he told me. The biggest part of homebrewing is sanitation and cleaning. This seems very tedious and boring, right? It is. In my first batch, I spent upwards of three hours sanitizing and cleaning. It is necessary because any sort of contamination could ruin a batch and weeks of work. The man at the brew shop told me about this, which I already knew, but I smiled and nodded because I did not want to seem rude. He recommended Star San for my sanitizer and powdered brewery wash (PBW) for my cleaner, which I am very thankful he did. Star San is a no-rinse sanitizer, meaning you can spray it onto your equipment and leave it. The ingredients in Star San are actually beneficial for yeast. When I got home and read more about brewing, it turned out that those two cleaning supplies are the staple for homebrewers everywhere. The three stages of cleanliness are clean, sanitized, and sterile. Making your brewing equipment sterile is not necessary. Cleaning your gear removes visible blemishes, such as dirt and dust. Sanitizing your equipment afterwards kills bacteria and other microscopic organisms that could contaminate your beer.
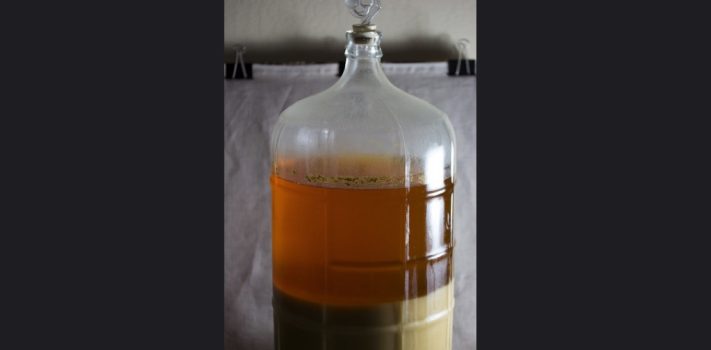
After I had my ingredients (amber ale malt, cascade hops, and US-05 yeast), I needed my equipment. Something to note: buy two packs of the yeast you plan to use, because sometimes your yeast could just have been a bad packet and turn out to be dead, and you would not know until you see that your beer does not ferment. My dad and I scoured the web for different supplies and better deals. Facebook marketplace, eBay, and you can name it, we had checked it. We found a good offer for an old Northern Brewer starter kit, and I recall awkwardly meeting the elderly woman who was selling the set in an Ace Hardware parking lot. I tried my first-ever attempt at bargaining. The woman could tell I was nervous, rejected my counteroffer, and I bombed horribly. I paid full price for the kit, but headed home happy. The kit had everything I would need, from a brew pot, a giant brewing spoon, tubing, siphons, airlocks (which are needed because even air can contaminate a batch, but the CO2 produced by the beer needs a way to exit), and buckets for storing the brew in as it ferments, among other things. I was concerned about the fact that I was going to be using buckets instead of carboys, which are basically big glass bottles, because the buckets would not be airtight which, as I previously mentioned, allows for outside air to get in and potentially contaminate your batch. A benefit to using buckets over carboys is an easier cleaning and sanitizing process.
When I had a long weekend off from school, the time was right for brewing. Unfortunately, I would be brewing while my high school was having our homecoming, and I would miss hanging out with my friends. In the morning we headed to my grandmother’s house to help with yardwork. After completing the list of chores she had given us, we headed home, and I showered. Armed with fresh ingredients, excellent equipment and most importantly, knowledge, I headed to the kitchen for my first shot at homebrewing. I donned an apron and safety glasses, as I did not want any beer to splash in my eyes. The steps of brewing go as follows: Cleaning and sanitizing, brewing, fermentation, and finally, bottling. As I stated before, I spent three hours cleaning and sanitizing. The recipe was for a one-gallon batch, but a standard beer batch is five gallons. I brought the water to a rolling boil as the instructions required, and carefully measured out the right amount of hops and malt. I poured them into the pot and stirred, although stirring is not necessary. What arose from this action was the most fetid aroma I had smelled in a long time. I rushed upstairs to grab a mask, which offered little relief against this stench.
It took a few hours before I brought the pot off the burner. You are supposed to have a big bucket full of ice to put the hot pot into to cool it down, as the high temperatures would kill the yeast. A brewer will quickly learn how finicky yeast is. I have found that one does not need to buy all this ice just for the sole purpose of cooling your wort (hop and malt mix), you can simply fill a bathtub with cold or even room temperature water, and it will have the same cooling effect. Once I cooled my wort, I siphoned it into one of the brewing buckets. You will want to siphon your wort or at least funnel it into whatever device you use for brewing because there is a lot of sediment at the bottom of the brew pot, and you do not want that in your beer.
(To be concluded tomorrow, in Part 2.)