


I’ve been reading SurvivalBlog for more than 10 years. God willing, I hope to continue for another 10 years. I’m not sure how I found this blogsite, but this is the first site I go to every day. I have always wanted to write an article for SurvivalBlog. From this blog I have gained some valuable information over the years such as getting out of debt, saving my nickels, buying gold and silver, and numerous how-to articles.
This article describes how to select and keep older vehicles running. With so many concerns today about an EMP attack from another country or solar flares knocking out electronics it would be nice to have an alternative means of transportation if the SHTF. Bicycles and horses are great alternatives, but you can’t beat the utility of a motorized vehicle.
Most cars today come with stainless steel exhaust, engines than can run 200,000 plus miles, and need very little maintenance. Modern vehicles can drive down the highway at 75 to 80 MPH with no problems and have all the comforts of home. The only problem in my opinion is they are loaded with electronics. Some of these are unnecessary. Sensors can fail and make your vehicle not run right. Without a computer and the right training, it can be impossible to repair it on your own.
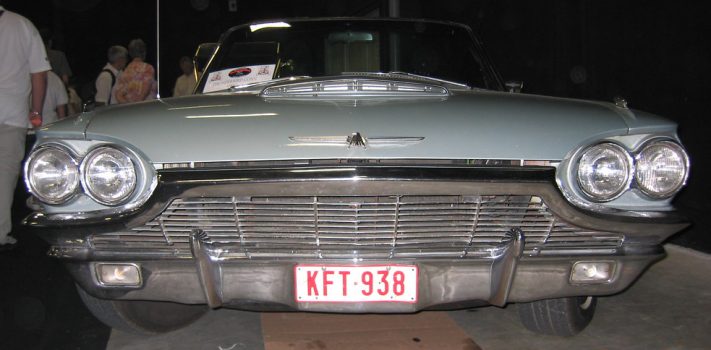
This is where older vehicles from the 1950s, 1960s, and 1970s shine. If you have the mechanical ability, you can repair them on your own. Brakes, exhaust, tune-ups, starter, water pump, alternator replacement to complete engine replacements can all be performed at home with some basic mechanic tools. I have replaced an engine from a 1960s Chevy using a come-along off a large tree limb. Most of the older vehicles had very little stuff under the hood. You could sit on the fender and replace the spark plugs. Ah, to be young again. High School kids could spend a weekend working under the hood and feel good about the repairs they made.
One reason to buy an older classic vehicle is the lack of electronics. No MAP sensor or oxygen sensor to fail on you. No computer to die and disable your otherwise perfectly good engine. Another reason is if they are well maintained they can go up in value. Imagine that a tangible investment you can drive and enjoy. A well-maintained vehicle can last many years.
In most states, your older vehicle can be registered as an antique. Which is much cheaper than newer vehicles. I register 2 old 1960s vehicles for 38 dollars per year. When looking for an older vehicle two-door cars are more popular and expensive than 4 doors. I drive what I like rather than what is popular.
Basic Repairs
So, let’s get into what to look for and how to do some basic repairs. A quick disclaimer, I am not a professional auto mechanic. My experience with cars comes from years of getting my hands dirty and reading and learning from books and Youtube. I did go to auto mechanic school back in the early 80s after high school. I never had much of a career as an auto mechanic. Most of my experience is from using a car manual in my garage.
This article will be mostly on the mechanics of older vehicles. Auto bodywork is a whole different animal.
You will want a vehicle that has a good body and frame unless you are good at auto body repair. If you don’t feel comfortable or you’re not sure what to look for, then you might want to bring a mechanic with you or bring it to a mechanic. It could be money well spent. If someone is selling a car and they have a problem with you bringing it to a mechanic to inspect, then you probably want to stay clear of that car.
The first thing is to look under the hood. Look for general condition of belts hoses and cleanliness. Before even starting it check the fluids. Engine oil should look clean and be full. You would be surprised how many people don’t check or change their oil. Next, pull the transmission dipstick if it’s an automatic. The fluid should be a cleanish red color. Smell it. If it smells like rotten eggs then it could need to be rebuilt. If it’s a standard, you will not be able to check the fluid level without crawling underneath. Usually, it’s done when the vehicle is on a lift. Check the brake fluid, power steering fluid, and radiator fluid if the engine is cold. Never open the radiator cap if the radiator is hot. Crawl underneath on both sides. Do you notice excessive rust on the frame or body panels? How about fluid leaks? Is there a puddle under the car? How about fluid all over the bottom of the engine and/or the transmission?
Now you’re ready to start it. Unlike newer vehicles, you will need to pump the gas several times before turning it over to set the choke. Let it warm up and idle. Most sellers will start the vehicle and let it warm up before they show it to a potential buyer. That’s okay, you just won’t know how hard it is to start it cold. The engine should run smoothly.
Is the exhaust loud or leaking? While it’s idling check the transmission fluid level. The engine needs to be running to check the transmission fluid level. Take it for a test drive. Does it shake while going down the road? When you give it gas, whether it’s a standard or an automatic does it slip? (The engine revs but it doesn’t seem to go.) When you step on the brake does it pull to one side or sound like the brakes are metal-to-metal? The good thing is all these things can be fixed. Use anything you find wrong as a bartering tool.
So, you’ve decided to buy it. Congratulations. Now the fun begins. Get a manual for the vehicle you have decided to purchase. The eBay auction site has just about any manual you can think of for classic vehicles. Chilton or Haynes manuals are easy to understand. They are comprehensive manuals that describe and illustrate most repairs on your vehicle.
Tune-Up Procedures
Let’s start with a tune-up. For 21st-Century cars, the “tune-up” is limited. Usually only need to change air filter, when dirty, and spark plugs after about 70,000 miles. But on pre-1980s vehicles, you may need to replace distributor cap, rotor, spark plugs, spark plug wires, PCV valve, air filter, gas filter, points, and condenser, set the timing, adjust the dwell, and adjust the carburetor. There are many websites, and Youtube videos on how to perform a tune-up on your specific vehicle. I will attempt to describe a tune-up for one of the most common engines out there, the Chevy V8 350 Cubic Inch Displacement small block. First, you will need these parts for your engine: Distributor Cap, rotor, spark plugs, spark plug wires, PCV valve, air filter, Gas filter, points and condenser.
Next, you will need to know the spark plug gap, the point gap, the dwell angle, the idle speed and the timing setting. This is where a manual for your vehicle comes in handy.
The tools you will need are a flat blade and Philips head screwdrivers, spark plug socket. Either a 5/8” or 13/16” socket depending on the spark plugs. This is a specialty socket that has rubber insert to protect the spark plugs while removing and installing them. You can use a regular deep socket if that’s all you have just be careful not to crack the spark plugs when reinstalling them. You will also need a ratchet and a small extension. Feeler gauges, a tach/dwell meter (Harbor Freight $42) and a timing light (harbor freight $32) at the date of this article. I like to buy quality tools that last a lifetime so I would probably get them at the same place auto mechanics get them. But in a pinch Harbor Freight will work.
I like to start by removing the distributor cap and the rotor. It is very tempting to remove the distributor from the engine to perform the following work. If you have never removed a distributor before, then I recommend not removing it. It is on splines and if you don’t get it back in the exact same location it may not start. And if it does it will be way out of timing, and you will not be able to get it to run correctly. Also, when you go to restart the engine after the tune-up is complete the timing should be close with only a minimal adjustment if the distributor is not removed. So don’t remove the distributor unless you absolutely must.
To remove the cap push down on the hold down screw and rotate ¼ turn. Leave the wires on the cap we will be replacing them one at a time, so we don’t mess up the firing order. More on that later. Remove the rotor by removing the two screws and pulling it straight up. With the rotor removed it is time to remove the points and condenser. These can either come as a unit or separately connected with a wire.
Most classic cars have had their old points and condenser distributor replaced with an electronic distributor. If that’s the case, you can skip the part of adjusting the point gap and setting the dwell angle. If you are worried about an EMP wiping out your electronic ignition then you should buy and extra electronic distributor and put it in a Faraday box. If you still have the old points and condenser you don’t have to worry about it. Learning how to adjust the dwell angle could be the difference between having a car that runs or not. If you want to gap the points and adjust the dwell angle perform the following.
You will notice the shaft of the distributor has a cam on it. Install the new points and condenser. Get your gap setting from your manual. My gap setting for this example is 0.035 inches. Set the gap by placing a socket on the crankshaft and turning the engine over until the distributor cam lobe fully opens the contacts on the points. Set the gap to your engine specifications using a feeler gauge. You can also loosen the distributor and move it clockwise and counterclockwise instead of rotating the crankshaft. The only problem is you just changed your timing and made it harder to start the engine. By rotating the crankshaft your timing will stay close to what it was when you started. Timing will still need to be checked and adjusted. This is an initial gap that will get the engine running. You will be using a dwell meter to set the dwell when the engine is running.
In a pinch, I have used the cover on a book of matches to set the initial gap. That is if you can find a book of matches anymore. On most Chevys, there is an Allen screw to set the gap. Other manufacturers don’t have this feature so you will need to adjust them as described above. This could mean you need to gap the points, place the distributor cap back on, start the engine and check the dwell. Rinse and repeat until you get the dwell angle correct. Once the points are gapped this is a good time to check the centrifugal advance weights, located over the points on the end of the distributor shaft where the rotor attaches. You should clean the weights, make sure they move and give them a little lube.
Now it’s time to install the rotor. It only goes on one way. Make sure it is all the way inserted and tighten the screws. Place the new cap onto the distributor and attach it.
Remove one wire at a time from the old distributor cap and follow it to its corresponding spark plug, removing it from the retainers that hold it in place. Unplug the wire from the spark plug. Grasp the wire as close to the spark plug as possible, Twist the rubber boot as you are removing it so it doesn’t come apart. Now remove the spark plug. Careful not to let anything fall into the hole. Check the spark plug gap on the new spark plug. Apply a thin coat of never seize on the threads and install the new spark plug. This will prevent the spark plug rusting in place. Most manufacturers recommend torquing the plug. If you don’t have a torque wrench, then feel for “snug tight” and a little more. Place a new spark plug wire or reuse the old spark plug wire back on the spark plug. Twist it onto the spark plug and make sure it is fully seated. A bad connection can make the engine run bad. Make sure you route the wire into the same retainers it was removed from. By doing only one at a time it will ensure you don’t mess up the firing order. Place the other end of the spark plug wire onto the correct distributor cap post. Continue replacing the other 7 spark plugs and spark plug wires in the same manner. Make sure you use all the retainers that hold the wire in place, so it doesn’t rub on anything or lay up against the exhaust manifold and create a short, causing the engine to run poorly.
(To be concluded tomorrow, in Part 2.)