


“Bees do have a smell, you know, and if they don’t they should, for their feet are dusted with the spices of a million flowers.” Ray Bradbury, Dandelion Wine
It’s January and getting close to time to get your bees ordered for anyone wanting to try their hand at beekeeping this year. Most bee suppliers have begun taking orders for bees and they typically sell out by late March so now is the time to start looking more seriously into whether or not you want to want to give beekeeping a shot.
Many people want to get into beekeeping until they see how expensive the startup costs are. This article shows you how to get started as frugally as possible instead of spending the $500+ which books and catalog companies suggest you to spend. If you have DIY skills, or if you know someone with DIY skills, you can get started for around $150. And if you’re good at scrounging lumber, or have enough of the right stuff laying around already, then you can keep it under $100. Even if you do have to purchase everything to get started, this article will provide some insights on how to do so while keeping costs to a minimum.
Is Beekeeping For You?
For me, beekeeping is a lot of fun. I’ve really enjoyed my bees from the self-reliance aspect, the scientific angle, and of course the honey. My bees are very gentle sitting on my finger when I rescue one from the rain barrel and they’re fun to watch up close as they’re working my garden and orchard. And everybody loves honey! It’s an excellent barter item now and in a TEOTWAWKI world it can only get better after most sweeteners become a thing of the past.
Beekeeping isn’t for everyone. The biggest reason for keeping your first-year costs as low as possible is that you may discover for one reason or another you don’t want to continue with beekeeping. It would be a shame to spend $500 only to find out it’s not your cup of tea. If you later discover you absolutely love beekeeping, you can upgrade everything the second or third year. So, let’s keep it cheap while you’re sticking your toe in the water the first time.
We’re all familiar with the concept of starting out with a package of 25 strawberry plants and a few years later they’ve expanded into a huge, beautiful berry patch. Bees are the same way. You can start out with a single beehive and once you figure out the difference between a drone and a doughnut, you can multiply your hives and catch wild swarms to boot. I look at beekeeping as one more skill on my TEOTWAWKI resume to provide food and barter after the grid goes down, as well as a valuable skill to teach to others.
Let’s Get Started
What’s most fresh in my mind from my own start seven years ago is all the expensive advice and conventional “wisdom” I followed from the experts. What I’ll show you is Plan B, Unconventional Wisdom, and how I’d do things differently if I were starting all over again. I spent $500+ my first year and soon wished I hadn’t, plus I ended up with an inferior product. If I were starting all over again, with my DIY skills and current methods, I could be back in business for under $100.
So, here are my recommendations. As you begin pricing things from catalogs and websites, be aware that your local farm store probably has a line of beekeeping supplies on hand as well. My local store has a complete aisle and even my small-town hardware store has a small section. I personally prefer hard copies of catalogs which most suppliers offer, they’re much more fun to browse through.
Beekeeping Books
The first thing I recommend is to read Beekeeping For Dummies ($14) as soon as possible. It’s the only “Dummies” book I own and it is exceptional. It is clearly written, with a very complete index, and loads of illustrations. It covers everything you’ll need as a first-year beekeeper. The most basic information is in the first few chapters so read those first to help decide if you really want to proceed with beekeeping or not.
A word of caution: last year a family member started beekeeping and felt overwhelmed with so much new written information. I told them to read the book and to keep in mind there wasn’t going to be a quiz afterwards! Read what you can absorb, then read some more later. The first six chapters are the most important for getting started and I wouldn’t worry about the chapters in the latter two-thirds of the book until it gets closer to the time when your bees arrive.
Buy or Build Your Own Hives
There are plenty of beekeeping catalogs, websites, and farm stores which sell beehives so check those for pricing if you’re buying instead of making your own. Be sure to check different sources as prices can vary wildly. Also, check your local newspaper. Even though the chances are slim of finding any ads, that’s where you’ll most likely find the best bargains of all. I see a few ads every spring in my own local weekly newspaper and the Penny-Saver types of free newspapers. Most people get started with store-bought beehives but if you have basic woodworking skills, DIY is less costly and an easy enough option.
For the DIY folks who don’t have a woodshop, less expensive beehive kits are available where you assemble all the components yourself.
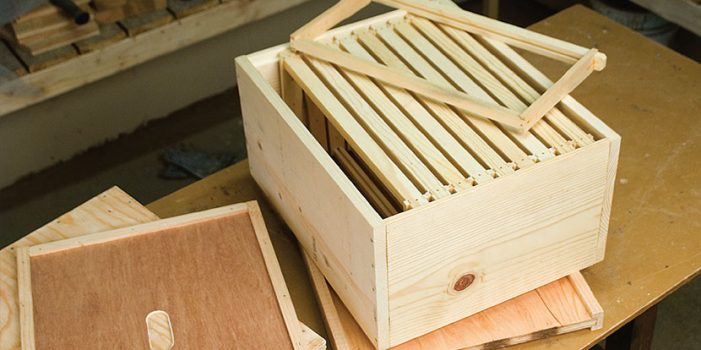
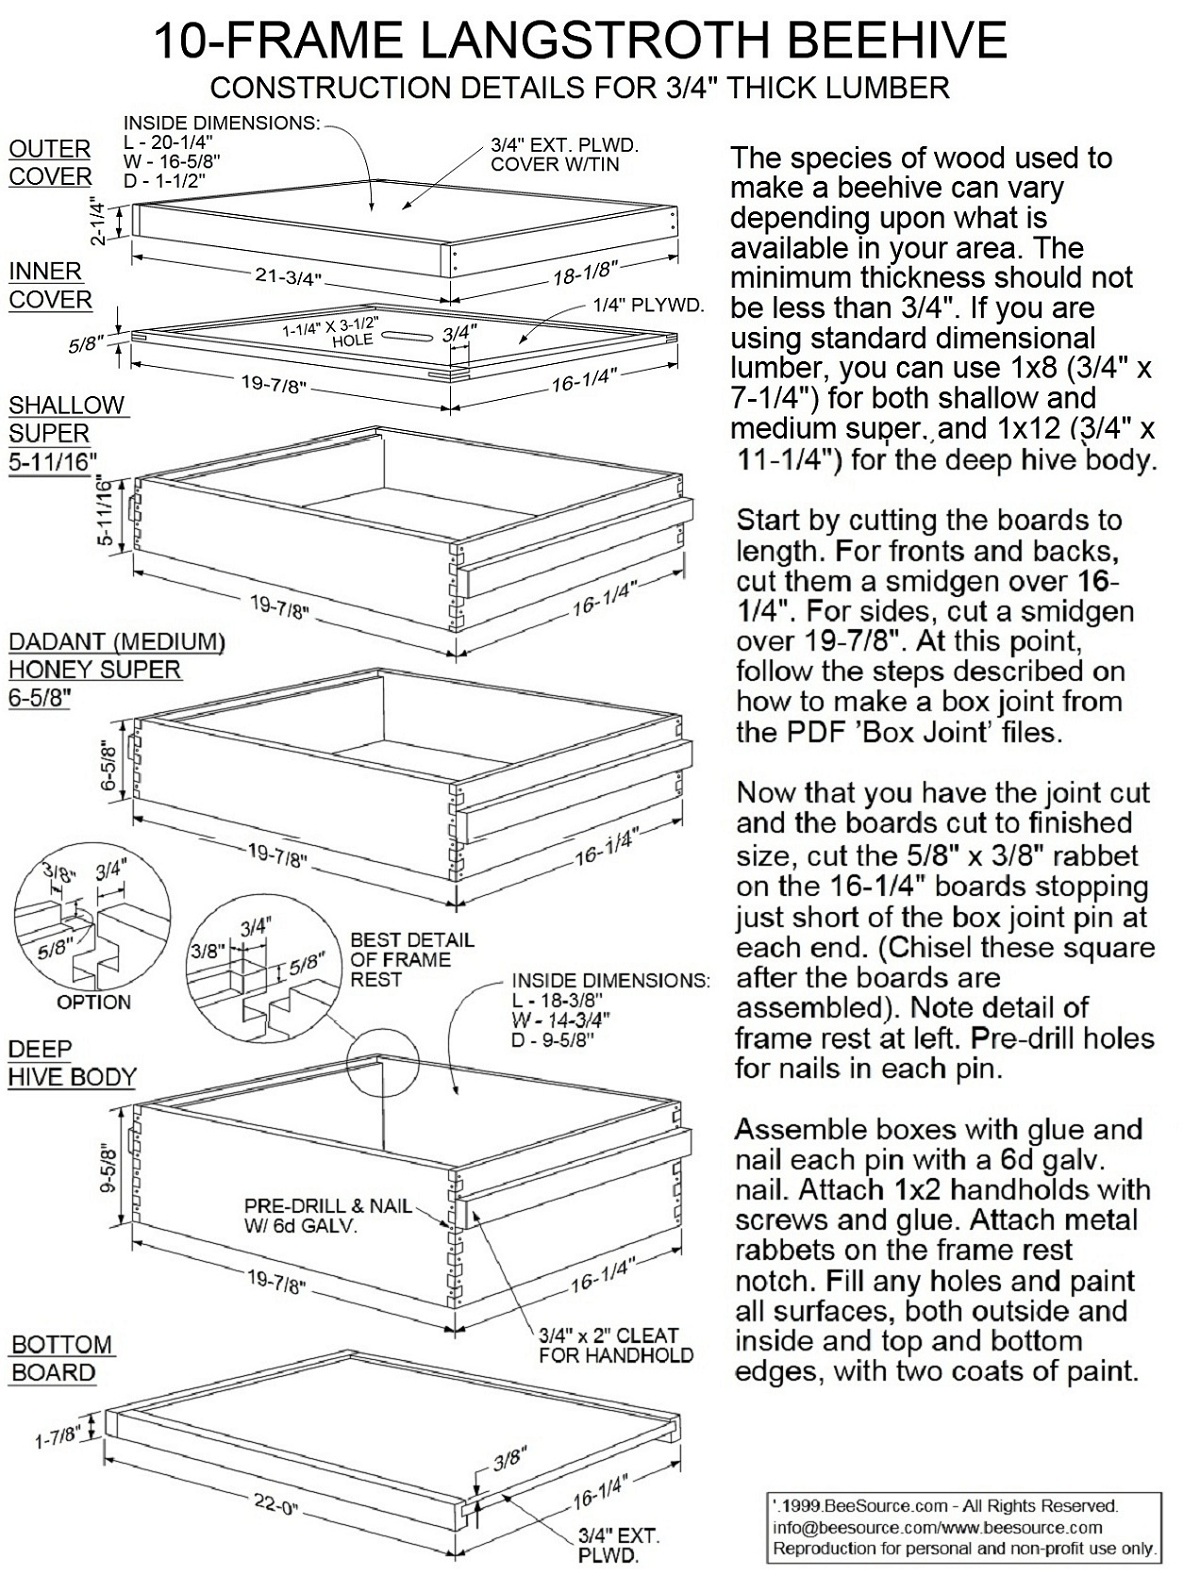
I started with Langstroth hives using free plans from BeeSource.com. They’re downloadable detailed plans to make all the beehive components I’ve needed. A sample is seen in Photo 1 and they also have plans for other types of beehives.
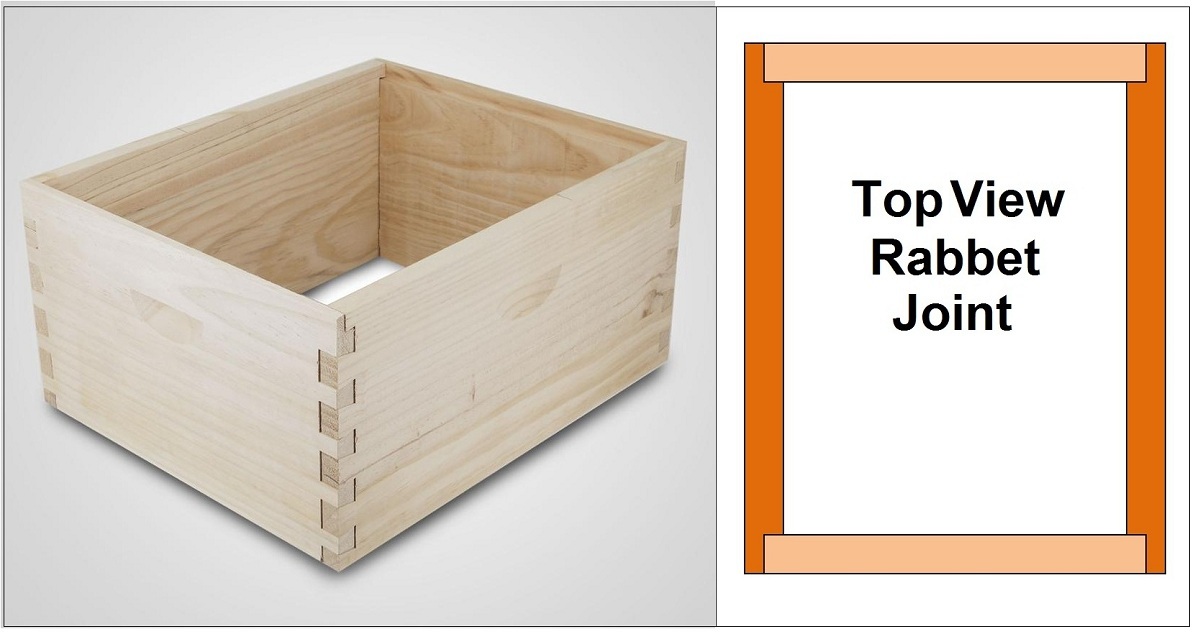
For DIYers, don’t let those fancy box joints with their overlapping fingers scare you away from making your own hives. I use simpler rabbet joints held together with sheetrock screws and waterproof wood glue, and my hives are as strong as any you can buy commercially (Photo 2, Photo 3 close-up).
Or, you can skip fancy joints altogether and just butt the ends together and join them with glue and screws. My beehives also have handles with a ¾” wide grip, not the ⅜” wide cutout grip which is found on commercial hives. The cutout handles make it easier to stack beehives on pallets for transportation to pollination areas, but they’re not as secure for lifting heavy hive bodies.
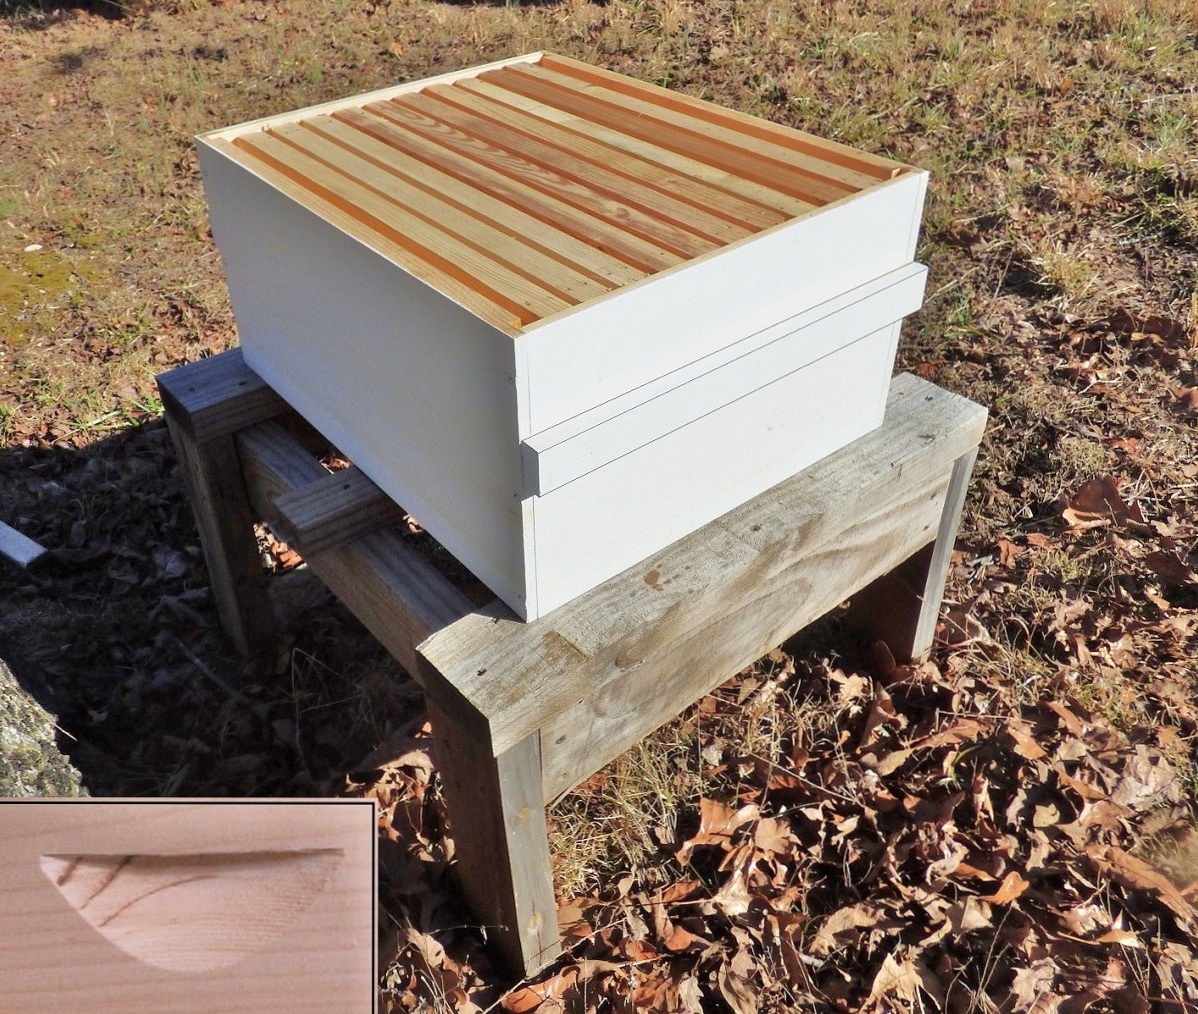
Photo 3 shows the handles I use with the inset showing the cutout types used in commercial hives. The photo also shows the DIY beehive stands I make from free scraps of 48” treated boards which lumber is stacked on when it arrives at the hardware store. Do an online search to find other beehive stand options. Many beekeepers just use cinder blocks. Keep your lower back in mind when deciding on the final height off the ground your hive is resting at. The less bending over you have to do the better.
One Hive or Two?
One area where the two-is-one-and-one-is-none rule doesn’t apply is in determining how many hives to start out with. The biggest change I’d make if I were beginning over again would be to start with just a single beehive instead of two. That alone should more or less cut your start-up expenses by 40%. Conventional wisdom says two are best for beginners in case you see something uncertain happening in one hive, you can look in the other to get a second opinion. I never once had to do that my first year so in the interest of frugality, I recommend you skip conventional “wisdom” and go with a single hive when starting out. If you do have an issue or you’re not sure what you’re seeing, the problem is likely covered in your Beekeeping for Dummies book, or easily researched online. Most of “problems” I saw my first year turned out to be inexperience, not problems. Another benefit to joining your local bee club is not only for troubleshooting if necessary, but if you ask one of the members they’ll likely give you a tour of their apiary and show you what to look for each time you do an inspection.
Therefore, I recommend sticking with just a single hive your first year if you are trying to keep costs to a minimum.
If you already have tons of free lumber laying around and you manage to get some free bees as mentioned in the next section, it may be worth your while to build two depending on some other factors further on in this article.
Package Bees, Nuc, or Free Bees?
There are three basic options for getting bees to populate your first hive.
Package Bees — The most common way to buy bees is called “package bees,” available from local sources as well as from catalogs and online bee suppliers. Package bees are just that, a package containing a small cage of loose bees that you put into your hive. Some of the more popular companies such as Mann Lake are currently charging, depending on the variety, between $150 and $195 for 3 lbs. of bees including a mated queen. Do an internet search to see where your closest supplier is and what their prices are. Often times your best bet for package bees is to join your local bee club and order from the local supplier at the club rate. My local guy sells a 3 lb. package for under $100 to bee-club members, which is then delivered in May. Again, these must be ordered early before they sell out. Ordering is typically no later than March and much sooner when possible just to be sure they won’t sell out.
Nuc — The second option is to order a nuc (pronounced “nuke”), which I don’t recommend unless you order late and they’re the only option left. They’re more expensive and you’ll most likely end up with old frames and new regrets. A nuc is a miniature plastic or cardboard beehive containing five frames of bees. It’ll have a queen, workers, and frames with developing bees so you’ll be further ahead than if you start out with package bees. The downside is, they’re more expensive (typically $200+) and may contain a bunch of ancient ugly mismatched frames as mine did. Most companies won’t ship a nuc and sell them as pick-up only. Personally, I don’t see a big enough difference by the end of the first year to make a nuc worth the extra cost.
Bee Swarm — The third option for populating a beehive is my favorite. If you have more patience than pesos and want to keep things as frugal as possible, you can build or buy a swarm trap. When bees start swarming in April/May your trap may attract a swarm and you’re in business. The risk of course is that you won’t catch a swarm and you’ll have to wait until next year to begin your beekeeping adventures.
I built my first swarm traps out of lumber scraps I had laying around my shop. Later ones I made from scraps covered with inexpensive ¼” luan plywood for a total cost of around $5 each. HorizontalHive.com has a good how-to article and using innovation, you can make them much cheaper and lighter as I do. The first year I used two traps and caught a swarm which is still one of my strongest after four years. I now use eight traps and spread them out as far as possible in different directions using trees on neighbors’ land and a local campground five miles away. Last year I caught three swarms.
For the DIYer, a good way to make some money is to sell complete DIY hives containing an established swarm. I generally consider mine established once the queen is laying and the workers are producing lots of honeycomb.
In Photo 4 you’ll see there are few things in beekeeping as exciting as watching a swarm arrive!

Once you have your first hive, the second year you can split that one to make two. It’s a very simple procedure explained in Beekeeping for Dummies and many other sources online.
Procrastination Doesn’t Pay
I can’t stress enough that you should have your beehive, tools, and bee suit PPE on hand long before you’re scheduled to receive your bees. You want to be prepared ahead of time so you’re 110% ready when your bees arrive. With their new home already set up you can get started on your new adventure with much less stress and less chance of killing your bees.
Beekeeping Costs and Equipment
When it comes to equipment, I’d skip all those fancy bee suits your first year and see what you may already have laying around the homestead first. If you discover later that you’re going to continue with your bees in year two, then you can upgrade. I’m in my seventh year and still haven’t upgraded, mainly because what I have is working just fine.
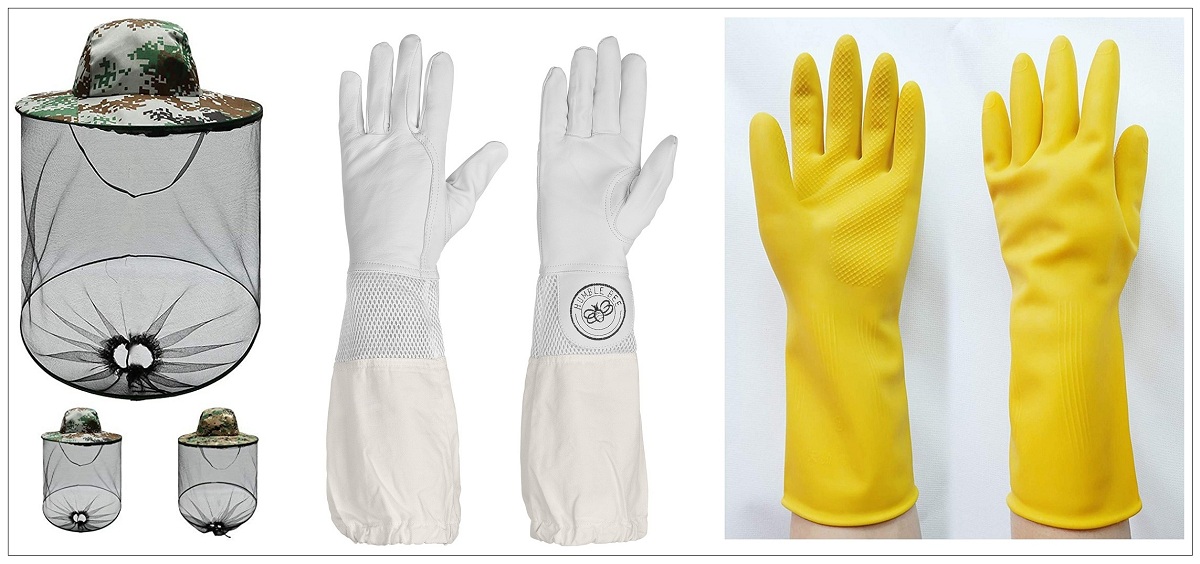
For the main covering I use a very lightweight hoodie which I pull over a tee shirt. I pull the hood drawstring so just my face is showing and tie a length of parachute cord around the waist to keep bees from crawling up underneath. I put elastic bands around my ankles so my jeans are tight against my boots. To complete it, I have long-sleeved beekeeper’s gloves and a beekeeper’s veil (Photo 5). Mine looks like a camo boonie hat ($15) with a drawstring to close the mesh around your neck to keep the bees out. Instead of spending $100+ on a complete beekeeper’s outfit, my entire setup cost $25 for gloves and veil. Don’t go too cheap on the veil, many are just mosquito nets with just a thin elastic around the neck. A proper veil will have a drawstring to close on the neck and a wire hoop near the bottom to keep the veil away from your face. Gloves can be leather beekeeping gloves ($10+) or some beekeepers use inexpensive dishwashing gloves.

The only two pieces of hardware you absolutely must have are shown in Photo 6: a smoker ($16) and a hive tool ($7). You can also buy them together as a pair for $17. The hive tool is specially made so spend the money to buy one. Bees glue everything together with “bee glue,” aka propolis. During each hive inspection, the inner cover cannot be lifted off and the two boxes cannot be separated without a hive tool. The ends of the frames will also be glued together with propolis and the tool is required to separate them. Commercial smoker fuel is unnecessary and I use small scraps of wood from my woodshop as well as twigs from the yard, cut up into 3-4” pieces. Once the smoker is going I also add cotton material from old jeans which smolders very well. Don’t use anything toxic like treated lumber or plywood glued together with unknown substances. Some beekeepers say pine needles make the best smoker fuel.
I would recommend you make do on all other equipment until you are certain you’re going to enjoy beekeeping. Once you get some experience and find out whether or not you and your bees are going to get along, then maybe it’s time to spend more money.
The Super Frugal Method
For the super-frugal, the most inexpensive way to get into beekeeping is to build a complete beehive and stand from repurposed lumber, then spend $42 on your gloves, veil, smoker and hive tools, and finally, build a swarm trap from scrap wood or ¼” luan plywood for around $15. For less money than most places are charging for a single package of bees, you can be in business. In 2021 I started constructing many of my beehive components from bookshelves and other wood items bought at estate auctions and thrift stores. Old hardwood sewing machine cabinets lacking the sewing machine can typically be had for $1.00 and provide not only lumber, but good hardware as well. Using these repurposed materials I can build some of my beehives for under $10. For any wood items you are repurposing be sure the wood is real and not laminated particle board.
Conclusion and Summary
If I could do it all over again knowing what I know now, this is exactly how I would do it without the slightest hesitation.
In summary, in order to keep everything as frugal as possible here are the steps in chronological order:
1. Again, get a copy of Beekeeping for Dummies and read through the basics in the first six chapters, right now, this week. There’s no quiz afterwards so don’t worry too much about not getting it all on the first read-through.
2. Research to find where you can get bees for the best price, preferably in your area to avoid shipping costs and to get to know your local supplier. Your local bee club will be a good resource for this.
3. Next, see if you can put together a bee suit with clothes already around the house. If not, buy the components to make one or purchase a commercially made suit.
4. Buy your hive tool, gloves, and smoker.
5. Order your bees as early as possible before they sell out in March. Your bees won’t be ready for pickup or delivery until about May.
6. If you’re using traps, get those made or purchased.
7. Get your beehives constructed preferably by the end of February or order them online early to be sure some of the components don’t sell out.
8. And finally, have your hive set up on its stand two weeks before your bees arrive or before you hang up your swarm traps. Once your bees show up, introduce them to their new home and begin your journey as a beekeeper.
If you decide to try beekeeping this year, good luck and have fun! Not only is it very rewarding and a good skill to add to your prepping resume, but you’ll have 60,000 new friends as well.