


I recently finished reading another set of doom and gloom novels. I like these stories as they give me ideas of what to do or options to consider if the need arises. After I put the book down, I thought about the equipment that was used and if it was relevant to my needs. I pulled out my go bag and dumped out the contents. What a revelation to see some of my mistakes. There were three major areas of potential catastrophe. The first was that I had the wrong clothing for the season at hand. The second issue was the spoiled and leaking food. The third area involved my selection of batteries for things like a light and small radio. Most of them were dead. This needed to be remedied.
There is no point in having a survival bag if you could not survive on the contents. To remedy this problem, I have made reminders on the wall calendar to review the contents of my bags every three months. That will take care of the clothing and food items. I needed to think about my battery selections. I did not provide any recharging ability without access to 120-volt AC power. I started researching what was available and what would be easily rechargeable on the trail.
Switching to Lithium
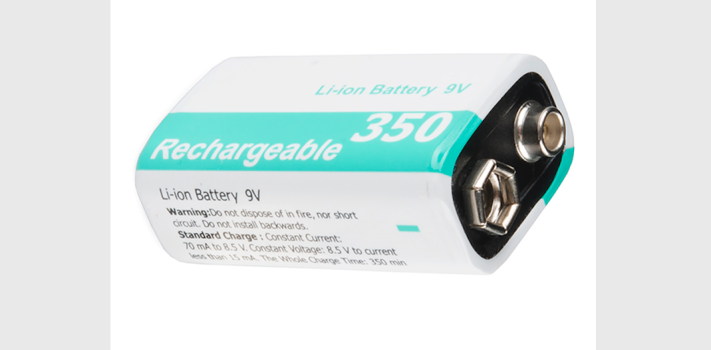
The best solution for me was to switch over to Lithium-Ion (Li-Ion) batteries. At the end of this article, I will include some links to various batteries and chargers that I found on Amazon.com. You may find better sources in your research. I was surprised to find 134a and button batteries available in Li-Ion, and chargers for those were also available. I found the following sizes: 18650, 14500, cr123a, and 2032 button cells, along with C, D, and 9-volt batteries. I did not need the C, D, and 9 volts batteries in my bag, but I have uses for these batteries at home. The C, D, and 9-volt batteries can be connected and charged using a USB cable. They have either a pop-up top or a USB port on the side to allow for the cable to be connected. The charge control circuit was built inside the battery. One note to mention about the 9-volt battery is that it does not charge up to a full 9 volts but a little under. So if your electronic gear is sensitive to reduced voltage, then this may not work for you.
I stayed away from nickel-cadmium (Ni-Cd) nickel-metal-hydroxide (NiMH) cells. I generally have had bad luck with these two types as they either were not charging or were weak in power. The Li-Ion cells of the 18650 size are typical in some of the small, high-powered mini flashlights, (‘Torches’ to SurvivalBlog’s British readers.) The 14500 size is a replacement for the AA size. They also have AAA sizes, but I don’t use them in any of my gear. The big surprise was the availability of cr134a and 2032 button cells. Those popped up a lot in the stories I have read where the character was worried his night vision gear would not work or other items that used the button cell or 134a battery.
I looked up some articles on Li-Ion battery design to see about proper charging methods and longevity. It seems they have a long shelf life and hold their charge very well. I have included a couple of links for your study. If I read the info correctly, the batteries are mostly built using one cell. The important part of this cell design is the min and max charge for this type of cell chemistry. The maximum safe voltage per cell is 4.2 volts, and the minimum charge is 3.4. At 3.4 volts, the battery will cut off if it has built-in circuitry. Using the battery below 3.4 volts can damage the cell. The nominal voltage is 3.7 volts. That’s one of the reasons when you put a 14500 battery in your little flashlight; it is so much brighter, 3.4 volts compared to 1.5 volts.
The best charge rate is .5 of the battery capacity per hour. Using a home charger, they say charging takes 2-3 hours. With this information, I looked at the various chargers that were available; none that I saw had a display in volts. Some had simple lights (red/green) or a multi-step light bar to indicate charge. Another feature I used in selecting my charger was the ability to charge from a USB cable. I will describe this in more detail later.
Get A Volt Meter
To monitor the different batteries’ voltages, I will use a small cell phone-size volt meter. This way, I can test each cell to determine the state of charge. See the links for more information. One additional item to consider is that when you purchase a bunch of these batteries, some don’t work, more often with the less-expensive batteries. I plan on buying extra batteries and then charging, discharging, and repeating a few times to see if I got a dud in the batch. By doing this and measuring the voltage, you can identify/segregate the good from the bad. It is better to do this at home than out in the sticks when you really need to rely on them.
Now that I have selected the batteries that I will use and the chargers for each type, you will see that some chargers will charge all of the above batteries except for the button cells. You will need a separate charger for the button cells. Don’t worry about the extra weight, the chargers are very light. They are so light I will carry an extra. With the above in mind, I thought of a charging source. A small folding solar panel came to mind. I searched for backpacking equipment and found many models made for hiking and camping. I chose a model with a USB output of 5 volts and a plug with a 12-to-13 volt output. By using the solar panel and a USB charger, I now have the ability to charge my batteries out in the wild.
I will have to do some tests on charging times as I expect the time to charge the batteries to be longer using the solar cell arrangement. My thinking is that a charged battery, while taking longer, is better than a dead battery. Another option for a source that I found is using a Ryobi tool battery. An inverter adapter is available that snaps onto the top of the Ryobi battery that has both a 110-volt AC and DC USB-voltage outputs. The drawback to this is recharging the big battery out in the sticks and its considerable weight.
With the new battery knowledge I gained, I thought of different items that could be useful. The first item that I thought of was an old, unused smartphone. I have a couple that I keep loaded with helpful apps. As my phone could be charged via a USB cable, it made it a smart choice to add to my gear. The weight and size are minimal.
In deciding which apps could be used, I set my phone’s Wi-Fi off or airplane mode so that the Internet was not available. I then reviewed each app to see if it would work without an Internet connection. I then segregated the apps into different pages to organize them so I would know which were available offline. You will find that many apps need to be connected to the mothership to work. Some of the more useful apps were shortwave frequencies, first aid, edible plants, game processing, survival skills, topo maps, etc. You can complete your own list. If you want something with a larger screen, then a small tablet could be carried. I will add another tip I heard about: If you’re out on the fringe of a cell phone signal, a text message may get through when a voice call won’t. Remember that cell phones with batteries installed are easily tracked.
EMP Protection
So now that you have batteries, chargers, and possibly a smartphone, you need to protect your gear. I selected anti-static bags in various sizes to put my items in. I used two bags on each to ensure survivability. After all, one of the reasons that you may need your bugout bag is the possibility of an EMP strike or an X-Class Carrington Event-scale solar flare. Though the odds are very low, the bags take up very little extra space and have almost no weight.
In closing, keep in mind the electrical gear you want to carry and avoid anything with batteries that you don’t carry or are unable to charge. If you do require an exotic battery, then carry extras.
P.S.: Don’t forget to pack USB cables!
For the week that this article runs, I will turn on free download for some books I have on Amazon. The price is right: free. Just try to leave feedback. Search for ‘Spy Valley Run‘ by Kevin R. Berg to find all six books.
Here are links for items mentioned in the article:
Optimal voltage for Li-ion batteries’ storage : 18650masterrace
At what voltage is a Lithium-Ion battery dead? – Electronic Guidebook
Lithium Ion Battery Charging And Discharging Tips,Bonnen Battery