


(Continued from Part 1. This concludes the article.)
My grandmother used open ceramic crocks to make sauerkraut. The problem is that they, like the Gartopf style ceramic crocks, are quite expensive compared to glass jars, so I bought several used crocks to try. It is hard to seal open crocks adequately to provide the anaerobic environment necessary to make sauerkraut without having to regularly skim off the spoilage that forms at the top of the crock. I tried using a piece of lexan sealed to the top of the crock with silicone glue, drilling a hole in the lexan to insert a wine-style airlock (similar to what I use for glass jars). That helped, but I found out that some of the used crocks I purchased were not fired properly and leaked liquid from the sides and bottom of the crock. If you decide to use a ceramic crock to make sauerkraut, then first test it to make sure that it doesn’t leak!
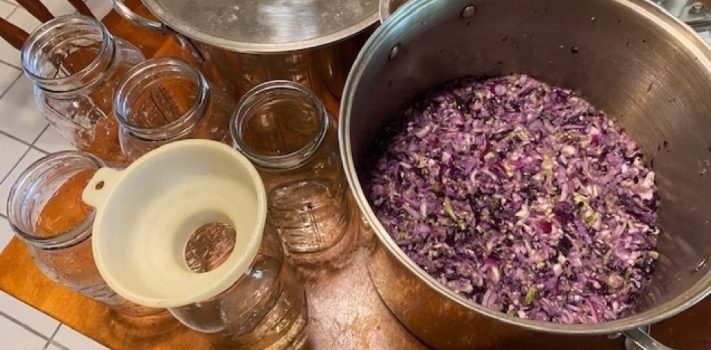
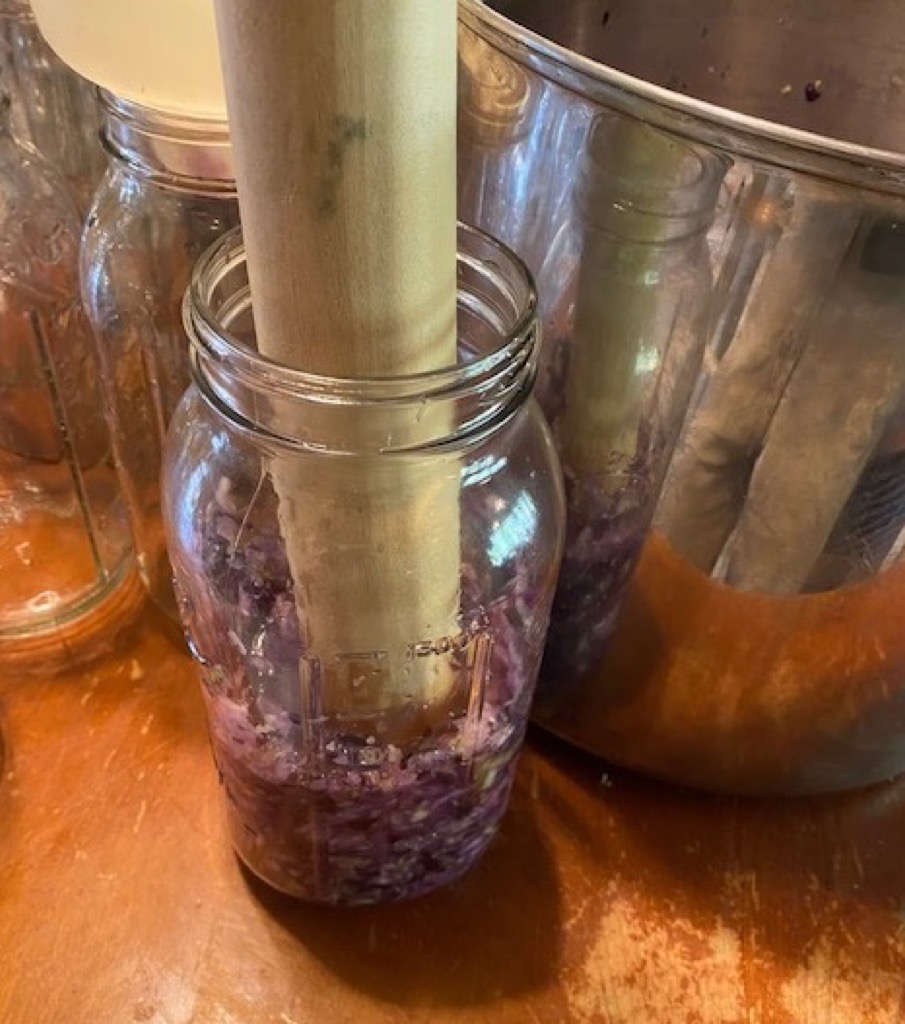
Use a funnel with a wide base so that spillage is minimal when filling the jars with a small ladle. As you fill each jar you need to periodically push the cabbage down with a tamper. The one shown below is a piece of 2-inch diameter poplar dowel that is 26 inches long. I added two handles to the top of the pounder but I don’t think they are really needed, unlike the heavy 4 x 4 pounder, where the handles are a necessity because of the weight and size of the 4 x 4. At this point, you are just pushing the cabbage down into the jar to remove the air pockets, not trying to mash the cabbage.
Fill the jars to the neck of the jar, at the point where the glass starts to curve inward to the top of the jar. The cabbage expands as it ferments, so don’t fill the jars too full or they will overflow and make a big mess.
After the jars are filled with the shredded cabbage mix, you must cover the mix with some large edible leaves to prevent the cabbage bits from floating to the top of the brine. Depending on what’s available, I have used cabbage leaves, horseradish leaves, kale leaves, swiss chard leaves, or Russian comfrey leaves. Today I am using Russian comfrey leaves. I cut the leaves into pieces as wide as the jars, and push them down on top of the cabbage mix. I use several pieces, and alternate the direction of the stem by 90 degrees with each layer.

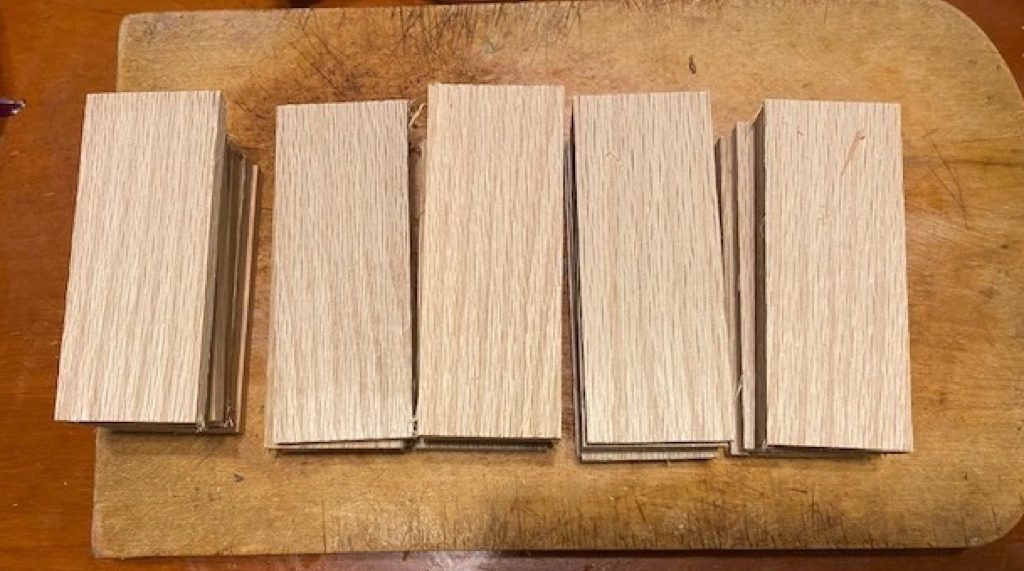
After the leaves are pressed down into the top of each jar, I use pieces of ¼ inch by 2-inch [untreated and unstained] oak a little less than 4 inches long in wide mouth jars to hold down the leaves. (In small mouth jars you will need oak pieces about 3-¼ inches long.) I use two oak pieces per jar, placed 90 degrees from each other. When you put the pieces of oak in the jar, it will be necessary to insert them at an angle, since they are longer than the width of the mouth of the jar. Once they are in the jar they should move freely below the neck of the jar so that there is no binding on the sides of the jar. The oak will expand as it absorbs water, and if it is too tight it will break the side of the jar (this happened with me once). The picture below shows pieces of oak that I cut up to put inside the jars.
The following picture shows the jars after the comfrey leaves and oak pieces have been added. The comfrey leaves block the shredded cabbage pieces from floating to the top of the brine, and the pieces of oak push the comfrey leaves down below the level of the brine.
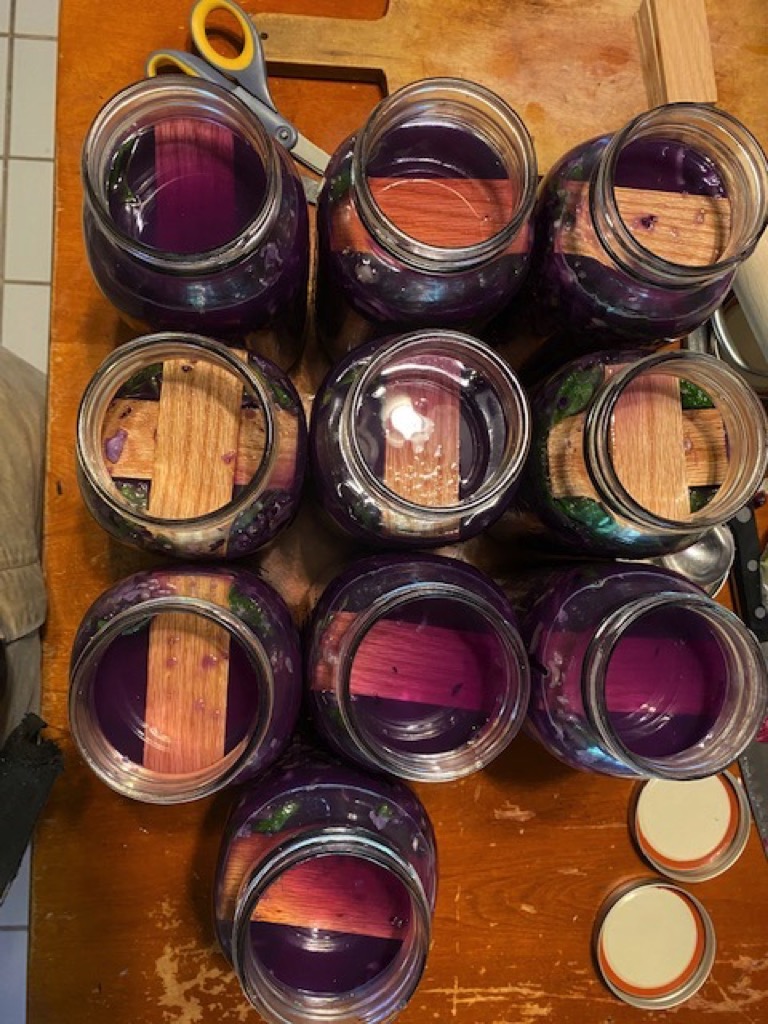
The liquid level of some jars is below the oak pieces, and it is above in others. The next step is to mix a salt brine solution using a tablespoon of pink Himalayan salt in 2 cups of water, and use it to raise the water level above the oak pieces.
After the salt solution has been added to the jars, the brine level should be above the pieces of oak, but well below the top of the jar to allow for expansion. The spacing between the top of the brine and the top of the jar is much more critical if you are using plastic airlocks for winemaking than if you are using silicone air locks, because the winemaking airlocks protrude below the top of the jar, whereas the silicone airlocks don’t.
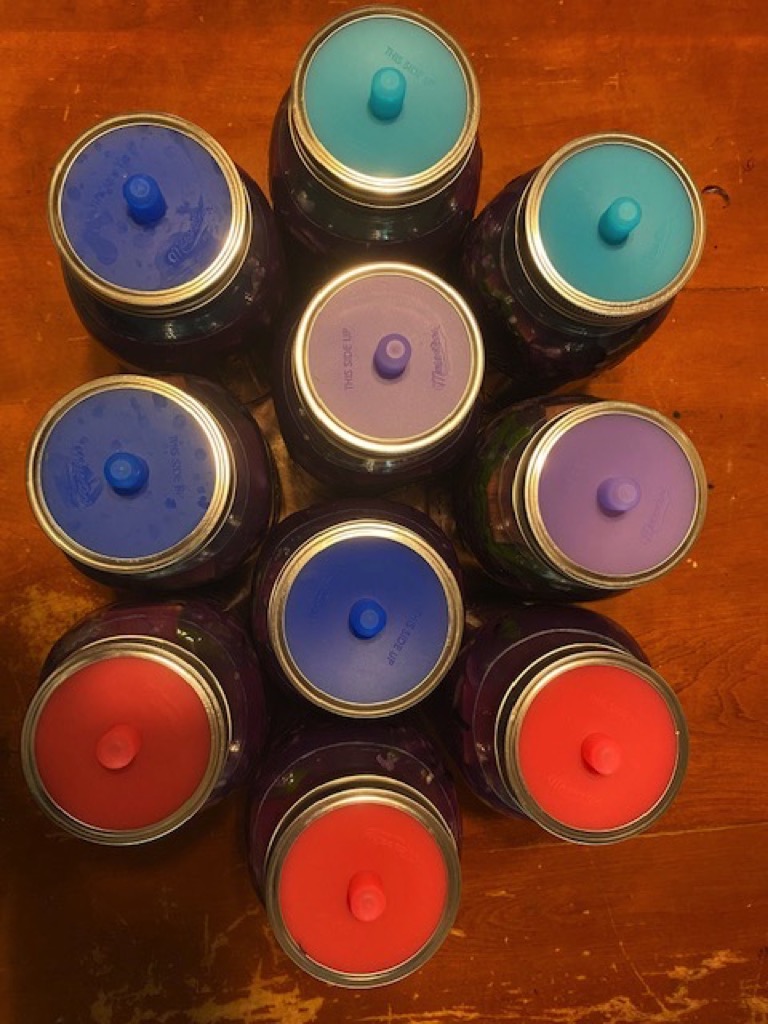
I used silicone air locks, which I purchased from Hoss Tools. You can also find them at other sites. They are attached to the jars with standard screw lid rings. Do not tighten them too much or they will be very hard to remove. If the airlocks are new, you are supposed to pinch the nipple of the airlocks before installing them to make sure they will open and let the carbon dioxide gas escape from the jar.
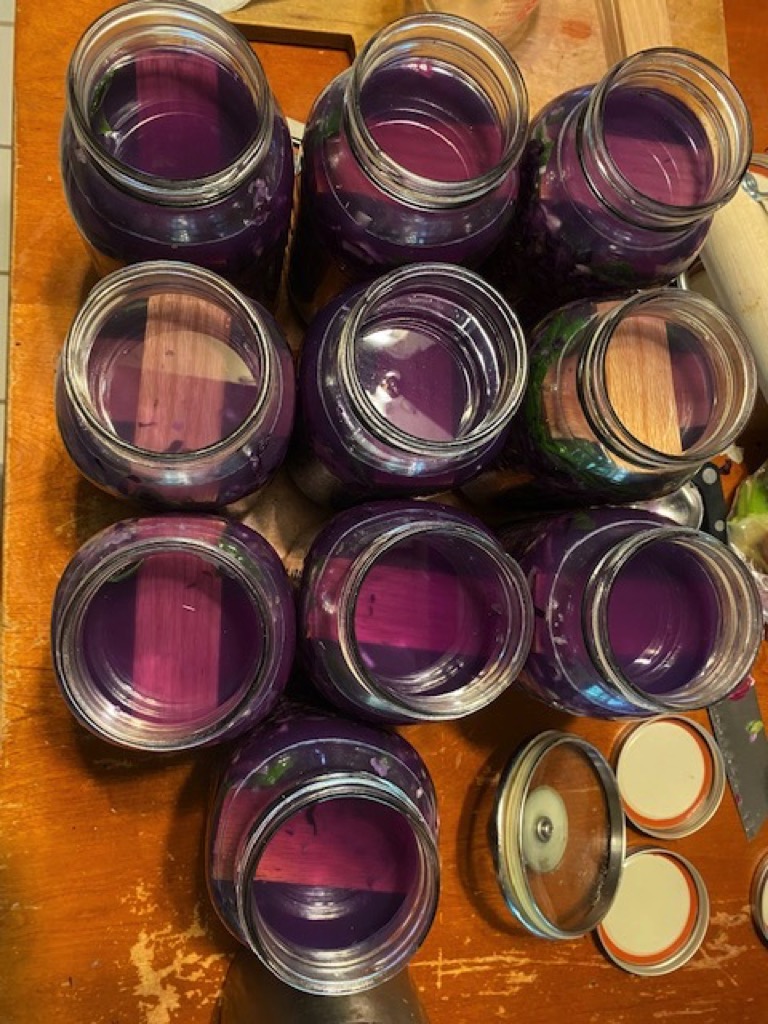
The following picture shows what the jars look like when you are done. This batch has a deep reddish color from the red cabbage and the red onions.

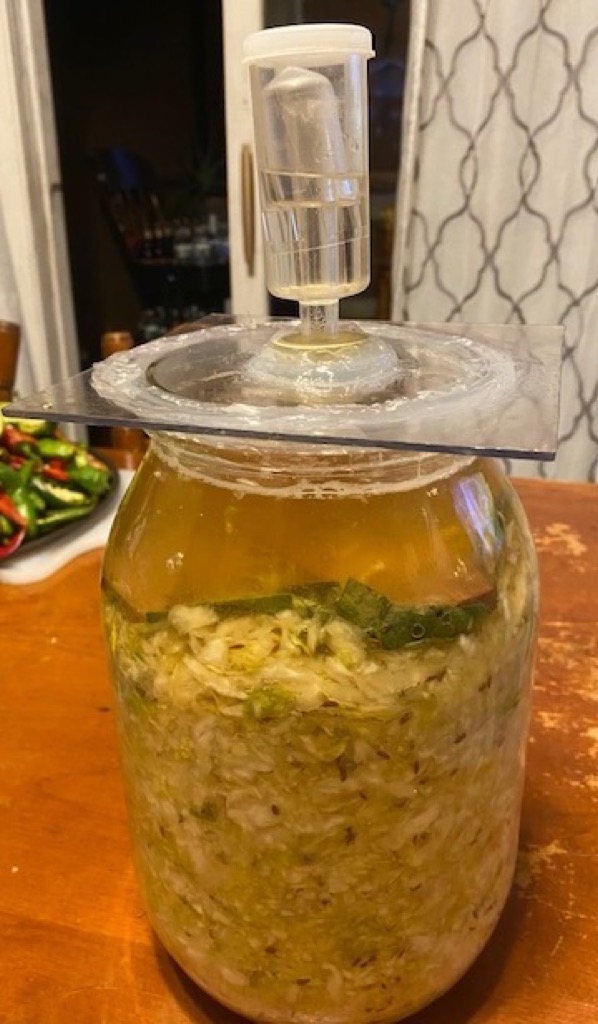
The picture below shows a gallon jar filled with some sauerkraut I made several weeks ago. As far as I know, the silicone airlocks are made only for small-mouth and wide-mouth jars, not for the extra wide-mouth gallon jars, so I used a winemaking airlock to seal the jar.
To make one of these, cut a piece of square lexan large enough to cover the mouth of the jar (I used an angle grinder with a metal cutting wheel to do this). Drill a hole in the center of the lexan using a wood bit. Use a caliper to measure the middle of the wall of the airlock cork to determine what size drill bit to use. Then insert the airlock into the hole in the cork, push the cork into the hole in the piece of lexan, and glue the cork to the lexan using silicone glue. I used to use food safe silicone glue, but the standard Red Devil silicone glue is a lot cheaper and works fine. It should normally never contact the brine anyway.
Cover the jar with the piece of lexan, put water into the air lock up to the fill line on the airlock, and glue the underside of the lexan to the top of the jar using a caulking gun.
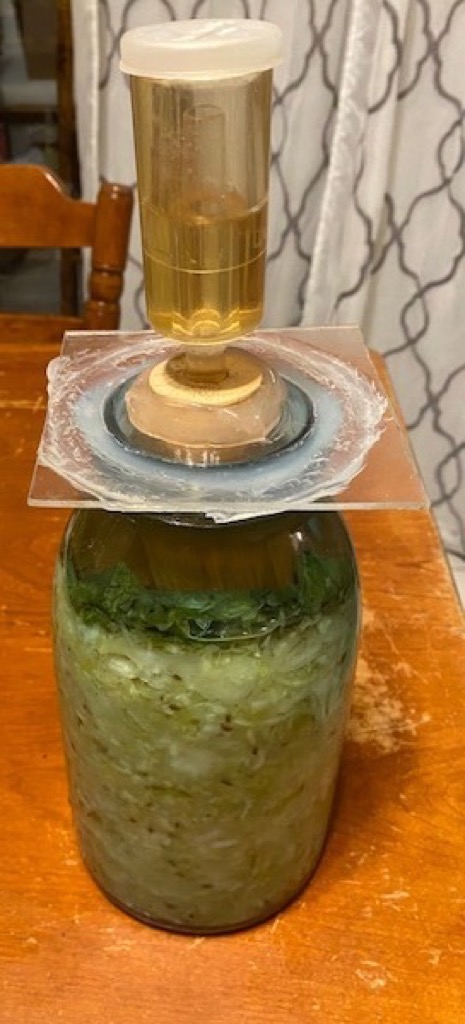
The picture below is one of my failures, but it’s a recoverable fail, not an epic fail. I filled the jar too full of brine, so the sauerkraut expanded up past the bottom of the airlock into the airlock, and overflowed brine onto the outside of the jar and onto the floor. This sauerkraut is usable, but I need to open the jar and put the contents into quart jars and put them into the fridge. To open these jars, take a paring knife and cut the glue along the bottom of the lexan between the lexan and the top of the jar so the piece of lexan comes off the jar.
I have had better luck with the wine airlocks preventing white mold from growing on top of the sauerkraut than with the silicone airlocks. But the wine airlocks are much messier, since you have to deal with the messy silicone glue when installing the airlock, and you have to clean up the dried silicone glue from the lexan and the jar before they are reusable.
There are other types of airlocks but I have not tried them and am not familiar with them.
Do a taste test of your jars of sauerkraut when you open them. If fermented properly, sauerkraut should be crunchy, not mushy. Throw away any white mold at the top of the jar. If it is mushy and there is no white mold, it has not been fermented properly, and bad bacteria have spoiled it. I have never gotten sick from testing mushy sauerkraut this way, but you should throw away the top layer until you get to the layer that is still crunchy.
Making your own sauerkraut is somewhat time-consuming, but you are making healthy raw probiotic food, and you know exactly what goes into it. Even if you can find raw, naturally fermented sauerkraut like this at the store, it is quite expensive. Most stores only sell the cooked canned stuff that is not naturally fermented.
I have kept my homemade sauerkraut in the refrigerator for over a year, and it still smells and tastes good. Just make sure to keep the sauerkraut in the jars submerged in brine.