


I have been making sauerkraut for many years. My grandmother (my mother’s mother) was German, and used to make it many years ago. Unfortunately, she never taught me how to do it, so I had to learn how to do it on my own. Fortunately, I found a really excellent book, Making Sauerkraut and Pickled Vegetables at Home, by Klaus Kaufmann and Annelies Schoneck. This book not only explains how to do it, providing many different recipes but also explains the science behind the fermentation process. I highly recommend it for anyone who is interested in making sauerkraut.
The basic steps are as follows:
1. Shred the cabbage.
2. Add salt to the shredded cabbage and mash it. This bruises the cabbage, and the salt brings the juice out of the shredded cabbage.
3. Add caraway seeds (for traditional German sauerkraut) or other spices and herbs to flavor the sauerkraut.
4. Put the shredded cabbage mix into a container that can be set up to prevent oxygen from entering the mix, but will allow carbon dioxide gas to escape.
5. Cover the shredded cabbage so that the pieces of cabbage can’t float to the top of the brine. This is done usually with a large leaf to cover the cabbage and a weight or other mechanism to prevent the leaf covering the cabbage to float to the top of the brine.
6. Install an air locking device on top of the container to allow gas to escape the mash as it ferments but will not allow oxygen to enter the container.
7. Let the sealed container set at room temperature (70’s) for a couple days to start the first phase of the fermentation.
8. Move the sealed container to a cooler environment (60’s) for the second phase to allow the bacteria that form the lactic acid ferment the cabbage properly.
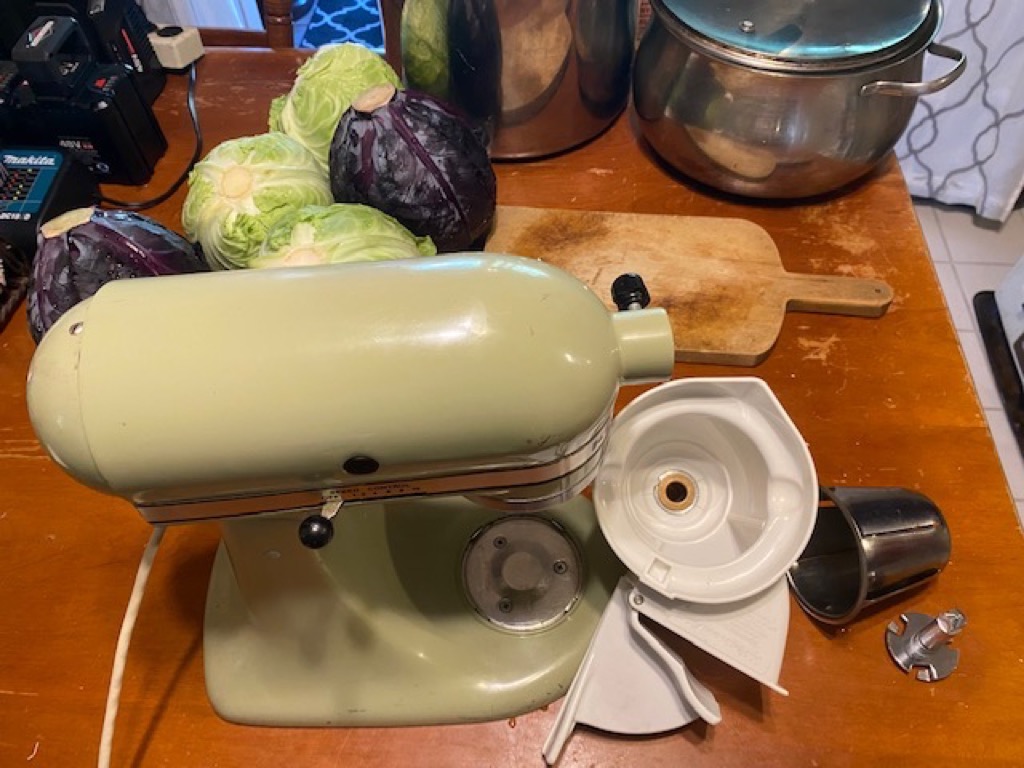
The first thing that must be done is to cut up and shred the cabbage. Historically, this was done by hand using a mandolin cutter. I have several of these, but have never used them to make a complete batch of sauerkraut because the process is slow and is a lot of work. The Kitchen Aid mixer with the vegetable slicer attachment shown below is a far superior alternative. It works really well to quickly slice up heads of cabbage.
The picture below shows in detail the process of cutting and slicing the cabbage. I use a large chef’s knife to first cut each head of cabbage in half. Then I cut each half into four pieces. A couple years ago I found some large Late Flat Dutch heads of cabbage. They were so hard that I had to use a 2-pound sledgehammer to pound on the end of the chef’s knife to cut the heads in two. The heads I have found this year were smaller and didn’t require this treatment, although they were dense and heavy for their size, which is what you want for making sauerkraut. I remove the discolored end of the core, but I grind the whole cabbage without removing the core.
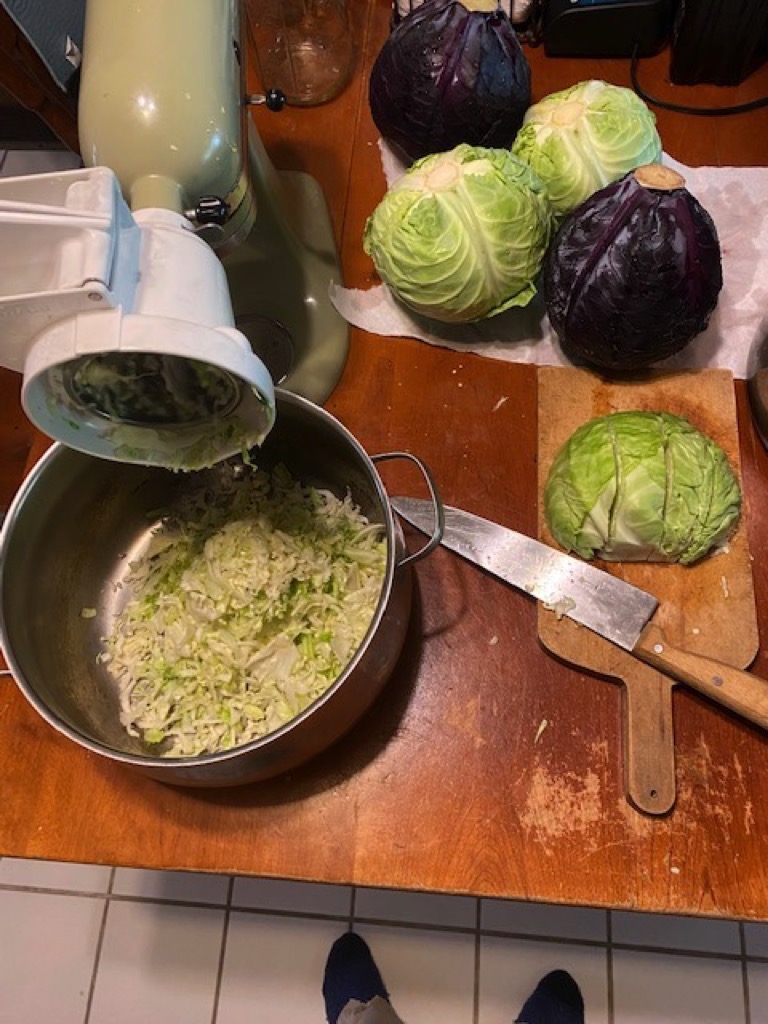
The picture below shows that it will probably be necessary to separate each cut piece into two parts in order to fit into the vegetable cutter.

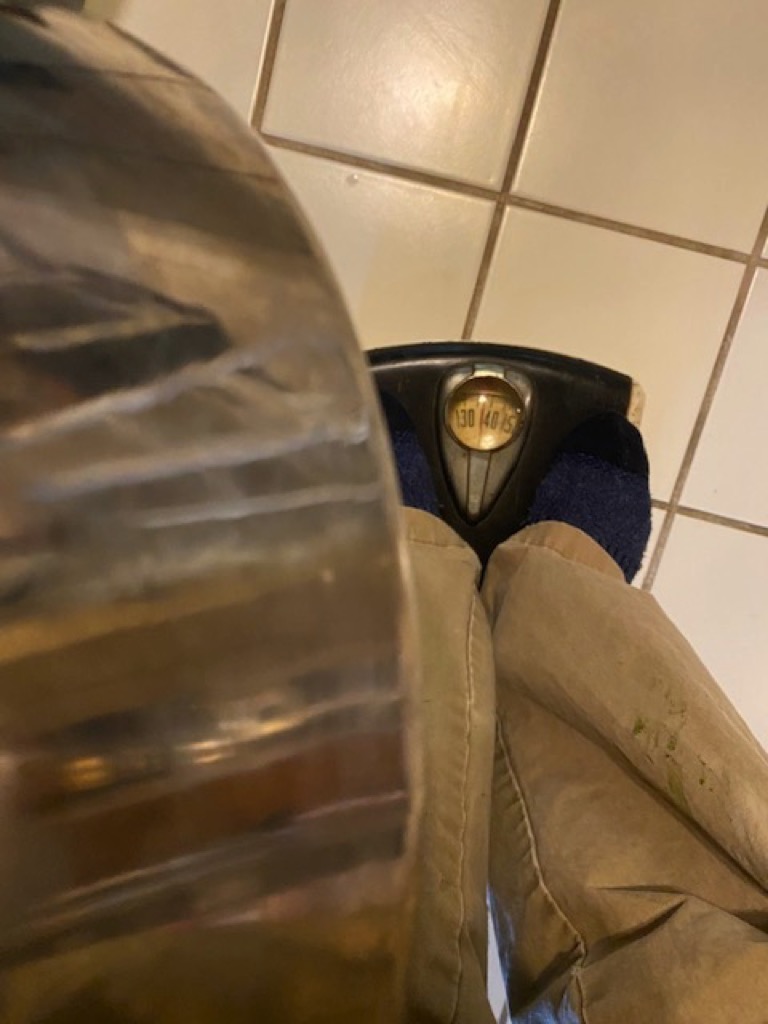
You will need at least one very large stainless steel pan to hold the sliced cabbage. I weigh myself holding the empty pan to determine the “empty weight”, which in this case is 137 pounds. If you don’t do this, I have found that these pans weigh on average about 5 pounds. The reason for doing this is to determine how much salt to add to the shredded cabbage based on the total weight of the cabbage in the pan.
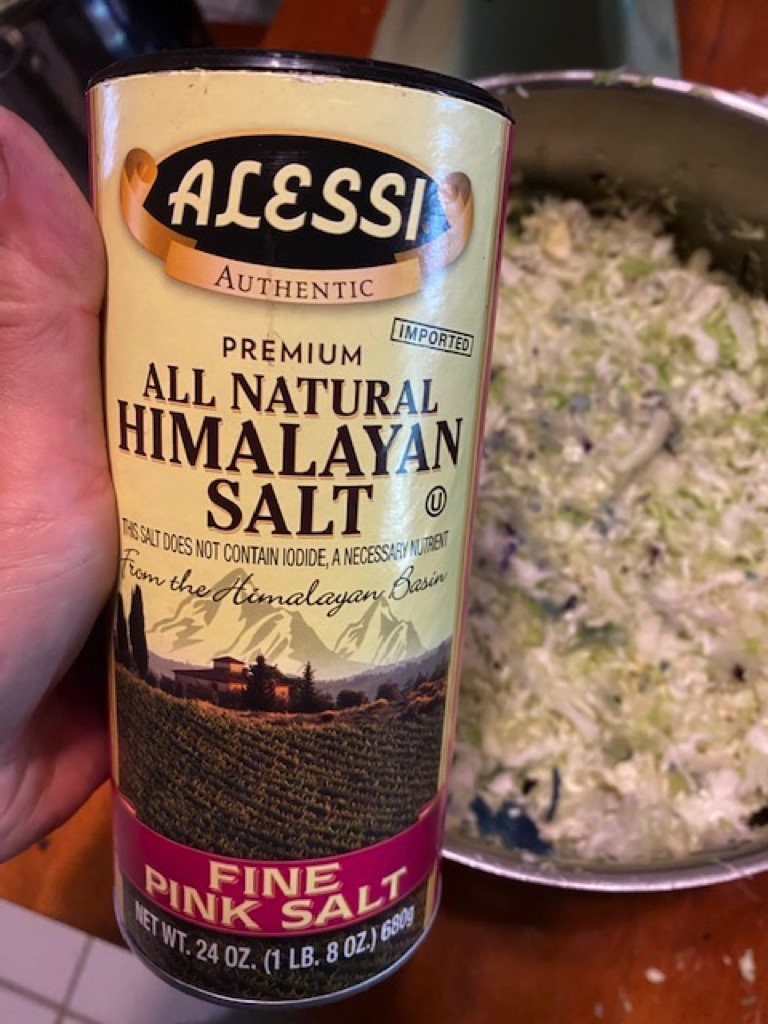
I use pink Himalayan salt to make sauerkraut because of the added beneficial minerals, but you can use any non-iodized salt. Today I am using Alessi Himalayan Salt. Use the fine salt, not coarse salt, so that it will easily dissolve.
After grinding the cabbage, I weigh the pot while holding it. The total weight shown below is 150 pounds. The empty weight was 137 pounds, so there are 13 pounds of shredded cabbage in the pot. As a general rule you should use 3 tablespoons of salt for every 5 pounds of shredded cabbage. If I am using pure sodium chloride I use level tablespoons, but I use heaping tablespoons of pink Himalayan salt because of the less sodium chloride and other added minerals it contains, making it less “salty”. I am going to round the weight up to 15 pounds = 3 x 5 pounds, so I am going to use 3 x 3 = 9 heaping tablespoons of fine pink Himalayan salt.
After adding the salt to the shredded cabbage, I mix it in using the large chef’s knife. The idea is to distribute the salt throughout the mix and evenly cover everything with salt before mashing it.
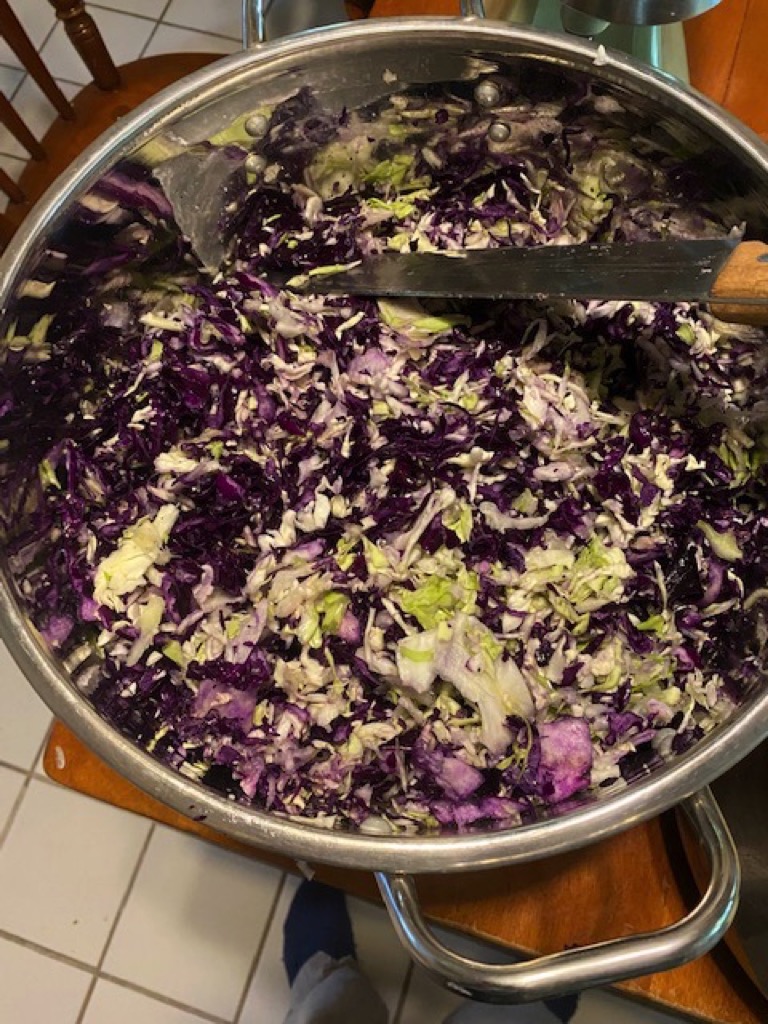
The next step is the most physically demanding part of the process, which is to pound the shredded cabbage to mash it to allow the salt to draw out the juice from the cabbage. Some instructions tell you to knead the shredded cabbage with your hands during this process, but I could never get this to work efficiently. Red cabbage (I used 2 heads of it today) is tougher than green cabbage, so you need my secret weapon shown below, that I made out of a piece of [untreated] 4 x 4 Douglas fir. It is 5 feet long, and the top of the handles are 9 inches below the top end of the 4 x 4. Lift up the pounder with the handles, and let it drop on the shredded cabbage in the pot. Keep doing this until you notice some suction and resistance when you pull the pounder out of the mash, indicating that liquid is being extracted from the cabbage in the bottom of the pot.
![]()
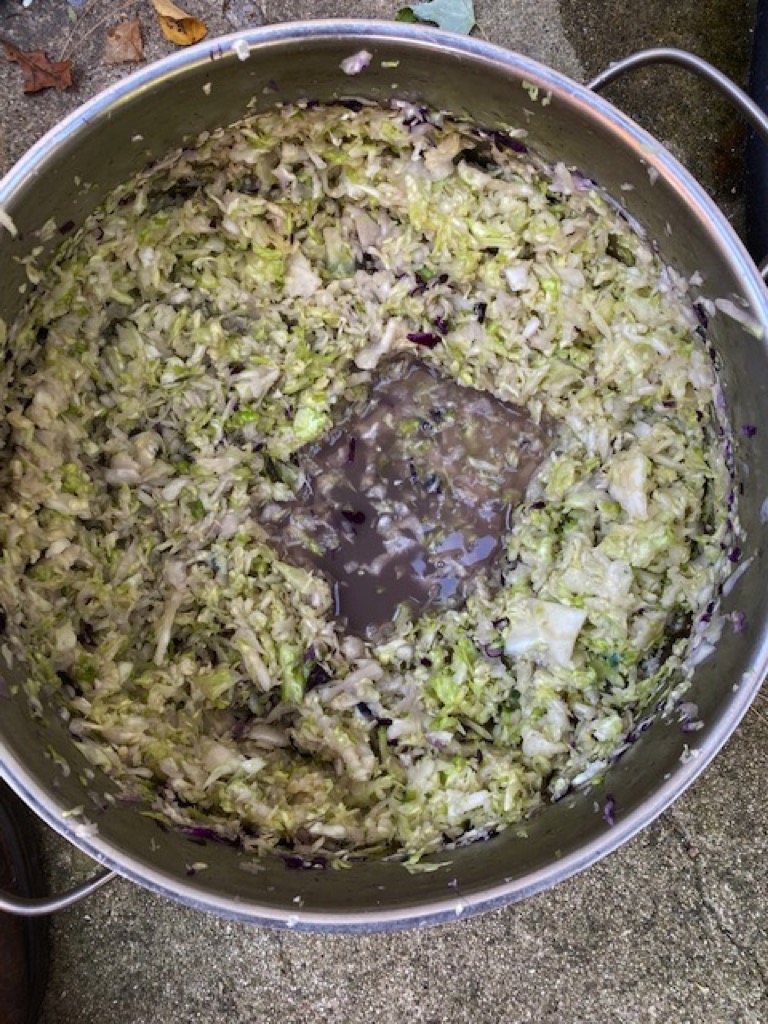
The picture below shows the liquid at the bottom of the pot when the pounder was removed, after the cabbage had been adequately mashed.
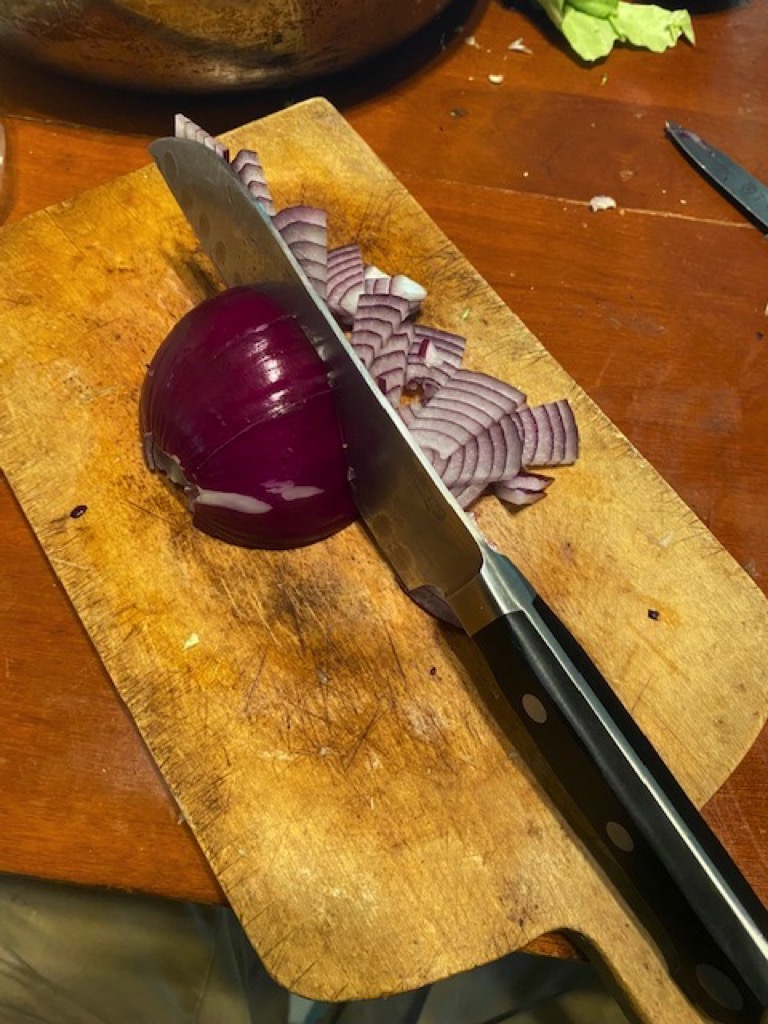
I am going to add some sliced onions to my sauerkraut, so I am going to cut up about 5 pounds of red onions to add to the cabbage. I used red onions because that was what was available at the time. I cut the top and bottom ends of the onions off with a small paring knife, and I use a santoku knife to slice the onions into small pieces.
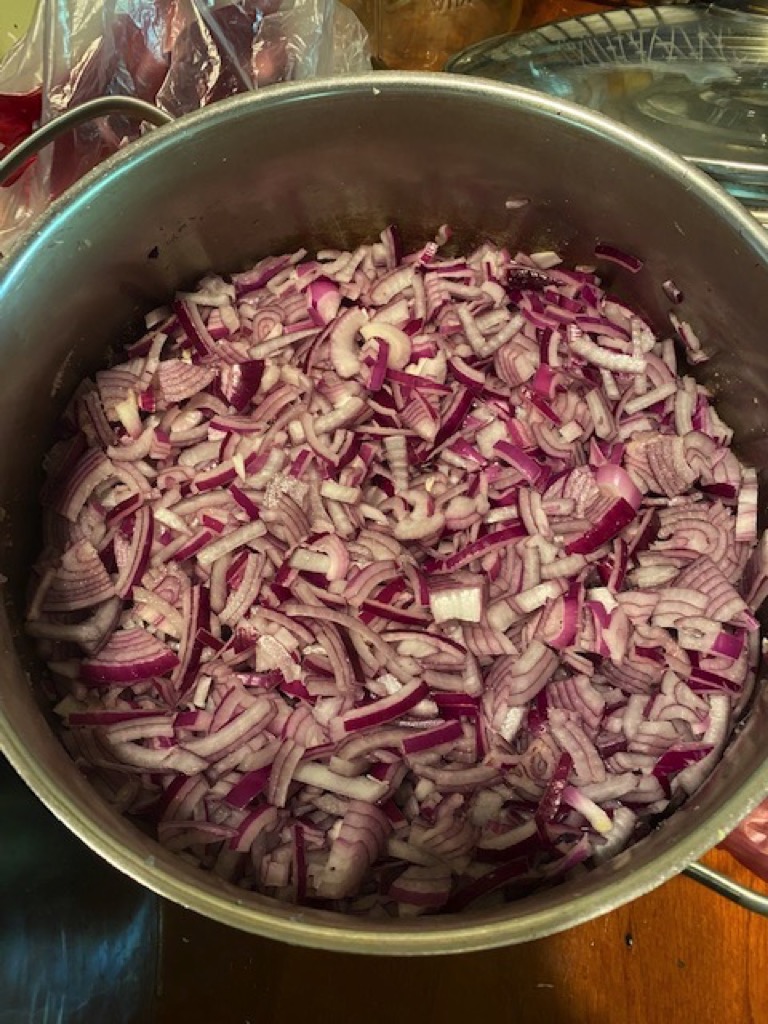
The picture below shows my red onions cut up and ready to add to the shredded cabbage. Since I had 5 pounds of cut onions, I added 3 heaping tablespoons of fine pink Himalayan salt to the onions and mixed them in to the shredded cabbage.
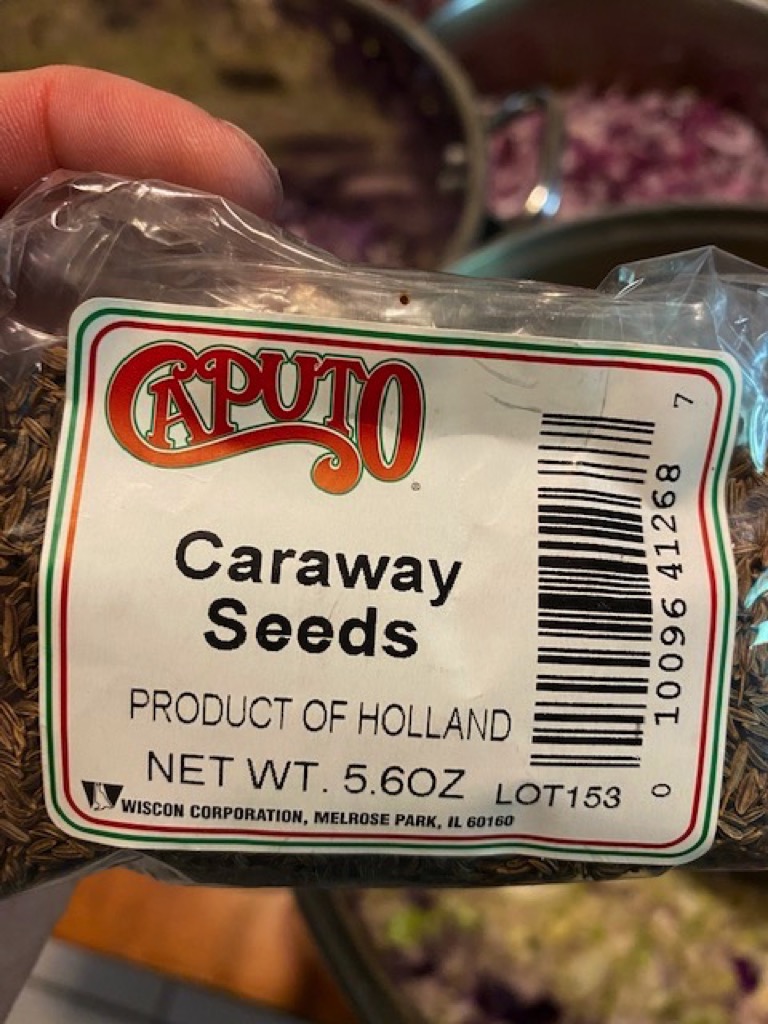
After adding the onions to the shredded cabbage, I added caraway seeds to the mix. I added about 1 heaping tablespoon of caraway seeds to each 5 pounds of cabbage (which is more than recommended in the book mentioned previously), but I like caraway seeds in sauerkraut, and the end result is very tasty.
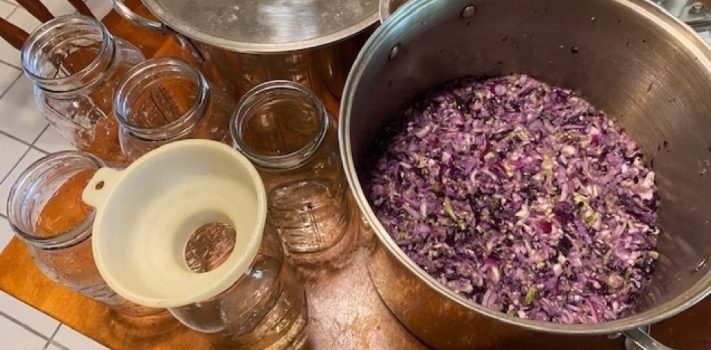
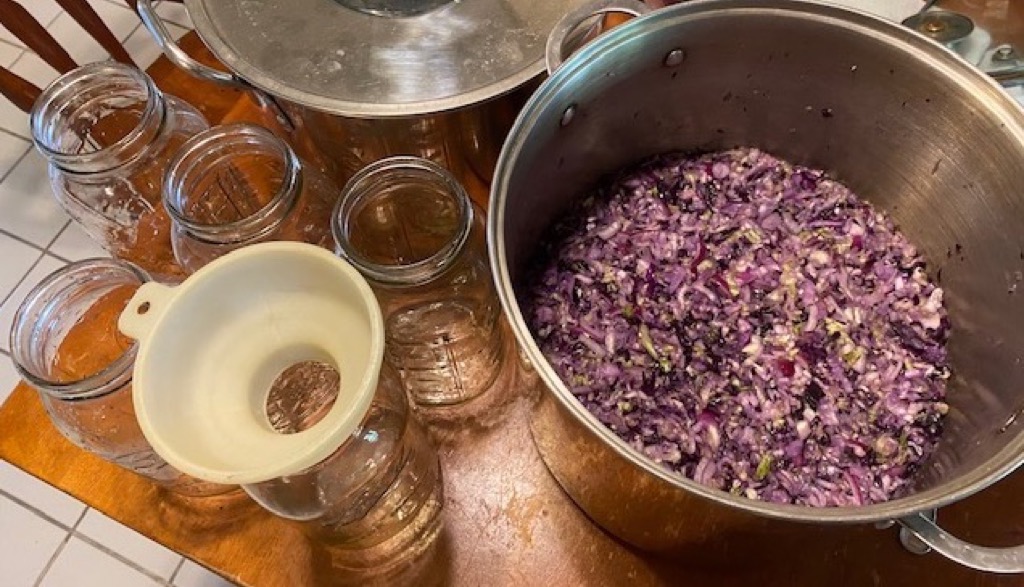
After mixing the caraway seeds into the cabbage and onions, you are ready to add the raw mixture to the fermentation containers. I first use the large chef’s knife to mix everything up. When it is loosened up I then use a large ladle to make sure the caraway seeds are evenly distributed throughout the mix. The liquid will settle to the bottom of the pot, so keep stirring it as you add the mix to the jars, to make sure the liquid is evenly distributed among the jars.
The sauerkraut book mentioned previously recommends using a ceramic crock with a water trough at the top of the crock to form the air lock. I have two German Gartopf crocks that I used when I first started making sauerkraut. Since then I have been using two-quart Ball jars for several reasons:
1. It is hard to estimate how much cabbage to use to exactly fill a large ceramic crock. This is much easier using multiple smaller glass jars. Today I filled 10 glass two-quart jars. I was a bit short on the last jar, so I cut up a red onion and used it to fill the remaining space in the last jar. When I used the ceramic crocks I usually had too much left over and didn’t know what to do with the remaining cabbage.
2. You can’t see what’s going on inside ceramic crocks, but you can easily see the rise in water level, the change of color of the cabbage as it ferments in glass jars, and the presence of undesirable yeast that tends to form at the top of the jars if air somehow gets past the airlocks into the jars.
3. The water in the trough in the ceramic crocks tends to evaporate fairly quickly, so you have to keep a close eye on the water level and add some more when it gets low so air doesn’t get into the crocks. This is much less of a problem using air locks on glass jars, and not a problem at all using the silicone air locks.
4. When you open a ceramic crock, you have to find many containers (glass jars) to put all of it in. With a glass jar as the fermentation vessel, what I usually do is put the contents of a two-quart glass jar into two one-quart jars and put them in the refrigerator. There is not so many jars to find space for and process at one time.
(To be concluded tomorrow, in Part 2.)