


(Continued from Part 1.)
Regarding spare parts – switches, relays, jacks, screws, battery holders and all of the other mechanical bits in electronics can be expensive to replace, and if you don’t have a decent stock you’ll almost always have to end up buying a replacement part (assuming you even can). I’ve found the best source of spare electronics parts are old discarded devices. All of my friends and family know that if they have an electronic device they’re going to dispose of that I’ll always take it. I’ve been given or found in the trash hundreds of devices over the years, and harvesting parts from them has a number of advantages:
- You get to practice troubleshooting and repairing on something that didn’t cost you anything, so you may end up with a working device if you can repair it
- They’re a great way to practice opening and carefully deconstructing electronic devices
- They’re a great source of spare parts
I have a lot of small plastic storage bins with switches, relays, jacks, small screws and a myriad of other parts, all organized, labeled and inventoried. To keep things from getting too messy in my shop I try to limit how many devices I’m working on at any given time, and I’ll promptly throw out any remains once I’ve harvested everything I can.
Knowledge
Before you get started on repairing anything electronic, it helps to have some basic knowledge and skills. Discussing everything in detail here would make this article way too long, so I have a couple of recommendations:
- If you don’t even know the difference between positive and negative polarity in direct current, buy and read the book ‘There are no Electrons’, by Ken Amdahl. This is a quirky, story-driven and completely non-technical introduction to electronics, and it’s introduced thousands of students to the joys of electronics. I’ve been working with electronics for decades and I still enjoy re-reading it every few years.
- ‘Electronics for Dummies’ is another good starting point for learning about electronics.
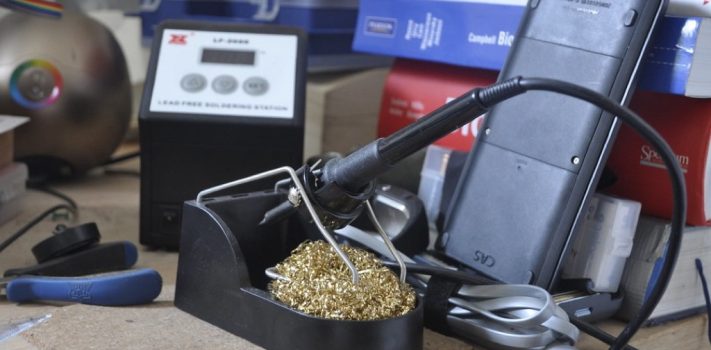
- Watch some how-to videos on soldering on your favorite video web site and practice it. It’s not really complicated but it does require a some practice to get it right. You should also practice desoldering.
- Learn how to use and practice with your multimeter. There are a lot of good web sites and videos available that will walk you through using the basic functions. The most common things you’ll do with it when troubleshooting are testing continuity (e.g. making sure two things are connected so electricity can flow between them) and testing battery voltage.
Another source of knowledge I highly recommend collecting is documentation on your specific devices. Whenever I add a device to my collection one of the first things I do is download every piece of potentially useful information I can find. Start with identifying the actual model number of the device, which may be different than the marketing name. For example, the ‘Samsung Galaxy Tab A 8.0’ tablet actually has a model number of SM-T350, which can usually be found in small print on a label somewhere on the device. Then go the manufacturer’s web site or use a web search to locate an electronic copy of the user’s manual and download it your local system. Your next stop should be one of several web sites that provide instructions for various repairs:
- I-Fix-It web site’s Repair Guides page – download a copy every repair guide you can find for your devices. They also have some good overviews of general skills related to electronic devices.
- NewPower99 sells battery replacement kits for lots of different electronic devices, and the product page for each kit include a link to one or more videos on how to open the device to replace the battery.
- YouTube and other video web sites have thousands of videos on how to open and repair electronic devices. Saving local copies of the videos for reference when the Internet is no longer available can be accomplished in several ways, including a YouTube Premium subscription, screen recording, etc. Make sure you comply with all local copyright laws when recording or downloading video from the Internet.
- Instructables provides a wide range of detailed instructions on repairing hundreds if not thousands of devices, but it’s not necessarily organized by obvious topics so you’ll need to exercise your search-fu. Look for both the device’s marketing name as well as it’s model number when searching Instructables.
- Another good source of repair guides is the Fix-It-Club, although they tend to focus on a much broader range of repair types and typically not in as much detail of I-Fix-It or Instructables
- Wikihow has some gems on device repair hidden among it’s many articles, so use your search-fu to find the ones relevant for your devices.
I’ll also spend some time doing web searches for forums, blogs, etc. that might provide additional details on issues identified or repairs that other people have made for the device and save copies of those pages. I organize and save everything in Joplin Notes with the web clipper plugin, but you can just set up some folders on your computer and save the pages as PDFs.
It’s also important to understand what’s probably the biggest secret of electronics repair – the vast majority of problems you’ll ever encounter with electronic devices aren’t actually caused by problems or failures in the electronic components themselves, they’re usually caused by either power or physical issues. Power issues are related to the battery or other power supply, and physical issues are things like loose or broken wires, connectors, switches, etc. Modern solid-state electronics are incredibly robust, and the odds of a semiconductor or discrete component like a resistor or capacitor failing are pretty low. It does happen, but a lot less frequently than you’d think. This means that you don’t necessarily need a detailed understanding of integrated circuits to successfully repair a lot of problems that crop up with electronic devices.
Let me in!
If the problem is anything beyond the device not being charged or used correctly, there’s a good chance you’ll need to open it up and get at the insides to fix or replace something. Unfortunately, most companies that produce modern electronics don’t want you getting inside, so opening up the device without destroying it can be one of the most difficult parts of the troubleshooting process. Most plastic devices are put together using one of four methods – screws, tabs, glue, or sonic welding. Screws tend to be the easiest to deal with, as long as you locate all of them, take care not to lose them and remember where they go when reassembling. Screws can sometimes be hidden under labels, so make sure you check carefully. Tabs need to be pressed to release their hold while at the same time separating the two parts, which sometimes requires three or four hands, so don’t be afraid to ask for help. Glue can be difficult, and you may have to apply heat to loosen it. Sonic welding is the hardest, since the two pieces have essentially been melded into one, so you may need to carefully cut along the seam using a small knife, saw, or a cutting disc on your rotary tool.
Before you start to take anything apart, see if you can learn from the mistakes of others. The device-specific information sources I mentioned earlier provide step-by-step instructions on how to open up many different types and brands of electronic devices, even if it’s not specific to the repair you’re doing. For example, if you need to open a device to replace a broken switch, the first part of a video on how to replace the internal battery can provide detailed instructions on how to open it up safely. If you can’t find instructions in one of the sources listed, you can do a web search for “model_name disassembly” or “model_name teardown”, where ‘model_name’ is both the marketing name as well as the actual model number. Keep in mind that many manufacturers use different model names for physically identical devices that have different internal features like memory, storage, network interface, etc., so check the manufacturers web site. Another good source of details on different models of tablets, cell phones, etc. is gmsarena.com.
If you can’t find any details on how to open your device on the Internet, here are some general guidelines that might help:
- Remove any externally-accessible batteries, charging cables, etc. before starting.
- Remove any covers, removable storage media, SIM cards, lanyards, etc. – if it can come off, take it off.
- Use the absolute minimum amount of force necessary. Disassembling electronics without any instructions can be frustrating, so relax and don’t try to force things too much.
- If there are visible screws, start by removing those; start with just the corners – if that doesn’t do the job continue removing screws one at a time and try after each removal.
- Rub your finger over labels to see if there are any openings under them that might contain additional screws.
- If there are glued-on rubber feet or bumpers you may need to look under those for more screws.
- Carefully label and store screws as you remove them to make sure you put them back in the right place. I use a small divided fishing tackle box and put small written notes in each bin to keep track of things.
- If there are no screws, look for slots on or near where the edges join. If there are slots, try using a small screwdriver or one of your pry tools to pop open any tabs while pulling the seam apart.
- If there are no slots, insert one of your plastic spludgers in the middle of the longest seam you can find and try to separate the seam. As you separate, insert pieces of thin plastic to keep the seam from popping back together.
- Gently move the spludger along the seam until you feel resistance from a tab. Try prying different ways to separate the tab. Once again, insert pieces of thin plastic to keep it from snapping back in place.
- Work your way around the seam until you get it fully separated.
- Before separating the parts further, look carefully around the whole perimeter of the seam to see if there are any cables connecting the two halves. If there are you’ll probably want to disconnect them, depending on whether or not you can reach what you need.
Is It Obvious?
The first thing to do when troubleshooting an electronic device is to look for obvious physical signs of damage or issues.
- If the device uses replaceable batteries, open the battery cover and see if the batteries have leaked.
- Is the device swollen in one area? That’s usually a sign that the internal battery has exceeded it’s useful life and the chemicals inside have started breaking down. This more noticeable on thin devices like cell phone and tablets.
- Is there obvious physical damage, like a broken switch, crack, etc.? Even if the damage itself isn’t directly causing the problem, it’s usually an indication the device has been physically abused, and the resulting g-forces from any impact might have knocked a connector loose inside.
Leaking batteries are one of the most common reasons people throw electronic devices away, but getting the device working again may not be that difficult, depending on how badly the leakage is and how long it’s been happening. Cleaning up battery leakage can be straightforward:
- The white crystals you see in a device where a Nickel-based battery has leaked are from the liquid chemical inside the batteries, and it’s caustic so you should take precautions to keep it off of your skin and out of your eyes. Wear safety glasses, gloves and a respirator.
- Remove the leaking batteries. They may be held in place by the dried crystals, so you may need to gently pry them out.
- Start by gently scraping off the big chunks you can see using a plastic scraper or a popsicle stick. Dump them onto a piece of newspaper for careful disposal.
- Once all of the big chunks are gone, moisten a cotton swab with white vinegar or lemon juice and gently wipe the caked on residue. Don’t use too much liquid so it doesn’t drip or leech into the device. Let is set for a minute or so.
- Scrape the softened residue off and repeat the moisten/sit/scrape process as necessary to get the visible surfaces clean.
- If you can’t get the metal battery contacts completely clean you may need to get a little more aggressive by using a small file, sandpaper, steel wool or a wire brush bit in your rotary tool. Go slowly so you don’t ruin the metal.
- Once you gotten off what you can, moisten another cotton swab with isopropyl alcohol that’s at least 90% pure and clean up any remaining vinegar/lemon juice residue.
- If it looks like the leakage was contained in the battery compartment you can try to put some fresh batteries in and see if the problem is fixed. However, battery leakage is pretty insidious stuff and there’s a chance it’s spread along wires and further into the device. If you think the leakage has spread beyond the battery case or fresh batteries don’t fix the problem after cleaning, you’re going to need to go in.
- Using the repair guides for your device you saved earlier, figure out how to safely open the case. This may involve removing screws, prying open the plastic case, etc. Carefully store anything you remove, and take pictures of where everything is before you take it apart.
- Look at the circuit board and casing in the area around where the battery compartment is located. If there is battery residue on the inside, use a cotton swab moistened with isopropyl alcohol to loosen it up and gentry wipe it off.
- If you see residue on a wire there’s a good chance it’s crept along the wire inside the insulation, so you’ll need to de-solder or cut out the existing wire and replace it with a new piece.
- Once you’ve gotten everything clean and reassembled, you should be able to put some new batteries in the device and start it up.
(To be concluded tomorrow, in Part 3.)