


(Continued from Part 1.)
Exposure versus Contamination
I like reading survival articles and watching survival videos. One of the issues that I don’t see explained very well is the difference between exposure and contamination. As a corollary, imagine walking down a road and you see a pile of dog dung. You stop and you smell its nasty odor. In this case you have been exposed but not contaminated. Now imagine walking down the road and step in a pile of dog dung, now you are contaminated and exposed. Until you decontaminate (wash the dog dung off your boot) you will continue to be exposed.
There are three types of radiation you need to be concerned about, Alpha, Beta, and Gamma. Alpha is the weakest type and can be literally stopped a piece of paper used as shielding material. The main concern with Alpha radiation is ingestion or inhalation of alpha contamination. Your internal tissue is more sensitive to Alpha radiation and will absorb more of a dose internally versus that same Alpha particle that is outside of your body, say on your scalp. Beta radiation is more powerful than Alpha but is still relatively easy to block by shielding. Instead of a single piece of paper you will need a thick book to block Beta radiation.
Gamma radiation is the most penetrating radiation and you will need very thick and dense material, like concrete, or lead, or 3 feet of soil. There are several Internet sources that will provide you with the shielding properties of different materials. Something to keep in mind is that the volume of material can make up for lack of density. That is paper isn’t a very dense material for protecting against gamma radiation but if you had 6 feet of books it would still provide some level of protection due to the volume of material.
To protect yourself internally, use a simple dust mask, no real need for an N95 or P100 but I will say that most of the simple dust mask out there do NOT seal well in which case you may want to use an N95 for quality purposes.
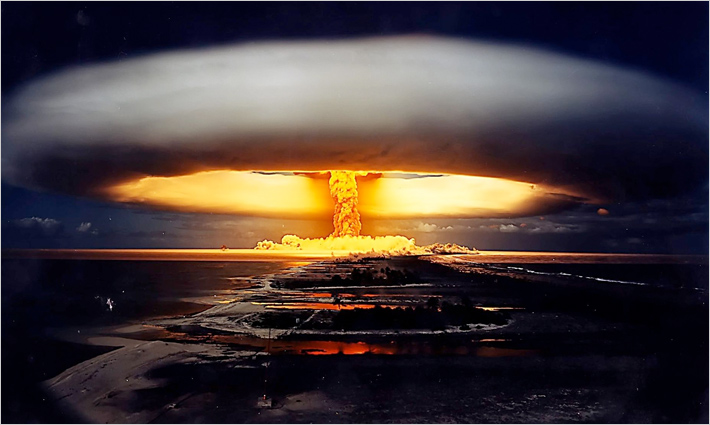
Surviving Fallout
There are three ways you protect yourself from radiation, time, distance and shielding. You will want to reduce, as much as possible, the amount of time you are exposed to radiation. The next thing you want to remember and employ is distance. Think about and take into consideration where radioactive fallout may fall around you. For many of us, fallout will settle on our home roof and on the lawn next to our home. If you have a two-story home without a basement, you would want to shelter on the first floor in the most interior spot in the home. If you have a two-story home with a basement the center of the basement will be the optimum place to shelter. Why? Because this will allow you to be as far away from the fallout as possible. Going back to the dog dung example the closure you are the more pungent the smell, and as you increase your distance from in you smell it less. Next you will want to put as much dense mass between you and the fallout, aka shielding. Sand, dirt, stone, cement, metal, wood and even books can help block gamma rays.
Many of the 1960s civil defense training videos on how to make an improvised home fallout shelter have been made into YouTube videos. I suggest that you search for “US Civil Defense Fallout Protection” on YouTube. I live in a single-level home with a basement and a metal roof. In the area where we will shelter in the basement, I used corrugated metal roofing for the ceiling. Both the metal roof and the metal ceiling add some shield, not much but every little bit helps, keep this in mind. Our primary shielding will come from dirt and sand-filled feed sacks that will be placed on the floor above the basement. We will put down tarps and plastic to protect the floor and to make clean up afterward easier.
Since the floor was not designed to hold the weight from the sand and dirt-filled bags we have four jack posts that we will place under the floor to help support the extra weight. We will put a 2×6 up that runs 10’ and then put the jack post under the 2×6 to support as many of the floor joist as possible. We will also add dirt around the outside of the house around the foundation to increase the shielding as well. We have a dirt pile from past excavation projects that we can quickly move with the tractor loader. Besides the dirt around the basement perimeter and dirt-filled feed sacks we will also build makeshift shelter within the shelter. That is to say, we will use furniture and things like books, etc to fashion a spot where we can lay that will provide additional shield from radiation, especially in the first few days after a detonation.
Some of the other items I have thought about using for the internal makeshift shelter area are full ammo cans. If you do not have a basement, this type improvised shelter should be built in the most interior space of your home. Think about when you were a kid and you built “forts” in your living room. Same concept except this time you want your “fort” to actually be made of dense materials versus blankets. However, you can still use the tablw. If you have children (under 21), it is imperative that they be afforded the most sheltered area(s) since a humans organs are not fully developed until our early twenties. The tissue in these still-developing organs is more susceptible to the effects of radiation. The good news is that most fallout particles decay relatively quickly. I suggest that everyone look up and learn the 7:10 rule. Print off copies and post them in your fallout shelter area so that you can see them. Don’t put them in a binder, since your mind will be very busy and “out of site is out of mind”.
Fallout arrival time
Again numerous variable will impact how fast fallout will impact you. Wind speed, distance from the target(s) and yield of the warhead(s) being the three main variables. My assumption is that I will have some time (20-30 minutes as a minimum) to get my dirt/sand up around my basement foundation and dirt ready for filling feed sacks for the interior. Priority number one is to get the dirt around the basement foundation and priority two is for feed sacks. Having a meter with me will let me know for sure if we are receiving any fallout but there is a chance that some of the fallout will be visible. If I don’t have time to put the dirt inside the feed sacks outside the backup plan is to put the dirt inside on a tarp with the feed bags.
Metering
So how much radiation is there? You can not sense radiation you must have meters to determine this. The book “NUCLEAR WAR SURVIVAL SKILLS” has a method to build a makeshift meter but I implore you to use that as a fail-safe backup and not your primary means of detecting and measuring radiation. You will want two meters. I suggest the old Civil Defense (CD) meters. They are rugged and built in the United States in a time when things were built to high quality standard. Since they are analog versus digital they have a lot less that can go wrong. These old CD meters are also still plentiful and less expensive than their newer counterparts. The Civil Defense V-777-1 Shelter kit would be a very good choice. Unfortunately, many of these kits have been split up and the items sold separately.
The Reason for two meters is for high and lower measurements. To measure higher amounts of radiation that would be expected in the first few days of a nuclear detonation use a CD-715 meter. The CD 715 measure 0.1R/h and 500R/h (R=Rad, h= hour). I would suggest that readers educate themselves on using these various meters. The good news is that many of the government training films on using these meters have been up-loaded as videos on YouTube. Something that isn’t well explained or even mentioned in those CD training films is meter saturation. This is basically too much radiation for the meter to read (on its current setting) and instead of pegging it will read zero. If nukes start going off you will want to use the meters on their highest level and go down to avoid the saturation issues. So if you use the CD meter you would want to start your monitoring using the CD 715 set to the “X 100” setting. Go down from there until you get a reading. The CD 715 reads very high levels and except in a post-nuclear blast or nuclear reactor meltdown you should not get any readings on the CD 715 meter. The other thing to keep in mind is the CDV 715 will NOT detect alpha or Beta radiation.
The other meter needed is a CDV 700. This meter is equipped with an external probe that has a metal shield that can be open and closed. The range for the CD V is up to 50 m/R/hr. This meter can detect beta radiation when the metal shield is in the open position. The CDV 700 is the meter we will use to survey whether or not something or someplace is “contaminated”. There are many different criteria as to how to determine if someone is “contaminated. The US EPA criteria is two times the background level where the background level of radiation is not over 0.1 m/R/hr, while FEMA’s criteria is 300 counts per minute (cpm). One thing to keep in mind about using the CD V 700 is that you must move the probe relatively slow. Studies have shown that it takes 19 minutes to properly survey an adult human to determine if the person is contaminated.
The other metering you will want is Dosimeters. These are the little tubes that are a little bigger in diameter of a pen and about 4” in length. A Dosimeter is important since it will indicate the total body absorbed dose of radiation the person carrying the dosimeter has received. In theory, each person should have their own. For those who are familiar with the old US Woodland BDUs there was a small stitched-in hole in one of the upper jacket pockets. Many people think this was for a pen but in fact that is for the soldier’s dosimeter. Not sure if the new military uniforms have this same feature.
There are two Civil Defense dosimeter that we will cover, the CD V 138 and the CD V 742. First the CD V 742 is the high range dosimeter that will measure up to 200R but its scale starts at 0R and is marked off in 10R increments. The CD V 138 on the other hand measures low levels of radiation and has a range up to 200 m/R. The 138’s scale starts at 0 m/R and goes up to 200 m/R in 10 m/R increments. So what’s the big difference between the 138 and 742? The 138 is 200 m/R while the 742 is 200,000 m/R when you convert it to m/r from R. To recognize which dosimeter you have look on the outside and it should be printed. If you can not read the printing on the outside look through the end without the metal dot and if you see “Milliroentgens” you know it is a low-level dosimeter if you just see “Roentgens” it is a high-level dosimeter.
In order to zero the dosimeters, that is to put the line back to zero you will need a CD V 750 dosimeter charger. The CDV 750 charger will zero both the CDV 138s and CDV 742s.
(To be concluded tomorrow, in Part 3.)