


OBJECTIVE
In this article, I will explain the life-saving benefits of the proper application of tourniquets, selection, placement. I hope to clear up some myths about tourniquets, and explain the actions that need to happen after applying a tourniquet. Along the way, I will introduce some medical terminology to better communicate and to impress your friends.
Anyone can apply a tourniquet. While you do not need any official or special medical certification or training, you do need to understand how to properly use one.
This article, while informative, is no substitute for hands-on training and practice.
A BRIEF BIOGRAPHY
My wife and I started prepping in the late 1990s. In 2011, we made the decision to bug out of the big city and moved to an 850-acre ranch in Colorado. The Good Lord has blessed us financially and we have been able to raise and educate our children at home. I have been fortunate to be able to work from home as a software engineer even before telecommuting became popular.
Since moving to this remote area, we have focused on increasing our skills. I have learned welding, gunsmithing, locksmithing, fiberoptic telecommunications, solar energy production, amateur radio, various ranch-related construction, and most recently, I have been working towards my emergency medical responder (EMR) certificate.
The EMR certification is the first level of certification within the emergency medical response system. It is a step below emergency medical technician (EMT) and well below that of paramedic. The training, however, is invaluable. Our local volunteer fire district has sponsored this training for their firefighters and have graciously offered the training to the community at no cost. You should check with your local fire department to see what training might be available for you at little or no cost.
INDICATIONS
Enough of all that small talk, let’s jump right into when to use a tourniquet. The purpose of a tourniquet is to control HEMORRHAGING in EXTREMITIES. Hemorrhaging is the loss of blood from a damaged blood vessel. Extremities are the upper arms, lower arms, hands, thighs, legs, and feet. Blood loss from open wounds can lead to HYPOVOLEMIA, a state of abnormally low extracellular fluid in the body, and will cause death if not treated. If direct pressure on the wound does not stop the bleeding after ten minutes, a tourniquet should be applied.
CONTRAINDICATIONS
As mentioned above, tourniquets are for open wounds on the extremities. Wounds of the abdomen, thorax, neck or head cannot be treated with a tourniquet. Also, if the bleeding can be controlled with direct pressure, a tourniquet is not indicated. There are also restrictions on the placement of a tourniquet that I will cover below.
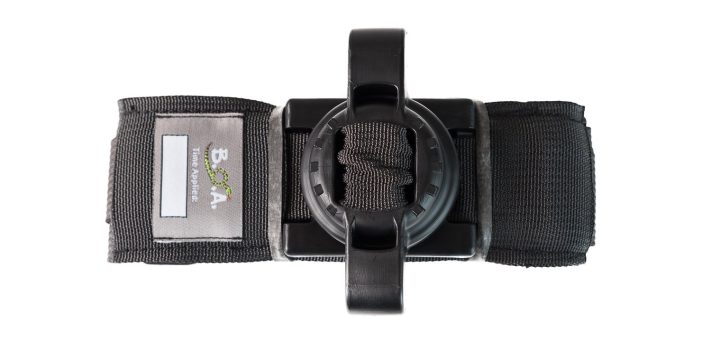
SELECTION
Do not try to outthink the experts in the selection of a tourniquet. The Committee on Tactical Combat Casualty Care (CoTCCC) is the prehospital arm of the Joint Trauma System for the Department of Defense. The TCCC recommendations are followed by both military and civilian responders. There are currently five non-pneumatic tourniquets approved by the TCCC:
1. TMT Tourniquet from Combat Medical.
2. CAT Tourniquet Gen 7 from North American Rescue
4. XT Tourniquet from SAM Medical
5. SOF Tourniquet Gen 4 from Tactical Medical Solutions
I have no affiliation with any of these companies, but our local paramedics carry the CAT tourniquets and that is what I was trained with, so that is my personal decision on what I will carry and put into my kit.
Some of these are available in different colors. It is recommended to choose a bright color so that it is obvious to subsequent responders that a tourniquet has been applied. Much less frequently would you want to make the tactical choice of black or camouflage.
Homemade (field-expedient) tourniquets are largely ineffective. We have all seen photos of mass casualty events where a good samaritan ties a bandana around someone’s leg thinking that may stop the bleeding. It won’t. There is no way to get enough tension to stop the blood flow and then secure it. But if all you have is a bandana or t-shirt, do not just give up completely. Use those items and apply direct pressure on the wound until other help can arrive.
Also, beware of cheap Chinese imitations of these products on large, online, mass-retail web sites. (Amazon, I’m looking at you…) Good tourniquets will set you back about $30 each, but cheaper ones are available, sometimes in packs of four or five for about the same price as one good one. Don’t fall for this. Some of these are made from inferior materials that can stretch or tear, seams that can unravel, plastic components that can bend or even break. If you already have one of these knock-offs, go ahead and use them for practice or training, then discard them. Don’t be tempted to keep them in your kit. Also, be sure to practice with the genuine tourniquets from the list of five above. The time you need one is generally not the most opportune time to figure out how to open the wrapper and put it into service.
PLACEMENT
The tourniquet ideally should be placed two to three inches PROXIMAL to the open wound. Proximal refers to a part of the body that is closer to the center of the body than another part. For example, the knee is proximal to the toes. The opposite is DISTAL. Some caveats however, the tourniquet should not be placed on a joint. It will be ineffective at stopping the blood flow and could cause damage to the joint.
Also, the tourniquet is most effective when placed directly on the skin. Yes, TRAUMA NAKED is a real thing. Removal of clothing is needed to properly examine the wound and is typically needed for the proper placement of a tourniquet. If you cannot take the time to determine the exact location of the bleeding, the tourniquet can be effectively applied over clothing as high up on the arm or leg as possible. However, the tourniquet must not be applied over solid objects within the clothing. As soon as the situation permits, the injured limb should be evaluated and another tourniquet positioned.
APPLICATION
If possible, keep the tourniquet loosely buckled and slide the loop on from the foot or hand. Not all situations will allow that, but doing so will reduce the time needed to properly deploy. Storing the tourniquet this way will also facilitate one-handed application. After placing the tourniquet two to three inches proximal to the wound (as described above) pull the strap to tighten the tourniquet and fasten it back on itself all the way around the limb, but not over the clips. Pull it tight. The band should be tight enough that the tips of three fingers cannot be slid between the band and the limb. Most tourniquet failures can be directly traced back to inadequate initial tension. Once the tourniquet is tight, begin twisting the WINDLASS (fancy term for plastic rod) to apply additional pressure. I was surprised how tight the tourniquet needs to be. You have two objectives here when determining how much to tighten the tourniquet:
1. The bleeding should slow, and then stop.
2. You should no longer be able to detect a DISTAL pulse.
The first should be obvious, the bleeding should stop once the tourniquet has been adequately tightened. Also, and maybe not as intuitive, you should no longer be able to detect a pulse in the extremity, this being a RADIAL (wrist) pulse for the upper extremity, or a PEDAL (top of foot) pulse for the lower extremity.
Secure the windlass with the plastic retention clip and velcro depending on the type of tourniquet. Mark the time that the tourniquet was applied. Most tourniquets will have a label area for this purpose, but in a mass casualty event, it is common to mark the time on the patient’s forehead with a sharpie.
Finally, do not remove the tourniquet. If there is still bleeding, you can apply an additional tourniquet above or below the first one. Removing, or even loosening the tourniquet will cause blood flow to resume and likely reverse any clotting that has taken place.
SUBSEQUENT ACTIONS
I must reiterate that the purpose of the tourniquet is to stop the patient from bleeding out. However, a tourniquet alone without follow-up treatment provides limited value. Typically, surgery is required to repair the trauma and save the life or limb.
MYTHS AND MISTAKES
Applying a tourniquet does not mean that the limb will need to be amputated. A tourniquet can be used safely up to two hours, and at times up to even six hours without permanent damage that would necessitate limb amputation.
Do not wait too long before applying a tourniquet. You must address the blood loss to prevent the injured person from losing too much blood and going into hypovolemic shock.
Be sure to tighten the tourniquet enough to constrict arterial blood flow.
Once a tourniquet has been applied, do not remove it.
Do not use alternative materials that can cut into the person’s skin such as paracord. This is not only ineffective, it is likely to cause more pain and additional injury.
TACTICOOLNESS
You’ve made it this far. Congratulations! But right about now you are probably thinking to yourself that this article is missing something. After all, what decent SurvivalBlog article can exist without some tacticool factor? So as to not disappoint, let me direct you to the tourniquet holster. You can do you own research here, but there are cloth, nylon and Kydex options available for attaching to molle webbing or belts. Put them on your plate carrier, belt, or even mount them to your holster. Add this to your EDC (every day carry) gear. Put one or two into your bug-out bag.
And for the ultimate in tactical brevity, call this device a TQ.
Get trained and pray daily.