


I know, you were expecting some sort of a solar box that held heat in for drying your clothes, perhaps even with a squirrel-powered tumbler to make the clothes come out fluffier, so my apologies. I had planned on making one of those to go along with my solar panels, solar food dryer, solar beeswax melter, and solar water heater among others.
While waiting to build my solar dryer I used the old-fashioned kind my mother, grandmothers, and everyone has used since rope was invented. By the time I was ready to build a box-type solar dryer, I discovered the rope one was working 51 weeks of the year and had some advantages of its own so I decided to stick with it.
Your second thought is, “How can there be a whole article on something as basic as hanging clothes?” It seems pretty simple, string a line and hang clothes on it right? But there’s a lot more to it than that and since most of us are accustomed to electric clothes dryers and are far removed from the old-fashioned kind, it’s something easily overlooked when prepping. Here are a few thoughts for our preps, those trying to live a self-reliant lifestyle as well as those who realize that electric dryers won’t be working too well if the grid goes down for a long time.
See my article on a Amish-style clothes washer so if you bookmark both of these on your SurvivalBlog archive stick, you can have a complete post-TEOTWAWKI washer and dryer set when your Maytag pair gets relegated to holding targets on the shooting range.
Rope
The rope of course is the most basic element needed for a clothesline. I’ve had good success with 5/16th rope and even though I’ve worried about it breaking a time or two when the winds were howling, it’s never let me down even though it’s ten years old. Selecting a rope is one of those times when there’s no such thing as “good enough.” Not just any rope will work. To be long-lasting it must not only be UV and rot resistant but selecting the correct diameter is important as well.
I gave up looking for clothesline rope online due to misleading headings and descriptions, and poor reviews by those commenting on using it as a clothesline. I wanted a rope that was nylon or polyester for UV resistance, white to keep color from bleeding onto clothes, braided (but not twisted) for strength and flexibility, with no core (personal preference), and 5/16” in diameter for a happy medium between too weak (¼”) and too large to work with clothespins (3/8”). If you do an online search, adding “marine rope” may help you find what you need.
When I recently replaced my 10-year old clothesline, my local farm store had exactly what I was looking for. I was able to do an up-close-and-personal inspection to be sure it was solid nylon with no core and high quality. I gulped at the price, 39¢/foot, but when I realized that 50’ only came to $19.50, it was well worth the investment for something that would last 10+ years.
Hanging the Clothesline Rope
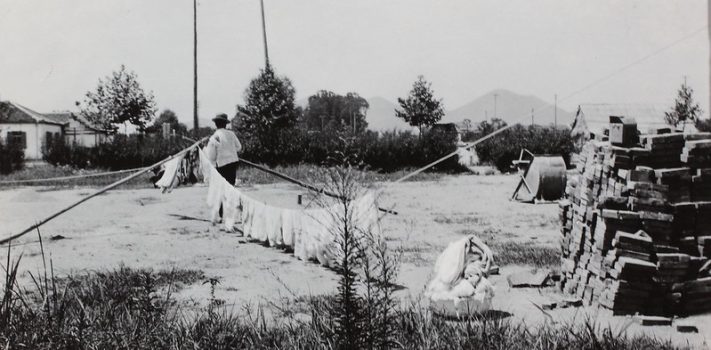
Location – There are many types of clothesline stringing options as discussed below but I chose the old-fashioned tree-to-tree method. It would seem like a sunny spot would be best, but since the wind is the biggest factor in drying clothes, I chose a moderately shady spot. This is due to partly because clothes come out a little softer than they do in full summer sunlight when left on too long after the full-dry stage. It also happened to be the only really workable spot where two trees were located close to the house. The type of trees I used are the last to get their leaves in the spring and the first to lose them in the fall so I get 7+ months of full sunshine, all in the colder months when it’s most beneficial.
Height Considerations – One thing to keep in mind is that the longer the runs of rope, the more stress heavy wet clothes will put on the line and the more it will stretch. I tied mine between three trees using two shorter runs of 15’ each. The rope is long enough to keep the loose end coiled up and hanging from the west tree. When relatives show up for a week, I uncoil it and tie it to a fourth tree for more capacity.
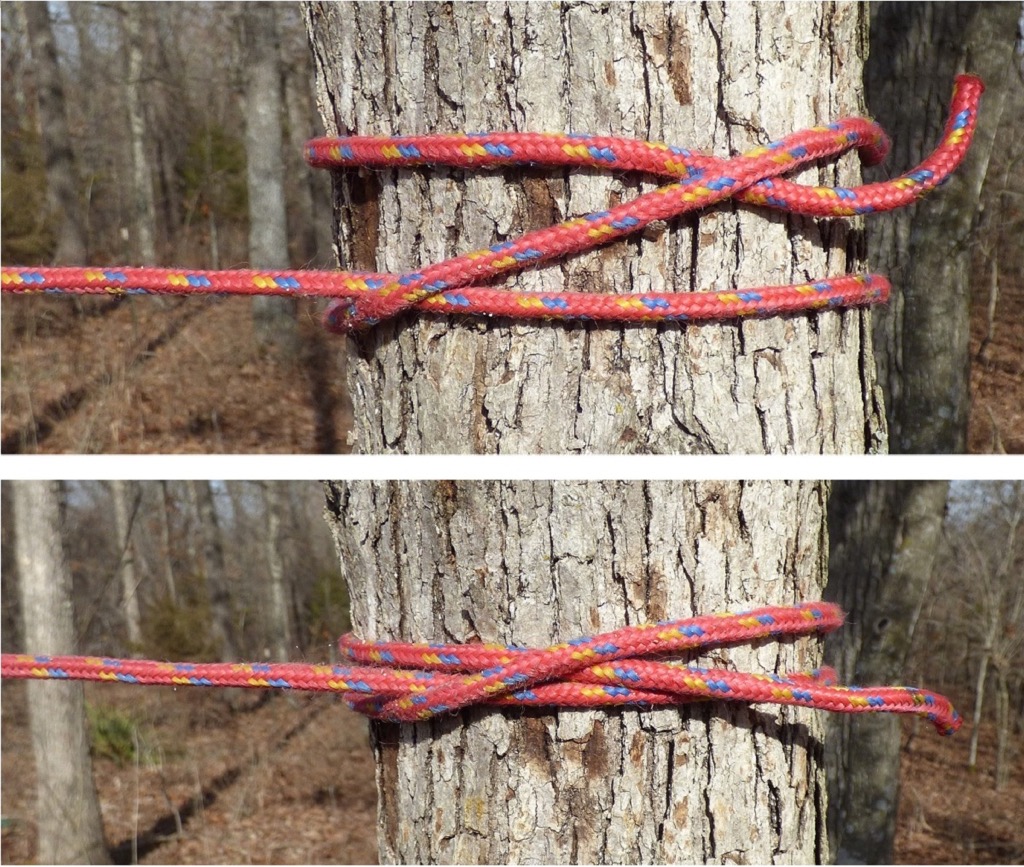
Tying the Line – The knot that works best for line attachment is called a clove hitch (Photo 1). While it’s not a particularly useful knot for most applications, it’s hands down the best knot for tying things to trees like clotheslines and hammocks. The rope in the photo is for illustration purposes only and most of these styles of rope have little to no UV resistance.
 The line obviously needs to be high enough that it keeps clothes off the ground and a fudge factor should be worked in to account for a little sag in the rope. Sheets and jeans are the longest items I hang so the line is high enough to keep those a foot off the ground. It helps to be able to drive the lawnmower under the rope as well when it’s not laundry day.
Clothesline Types
Aside from a rope between two trees, there are other configurations and types of clotheslines. To take up the least amount of space, the pole-mounted square type with many lines works well, as does the T-post kind with six or seven lines on it. To get a better idea do an online search of clothesline types to see what might work best for your situation. Lehman’s, an online-supplier for old-fashioned items, many of them Amish made, is a good place to start.
When I was a kid my mother had a very long clothesline in a loop with pulleys mounted on the house and a far tree. She stood on the porch hanging the clothes, pushing on the rope to move the clothes toward the tree and bring empty line to hang more clothes on. She was petite and couldn’t bench press a rolling pin so it didn’t take much strength to move the line even when full of clothes. Various clothesline hardware is available including special pulleys and a simple device that’s put in the center of the run to keep the bottom line from sagging too much.
Clothespins
Clothespins come in a variety of styles and materials. They will also be an excellent post-SHTF barter item.
Plastic clothespins – I can’t say much about these for lack of experience but plastic just doesn’t seem durable enough. Lehman’s has synthetic ones made from recycled hay wrap that resemble synthetic deck board material and seem like they’d be more durable and long-lasting than plastic.
Wood clothespins are the most common and nowadays are made of pine or other types of inexpensive wood while others are made of birch which is more durable. Modern ones also tend to have inferior springs made with small-diameter wire (1.1 mm dollar sore, 1.4 mm farm store) so the clothespins often come apart and leave a pile of springs and wood pieces in the bottom of the clothespin bag. Not a big problem since they are easy enough to reassemble, but it is a major inconvenience.
Maple Clothespins – if you either belong to the landed aristocracy, have more money than you know what to do with, or are serious about having the best of the best for surviving TEOTWAWKI, then maple clothespins are the only way to go. For the rest of us, check thrift stores, auctions, and Grandma’s basement. My ship came into port when I found 100 at an auction, including the hanging clothesline bag to put them in. They set me back $2.50 because nobody else even bid on them. One woman wanted to take my photo claiming she had never seen a man with clothespins in his hands before. I have since priced them online at several different sources including Lehman’s and cannot find them for less than, gulp, $20 for a ten-pack. Yes, $2 each. So it looks like I got $200 worth of clothespins for $2.50. Again, if you have any really old friends, they may have some on a dusty shelf in the garage they’d be willing to give you. It’s worth checking. At any rate, not only is the wood super durable to last a TEOTWAWKI-time, but the springs are very substantial (1.9 mm), bent a different way, and made from a gauge of wire that’s a third thicker than what’s on the market today so they only rarely come apart.
Springless (peg) clothespins – This is my preferred type of clothespin for most applications. They’re not quite as versatile as regular clothespins for thicker clothes like jeans and jackets so it’s best to have both kinds. They’re much quicker and easier to use, can’t come apart, and less manual dexterity is required. For those with arthritis, and/or decreasing manual dexterity, or hanging clothes on a winter day with cold fingers, these are just the ticket. Some reviews complain they don’t hold clothes well but based on the majority being very-high ratings, they’re most likely using 1/4” clothesline instead of 5/16th”.
Beware of most peg clothespins being sold online or at Walmart as they’re usually for crafts, not for hanging clothes. Be sure to read the ratings concentrating on the worst ratings first. Most complain the gap is too narrow for hanging clothes.
Clothespin bag – You’ll want a way to keep the clothespins easily accessible while hanging clothes. Clothespin bags hang right on the line so you can move it ahead of you as you work. Even though I have one, I prefer using one of the free nail aprons available from my local hardware store. I recently upgraded mine by replacing the tie strings with a webbing strap and clip buckle.
Hanging Basics
There are two main ways to maximize line space. The first is to hang sheets so the head and foot portions are the ones hanging down instead of lengthwise. Whichever way you hang them, you’ll still only have 50% of the sheet hanging down so they’ll dry just as quickly either way.
It seems only natural to hang all items stretched to their maximum width with a clothespin holding each side as typically seen in illustrations. Stretching to maximum width works for things like jeans which take the longest to dry, but everything else has a more space-saving way to hang. Shirt, towels, and most items can be allowed to sag between the clothespins and will dry just as quickly. For example, if a towel is 18” wide, it can be hung so that it only takes up 10” on the line and allowed to sag in the middle. Ditto with a sheet that’s 60” wide. By bunching it up at even intervals, it can be hung using only 36” or so inches.
Even more space-saving is to hang lightweight things like bandanas, washcloths, and underwear from one corner with a single clothespin. Again, they’ll dry just as quickly. This took me a while before I had the “duh” moment and it not only saves clothespins but time and space as well.
Clothes like shirts are best hung by the tail to prevent clothespin wrinkles on the shoulders. I also hang jeans and heavier items close to the ends of the line to cause less stress on the rope if the wind be blowing harder than normal.
Weather
It seems obvious that weather would be a big factor in using a clothesline but unless it’s raining, it’s generally not. I’ve had no problem drying clothes 51 weeks of the year even though I live in a humid and rainy part of the country where it freezes in the winter. On that odd week when the rain or snow just won’t stop, I wait a week until it does, then do laundry.
As previously mentioned, the wind does more to dry clothes than the sun so windy days are a help in colder weather. People joke about clothes “freeze-drying” in the winter but that’s exactly what they do. There’s a natural process called sublimation where a frozen liquid can evaporate and go straight to the gas phase without melting to the liquid phase first. That’s what a freeze dryer does when you preserve food. The food stays firm and maintains its shape better by not going to the mushy melt stage first. The same happens when you dry clothes in freezing weather.
In my experience as long as the clothes aren’t dripping wet when hung on the line, they’ll still dry in a single day. As an experiment for this article, one morning in January I hung a wash load of various bath towels when it was 13°F, the sun was shining, and it was a slightly windy that day. I checked four hours later while it was still freezing (30°F) and they were already dry. So if necessary, you can slap on the snowshoes and head for the clothesline.
It’s only two or three times a year when I have to bring clothes in to let them finish drying, usually because I forgot to get them washed and hung on the line sooner in the day. It’s only jeans and heavy shirts that don’t get quite dry enough, on cloudy windless days in winter when the days are shorter.
Even on windless days when it’s cold but warms up in the afternoon, or on freezing sunny days when the clothes warm by absorbing heat from the sun, they’ll easily dry in a day, just taking a little longer than they would on a day with at least a gentle breeze. As another test for this article, I was able to dry two loads of laundry in the same winter day using the same line. Year-round, if the weatherman is predicting even slight winds, I’ll do the heavy clothes first thing in the morning, and if those are drying rather quickly, I’ll follow up with light, more quickly-drying items like sheets and linens.
Conclusion
There you have it, Solar Clothes Drying 101.
Many of the more mundane and common topics like washing clothes fail to get mentioned in survival novels and are often omitted from prepping lists. We also tend to forget them when they’re not currently part of our daily routines. For those wanting to be prepared for every post-SHTF daily necessity, those striving to live a self-reliant lifestyle, and others who may just enjoy doing many things the old-fashioned way, once you get used to the routine of hanging clothes on a line there’s nothing to it and I’ve never regretted not having an electric dryer.
The only small downside I see is that line drying doesn’t remove as much lint from clothes as a regular clothes dryer will. Since I send my tuxes and Armani vicuña wool shirts to the dry cleaner anyway a little lint isn’t a big issue for me when wearing my everyday jeans and shirts.