


I would like to share my thoughts on the creation of a Bug Out Bag. (Or “BOB” for short.) I have refined my BOB based on my own camping experience, and the experience of others, especially survivalists and wilderness campers on Youtube. (The real ones, not phony Bear Grills types, LOL.) I will give credit for their ideas where it is due. A BOB is a personal thing, it should fulfill your short-term needs and, if you can spare the weight, a couple luxury wants.
Additionally, you also have to consider the people you are bugging out with, such as your family, and potentially share items across your bags. However, the essentials should be present in each person’s bag. My BOB is most likely too heavy for my current physical conditioning if I have to bug out on foot. However, I know in my head which items I are more of a luxury than a need and would ditch items accordingly. If I had to go on foot, then I would also carry more food than what is in my pack right now.
Keep in mind, if you attempt to build the BOB that I’m describing in this article it will be very expensive. Do not get discouraged. Start with simpler items and upgrade to better/higher quality items as you can. Your best bet is to make a monthly budget for all prepping and then prioritize what you will buy.
One of the first things that most people do when creating a BOB is to buy the bag. Instead, I would recommend you buy the bag towards the end. You should see how many things you need to put into the bag first. To start off, you can put items in something as simple as a school book bag. I think that picking the bag is a very personal choice. “Gray Man” blending in doesn’t really apply to a BOB in my opinion due to the size of bag needed to carry your gear. The main thing you have to decide is whether you want to get a bag with every possible “tacticool” pocket and zipper or go with a bag that has less compartments and organize with smaller pouches like the Rothco tactical breakaway pouch. Personally, I don’t like digging in zippered compartments so I like bag option number 2. There are many ways to expand a simpler bag.
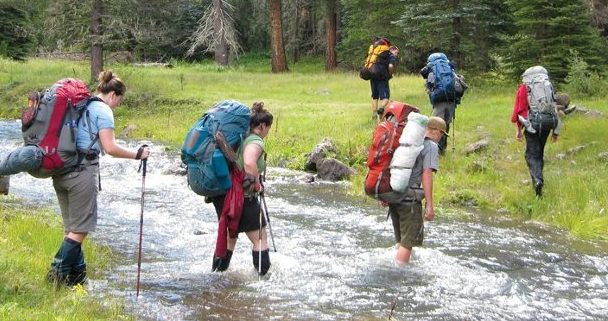
My Pack
I went with a very non-traditional bag, the Mountain Hardwear Crag Wagon 35L. This bag is actually originally designed for rock climbing. Please do not choose a bag just because I went with it, instead look at the features that bags offer and pros/cons. The main reason I went with this bag is because A: I got it at least 50% off the normal retail price, and B: I like that it has a giant front U zip opening that I can access everything quickly, without digging through the entire pack taking items out of a small top opening. The bag has a lightweight aluminum frame, waist and sternum straps and was built for carrying heavy rock-climbing gear. I have added 2 additional Wisport Racoon Pocket cylindrical 9L pouches on either side attached with lash straps to lash points that come on the pack. This increases the total pack volume to about 50L. In my opinion, a bug out bag should be between 40L and 50L in size.
On the opposite spectrum of the Crag Wagon bag would be something like the 5.11 Rush24. It has almost an overabundance of pockets and organization built in. I already had purchased the 5.11 Rush Moab sling pack as a small get home bag and picked up a 1st generation 5.11 Rush24 because I couldn’t pass it up at 60% off sale price. The Rush24 bag is only 37L. However, it can be expanded with adding pouches or small bags to the molle. The Moab sling pack is designed to attach to the front of the bigger Rush bags and even comes with the 4 MOLLE straps to connect it. You may want to find a bag that has the ability to put you rifle in the pack with the gun sticking out the top.
Tailor It To Your Locale
When determining what gear should go into your bag, you should adapt it to your location, weather/climate, and the time of year. You should consistently review your gear and update the contents of your pack. Keep in mind that what works for me and in my location may not work the best for you. For example, I have an allergy to fish, so I do not have a small fishing kit in my bag even though I live by countless small lakes. I put gear into 6 main categories: cutting tools, combustion, shelter, container/water, cordage/fixation, food, and other.
Cutting Tools
For cutting tools, you need to determine your firewood cutting strategy before choosing your gear. You can either go for a hatchet and have a medium size knife or you can go with a small folding saw with a large thick knife that can baton split wood. Pick the option that works best for you. In my opinion, a small Japanese folding saw and a bowie knife are the best combination. The Silky Ultra Accel Curve 240mm is the ultimate survival folding saw. The saw is very sharp and quickly cuts through large branches or small trees. Japanese saws only cut on the pull stroke. In my opinion, this is superior to western saws that cut on the push stroke because the blade can more easily bend and bind with western saws. Additionally, the slight curve in the Silky’s blade helps to draw the wood into the teeth.
Take a look at the Youtuber Survival Russia’s video: “Reality of Survival. Saws Vs Axes…”. He brings up several very good pros for a good saw including: it is much lighter (just over half a pound vs. 1.5lbs), safer to use, quieter thus stealthier, quicker to take down small trees, and uses less energy. The only big pro for the hatchet is that it can theoretically be used to skin game and make feather sticks for fire starting. However, when the saw is used in combination with a large bowie knife, the bowie knife can perform those tasks. Finally, the orange color of the folding saw is an asset. It is easy to place a saw or knife on the ground while working and then lose it in the surrounding vegetation. Orange or yellow colors will keep you from losing it in the woods.
If you choose to go with the hatchet, I would recommend you get the Husqvarna Hatchet. It is hand-forged, made of quality steel, and of the highest quality for value received coming in under $50.
The main knife that I choose to carry with the Silky saw is the Ka-Bar Becker BK7 bowie knife. It is full tang and very thick at 0.188”. The knife has a 7” blade and is made of 1095 Cro-Van steel. This steel is not a fancy stainless steel that is rust resistant, but it is a hard alloy, easy to sharpen, with good edge retention and is cost effective. The BK7 can take a beating. If you need to split some kindling, you can easily baton this sturdy knife with another piece of wood. This knife is the essence of a survival knife. Take a look at AlfieAesthetics Youtube video: “Ka-Bar Becker BK-7 – Knife Review & Demonstration”. (Warning: He does have some crude humor and language.) Expect to pay around $100.
A handful of other cutting tool items are useful in the kit. First, pick a regular sized multi-tool from a reputable name brand like Leatherman or Gerber. Expect to pay around $60 for a multi-tool with around 10 or more tools like the Leatherman Wingman or Gerber Multi-Plier 400 or 600. Don’t get carried away trying to have a multi-tool that has everything. The main necessities are pliers/wirecutters, additional blade, scissors, can opener, and screwdrivers. For keeping your blades sharp, pick up a Lansky Quad Sharp. It will quickly fix any blade damage with its carbide sharpeners. Finally, put a couple single edge razor blades in your pack. They weigh almost nothing and can come in handy.
Fire Starting
Getting a fire started is very important in a survival situation. You should have multiple choices for fire starting. First, find a good ferrocenium rod like the Gerber Bear Grylls. The composition of the rod sends hot sparks showering towards your tinder when struck with the striker. When the weather is damp or windy, use weatherproof matches. Finally, take a third option with a good old disposable lighter.
In addition to fire-starting items, I have included a small stove in my BOB. I have a Solo Stove Titan. It is a dual wall stainless steel secondary burn stove. What does that mean? It allows air to flow upwards and heat up between the outer wall and inner combustion wall. Then, the heated air enters the top of the combustion ring at holes in the top. The heated air creates a secondary burn that will look like flames coming out of the holes. What is happening is that unburnt wood gas that comes off the fire as smoke is burned in a secondary fire when the heated oxygen is introduced. The result is a hotter fire with minimal smoke. The Titan can take wood twigs/branches up to the diameter of your finger.
The stove is not essential to a BOB but, it only weighs 1lb and can very quickly boil water with easy to scavenge wood. It also works great for cooking smores in the backyard with kids when it isn’t in your pack. I put mine in one of the 9L Wisport Raccoon additions to my pack. Alternatively, another good lightweight solution would be a Jetboil. With a Jetboil, you can boil water faster than thought possible. As a downside, you have to have additional fuel canisters. A secondary benefit of the Jetboil is that it will not give off smoke and should be clean burning. Thus, it can help keep your position concealed while you cook.
Shelter
Shelter is just as important as combustion. To begin with, I do not recommend packing a tent. Tents weigh too much to carry on your back with all your other gear effectively. Personally, I have a DD Hammocks 3×3 meter tarp. It has 19 lash points and includes 4 pegs and guy lines. It comes in at 1.75lbs. Depending on the season, it might be a good idea to pack a reflective tarp. When hung at an angle towards a fire, the Arcturus Reflective Tarp can reflect radiant heat from the fire to warm you further. See this tarp used in Corporals Corner videos on Youtube. I know it is called a survival blanket, but it is really a tarp with a reflective side. Alternatively, this can also be accomplished with a cheap emergency blanket fastened to the bottom side of your regular tarp.
If you are camping overnight in extreme cold and have a tarp large enough to create a 3-sided shelter, one option is to add a clear shower curtain to the front of the shelter. The clear plastic will allow the radiant heat from the fire to come into the tent while trapping the heat inside the shelter. Use a reflective tarp or emergency blanket hanging from the inside of the roof to reflect the heat back at you. See the Far North Bushcraft and Survival video titled: “92 Degrees in A Campfire Heated Tent.”
(To be concluded tomorrow, in Part 2.)