


(Continued from Part 2. This concludes the article.)
11. NECK CORD KNOT
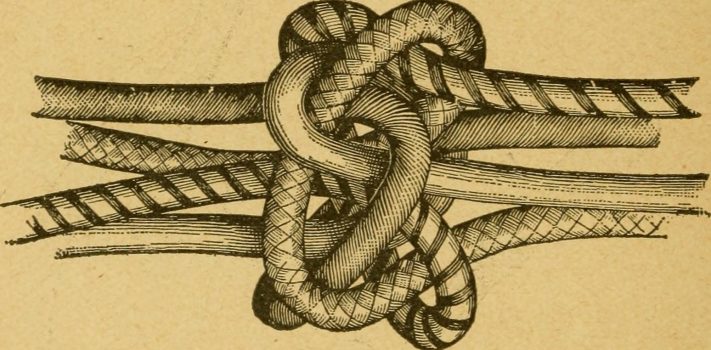
This isn’t one of the 10 basic knots but since it’s nearly impossible to untie, it’s useful for tying a cord to hang around your neck for carrying a small ferro rod, hand lens, compass, or anything else small you don’t want to lose. The interesting part is that it’s just two intertwined overhand knots. I don’t know the real name of this knot and it’s not well known but I learned it many decades ago after reading a story in Newsweek about a new knot discovery (Photo 20).
It seems simple to tie but it’s tricky. It’s made with a single cord but two colors are used here to see more clearly what’s happening. Here’s a little mnemonic I use. Bats are nocturnal so “The bats come out at nine, the snake comes out of his hole, goes underneath himself, comes up through the right pretzel, then ties himself in a knot.” Translation: first an overhand knot is made with the loose end coming out of the hole at the 9:00 position (A). Notice how it can be made into a pretzel (B). Next, the snake comes out of its hole (C), goes underneath itself (D), up through the right half of the pretzel (E), then completes its own overhand knot (F). Once it’s that far along, carefully tighten it up. Pull gently (G & H) until the knot begins to form a cross, then pull on opposite arms of the cross until the knot is tight (I), then trim the ends off (J). Notice in the two small photos the decorative sides of the knot, one with a parallel section and the other crossed.
[PHOTO 20 – Neck Cord Knot]
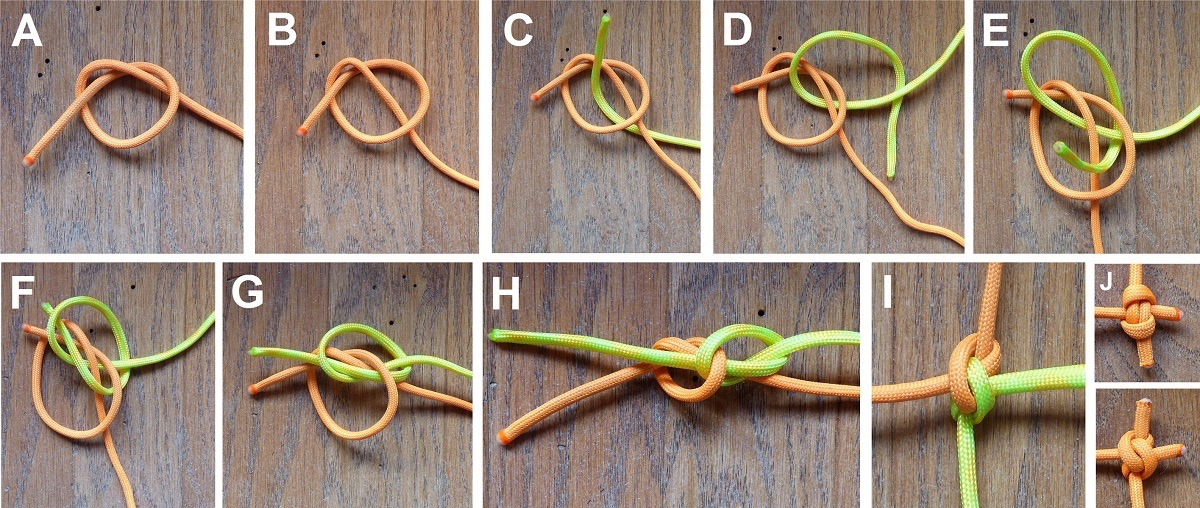
One last note on using cords to hang things around your neck. Photo 21 shows how to sew O-rings onto the cord to keep whatever is hanging there in place. On the right is a knot I tied 35 years ago on a hand lens and button compass which I carried for 25+ years until I stared building my house. Two split rings, sewn to the cord, are used to keep the hanging object in a flat position against your chest.
[PHOTO 21—Neck Cord Attachment]
A FEW ODDS AND ENDS
DOUBLING ROPE
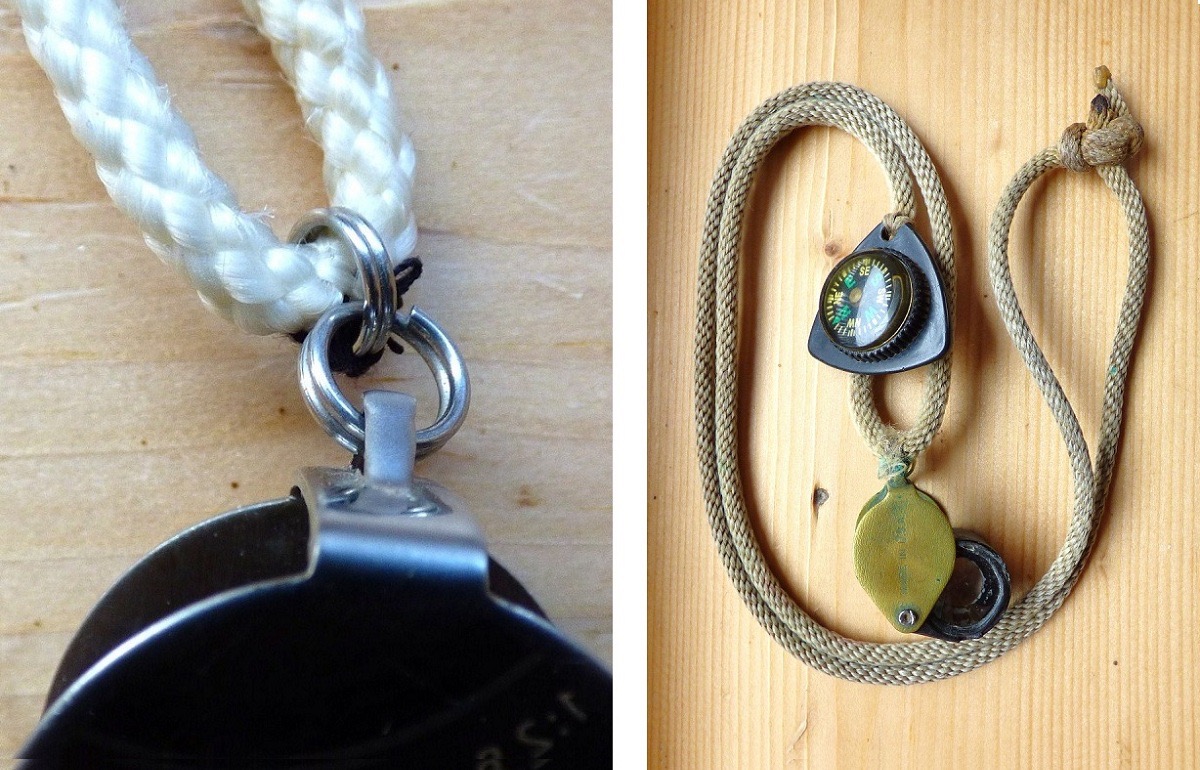
Oftentimes we want to double a rope to get more strength. Sometimes however, we think we’ve doubled the rope when we really haven’t done anything to increase the strength. Photo 22 (A) is the most common way people double a rope. At the arrow, which is where all the weight is being held, there is still just a single strand of rope so the rope isn’t the least bit stronger. While the cow hitch in (B) is stronger than (A), it still has a single-strand weak point at the arrow. (C) uses a figure-8 which truly is a doubled rope, but a figure-8 probably isn’t the best knot to use for strength in some situations. (D) shows our faithful friend the bowline, having a double strand of rope at every stress point.
[PHOTO 22 – Double Strength]
BAILING TWINE
Bailing twine deserves special mention. It has 1,001 uses and is dirt cheap. It’s not only strong (110 lb. tensile strength) but also UV resistant only $30 for almost 4 miles of twine (20,000’). At that price, even ultra-frugalists like me won’t feel bad about wasting some. It’s a great item to have in your preps and is cheap enough to have extra rolls so you can set up shop bartering 100+ foot sections after the SHTF.
I keep a back-up roll in my garden shed (twin packs $46) and the other I keep in my shop. I’ve found it’s best kept on a high shelf where it’s out of the way (Photo 23a), a guide made with duct tape, and a dispenser made by feeding it through an eyelet in the wall (23b.) I cut off what I need two feet or so beneath the eyelet so I don’t have to feed the loose end through it each time.
[PHOTO 23 a and b – Bailing Twine]
NOT A KNOT – Getting a Rope Up Into a Tall Tree
Here’s a useful trick I use for getting a rope high into a tree. Start with bailing twine (or fishing line) with a weight tied to one end. It will take multiple tries but throw the weight over the limb you need a rope tied to. Once the baling twine is over the limb lower the weight to the ground (Photo 24a.) Next tie a piece of rope or paracord to the weight (Photo 24b) and pull it up and over the limb by pulling on the bailing twine (Photo 24c.) If a larger rope yet is needed, repeat the process by tying it to the paracord to pull it over the limb. Once the weight end of the final rope is down to the ground (Photo 25d) you’ll need to make a loop so untie the knot and remove the weight. In Photo 25e, I didn’t want to cut the rope so I made a loop large enough for the reel to pass through. Once the rope is through the loop, pull on the loose end to raise the loop into the air (Photo 25f.) It will come to rest at the limb, secure in place, so you can now get on with the job which required you to have a rope tied to the limb.

[PHOTO 24 – Tree Rope Combo 1]
[PHOTO 25 – Tree Rope Combo 2]
I used this method for getting a line around the two limbs I needed to tie as mentioned with the trucker’s hitch above. I also use it when trimming very large trees. I tie a rope to the limb I’m cutting and have an assistant pull on the rope so the limb falls where I need it to instead of on top of a fence.
Though hard to believe, I once used it with a strand of paracord to pull a large tree down which had pinched the blade of my chainsaw. I had the paracord loop attached near the top of the tree and by rocking the tree back and forth, slowly at first only a few inches at a time, I was eventually able to build up enough momentum that the tree finally broke along the bottom cut I had made and fell down. I later used paracord to pull down a dead branchless tree. It was leaning quite a bit south towards the fence so by rocking the tree east and west, it finally fell without doing any damage.
A KNOT-TYING PROJECT
After writing this, I took a tarp and some cordage and out to my east 40 to set up a lean-to. I tied a total of 12 knots: one on each end of four guy lines, and four on the main ridgeline to hold the tarp up between two trees. You can see in Photos 26-28 how they were put to use.
I started off by using a clove hitch to attach one end of the ridgeline rope to a tree. I then used short ropes for the ridge line to demonstrate two splices. One was a fisherman’s knot, the other a square knot. The square knot was a better choice since it’s quicker and easier to tie and untie, and it works well in this application since there’s even pressure on each line as required for this knot. Next was a trucker’s hitch used on the second tree to provide enough tautness to prevent the ridgeline of the lean-to from sagging. This trucker’s hitch as well as the four on the guy lines were finished off with a slip knot instead of half hitches since this a short-term application and can be untied quickly when it’s time to break camp. Since I prefer not cutting cord when possible, you’ll notice in the photos that three of the knots were tied without cutting. In those cases, a trucker’s hitch finished off with a slip knot not only allows you to avoid cutting cord but a simple tug on the slip knot quickly unties it. Once you get to know some of these knots and start mixing and matching, you’ll discover even more versatility.
As mentioned, the most useful knots are strong, easy to tie, and easy to untie. I timed myself taking down the lean-to and it took three minutes and forty seconds to untie all the knots, wind the ropes, and fold up the tarp. Yes, I was hustling but it makes the point that all of these knots are quick and easy to untie thanks to the slip knots incorporated into most of the knots.
From this exercise you can see there are knots that work best for every situation and where tension was needed on all five lines, the trucker’s hitch is one of the most useful knots in the outdoors. Learn these knots and you can impress your friends who are still trying to move beyond granny knots.
[PHOTO 26 – Lean-to 1]
[PHOTO 27 – Lean-to 2]

[PHOTO 28 – Lean-to 3]
CONCLUSION
Once you’ve learned these knots and others, keep practice tying them until you can do it proficiently and quickly using muscle memory. Once you’ve accomplished that, you’ll know which knots work best for what and it’ll be easier to select the appropriate knot next time you need one.
Do yourself a big favor and learn to tie and use these knots if you haven’t already. If you can’t remember what each one is called but you can tie them blindfolded, that’s good enough where I come from.