


(Continued from Part 2. This concludes the article.)
Document Tools
Being able to store sensitive files and minimizing the chances of someone finding them is useful, but you still need to be able to view and edit the files in a secure and private manner without leaving details on what files you’ve worked on and what they contain all over your system (or the Internet). Many of the commercially available document and file editing tools such as Microsoft Office store a lot of information on what files you’ve worked on and potentially what’s stored inside them (for your own good, of course), and Microsoft has pretty much abandoned the standalone edition of Office and is forcing people to start using the online Office 365 version. Using free tools like Google Docs compounds the problem by moving all of your content under Google’s control. To further increase the privacy and security of your sensitive content we’re going to set up some free tools on the removable drive that provide all of the functionality you need but do a really good job of protecting your privacy.
The first tool set we’re going to use is called LibreOffice, which is a free and open source office suite similar to Microsoft Office. It includes:
- Writer – Documents (similar to Microsoft Word)
- Calc – Spreadsheets (similar to Microsoft Excel)
- Draw – Diagrams (similar to Microsoft Visio)
- Presentation (similar to Microsoft PowerPoint)
- Database (similar to Microsoft Access)
- Other tools
One really nice feature of LibreOffice is that it can open most equivalent Microsoft Office documents – LibreOffice Writer can open most MS Word documents (.doc, .docx), LibreOffice Calc can open most MS Excel spreadsheets (.xls, .xlsx, .csv, etc.), etc. That allows you to keep using files you may already have. Note that LibreOffice has its own file format called the Open Document Format, with file extensions that start with ‘.ODx’, where ‘x’ is different for each application. Here’s a complete list of the various file types LibreOffice supports – https://fileinfo.com/software/libreoffice/libreoffice.
Most LibreOffice tools are very similar to their MS Office counterparts, so I’m not going to go over how to use them, but the LibreOffice folks have created some great documentation for each of the tools.
Just like with VeraCrypt we’re going to install LibreOffice directly on the hidden partition on your removable drive to minimize any fingerprints that might be created on your system when you use it. Note that this is referred to as a ‘portable’ version of LibreOffice.
Start by mounting your hidden VeraCrypt volume if it isn’t still mounted, then use File Explorer to create a folder called ‘Downloads’ on your mounted volume; this isn’t absolutely necessary, but I like to keep things organized (‘S:\Downloads’ on my system, since I always mount the hidden volume as drive ‘S’). Then download the latest version of the portable installation executable for LibreOffice into the Downloads folder. When the download finishes, go to the S:\Downloads folder in File Explorer and double-click on the downloaded .exe file. The installation process is pretty straightforward, so I’m not going to include screenshots for this part:
- Select your language
- Click ‘Next>’
- On the ‘Choose Components’ dialog, you can select ‘Remove Extra Languages’ to save some space
- Click ‘Next>’
- In the ‘Choose Install Location’, select a folder on your mounted hidden drive
- Default will be set to a folder called ‘LibreOfficePortable’ under the folder containing the install .exe file that’s currently running (e.g. ‘S:\Downloads\LibreOfficePortable’ on my system)
- I changed it to ‘S:\LibreOfficePortable’, but you can install it anywhere on the mounted hidden partition.
- Click ‘Install’
Once the installation is done you can delete the downloaded installation .exe file (optional to save space). When that’s completed, use your File Explorer and go to the root folder for your mounted hidden volume (‘S:\’ for mine) and create a new folder called ‘Temp’ (‘S:\Temp’) to store LibreOffice’s temporary files. This will be used to prevent LibreOffice from storing any temporary files on your computer’s local disk that might contain sensitive data. If you want, you can also create a default folder for LibreOffice to store your documents in – if you don’t the default will be the root folder of your mounted hidden volume (‘S:\’ for me) which might get messy if you plan on working with a large number of files. I created ‘S:\My Documents’ on my system.
Now you need to tell LibreOffice to use the new temporary and default document folders, so navigate to the folder where you installed LibreOffice Portable (‘S:\LibreOfficePortable’ for me), then double-click on ‘LibreOfficePortable.exe’ file to start the LibreOffice main program. Note that you may get security warning from Windows, since LibreOffice still wants to write to your system’s folders, which Windows is sensitive about. Don’t worry – we’ll change that in a second. Once LibreOffice is running:
- Select ‘Tools/Options’ to open the Options dialog
- Expand ‘LibreOffice’ (click on the ‘+’ to the left)
- Select ‘Paths’

- Select ‘Temporary Files’ under ‘Paths used by LibreOffice’, then click on ‘Edit’
- A folder selection dialog will pop up
- Select the ‘Temp’ folder you created earlier (‘S:\Temp’ for me) and click on ‘Select Folder’
- If you created a new default ‘My Documents’ folder earlier, highlight ‘My Documents’, click ‘Edit’ and select the new folder
- Back on the Options dialog window, click on ‘Apply’, then ‘OK’.
LibreOffice is now ready to use. One word of caution – when opening documents on your hidden volume, you should open the associated LibreOffice application first (Writer, Calc, etc.), then select ‘File/Open’ and navigate to the file you want to open. Don’t double-click on document files to open them, even if it has a LibreOffice file extension – when Windows File Explorer opens a file it keeps a record in the Windows registry.
You should also keep in mind that your files and documents are only protected as long as they’re stored in the encrypted volume – if you save a file on your local system or copy it from the mounted hidden partition to a local disk, it’ll become accessible to the operating system and potentially other applications. We’ll talk about a way to securely share files with other users later on.
Other File Types
While LibreOffice Portable is great for viewing and editing documents, spreadsheets and diagrams, it’s not a great choice for viewing other files types such as PDF, ePub, Mobi, etc. There are some good open source PDF and eBook readers available such as FBReader, but most of them aren’t designed to be run from a removable drive and require that you install them on your local system, meaning that’ll they’ll leave fingerprints on your system with information on the files you opened. The best solution I’ve found that works well with our hidden approach to documents is called Sumatra PDF, which can be run as a single standalone executable and doesn’t make any changes to your system. Sumatra PDF can read PDF, ePub, MOBI, CHM, XPS, DjVu, CBZ and CBR files. Note that Sumatra PDF is only available for Windows, so if you want to use Mac OS or Linux you’ll need to find an equivalent solution for your operating system.
To install it, first create a folder on your mounted hidden partition to hold the executable – I used ‘S:\Sumatra PDF’. Then download the Sumatra PDF portable version zip file into the folder you created and unzip the downloaded file into the same folder. That’s it – the Sumatra PDF viewer .exe is now sitting in the folder. You can delete the original download file to save some space.
As with LibreOffice documents, if you want to open a PDF, ePub or other file, you should start the Sumatra PDF app first by clicking on its .exe, then use the small document icon in the upper left corner to select the file you want to view. Double-clicking on a file will cause Windows to use whatever default application is defined for that file type, and it leaves fingerprints about what files you’ve opened on your system.
Organizing Things
So far I’ve recommended creating a ‘Documents’ folder in the root of your hidden VeraCrypt volume for your documents, and individual folders for each of the applications. However, unlike the standard Windows/Mac/Linux applications, we’re running everything directly from standalone files on removable storage, so you can organize your executable programs and documents any way you want on your hidden volume. For example, you could create a single ‘Programs’ folder in the root of your mounted hidden volume and create a separate subfolder under that for each application. Since there are minimal dependencies on what files are in what folders, you can move things around at will. The one exception to the are the temporary and default document folders you set when you installed LibreOffice – if you want to move those you’ll need to back into the ‘Options’ in ‘LibreOfficePortable.exe’ and change the paths to point to the new folders.
The same applies for your documents – if you want to create subfolders to organize things and move them around, go ahead.
Further Misdirection
No matter how stealthy you try to be, Microsoft Windows will inevitably still have some record of what you’ve been doing on your system. Most of the time that information is stored in something call the registry, which, if you’re not familiar with it, is Window’s version of extreme hoarding for information. To illustrate this, click the search icon (magnifying glass) in the lower left corner of your Windows desktop, type ‘registry’, and click on ‘Registry Editor’ in the left column. In the registry editor, click on ‘File/Search’ and enter ‘LibreOfficePortable’ in the search window that pops up. It’ll probably take several minutes, but you’ll most likely see at least one instance of information showing something you did on your secret hidden volume. If someone is running forensics on your system in order to figure out what you’ve been doing, they’ll realize that there are programs and documents they haven’t found yet and may continue their coercion until you give them up.
In order to make them think they’ve found everything, you can enhance the effectiveness of your decoy VeraCrypt volume. If you have your hidden volume mounted, dismount it and then mount your decoy volume on the same drive letter you used for your hidden volume by entering your decoy password after clicking on ‘Mount’. Now go through the previous steps to install portable LibreOffice and Sumatra PDF on your decoy volume just like you did on your hidden volume. That way any fingerprints they find on your system pointing to programs you ran on your hidden volume can be explained by what’s installed on your decoy volume. Don’t forget to unmount your decoy volume when you’re done.
I’m not as familiar with what types of information Mac OS or Linux may collect regarding your activities, but if you’re at all concerned you should probably take these same steps for them.
Usage Steps
Using this solution is pretty straightforward:
- Log onto a Windows computer using an account with Administrator privileges
- Plug your storage device into an available USB port
- Open a File Explorer and navigate to the VeraCrypt folder on the mounted device
- Run VeraCrypt
- Select the drive letter you want to mount your volume on
- Click on ‘Select File’ and navigate to and select your VeraCrypt volume file
- Click on ‘Mount’
- Enter the appropriate password – decoy or hidden volume
- The associated volume will be mounted
- Do your work
- Close all applications (including Filer Explorer) when you’re done
- Go back to the VeraCrypt window
- Click on ‘Unmount’
As I mentioned previously, you may get a pop-up message telling you applications still have files open on the volume you’re trying to unmount. If that happens, verify that you’ve closed all applications and wait a minute or two and try again. If you still get the message you can probably safely ignore it and unmount the volume – I’ve done so dozens of times and have never had a problem.
Sharing Files
No man is an island, and there will most likely be times you need to share files or documents stored on your hidden volume with other people. For example, you may have to make some updates to your communications SOP that you need to share with the rest of your group. You can do so reasonably securely and privately by copying the file(s) onto a USB drive, physically transferring the drive to the other user to copy onto their hidden volume, then securely wiping the drive. However, this approach can be cumbersome if other users aren’t physically close by. You could possibly mail the USB drive, but given that pretty much all of the package transport services (including the USPS) will potentially have access to the drive while in transit, that’s not necessarily the best idea. There are other encryption options available for protecting the USB drive, but the best approach is to do the exact same thing you did for your original VeraCrypt volume, just on a smaller scale.
Plug your VeraCrypt removable device in, then run VeraCrypt and go through the exact same steps you did earlier when you created your hidden volume, but create a small hidden volume file on your local disk. Size the outer decoy volume to be large enough to hold the file(s) you want to transfer along with another decoy file or files, and size the hidden volume to be slightly larger than the file(s) you actually want to transfer. For example, if I want to send someone a 10MB file, I’d probably create a 15-20MB outer volume and an 11MB hidden volume. Mount the outer decoy volume, copy a small decoy file or two onto it, dismount it, mount the hidden volume and copy the actual file(s) you want to transfer. You’ll also need some secure way to inform the recipient of the decoy and hidden volume passwords – this should not be done via any digital electronic means that can be associated with you or the recipient.
Now you can share the small VeraCrypt volume file using email, Google Drive, or anything else you want, since it’s fully encrypted, and if it’s intercepted and you or the recipient are coerced you can just give up the decoy password.
Notes
While this solution provides a pretty good degree of security, privacy and plausible deniability in a number of different scenarios, it can’t protect you from everything. There are several things that you need to be aware of:
- If the computer you’re running this on is infected with data-stealing or keyboard monitoring malware, whether from a private hacker or government, everything you do can still be recorded and/or reported, including whatever information you’re typing into any files. You still need to practice good security hygiene on any computer you use (e.g. avoid dubious web sites, don’t install unknown software, run antivirus, etc.) You may want to consider getting a second inexpensive computer (like a laptop), set it up once and never connect it to the Internet after that.
- Once you’ve mounted the hidden volume, your operating system and programs with appropriate privileges can potentially access your files. Try to limit your exposure by only mounting the hidden volume when you need to access or work on it, and dismount it as soon as you’re done.
- If you forget or lose your passwords then you’re stuck – there’s no way to recover them. Use some guile and ingenuity to make sure you’ve got some safe and secure way to remember your passwords. I recommend against documenting the hidden volume password anywhere on your system or online, as those can be compromised. Storing the decoy password using a password manager is okay, since that’s something you’ll need to give up anyway if you’re coerced.
- If the storage device you’re using fails you’ll lose your data. If the data is critical you should consider getting a second device (it can be an inexpensive USB drive) and make regular backups of either your whole device or just the VeraCrypt volume file.
- If you want to get really sophisticated with your decoy files, create files that have the same names as the sensitive files in your hidden volume but fill them with innocuous or misleading information.
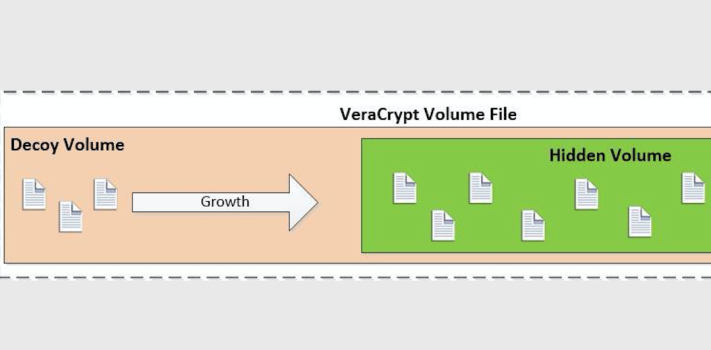
- You should occasionally mount your decoy volume and make some minor changes – e.g. edit a file or two, add or delete some small files, etc. The modified date on your VeraCrypt volume is updated each time you mount the hidden volume and someone analyzing your system might get suspicious if the VeraCrypt volume file has been modified recently but the files in the decoy volume haven’t been touched for years.
Conclusion
Using a computer as a tool to organize and document your preparations can greatly simplify the process of managing large amounts of complex information. However, as with everything in life, there are tradeoffs in terms of privacy and security. Using a solution such as VeraCrypt hidden volumes and open-source document tools can help reduce the risk of your sensitive information getting into the wrong hands, but keep in mind that it doesn’t solve every security and privacy problem – you still need to practice good security hygiene in other areas such as running antivirus, avoiding shady web sites and not clicking on email links you’re not 100% sure of. In a future article I’ll be discussing additional ways to use VeraCrypt to help protect you while you’re doing other types of work such as surfing the web and reading email.