


The Bolt Action Rifle
In 1836, Johann Nikolaus von Dreyse introduced the first successful bolt action rifle, the needle rifle, using paper cartridges. By the mid 1850s, bolt action rifles using metallic, centerfire cartridges were introduced. These, in turn, lead to iconic designs like the 1891 Mosin Nagant, the Lee-Enfield, Mauser bolt actions, and the 1903 Springfield. Among their many advantages, bolt actions tend to be strong, reliable, fast to operate, and easily-maintained.
Cleaning the Bolt
Over the course of time, a combination of lint, powder and primer residue, dirt, oil, and condensation can collect in the interior of a rifle bolt. When enough of this gunk collects, it can impede the forward motion of the firing pin, particularly under cold weather conditions. This can prevent the rifle from firing when the trigger is pulled.
To avoid this malfunction, the bolt should periodically be disassembled and cleaned. With most Mauser, Remington, Springfield 1903, Winchester, and similar bolt action rifles, the bolt can be effectively disassembled and cleaned by the owner. Some other brands, like Savage, tend to be more complicated, and may require the attention of a gunsmith.
My first experience with disassembling and cleaning a rifle bolt came when I acquired an M1893 Spanish Mauser. My experience may be a fairly typical representation of what is involved in this process.
The M1893-SeRies Spanish Mauser
I had always wanted to own a bolt action rifle, but had somehow never gotten around to it until recently. With the help of the Elk Creek Company, I acquired a Mauser Model M1893. I have been having great fun testing the rifle, and plan to submit a more extensive range report to SurvivalBlog in the near future.
As I was familiarizing myself with the rifle, I noticed that the safety was quite difficult to operate. I wondered if this might be due to dirt and other grit that had collected inside of the bolt body. With that in mind, I searched the Internet for information on how to disassemble and clean the bolt of a Model 1893-94-95-96 Mauser. The same instructions apply to Model 1916 Spanish Mausers. I found several very helpful YouTube videos:
- https://www.youtube.com/watch?v=oKSP1wMBQG0
- https://www.youtube.com/watch?v=3baq94M4BeE
- https://www.youtube.com/watch?v=3nDO-3Pj23Y
Disassembly
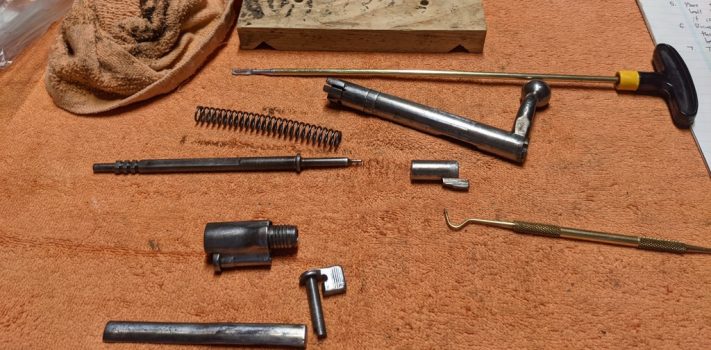
Based upon the information presented in the videos, I took the following steps to disassemble the M1893 bolt:
1. Verified that the rifle was unloaded.
2. Cycled the bolt to cock it, and then moved the flag safety to the safe (up) position.
3. Opened the bolt, released the bolt catch, and removed the bolt from the rifle.
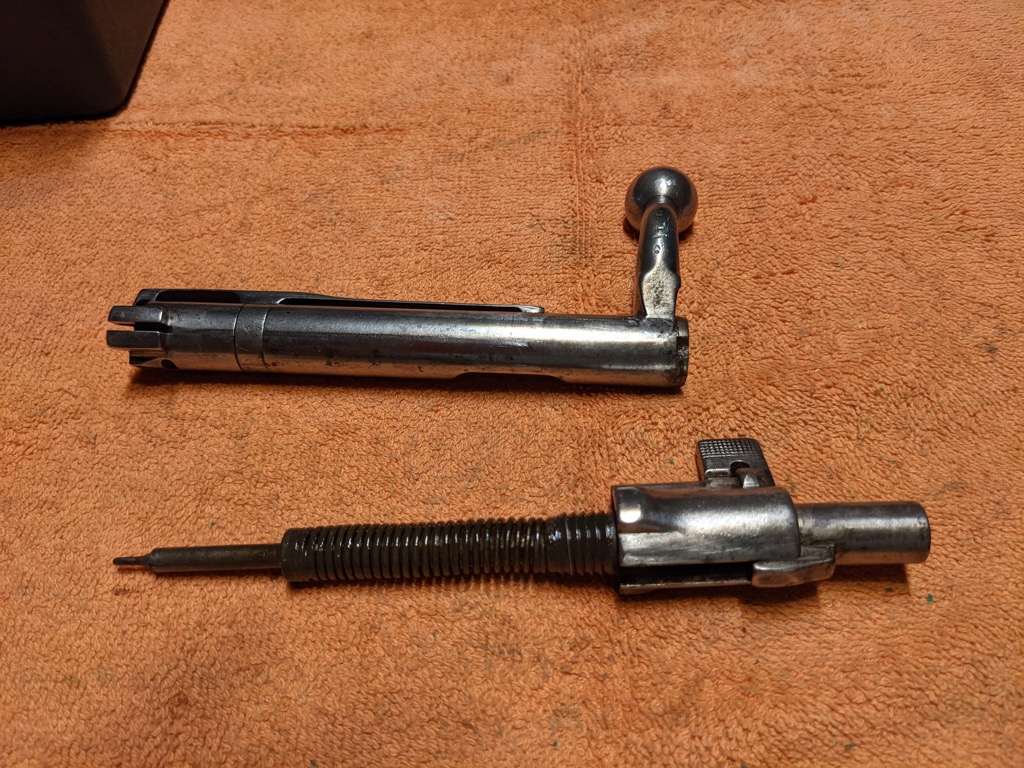
4. Rotated the back of the bolt counterclockwise to unscrew it from the bolt body. Put the bolt body aside for later attention.
5. Placed a block of hardwood on the work surface. Set the end of the firing pin on the block of wood with the rest of the striker assembly positioned vertically above it. Placing the thumb of the left hand on the safety and the remaining fingers of the left hand around the striker assembly, pressed downward toward the block of wood in order to compress the mainspring.
6. While continuing to maintain downward pressure, rotated the cocking piece on top of the striker assembly 90 degrees (this can be done in either direction), and then lifted if off from the striker assembly.
7. Gently released the downward pressure on the striker assembly. Removed the firing pin and mainspring from the striker assembly.
8. Moved the safety to the bolt lock (right) position, and removed it from the striker assembly.
9. Removed the extractor from the bolt body by rotating the extractor to the left position, and pushing it simultaneously forward and left to release it from the lugs on the extractor collar.
Cleaning
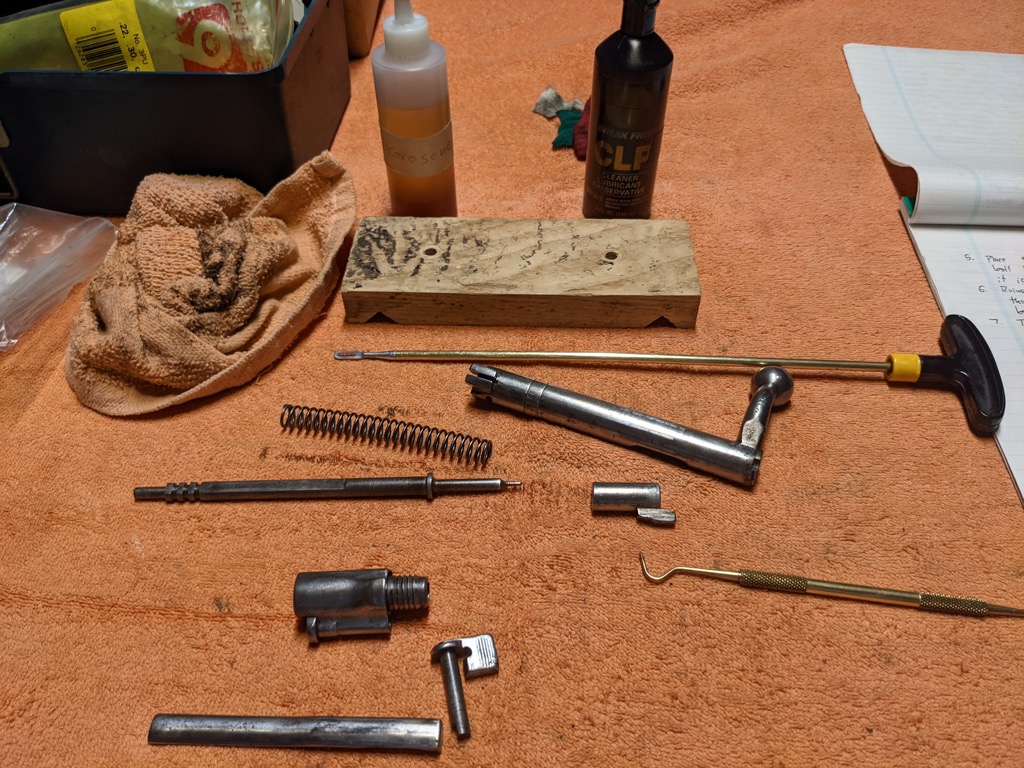
The inside of the bolt had a generous coating of somewhat dirty grease, but otherwise was in relatively good condition. I began the cleaning by wiping away as much of the grease as I could with a dry rag.
Next, I wiped down the outside of the various components with a rag wetted with kerosene.
Then, I used kerosene wetted patches of various sizes with a cleaning rod to scrub the inside of the various hollow parts.
Next, I used kerosene patches with a brass dental pick to get into small crevasses that were inaccessible to the cleaning rod.
Finally, I used BreakFree CLP patches of various sizes to lubricate and protect all the places I had cleaned.
Reassembly
I took the following steps to reassemble the bolt:
1. Reattached the extractor to the bolt body by sliding the slot in the back of the extractor over the lugs in the extractor collar.
2. Reinserted the safety into the striker assembly, and moved it to the safe (up) position.
3. Placed the mainspring on the firing pin, and then inserted the rear of the firing pin into the striker assembly.
4. Placed the end of the firing pin on a hardwood board on the work surface, positioned the assembly vertically with the striker assembly uppermost, and placed the left hand around the striker assembly with the thumb on the safety lever in the safe position.
5. Depressed the striker assembly downward against the mainspring sufficiently to allow the cocking piece to be placed over the top (back) of the striker assembly and rotated 90 degrees into position.
6. Placed the striker assembly into the bolt body, and rotated it clockwise until it was screwed fully into place.
7. Reinserted the bolt into the rifle and depressed the magazine follower to allow the bolt to be closed.
8. Turned off the safety and moved the bolt handle upward to decock the rifle without dry firing it.
Preliminary Results
After this cleaning, the bolt seemed to operate more smoothly, but the safety was still extremely difficult to engage.
Further Work on the Safety
The next day I decided to address the problem with the safety by gently polishing the places where the safety and the cocking piece engage each other.
It is very important to proceed with caution in this task. If too much material is removed from the cocking piece, then the rifle may become prone to accidental discharge. This occurs if the sear is unable to reengage the cocking piece after the trigger is pulled while the rifle is set on safe. If this occurs, the rifle will discharge accidentally when the safety is disengaged. Correcting this problem would involve replacing the cocking piece. Since the other possible solution to the problem of an overly stiff safety also involves replacing the cocking piece, I decided that I had nothing to lose by attempting the polishing solution first.
I began by taking a Sharpie and marking the point on the cocking piece that is engaged by the safety. I then cocked the bolt, put the safety in the safe (up) position, and removed the bolt from the rifle.
Next, I disassembled the bolt, and used an emery board to lightly polish the edges of the cocking piece and of the safety where they engage each other. I then wiped the grit away from the polished area and surroundings with a rag.
Next, I kneaded a tube of TW25B grease. TW25B is designed to work well under cold weather conditions (down to -90 degrees Fahrenheit). I applied a thin sheen of TW25B to the firing pin. Upon reflection, I had become concerned that I might have left the firing pin too dry after the previous day’s cleaning. While the bolt was disassembled, I was able to address this concern. I also applied a small amount of TW25B to the edge of the safety where it engages the cocking piece.
I reassembled the bolt, inserted it in the rifle, and tested the safety. The safety was better, but still somewhat difficult to operate.
I again cocked the bolt, removed it from the rifle, and disassembled it. I wiped the TW25B from the safety and cocking piece, and polished the metal more extensively with the emery board. I then once again wiped away the grit, reapplied TW25B to the safety and cocking piece, and then reassembled the bolt.
After I reinserted the bolt into the rifle, I found the operation of the safety to be much improved. I also function tested the rifle by repeatedly cocking the bolt, putting on the safety, pulling the trigger, and turning off the safety. The sear consistently engaged the cocking piece in a safe and reliable manner.
Conclusions
I am glad that I took the time to learn how to disassemble and clean the bolt on my rifle. I now feel more confident that it will operate reliably under cold weather conditions. I am also pleased with the improved operation of the safety.
I find working with the M1893 Mauser to be very aesthetically pleasing. The rifle is elegantly functional without unnecessary intricacy or artifice. Peter Paul Mauser was truly a genius. I am grateful to JWR and Elk Creek Company for their part in helping me to acquire this interesting and historic rifle.
Disclaimer
SurvivalBlog’s Senior Editor JWR kindly paid the shipping and insurance on my order from Elk Creek Company. He also sent me the gift of autographed copies of two of his books. This was done without any expressed or implied solicitation to write about my purchase from Elk Creek Company. His kindness must be considered an expression of his character and not an inducement. I did not receive any other financial or other inducements to mention any vendor, product, or service in this article.