


(Continued from Part 1.)
The planting process starts by seeding most crops indoors under artificial lights about 4-6 weeks before it is time to plant them outside; Here, refer to the USDA Hardiness information for planting times. Most crops need from 60 to 90 days to mature after you’ve transplanted. In Zone 5, I start spring seeds indoors in February, summer seeds indoors in April and fall seeds in July. Once things have sprouted, they need to be transitioned outside. You cannot just take a plant from the low light of the indoors into the full power of the sun without letting to plants become accustomed to the change gradually. Each cell on the plant has sensitive cells to allow photosynthesis – the process of converting sunlight into energy. These are similar to your eyes in the sense that they open wide in low light to allow more light in, then close down in brighter light. Taking a plant directly outdoors is like walking from a dark basement into the bright sunlit sky and looking up at the sun – your eyes snap shut to protect your cornea until your eyes adapt. Plants do not have eyelids and their cells will literally explode if you do this – not instantly, but the day after you put them in direct sunlight you will see leaves starting to turn brown and die. You must take them outdoors and place them in shade, or cover with shade cloth, for a week or so, then move to the full light. Make sure to factor this into your transplant schedule. Once they are hardened off, and the timing is right for your zone, transplant them. Then, you have two to four weeks before it is time to start the next wave – unless it’s fall. Then you have to wait until closer to spring to start over. Always start more seeds than you need to account for loss – you can get more seeds from your harvest, but you can never get the time back you lost on a total crop failure.
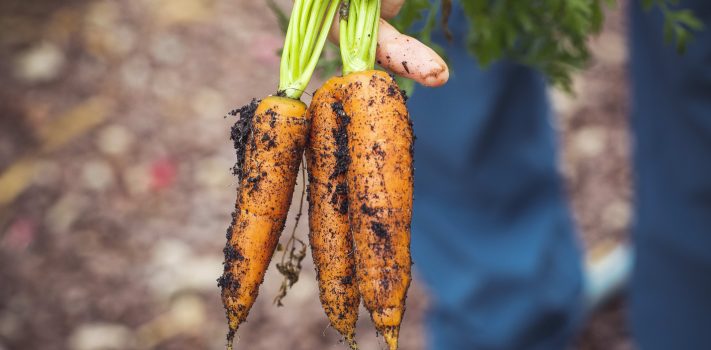
After the first year, expand your 10×10 space by 4 feet in length and width and add two more rows. Now, in addition to the original four crops, add cabbage and carrots for spring and fall and lentils and winter squash for summer. Each year, add a little more space and add a new crop or two into your rotation. Soon, you will have a large garden and the ability to make the compost material to grow what you need to feed your family. By slowly adding space and crops you will not overwhelm yourself trying to plant two dozen things – like the little can of Emergency Seeds would have you do. You will build your space, your soil and most importantly your knowledge. Your failures are more important than your successes. Every year some part of my garden fails. From these failures, I learn new lessons. These lessons are frustrating now, but in a real survival scenario, they may be fatal. Learning as much as possible now will serve you well.
As you begin to get successful, say in year three or four, you will learn just how much space you will need to sustain your family long-term. You will also understand that your small can of seeds is not even close to enough seeds to feed even a small family. You must have the seed stock in place before WROL if you hope to grow food after the first year. In fact, you will need that year’s supply of food to allow you to begin to expand your space and get large-scale crops in the ground.
Counting Calories
You have to know how many calories are in each crop, and how much to plant for each person. A 2,000 calorie a day diet is close to 800,000 per year. For a quick break down that might end up being:
• 225 pounds of dried corn
• 200 pounds of dried peas and/or dried beans
• 50 pounds of greens such as Kale, lettuce, spinach and green beans
• 50 pounds of beets
• 200 pounds of potatoes
• 50 pounds of squash
That is for one person, and it is daunting. Using intensive growing techniques, with lots of compost and adequate crop rotation, that is close to 1/5 acre per person, per year. That includes growing all three seasons. It also means you must have the seed stock on hand for each. For easy calculations figure a 20:1 ratio of harvest to seed stock and you will begin to understand how much you need to have on hand to even start. The best way to have that stock is to grow your own in your scaled-down Survival Garden now and be sure that it is big enough to produce your seeds stock every year. So, your Survival Garden is exactly the size you need to have adequate seed stock for a full WROL event. That way your stock is from proven materials, is fresh and has the best chance of germination. You are not a hobby gardener, but a practicing Survival Gardener.
Calculate your needs and make a plan to get there. Do not start big – you will fail and get discouraged. Start with my action plan and accrue knowledge and seeds over time. It is possible to generate all the seed stock you need in a small space, say a ¼ acre. You can do it in containers, raised gardens, and vertical gardening if you are short on space. A lack of land cannot be an excuse, just a challenge. Without the seed stock you have no ability to grow your next year’s crop. If a sudden WROL situation occurs, will you have the time and ability to go get all the seed stock you need? It’s so much better to have it in your Survival Garden ready for use.
Starting from scratch can seem quite daunting. There are so many details, so many ways to fail – some are potentially your fault while others are beyond your control like weather and critters. It doesn’t have to be a huge effort, however. I’ve laid out a small 10 by 10 starter space that can be prepared in a weekend with nothing more than a shovel. To begin, there are a few immediate steps to take; it is your action plan. It assumes you have no experience gardening, no prepared land and no clue where to start.
Start With a Compost Pile
First, start building a compost pile. Use lawn clippings, weeds and kitchen scraps. Match that with all the cardboard you probably receive from deliveries, shred your junk mail, pick up shopping advertisements and shred them too. Build in layers making sandwiches of greens and browns. The point is, this should be a free activity that actually reduces some of your trash. The pile will decompose over months, so you’re building next year’s compost. Keep adding all year long, if you turn the pile frequently, it will decompose quicker, but if you just practice benign neglect, nature will take care of it for you. I do that myself, just build huge piles of freely available materials and “harvest” it in the spring. You cannot have too much – a giant pile today composts down to less than a tenth of the size by the time it’s ready. Make lots of big piles, way more than you think you need.
Secondly, find your space. Look for a location with as much sun as possible. South facing spaces get the most sunlight as the sun moves from east to west during the day. Get your shovel and turn the soil, break it up as you go. This is tough labor, but remember in a WROL you’ll be doing this on a scale a thousand times as large. It can be done by most healthy adults in a single day’s labor. Now it’s time to amend your soil. Since your compost pile is not ready, this time you will need to add organic material you obtain elsewhere. If you have a pickup truck, you can get free horse manure from many farmers or horse barns. I truck in 20 tons a year myself. If it is “fresh”, meaning you can still see the sawdust or hay they use to cover the floor and easily spotted droppings, then you can either pile it up somewhere to break down, or mix it well into your soil.
If you can’t get free manure, you can buy bags at most box stores. Get enough to cover 3-4 inches of the entire space, but you really cannot overdo organic material – more is better. If your soil is full of clay, you can also mix in some peat moss to help break things up. If you have access to a rototiller, the mixing will be easier. You can probably borrow one from a neighbor or rent one. It is certainly possible to mix it with a shovel, but it is a lot of work; teenagers are a good source of free labor if you have some in your home. When things are prepared, designate four rows with a path between them. These will each hold one of the crops listed above.
(To be concluded tomorrow, in Part 3.)